This document covers the following topics:
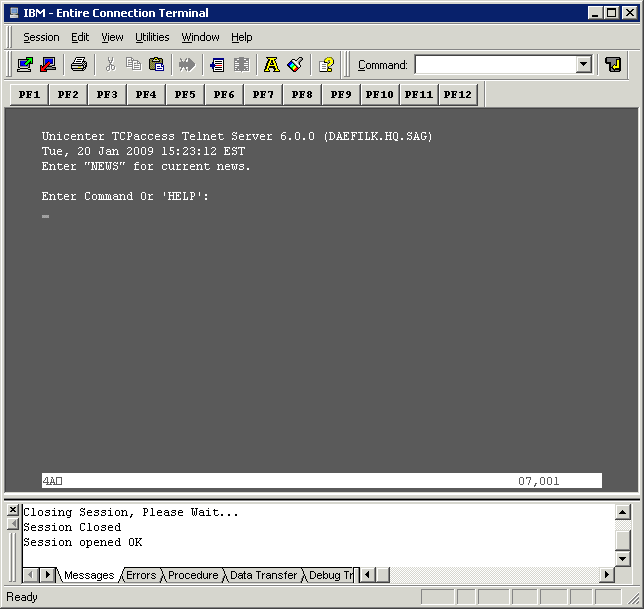
When you start a host session, terminal emulation is activated.
You can work with several host sessions at the same time. For one communication method, several sessions can be open at the same time. Each host session is shown in a separate terminal application window.
So that communication is successfully established with the host environment, all required communication parameters must be specified for the required session type. During communication with the host, the definitions in the session properties are used.
Messages from the host are shown in the status line of the terminal emulation screen (this is not the status line of the application window). The status line is located below the last line of a screen. For example, the status line for terminal model 2 is located in the 25th line.
Entire Connection uses the right corner of the status line in the terminal emulation screen to display the following information:
Cursor position
Example: the value 23,011 indicates that the cursor is located in
row 23 and column 11.
Learn mode
If learn mode is
active, an L is displayed in column 76. Learn mode is a trace option.
Trace status
If a trace command is active, a character indicating the
corresponding trace command is displayed: B for
REC_BUFF,
S for REC_SCR and
X for REC_XFER.
Procedure file processing
The character P in column 78 indicates that a procedure file is
currently being processed for this session.
![]() To start a host session
To start a host session
From the menu, choose .
Or:
Press CTRL+O.
Or:
Choose the following toolbar button:
![]()
If only one session has been defined, this session is immediately started.
If more than one session has been defined, the Open Session dialog box appears and you must proceed as described below.
In the Open Session dialog box, select a session.
Choose the button.
Notes:
In a the terminal emulation screen, you can use both mouse and keyboard. To change the cursor position, use the standard keys (e.g. TAB or the arrow keys) or the mouse. To use a host function key, press the terminal emulation key assigned to this function key. To simulate the ENTER key, double-click any position in the terminal emulation screen. Otherwise, you can use your keyboard to enter data as normal.
The key combinations that you can use (for example, for editing text) depend on the key scheme that has been defined for the current host session. See Key Schemes in the Configuration Manager section.
The following functions are hardcoded for the following key combinations and will always be used if these key combinations are not defined otherwise in the current key scheme:
| Key Combination | Description |
|---|---|
| CTRL+RIGHT-ARROW | Jump to the next word. |
| CTRL+LEFT-ARROW | Jump to the previous word. |
| CTRL+END | Jump to the end of the field. |
Note:
The shortcut keys that are displayed next to a menu command (e.g.
CTRL+V for pasting text) are not available when the active key
scheme uses them for different purposes.
Using the commands from the menu, you can copy or cut a terminal emulation screen (or part of it) and paste it somewhere else (for example, in another terminal emulation screen or in a PC application such as Microsoft Word). You can also copy or cut text from a PC application and paste it in a terminal emulation screen. Cut or copied data is stored on the Windows clipboard.
You must first select the desired text before you can use the , or command.
The following rules apply for a terminal emulation screen:
You can only cut text from unprotected fields. If protected fields have been selected, they are copied.
When you use the or command, the content of the clipboard is deleted and replaced with the new text. If you want to add data to the clipboard, you must use the command.
When you use the command, the content of the clipboard is not deleted. The selected text is inserted behind already existing text on the clipboard. When you then choose the command, the whole content of the clipboard is inserted at cursor position.
You can only paste text into unprotected fields. If the field is not long enough, it is filled up to its maximum size and the remaining text is inserted in the next unprotected field. Example: the text to be pasted is "DISPLAY" and the cursor is located in a two character long input field. In this case, only the first two characters ("DI") are pasted into the input field.
Unless indicated otherwise, the left mouse button is always used. The right mouse button is used to select the menu commands from a context menu.
![]() To select part of a terminal emulation screen (mouse usage)
To select part of a terminal emulation screen (mouse usage)
Move the mouse pointer to the beginning of the text you want to select.
Press and hold down the left mouse button.
This clears any previous selection.
Drag the mouse until all desired text is selected.
Release the mouse button.
You can now cut, copy or append the selected text.
![]() To select part of a terminal emulation screen (keyboard usage)
To select part of a terminal emulation screen (keyboard usage)
Use the arrow keys to move the cursor to the beginning of the text you want to select.
This clears any previous selection.
Press and hold down SHIFT.
Use the arrow keys to select the desired text.
Release SHIFT.
You can now cut, copy or append the selected text.
Note:
When holding down CTRL+SHIFT and then using the arrow
keys, all text to the end of the line (with RIGHT-ARROW) or to the
bottom of the screen (with DOWN-ARROW) is selected.
![]() To select the entire content of the terminal emulation screen
To select the entire content of the terminal emulation screen
From the menu, choose .
Or:
Press CTRL+A.
A box outline is shown around the terminal emulation screen.
You can now cut, copy or append the selected text.
![]() To cancel the selection
To cancel the selection
Click another screen position.
Or:
When using the keyboard, just select another part of the terminal
emulation screen as described above.
The existing selection is canceled.
![]() To delete the selection
To delete the selection
From the menu, choose .
Or:
Press DEL.
The selection is deleted (except protected fields). It is not transferred to the clipboard.
![]() To copy the selection and append it behind existing text in the
clipboard
To copy the selection and append it behind existing text in the
clipboard
From the menu, choose .
The selection is copied to the clipboard and appended behind already existing text.
![]() To cut the selection and transfer it to the clipboard
To cut the selection and transfer it to the clipboard
From the menu, choose .
Or:
Press CTRL+X.
Or:
Choose the following toolbar button:
![]()
The selection is deleted and transferred to the clipboard. Exception: protected fields are not deleted; they are copied.
Note:
With VTxxx terminals it is not possible to cut text.
![]() To copy the selection to the clipboard
To copy the selection to the clipboard
From the menu, choose .
Or:
Press CTRL+C.
Or:
Choose the following toolbar button:
![]()
![]() To paste the content of the clipboard into a terminal emulation
screen
To paste the content of the clipboard into a terminal emulation
screen
Move the cursor to the position at which the text is to be inserted.
From the menu, choose .
Or:
Press CTRL+V.
Or:
Choose the following toolbar button:
![]()
The content of the clipboard is inserted at cursor position.
Using the commands in the menu, you can set several options. The following options are available:
For each session, the current settings of the options in the menu are stored when the session is closed. They are used again when the same session (with the same name) is opened once more.
This feature is only available for TN3270 and BS2000 sessions.
TN3270 and BS2000 terminals are normally in overwrite mode. If you want to insert characters, you have to press the INS key to activate insert mode. The insert mode is always reset to overwrite mode when you press ENTER, a PF key or any other key that sends the screen to the host.
However, when you enable , the terminal is no longer reset to overwrite mode after a screen has been sent to the host.
![]() To enable insert mode permanently
To enable insert mode permanently
From the menu, choose .
When insert mode is enabled, a check mark is shown next to the command.
This mode is helpful when working with editors. When you select a block of text and paste it in the middle of a line, the block remains intact. The lines after the first line begin in the same column as the first line.
When block mode paste is not enabled for a TN3270 or BS2000 session, the lines after the first line start at the beginning of a line. When field mode copy/paste is enabled for these session types, block mode paste is ignored.
![]() To enable block mode paste
To enable block mode paste
From the menu, choose .
When block mode paste is enabled, a check mark is shown next to the command.
This feature is only available for TN3270 and BS2000 sessions.
This mode is helpful if you want to copy the contents of several input fields in a screen to another set of input fields which has the same structure. During the paste operation, the target input fields (which can also be on a different screen) are filled field by field as they were copied from the source fields. Any non-input fields (protected fields and screen areas) that are part of your selection are ignored during the paste operation.
![]() To enable field mode copy/paste
To enable field mode copy/paste
From the menu, choose .
When this kind of copy/paste mode is enabled, a check mark is shown next to the command.
![]() To copy and paste the contents of input fields
To copy and paste the contents of input fields
Select the part of the terminal emulation screen from which you want to copy the input fields (see Transferring Data Using the Clipboard).
From the menu, choose .
Go to the screen on which you want to paste the copied input fields.
Select the first input field in which you want to start the paste operation.
From the menu, choose .
All target input fields are filled field by field with the contents of the source fields.
This feature is only available for VT sessions.
In single line paste mode, only the first line of the text from the clipboard is pasted. Pasting starts at the current cursor position and stops at the end of the line; further text in the line which is pasted from the clipboard is ignored. This feature is helpful when working outside of Natural, for example, on the UNIX command line.
When block mode paste is enabled for a VT session, single line paste is ignored in this session.
![]() To enable single line paste mode
To enable single line paste mode
From the menu, choose .
When single line paste is enabled, a check mark is shown next to the command.
Within the same terminal emulation screen, it is possible to copy alphanumeric data into an input field using the mouse. To use this feature, you have to enable the right mouse button for terminal mode.
The data to be copied must not contain blanks and it must not contain non-alphanumeric characters. The copied data is always inserted at the current cursor position which may also be in the middle of an input field. If the input field is not long enough, the data are automatically truncated. Example: the copied data is "Display" and the cursor has previously been positioned at the beginning of a two character long input field. In this case, only the first two characters ("Di") are inserted in this field.
When you click on a period (.), only the period is copied to the input field.
Note:
The context menu containing the edit commands is only shown when
the right mouse button has not been enabled for terminal mode.
![]() To enable the right mouse button for terminal mode
To enable the right mouse button for terminal mode
From the menu, choose .
When the right mouse button is enabled for terminal mode, a check mark is shown next to the command.
![]() To copy data to an input field (single click)
To copy data to an input field (single click)
Move the cursor to an unprotected field in which you want to enter data.
Click the required string with the right mouse button.
The string is copied to the input field.
![]() To copy data to an input field and send it to the host application
(double-click)
To copy data to an input field and send it to the host application
(double-click)
Move the cursor to an unprotected field in which you want to enter data.
Double-click the required string with the right mouse button.
The string is copied to the input field and is then immediately sent to the host application.
It is possible to simulate a function key (PF key or PA key) with the mouse: you double-click the name of a defined function key on the screen in order to send the corresponding key code to the host. To use this feature, you have to enable the mouse for standard PF keys.
![]() To enable the mouse for standard PF keys
To enable the mouse for standard PF keys
From the menu, choose .
When the mouse is enabled for the standard PF keys, a check mark is shown next to the command.
This feature is only available for TN3270 and BS2000 sessions.
A crosshair cursor consists of two thin lines, one horizontal and one vertical, meeting at the lower left corner of the cursor. These lines help to see what is contained in the same line and column.
The crosshair cursor is displayed in addition to the regular cursor; it does not replace the regular cursor.
When the crosshair cursor is displayed, you can additionally define whether only the horizontal or the vertical line is to be shown, and you can fix the crosshair cursor at the current position.
Note:
The color of the crosshair cursor can be changed in the
color
scheme.
![]() To display the crosshair cursor
To display the crosshair cursor
From the menu, choose .
When the crosshair cursor is displayed, a check mark is shown next to the command.
![]() To display only the horizontal or vertical line of the crosshair
cursor
To display only the horizontal or vertical line of the crosshair
cursor
From the menu, choose .
Or:
From the menu, choose
.
Only one of these two commands can be active at one time. Choosing automatically disables , and vice versa.
When only the horizontal or vertical line is displayed, a check mark is shown next to the corresponding command.
![]() To fix the crosshair cursor at the current position
To fix the crosshair cursor at the current position
From the menu, choose .
When the crosshair cursor is fixed, a check mark is shown next to the command.
You can define another font to be used for the current session directly from the terminal application. Your new font definition is written to the share file. It is not necessary to invoke the Configuration Manager for this purpose.
Note:
When you (the general user) modify the font of a public session, a
private session is automatically created. This private session has the same
properties as the public session. From now on, you continue working with the
new private session.
![]() To modify the font
To modify the font
From the menu, choose .
Or:
Choose the following toolbar button:
![]()
The Font dialog box appears:
See the Overview of Object Properties for information on this dialog box.
You can define another color scheme to be used for the current session directly from the terminal application. Your modifications are written to the share file. It is not necessary to invoke the Configuration Manager for this purpose.
Note:
When you (the general user) modify the color scheme of a public
session, a private session is automatically created. This private session has
the same properties as the public session. From now on, you continue working
with the new private session.
![]() To activate another color scheme
To activate another color scheme
From the menu, choose .
Or:
Choose the following toolbar button:
![]()
The Color Selection dialog box appears:
The active color scheme is indicated by an arrow. When the lock symbol next to the color scheme name shows a green check mark, the color scheme can be modified by a general user. When it shows a red cross, it cannot be modified by a general user; it can only be duplicated in this case.
Select the color scheme you want to activate.
Choose the button.
Besides activating another color scheme, you can also create, modify, delete or duplicate a color scheme directly from the terminal application. To do so, use one of the following command buttons in the Color Selection dialog box:
| Modifies the selected color scheme. You can only modify the color scheme which is currently active. If you select another color scheme, you are asked whether you want to make the selected color scheme active in order to continue. | |
| Creates a new color scheme. Specify a name for the new color scheme in the resulting dialog box and choose the button. You are then asked whether you want to make the new color scheme active in order to modify it. | |
| Deletes the selected color scheme. You are asked to confirm the deletion. Any session using this scheme will need to be updated manually. SAGCOLORS or VTColors cannot be deleted. | |
| Creates a copy of the selected color scheme. Specify a name for the copy in the resulting dialog box and choose the button. You are then asked whether you want to make the copy active in order to modify it. |
For detailed information on the dialog box which appears when you create, modify or duplicate a color scheme, see the Overview of Object Properties.
P-keys (programmable keys) are only available for sessions of type BS2000 TCP/IP.
You can define another P-key scheme to be used for the current BS2000 session directly from the terminal application. Your modifications are written to the share file. It is not necessary to invoke the Configuration Manager for this purpose.
Note:
When you (the general user) modify the P-key scheme of a public
BS2000 session, a private session is automatically created. This private
session has the same properties as the public session. From now on, you
continue working with the new private session.
![]() To activate another P-key scheme
To activate another P-key scheme
From the menu, choose .
The P-Key Selection dialog box appears:
The P-key scheme with the name Currently defined P-keys is always available. Its key definitions may change dynamically, depending on the application that is active in the current session. When you modify this P-key scheme, your modifications may be lost when you change to another application.
The active P-key scheme is indicated by an arrow. When opening the P-Key Selection dialog box, the arrow always points to the P-key scheme which has been assigned in the Configuration Manager, or to the P-key scheme with the name Currently defined P-keys if a P-key scheme has not been assigned in the Configuration Manager.
When the lock symbol next to the P-key scheme name shows a green check mark, the P-key scheme can be modified by a general user. When it shows a red cross, it cannot be modified by a general user; it can only be duplicated in this case.
Select the P-key scheme you want to activate.
Choose the button.
Besides activating another P-key scheme, you can also create, modify, delete or duplicate a P-key scheme directly from the terminal application. To do so, use one of the following command buttons in the P-Key Selection dialog box:
| Displays/modifies the selected P-key scheme. | |
| Creates a new P-key scheme. Specify a name for the new P-key scheme (can be up to 16 characters long) in the resulting dialog box and choose the button. | |
| Deletes the selected P-key scheme. You are asked to confirm the deletion. Any session using this scheme will need to be updated manually. The P-key scheme with the name Currently defined P-keys cannot be deleted. | |
| Creates a copy of the selected P-key scheme. Specify a name for the copy in the resulting dialog box and choose the button. |
For detailed information on the dialog box which appears when you create, modify or duplicate a P-key scheme, see the Overview of Object Properties.
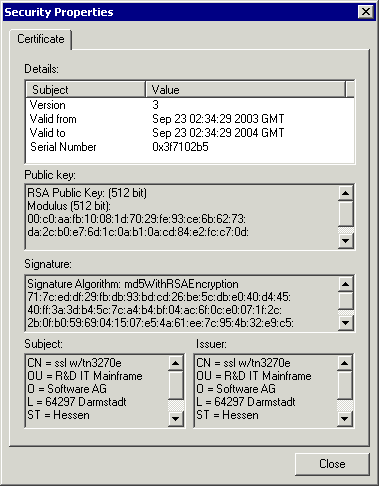
Only available for sessions of type TN3270 for which SSL has been enabled.
You can display information on the server certificate.
![]() To display security information
To display security information
From the menu, choose .
Or:
Choose the following toolbar button:
![]()
The Security Properties dialog box appears:
You can print the contents of the terminal emulation screen on a printer that is defined under Windows.
![]() To set up another printer
To set up another printer
From the menu, choose .
The Print Setup dialog box appears in which you can connect to another printer.
![]() To preview the screen to be printed
To preview the screen to be printed
From the menu, choose .
The print preview window appears.
Optionally: use the and buttons to view the information in this window. Or choose the button to invoke the Print dialog box.
To return to the terminal emulation screen, choose the button.
![]() To print the screen contents using a dialog box
To print the screen contents using a dialog box
From the menu, choose .
Or:
Press CTRL+P.
Or:
Choose the following toolbar button:
![]()
The Print dialog box appears.
Choose the button to print the current screen.
![]() To print the screen contents directly, without displaying a dialog
box
To print the screen contents directly, without displaying a dialog
box
Press the PRINT SCREEN key.
The contents of the current terminal emulation screen are immediately printed. The current printer settings are used.
You can also print directly from the application that is currently running on the host. You simply have to issue this application's print command. See the description of the Host Printer Manager for further information.
See also: Downloading Data to a File or Printer Using a Dialog Box.
You can specify that the contents of a terminal emulation screen is always printed with a specific orientation: landscape, portrait or half page.
Half page means that the screen is printed in portrait orientation on the upper half of the paper. This leaves the lower half of the paper, for example, for handwritten notes.
Before you define the default orientation for the first time, the orientation is as defined with the printer settings. Your new default orientation only applies to Entire Connection. It overwrites the orientation (portrait or landscape) defined in the printer settings.
![]() To define the default orientation
To define the default orientation
From the menu, choose .
The Print Options dialog box appears:

Select the desired orientation.
An example of the selected orientation is shown to the right of the option buttons.
Choose the button.
When you lock a session, terminal emulation is no longer displayed and "locked" appears in the title bar. As long as you do not unlock the session, nobody can work with it.
![]() To lock the session
To lock the session
From the menu, choose .
When the session is locked, a check mark is shown next to this command.
![]() To unlock the session
To unlock the session
From the menu, choose .
The Entire Connection Logon dialog box appears. It shows the user name with which you are currently logged in.
Enter your password (if required).
Choose the button.
Using the commands in the menu, you can switch to another session which you have previously opened (these sessions are also called active terminals). Each session is displayed in a separate terminal application window.
Up to ten active terminals can be shown as menu commands in the menu. The complete list of active terminals is always shown in the dialog box which you can also invoke from the menu. The active terminals are shown in the order in which they have been opened.
The names of the sessions are shown as menu commands or as entries in the dialog box. If a terminal does not contain an active session, "No Session" is shown. The current terminal is marked with an asterisk (*).
![]() To switch to another terminal using the names in the menu
To switch to another terminal using the names in the menu
From the menu, choose the name of the required session.
Or:
Use the key combination which is displayed next to the menu command,
for example SHIFT+ALT+2 to open the second terminal in the list.
Note:
The key combinations shown in the menu
are always available. It is also possible to use a shorter key combination,
without SHIFT (for example, ALT+2). However, this shorter
key combination can only be used if it has not been defined otherwise in the
current key scheme.
![]() To switch to another terminal using a dialog box
To switch to another terminal using a dialog box
From the menu, choose .
The Active Terminals dialog box appears.
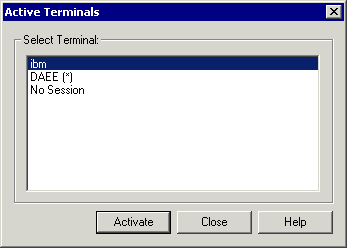
Select the required terminal.
Choose the button.
You can switch directly to the Configuration Manager.
![]() To switch to the Configuration Manager
To switch to the Configuration Manager
From the menu, choose .
When the Configuration Manager has not yet been started, it is invoked. When it is already running, its window is activated.
Only available to an administrator (default name: SYSTEM), and only when host printer LU support for Entire Connection has been installed.
You can switch directly to the Host Printer Manager.
![]() To switch to the Host Printer Manager
To switch to the Host Printer Manager
From the menu, choose .
When the Host Printer Manager has not yet been started, it is invoked. When it is already running, its window is activated.
Before a host session is terminated, a logoff procedure, if defined, is executed. A logoff procedure contains, for example, all keyboard input required to logoff from a host session. The logoff procedure is defined in the session properties.
![]() To terminate a host session
To terminate a host session
From the menu, choose .
Or:
Choose the following toolbar button:
![]()
Or:
Enter the command DISCONNECT
in the command line.
This terminates the host session. The terminal application window, however, remains open, displaying "No Session" in its title bar.