Using the NBS Tester, you can build a test suite to test the connections used to access your business services. The NBS Tester is available on the menu in the Natural Business Services Natural plug-in or as a stand-alone utility on the menu.
If you run this utility from the Natural plug-in, the current mapped connection is tested.
If you run the utility from the menu, you can select which connection to test.
This section covers the following topics:
![]() To create a new test suite:
To create a new test suite:
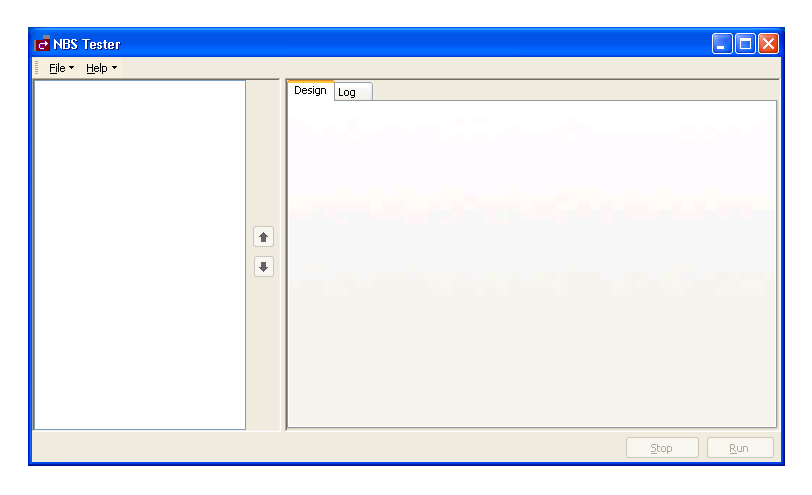
Select on the menu.
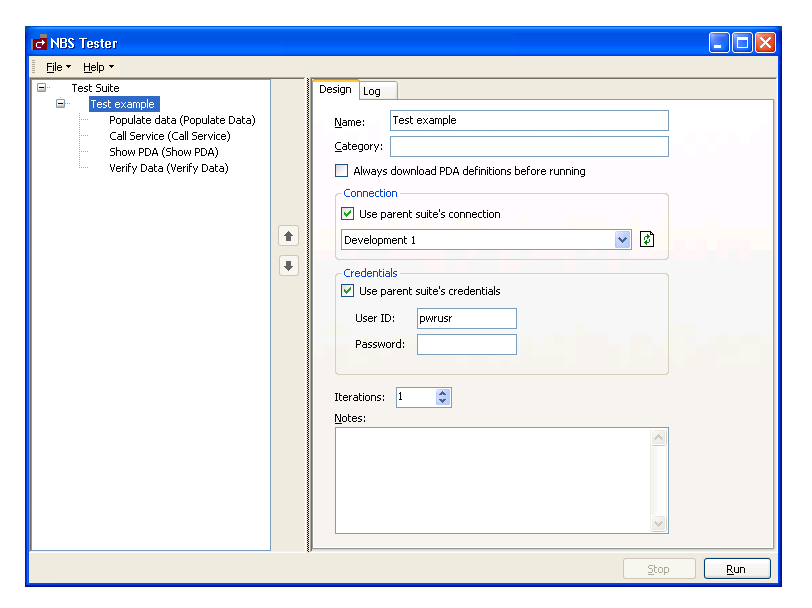
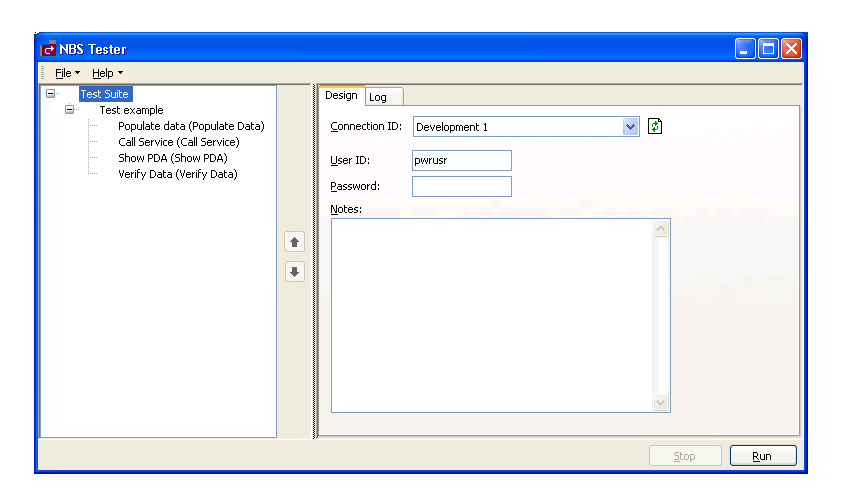
The NBS Tester window is displayed. For example:
Select on the menu.
Test Suite is displayed in the upper left corner of the window.
Select .
The Design tab becomes active. For example:
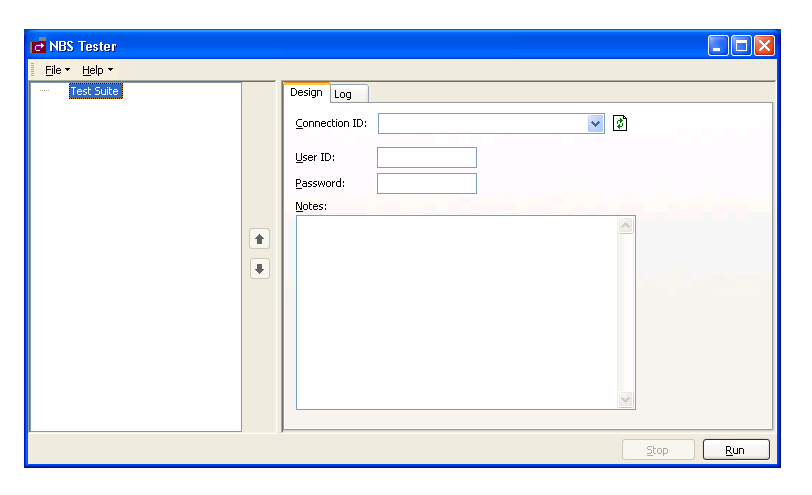
Select the connection ID in Connection ID.
Type the user ID and password for the connection.
Open the context menu for Test Suite.
Select .
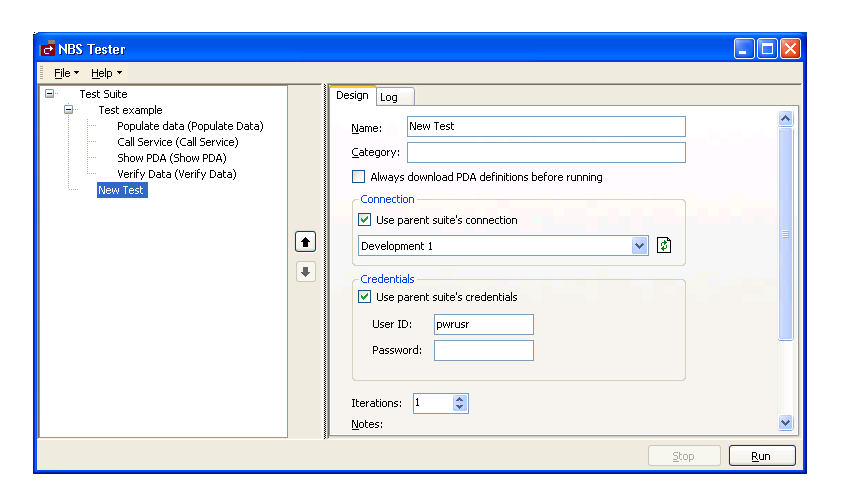
The Design tab displays the specifications for a new test. For example:
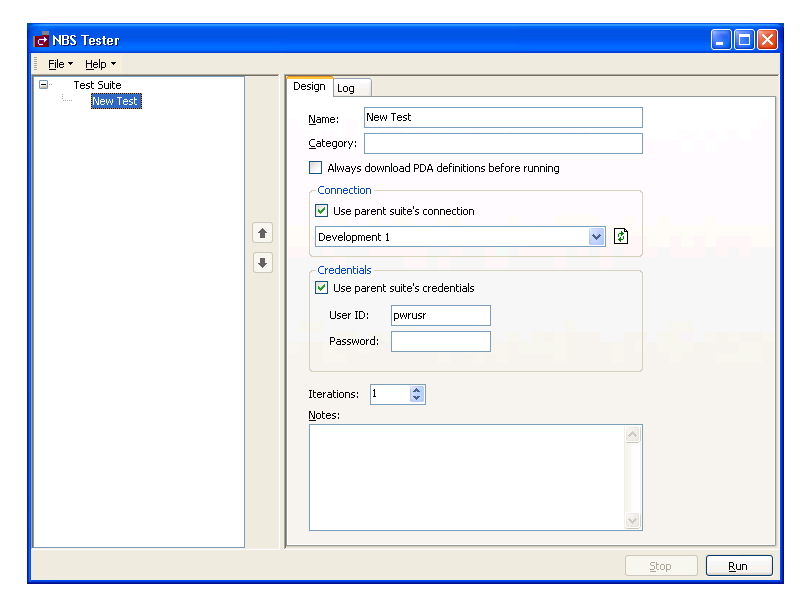
Type a descriptive name for the test you are creating in Name (for this example, type "Test example").
The name is displayed in the Test Suite tree. You can optionally specify the following information for the test:
| Option | Description |
|---|---|
| Category | Name of the category for this test suite (for example, Development). |
| Always download PDA definition before running | If this option is selected, the PDA definition is downloaded before the test is run. |
| Connection/Use parent suite’s connection | If this option is selected, the test suite is part of another test suite and will use the parent test suite’s connection ID. If this option is not selected, select the connection ID to use for this test suite. |
| Credentials/Use parent suite’s credentials | If this option is selected, the test suite is part of another test suite and will use the parent test suite’s credentials. If this option is not selected, type the user ID and password to use for this test suite. |
| Iterations | Number of times to run the test. |
| Notes | Information about the test suite. |
Open the context menu for the new test in the Test Suite tree.
For this example, the Test example node.
Select .
The Select Actions window is displayed. For example:
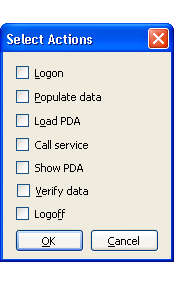
This window lists the actions available for the test suite.
Select the actions you want to test.
For this example, select the following actions:
Populate data
Call service
Show PDA
Verify data
Select .
Expand the Test example node.
For example:
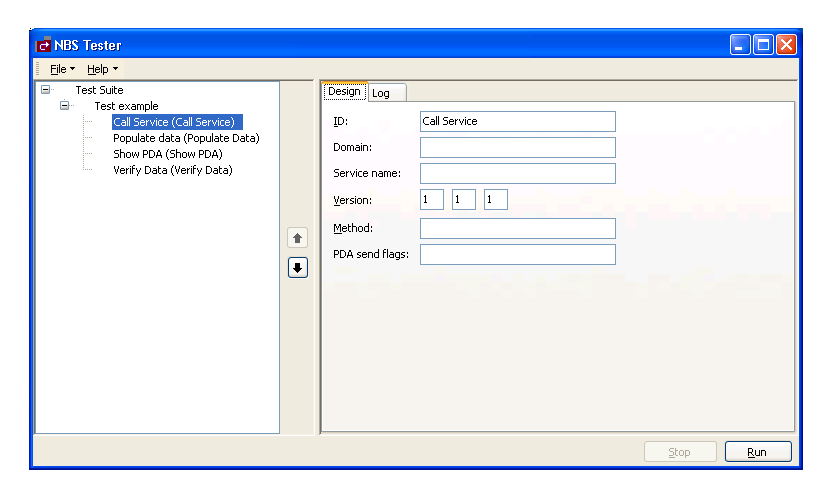
Select Call Service to specify which service to call.
The call service information is displayed on the Design tab. For example:
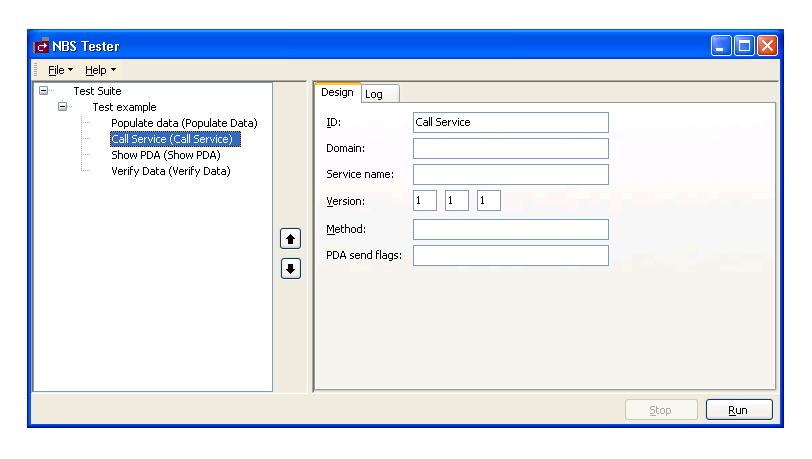
Type the following information:
| Field | Input |
|---|---|
| Domain | DEMO |
| Service name | Calculator |
| Method | Add |
Note:
Ensure the input values use the same case as indicated
above.
Optionally, you can:
Type a different call service in ID
Type a different version number in Version (by default, 1.1.1)
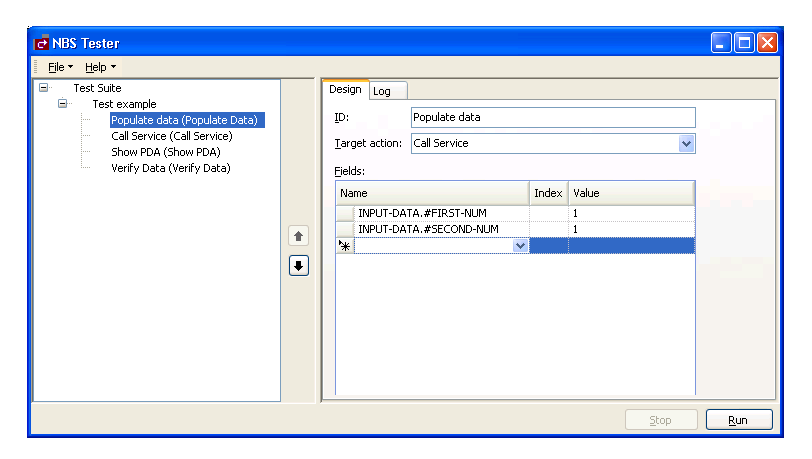
Select Populate data to specify which data to send to the service for the test.
The Populate data information is displayed on the Design tab. For example:
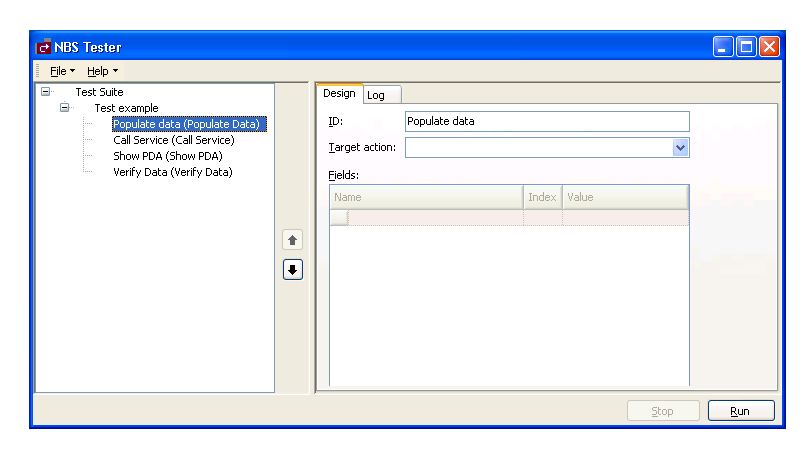
Select Call Service in Target action.
Type the following two lines in Name:
INPUT-DATA.#FIRST-NUM
INPUT-DATA.#SECOND-NUM
Type "1" in Value for both numbers.
For example:
Select Show PDA.
This action allows you to debug the service for testing purposes. The Show PDA information is displayed on the Design tab. For example:
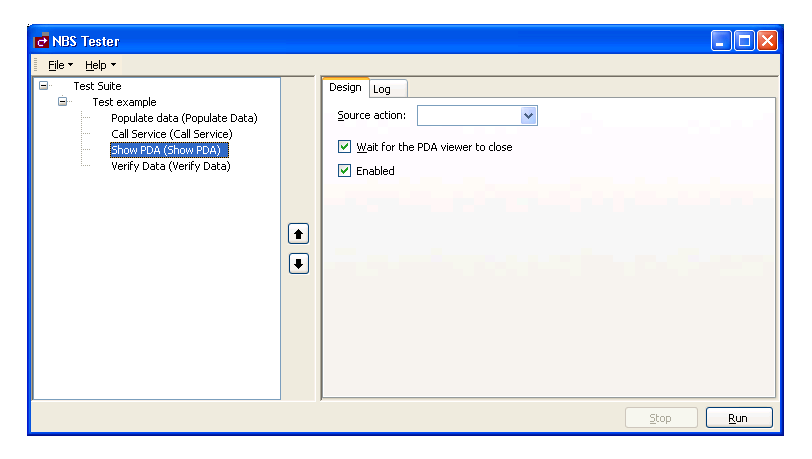
Select Call Service in Source action.
The source action must be specified. This value will be any call service in your test.
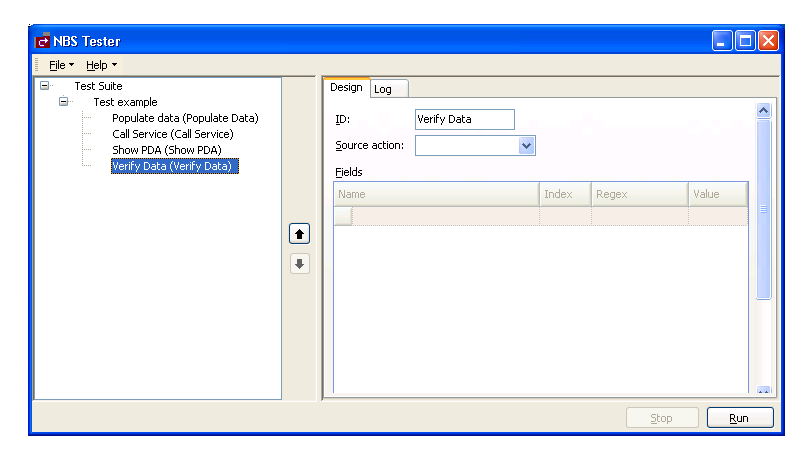
Select Verify Data to verify that the service is working correctly.
The Verify data information is displayed on the Design tab. For example:
Select Call Service in Source action.
Type the following in Name:
OUTPUT-DATA.#RESULT
Note:
Regex indicates a Regular Expression. You can use this field to
specify a Regex pattern to check for matches.
Type "2" in Value.
For example:
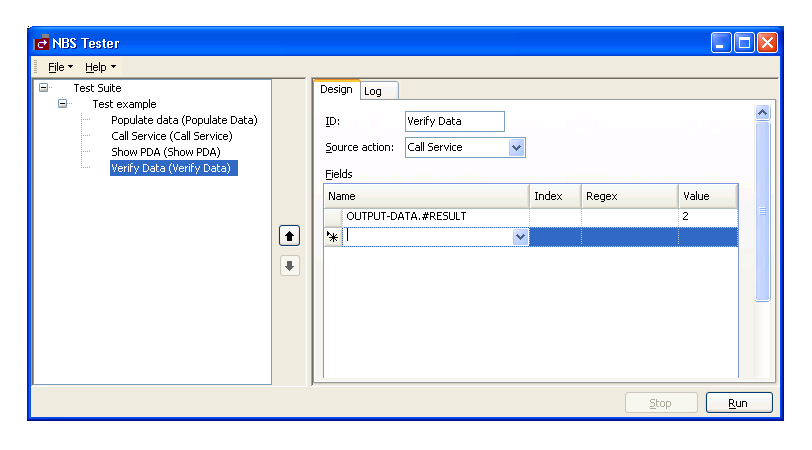
This value indicates that the expected result of the test is 2.
Select .
Because you selected Show PDA, the Natural Data Area Viewer window is displayed. For example:

This window displays the INPUT/OUTPUT data in the PDA for the service.
Close the window.
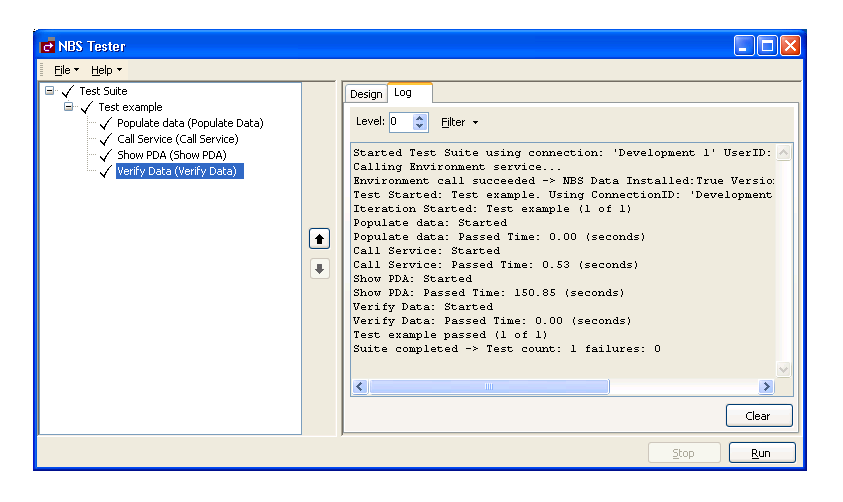
Select the Log tab to see the results of the test.
For example:
Select on the menu to save the test suite.
A window is displayed to type a name for the test and select a location to store the test suite.
Note:
You can repeat this procedure to create additional test
suites.
After saving a test suite, you can add other tests to the suite.
![]() To add a test to an existing test suite:
To add a test to an existing test suite:
Select on the menu.
A selection window is displayed.
Select the test suite.
The selected test suite is displayed in the NBS Tester window.
Expand the Test node to see the actions for the test. For example:
Optionally, you can use this window to:
Change the connection ID for the new test
Change the user ID or password
Open the context menu for Test Suite.
Select Add Test.
The new test is added to the test suite. For example:
Enter the specifications for the new test.
For information, see Build a New Test Suite.
Select on the menu to save the changes.
You can reorder the tests in an existing test suite.
![]() To reorder a test in an existing test suite:
To reorder a test in an existing test suite:
Select on the menu.
A selection window is displayed.
Select the test suite.
The selected test suite is displayed in the NBS Tester window.
Expand the Test node to see the actions for the test. For example:
Select the test you want to reorder.
Select the up or down arrow to move the test to a new position.
In the following example, the Call Service action was moved up in the list:
Select on the menu to save the changes.
![]() To delete an existing test suite:
To delete an existing test suite:
Open the context menu for the test suite.
Select .
Select on the menu to save the changes.
![]() To delete a test from an existing test suite:
To delete a test from an existing test suite:
Open the context menu for the test suite.
Select .
Select on the menu to save the changes.
You can use the NBS Tester to access the Configuration utility.
![]() To access the Configuration utility:
To access the Configuration utility:
Select on the menu.
The Configuration utility is displayed. For example:
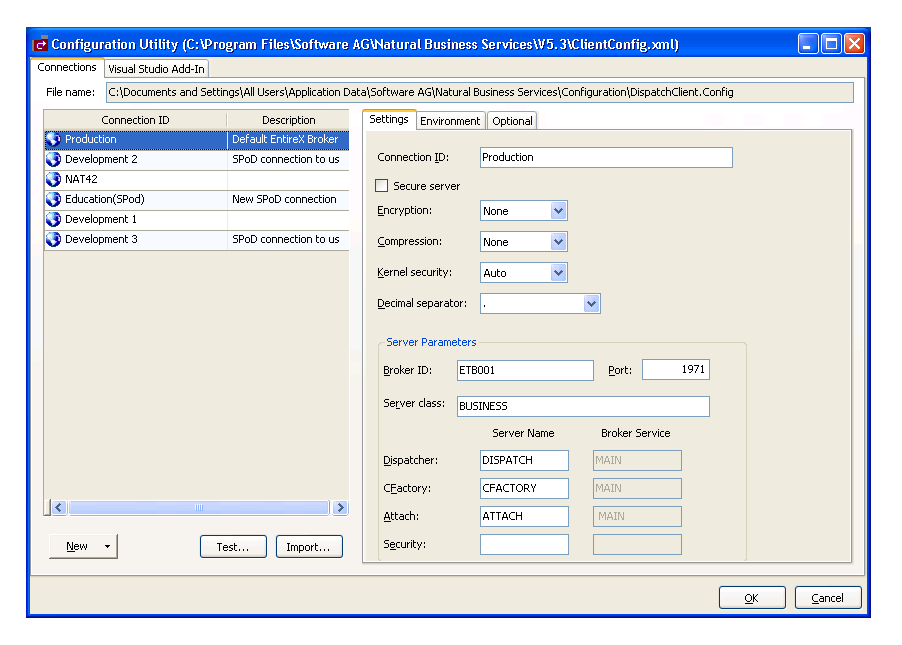
For information about the settings on this panel, see:
For the Eclipse plug-in, Configure Connections
For the Visual Studio add-in, Configure Connections