Block category | Icons | Description |
Applications |  | Displays the Application categories available in Integration Cloud. |
Services |  | Use the Service blocks (date, math, string, and so on) to specify the service that will be invoked at run time. Related services are grouped in blocks. You can sequence services and manage the flow of data among them. Note: For information on the different services, see Built-In Services. The Reference Data block appears only if a Reference Data service is available at the Projects > <Select a Project> > Reference Data page. See
Add Reference Data for more information. |
Integrations |  | Displays the list of Integrations created in Integration Cloud. You can invoke an Integration from another Integration. When copying integrations from one stage to another, all the referred Integrations and their dependents will also be copied. The Integrations category also lists all the shared projects and the integrations available in the shared projects. Integrations available in the same project are also listed. The display format for a shared asset is <project name> <integration name> 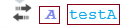 , where A is the name of the project and testA is the name of the integration in the project A. See
Sharing Assets across Projects for more information. , where A is the name of the project and testA is the name of the integration in the project A. See
Sharing Assets across Projects for more information.Click the  icon if you want to view or modify an Integration after it is dropped at the anchor point. The Integration will open up for editing in a new tab. icon if you want to view or modify an Integration after it is dropped at the anchor point. The Integration will open up for editing in a new tab.Click the  icon and select Modify Mapping if you want to map the input of the operation from the Pipeline and also map the output of the operation into the pipeline. icon and select Modify Mapping if you want to map the input of the operation from the Pipeline and also map the output of the operation into the pipeline.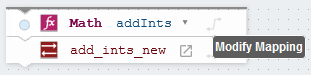 Right-click on a block to add Comments for the block. 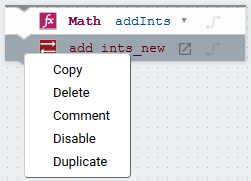 Click Duplicate to repeat the block, click Delete to remove the block from the workspace, click Copy to copy the block from the workspace, or click Disable to disable a block. If you disable blocks, those blocks will not be considered for execution, test, or debug operations. Click the Show Inline Comments option available at the top-right corner of the workspace to view the comments entered for the block. |
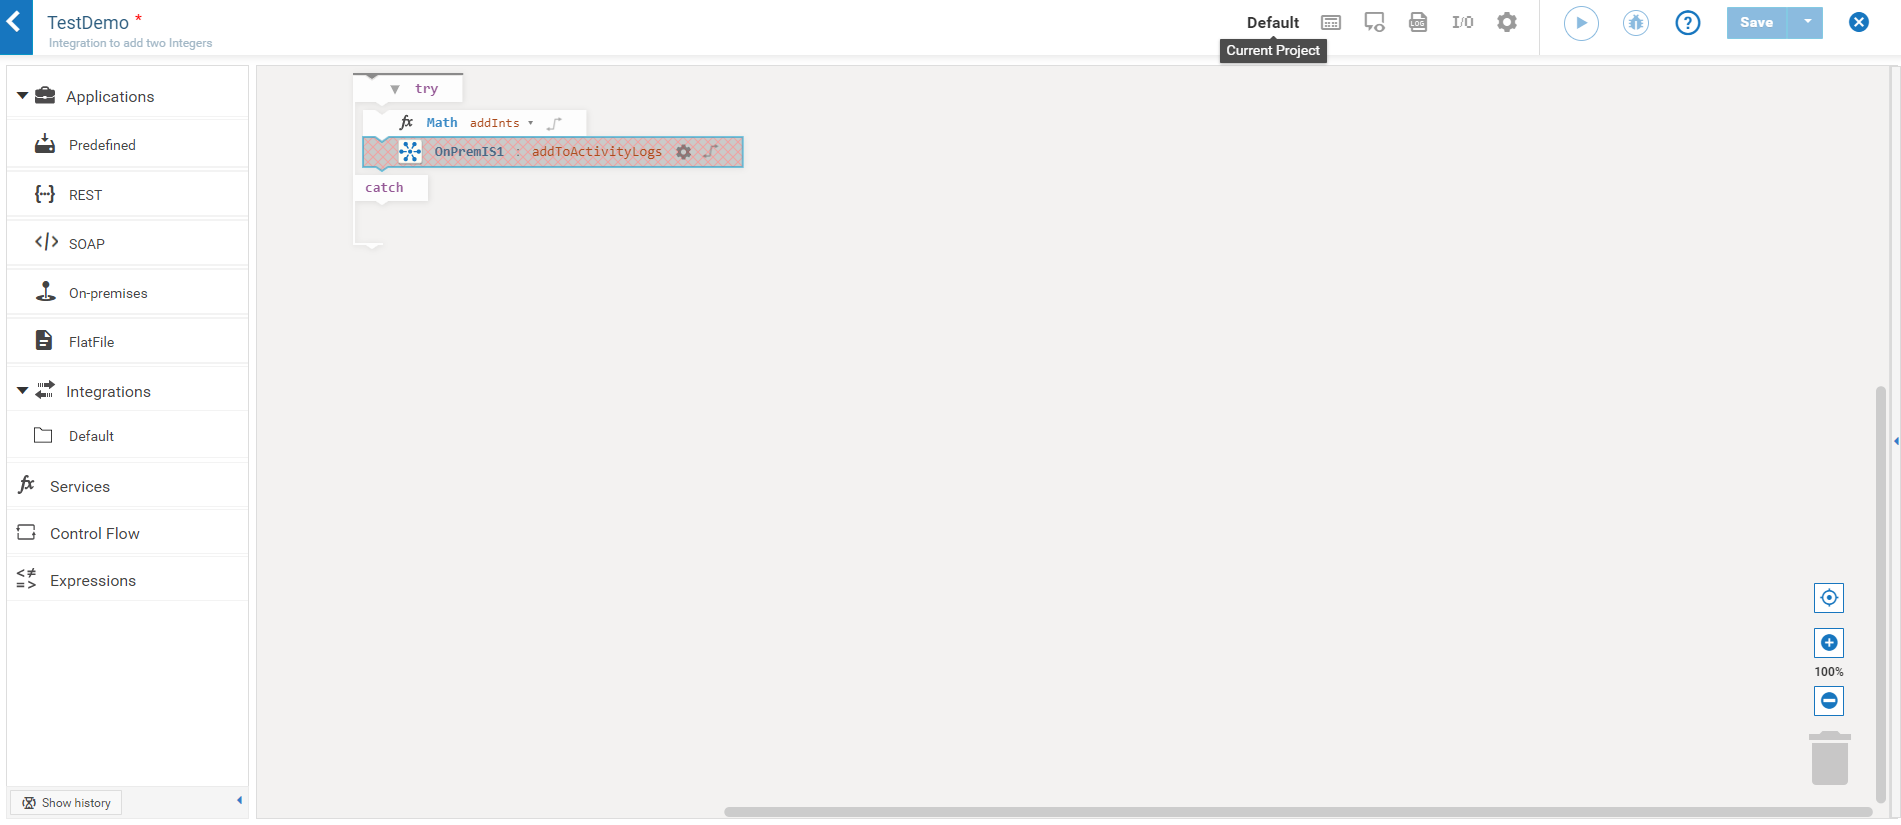
Control Flow |  | Conditional expressions, looping structures, and transform pipeline. Conditional expressions perform different computations or actions depending on whether a specified boolean condition evaluates to true or false.The if block is used to evaluate a boolean condition and if the condition is true, statements inside the if block are executed. The if statement can be followed by an optional else statement, which executes when the boolean expression is false. 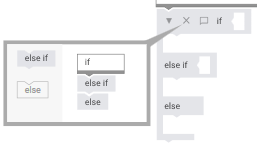 The if statements are executed from the top towards the bottom. You can use one if or else if statement inside another if or else if statement(s). You cannot have multiple else statements. Switch allows a variable to be tested for equality against a list of values. Each value is called a case, and the variable being switched on is checked for each case, that is, Switch evaluates a variable and skips to the value that matches the case. For example, if the Switch variable evaluates as "A", then case "A" is executed. A switch statement can have an optional default case, which must appear at the end of the switch. The default case can be used for performing a task when none of the cases are true. You cannot insert multiple default statements. 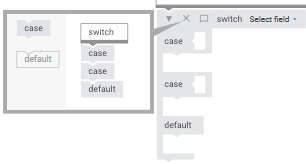 Note: You can include case steps that match null or empty switch values. A switch value is considered to be null if the variable does not exist in the pipeline or is explicitly set to null. A switch value is considered to be an empty string if the variable exists in the pipeline but its value is a zero length string. Note: Switch executes the first case that matches the value, and exits the block. The try catch block is used to handle errors and exceptions. If you have a statement in the try block that has thrown an error, the error will be caught in the catch statement. Note: If an error is thrown inside the catch section of the try catch block, the error will be ignored and the next statements in the Integration will be executed. Loops execute a set of steps multiple times based on the block you have chosen. It repeats a sequence of child steps once for each element in an array that you specify. For example, if your pipeline contains an array of purchase-order line items, you could use a Loop to process each line item in the array. Loop requires you to specify an input array that contains the individual elements that will be used as input to one or more steps in the Loop. At run time, the Loop executes one pass of the loop for each member in the specified array. For example, if you want to execute a Loop for each line item stored in a purchase order, you would use the document list in which the order’s line items are stored as the Loop’s input array. The while loop is used to iterate a part of the program several times. If the number of iterations are not fixed, it is recommended to use the while loop. The do-until loops are similar except that they repeat their bodies until some condition is true. The for-each block traverses items in a collection. Unlike other for loop constructs, for-each loops usually maintain no explicit counter: they essentially say “do this to everything in this set”, rather than “do this x times”. While selecting a field for the conditions, that is, while using the If, or Loop, or Switch statements, you can click on the Select Field expression and choose a field in the Pipeline Data dialog box to add its path to the condition. If you want to use the field element inside the array list, select the Add Index option to add the index and use the indexed field path. 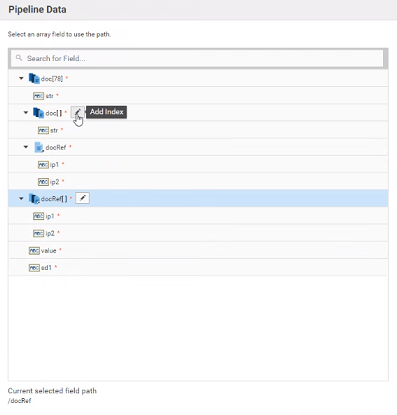 While selecting a field for the iterations, that is, while using the for-each statements, you can click on the Select Field expression and choose an array in the Pipeline Data dialog box to add its path to the iteration. If you want to use an array element inside the array list, select the Add Index option to add the index and use the indexed field path. The Exit Integration signaling success block allows you to successfully terminate and exit from the currently running Integration. You cannot attach child blocks to the Exit Integration signaling success block. The Exit Integration signaling failure "…" block abnormally terminates the currently running integration with an error message. You can specify the text of the error message that is to be displayed. If you want to use the value of a pipeline variable for this error message, type the variable name between % symbols, for example, %mymessage%. The variable you specify must be a String. You cannot attach child blocks to the Exit Integration signaling failure "…" block. The Throw error "..." block can be attached inside any block except the catch section of the try catch block, and allows you to explicitly throw an exception with a custom error message. If it is used inside the try section of the try catch block, the error will be caught in the catch section. If you want to use the value of a pipeline variable for this custom error message, type the variable name between % symbols, for example, %mymessage%. The variable you specify must be a String. You cannot attach child blocks to the Throw error "..." block. Note: If you add a Throw error "..." block inside a try catch block, any changes done to the pipeline variables inside the try block will be reset to the previous values existing in the pipeline. The Break out of loop block should be used only within a loop and allows you to break out of the containing loop, that is, it allows you to break the program execution out of the loop it is placed in. You cannot attach child blocks to the Break out of loop block. |
A Loop takes as input an array field that is in the pipeline. It loops over the members of an input array, executing its child steps each time through the loop. For example, if you have a Integration that takes a string as input and a string list in the pipeline, use Loops to invoke the Integration one time for each string in the string list. You identify a single array field to use as input when you set the properties for the Loop. You can also designate a single field for the output. Loop collects an output value each time it runs through the loop and creates an output array that contains the collected output values. Use the Transform Pipeline block to make pipeline modifications. See
Pipeline and Signatures for more information. | ||
Expressions |  | Logical operations, comparisons, and values. The six comparison operators are: equal to, not equal to, less than, less than or equal to, greater than, greater than or equal to. Each takes two inputs and returns true or false depending on how the inputs compare with each other. The and block will return true only if both of its two inputs are also true. The or block will return true if either of its two inputs are true. The not block converts its Boolean input into its opposite. You can also type a text value, select a field on which to build an expression (Select field), or select a block with no inputs. The Field exists block allows you to check if a variable exists or not and can be used with other Control Flow blocks, for example, the if block. The Field exists block validates the existence of a particular field in the pipeline. Note: It is recommended not to leave an input empty. |

Icons | Applicable for... | Action/Description |
 | Comments for blocks | Inline comments for all blocks. Click the Show Inline Comments option to view the comments entered for the blocks. |
 | Applications, Services, Integrations, and the Root block | Define Input and Output Signature Click the Define Input and Output Signature icon to define the input and output signature of an Integration. You can declare the input and output parameters for an Integration using the Input and Output tabs. Input and output parameters are the names and types of fields that the Integration requires as input and generates as output. These parameters are also collectively referred to as a signature. For example, an Integration can take two string values, an account number (AcctNum ) and a dollar amount (OrderTotal ) as inputs and produces an authorization code (AuthCode ) as the output. On the Output tab, specify the fields that you want the Integration to return. |
You can use a Document Reference to define the input or output parameters for an Integration. If you have multiple Integrations with identical input parameters but different output parameters, you can use a Document Type to define the input parameters rather than manually specifying individual input fields for each Integration. When you assign a Document Type to the Input or Output side, you cannot add, modify, or delete the fields on that part of the tab. You can select a Document Type from the Document Reference drop-down list. To create a Document Type, from the Integration Cloud navigation bar, select Projects > <Select a Project> > Document Types > Add New Document Type. See
Overview for more information. You can create pipeline variables as document references, create document types comprising of document references, and also define the signature of Integrations comprising of document references. You can also copy a field from the fields panel by clicking the  icon. Depending on the context, you can either paste the field or the field path by clicking the icon. Depending on the context, you can either paste the field or the field path by clicking the  icon. For example, if you copy a field and paste the field in the Set Value window in an Integration, (double-click a field to set a value), the field path will be pasted. icon. For example, if you copy a field and paste the field in the Set Value window in an Integration, (double-click a field to set a value), the field path will be pasted.See
Creating Document Types from Scratch for more information. Note: You cannot modify or paste the child fields of a Document Reference. | ||
Select the Validate input and Validate output options if you want to validate the input and output to the Integration, against the service input or output signature. | ||
Select Business Data to Log Integration Cloud allows you to log select business data from the Operation and Integration signatures either always, or only when errors occur. Values of logged fields can be viewed in the Only Business Data section in the Execution Results screen. You can also create aliases for the logged fields. Note: User specific data which may be considered as personal data will be stored and retained till the retention period defined in Execution Results. | ||
To select input or output fields for logging, click the Select Business Data to Log icon  , and in the Select Business Data to Log dialog box, choose whether you want to log business data only when errors occur (On Failure) or choose (Always) to always log business data. The default setting is On Failure. Then expand the Input Fields and Output Fields trees to display the fields available in the signature, and select the check boxes next to the fields you want to log. If you want to define an alias for a field, type an alias name beside the field. The alias defaults to the name of the selected field, but it can be modified. Click the , and in the Select Business Data to Log dialog box, choose whether you want to log business data only when errors occur (On Failure) or choose (Always) to always log business data. The default setting is On Failure. Then expand the Input Fields and Output Fields trees to display the fields available in the signature, and select the check boxes next to the fields you want to log. If you want to define an alias for a field, type an alias name beside the field. The alias defaults to the name of the selected field, but it can be modified. Click the | ||
When selecting fields for logging, you can create the same alias for more than one field, but this is not recommended. Having the same alias might make monitoring the fields at run time difficult. Map Input and Output Map the input of the operation from the Pipeline and also map the output of the operation into the pipeline. You can copy a field from the fields panel by clicking the icon. Depending on the context, you can either paste the field or the field path by clicking the icon. If you copy an array item, the path that is pasted includes the item index. For example, if the item that is copied is A/B/C[10], then the pasted path will also include the item index [10]. But if it is pasted in the document tree, it will appear as an array, like A[ ]. If there are multiple fields with the same name in a document, and one of the occurrences of such a field is copied, then the path when pasted will contain the occurrence number in brackets, for example, the path will be A/B/C(5) if the copied element C is the 5th occurrence under field B. | ||
 | Settings to enable or disable the cache. See
Caching Integrations for more information. Contact Global Support to enable the caching feature. | |
 | Control Flow > Modify Mapping | Make pipeline modifications. Edit data mapping, add Transformer, clear all mappings, add, delete, edit, or discard a field, set a value for a field and perform pipeline variable substitutions. |
 | Applications | Account and an Operation for the Application is configured. |
| Applications | The block is not configured. Select an Operation and an Account for the Application. |
 | Services | The block is not configured. Select a service. |
| Orchestrated Integrations | Click to view or modify an Orchestrated Integration after it is moved to the workspace. The Orchestrated Integration will open up for editing in a new tab. |
 | Orchestrated Integrations | An Orchestrated Integration has been modified or newly created but not saved. |
icon and then select Modify Mapping to map the Pipeline Input to the Input Signature. 
 icon to run and test the Integration execution in real time and view the execution results on the Test Results panel.
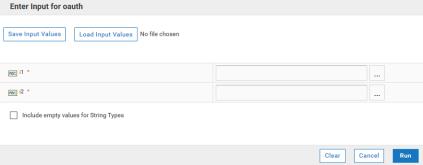
 icon on the Test Results panel header and click Remove All to delete the test results permanently or click Close to close the test results panel.
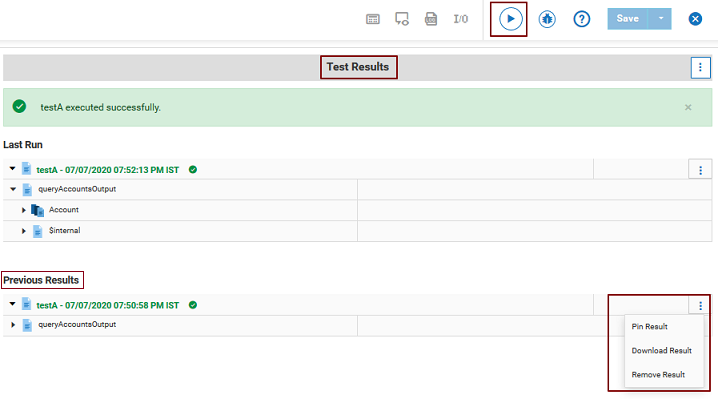 icon, and click Download Result to save the entry locally in JSON format. Click Remove Result to remove the selected entry. Click Pin Result if you want to prevent a previous result from getting deleted as more results fill the test results panel. Click Unpin Result to move the result to the Previous Results panel.