
This document covers the following topics:
The Literal Translator can be used to translate text IDs. You can also use it to add and remove text IDs.
Note:
Text IDs can also be translated using the
Literal Assistant.
The concept of the multi language management is described in Multi Language Management in the Natural for Ajax documentation. It is recommended that you read this information before you proceed with the information below.
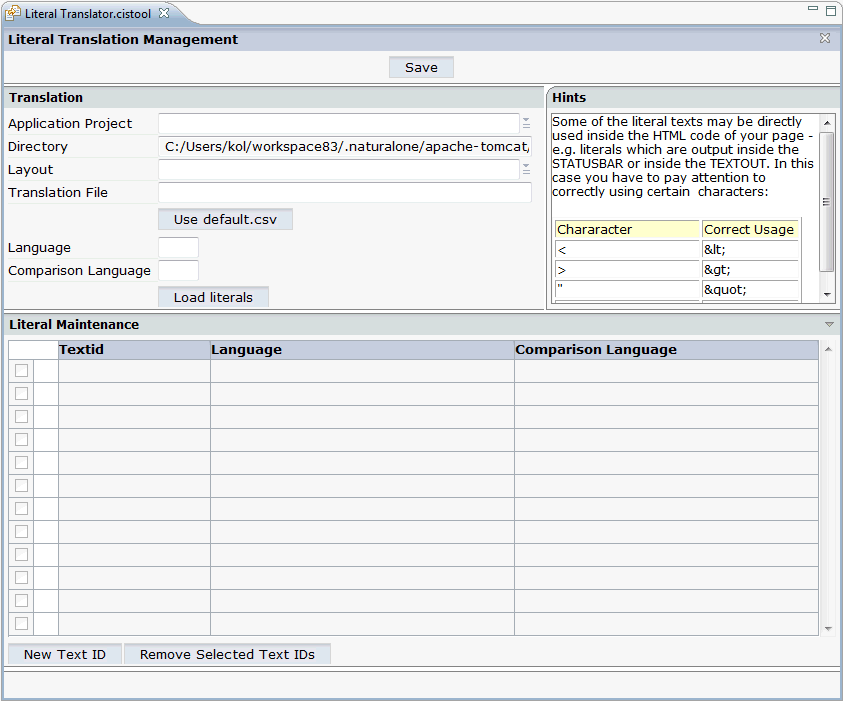
When you invoke the Literal Translator, the following is shown:
 To invoke the Literal Translator
In the ProjectExplorer view, select the project for which you want to invoke the Literal Translator.
Invoke the context menu and from the menu, choose .
You can load and modify the texts for a specific layout in one language. Optionally, can also load the literals of a second language for comparison purposes.
Note:
If you want to open the literals for a different layout or
project, you have to close the Literal Translator and start it once more.
Otherwise, the required options are not enabled.
To load the literals of a layout
In the text box of the Application Project drop-down list box, enter the name of the project which contains your layout.
Or:
Open the drop-down list box and choose the project from the
resulting dialog.
In the text box of the Layout drop-down list box, enter the name of the layout for which you want to translate the literals.
Or:
Open the drop-down list box and choose the layout from the
resulting dialog.
In the Translation File text box, enter the name and extension of your translation file.
Notes:
In the Language text box, enter the abbreviation for the language that you want to use. See also Language Manager.
Optional. If you want to display the literal of a second language for comparison purposes, enter the abbreviation for this language in the Comparison Language text box.
Choose the button.
The contents of the translation file(s) are loaded and the literals are shown at the bottom. Example:
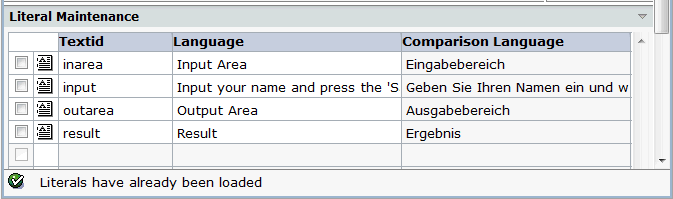
You can edit the literals that are shown in the Language column. It is not possible to edit the literals of the comparison language.
To edit the literals
Enter the new text directly in the Language column.
Or:
To edit a literal in a separate dialog, choose the following
icon which is shown next to the literal (this is helpful with long
literals):
![]()
If you have opened a separate dialog, you have to choose the button in order to confirm your changes and to close the dialog.
Choose the button to write your changes to the translation file.
You can add a new text ID to the translation file and specify a literal for it.
To add a new text ID
Choose the button which is shown below the list of literals.
An empty line is added to the list.
Enter the literal in the Language column.
Choose the button to write the new text ID and literal to the translation file.
You can remove one of more text IDs from the translation file.
To remove text IDs
Select the check boxes in front of the text IDs that you want to remove.
Choose the button which is shown below the list of literals.
Choose the button to remove the text IDs from the translation file.