
This document covers the following topics:
The Literal Assistant can be used it to maintain texts of different languages for the literals that are referenced within the XML layout.
The concept of the multi language management is described in Multi Language Management in the Natural for Ajax documentation. It is recommended that you read this information before you proceed with the information below.
Note:
Text can also be translated using the
Literal Translator.
The Literal Assistant needs to know in which file the
language-specific texts are kept. The name of this translation file is stored
in the translationreference property of the
page.
See also Writing Multi Language Layouts in Multi Language Management - this is part of the Application Designer documentation.
 To open the Literal Assistant
From the menu, choose .
When a translation file has not yet been specified, the following dialog box appears:
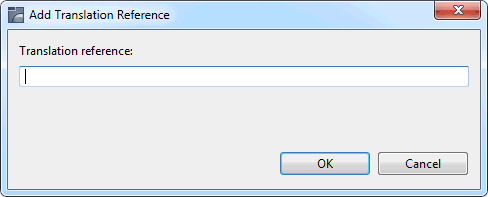
Specify the name of the translation file and choose the button.
The name you specify is entered in the
translationreference property.
The Literal Assistant appears in the editor area.
Note:
For multi language support, you use the
textid property for a label (instead of the
name property).
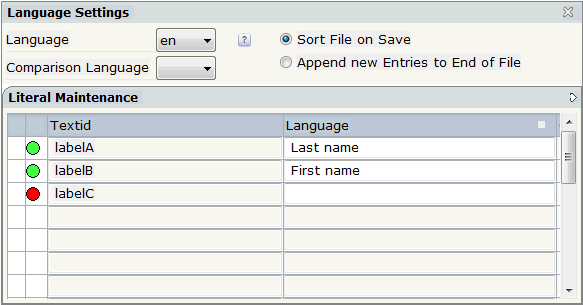
All referenced literals of the currently selected language are provided in the Literal Maintenance area.
Colored dots are shown in front of each literal. The color of the dot indicates whether the Literal Assistant could find the corresponding text in the translation file for the currently selected language.
Possible dot colors:
| Green | A text is available in the translation file. |
|---|---|
| Yellow | The translation file contains a line for the literal - but the text is empty. |
| Red | The literal (and text) does not yet exist in the translation file. |
When you select the first column (that is, the column to the left of the colored dot), the corresponding node is automatically selected in the layout tree and the properties for this node are shown in the Properties view.
To add/modify text for the current language
Enter all required text in the Language column.
Define the sequence of the entries in the translation file by selecting one of the following option buttons:
Sort File on Save (ascending order)
Append new Entries to End of File
Choose the standard Eclipse command to save your text input.
Your changes will also be available in the preview of the HTML page.
The valid languages are determined by the existing subdirectories in the multilanguage directory which belongs to your user interface component. An entry for each subdirectory is provided in the Language drop-down list box.
Note:
You may have to choose the command to refresh the Literal Assistant so that any
subdirectories you have just defined in your file system are shown in the
drop-down list box.
To select another language
From the Language drop-down list box, select the required language.
When you have not yet saved your previous changes, a dialog appears asking whether you want to save your changes.
Important:
The Literal Assistant keeps changes for one language
only. If you want to maintain texts for several languages, save the changes
before you switch to another language. Otherwise, you will lose input.
The selected language is shown in the Language column of the table.
For comparison purposes, you can display the texts of another translation file in the Comparison Language column. The Comparison Language drop-down list box contains an entry for each subdirectory in the multilanguage directory which belongs to your user interface component.
To display another language for comparison
From the Comparison Language drop-down list box, select the required language.
The selected language is shown in the Comparison Language column of the table.