
A server installation has a variety of advantages over installing Natural or Natural Runtime on single PCs. You can install Natural or Natural Runtime once on a file server and then access it from any number of client PCs, saving disk space and time.
This document describes how to install Natural and Natural Runtime on a file server and how to prepare the client PCs to access the file server installation. It covers the following topics:
A setup program is provided for installing Natural or Natural Runtime on a file server. This program decompresses the files contained on the installation medium, copies them to the file server you specify and thus makes them available for a number of client PCs. After Natural or Natural Runtime has been installed on your server, from there you start a short client installation for each PC you want to be able to access Natural or Natural Runtime. A setup program guides you step by step through both installation procedures.
The installation procedure is used for first-time installations of Natural or Natural Runtime as well as for update installations (in which case previous configuration information is used by the setup program).
With Natural Runtime, only a subset of the Natural features will be installed. Natural Runtime and Natural are two entirely separate environments. The Natural Runtime installation procedure, however, is almost identical with the Natural installation procedure.
A file server installation consists of two phases:
Configuration Phase
Environment information is collected. You are prompted to enter
certain installation values; other values are automatically included by the
setup program. The installation parameters are displayed for confirmation prior
to the actual installation. During this phase you may cancel the setup
procedure at any time or step back to previous dialogs. No changes to your
system will occur during this phase.
Installation Phase
The files are copied. The setup program installs Natural or Natural
Runtime according to the values you entered during the configuration phase.
After the file server installation is completed, a short installation must be performed for each client PC. This is necessary because some parts of Natural or Natural Runtime may not reside on a server during the execution of Natural or Natural Runtime, for example, terminal emulation. Additionally, the client installation registers the Natural or Natural Runtime environment to the client PC and creates the shortcuts on the Windows desktop.
A client installation also consists of two phases:
Configuration Phase
User information is collected. If a license key file is required, you
are prompted to provide it.
Installation Phase
The product registration is performed and the shortcuts are created
on the Windows desktop.
Important:
You must have administrator rights to install Natural or
Natural Runtime.
This section describes how to install Natural or Natural Runtime on a file server.
The following topics are covered below:
Before you start the setup program, ensure that your system meets the requirements outlined in the section Installation Prerequisites.
Important:
Due to a changed update behavior of Microsoft
Windows Server 2003, the destination location for a Natural file server
installation must be on a different machine. Otherwise, you will run into
problems when you later install a Natural update.
![]() To run the setup program
To run the setup program
Close all active Windows applications.
Insert the Natural installation medium into the drive.
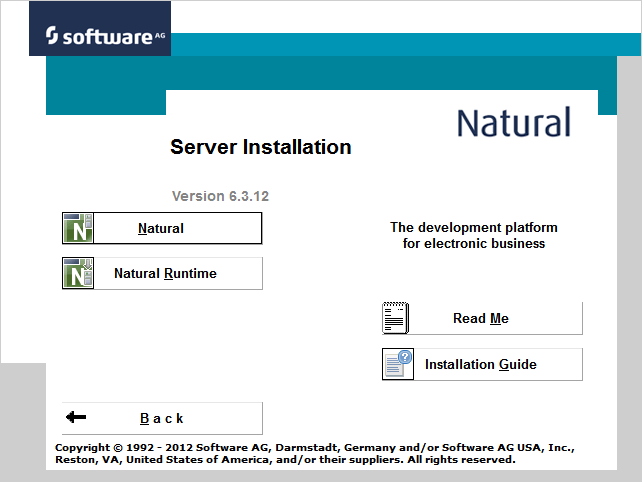
The setup program is automatically started and the initial installation screen appears.
Note:
If the autostart feature of your operating system is disabled,
execute Setup.exe which can be found in the root directory
of the installation medium.
Choose in the initial installation screen.
The following screen appears.
Choose either or in this screen.
The welcome screen for the selected product appears.
Choose the button to proceed.
Now, you will be guided through the installation for the selected product. Proceed as described below.
After the welcome screen, the license agreement screen is displayed. To proceed with the installation, you have to accept the terms in the license agreement.
Choose to proceed.
In this screen, you specify the destination folder for the file server to which Natural or Natural Runtime will be installed. All PCs that will use the file server installation must have access to a common share located on this file server.
To specify the path, it is recommended to use UNC notation, for example:
\\server-name\share\path
If necessary, choose the button to change the path. Please note that it is recommended to use UNC notation.
Important:
If you do not use UNC notation, the drive specified must be
identical on all clients. Otherwise, access will not be possible.
"natural\n.n" (where n.n is the current version number) will automatically be added to the path you have specified.
Choose the button to proceed.
Notes:
In this screen, the standard features to be installed are preselected. You can add or remove features according to your needs. What you select here, will be available for the clients who access this Natural or Natural Runtime installation. Different screens appear for Natural and Natural Runtime:
Depending on your choice of features, further information may be required.
This screen appears when you install Natural.
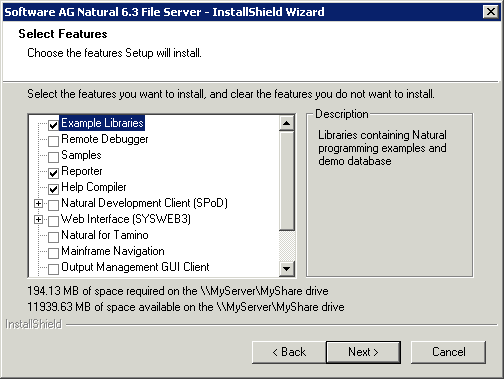
Select the features you want to install.
Choose the button to proceed.
This screen appears when you install Natural Runtime.
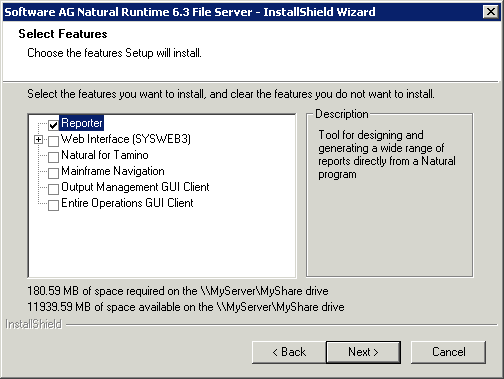
Select the features you want to install.
Choose the button to proceed.
In this screen, the values for the database IDs and file numbers for
FUSER
and FNAT and the default path for the
FUSER directory are displayed. Example for Natural:
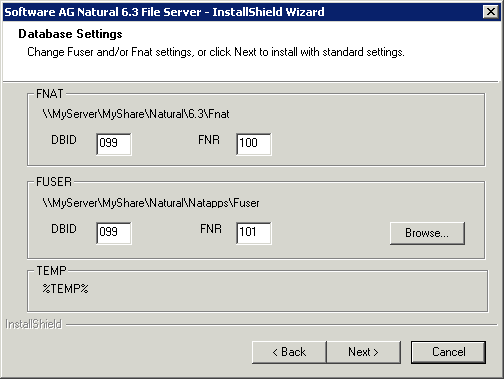
You can change the FUSER settings by choosing the
button.
Choose the button to proceed.
This screen appears only if you have selected the feature Web Interface. Example for Natural:
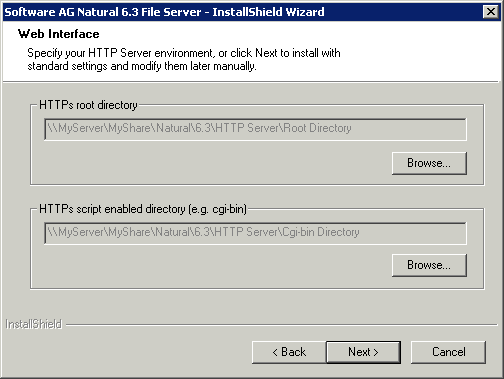
In this screen, you can verify the HTTP server root directory and the HTTP server script enabled directory for the Web Interface. The paths shown in the screen are the default paths.
If necessary, choose the buttons to change the paths. Please note that it is recommended to use UNC notation.
Choose the button to proceed.
This screen appears only if you have selected the feature Web Interface and have selected the HTTP server extensions for Apache. Example for Natural:
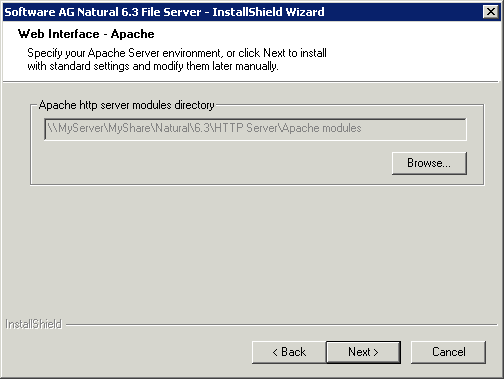
In this screen, you can verify the Apache HTTP server bin directory for the Web Interface. The path shown in the screen below is the default path.
If necessary, choose the button to change the path. Please note that it is recommended to use UNC notation.
Choose the button to proceed.
In this screen, your current settings and the features to be installed are displayed for reviewing.
Confirm the settings by choosing the button. The files are then copied to your system. The progress of the setup status is shown. The Natural or Natural Runtime shortcuts are created on your Windows desktop.
Or review your choices by choosing the button.
Or choose to exit the setup program.
After the files have been copied to your system, the last screen appears. You can display the Readme information now or later.
Complete the installation process by choosing the button.
The latest information will be displayed, unless you deselect this option.
Continue with the client installation as described below.
This section describes how to prepare the client PCs to access the file server installation.
After Natural or Natural Runtime has been installed on your file server, it is necessary to perform the following steps for each PC that is going to access this Natural installation.
Before you start the setup program, ensure that your system meets the requirements outlined in the section Installation Prerequisites.
![]() To start the setup program
To start the setup program
Execute ClientSetup.exe which is located in the directory to which the server installation was installed, for example:
\\server-name\share\product-name\n.n
where product-name is either "Natural" or "Natural Runtime" and n.n is the current version number.
The setup program is started and you have to proceed as described below.
After the welcome screen, the license agreement screen is displayed. To proceed with the installation, you have to accept the terms in the license agreement.
Choose to proceed.
In this screen, you enter your customer information.
Enter your user name.
Enter the name of your organization.
Specify the path to the XML file which contains your license key.
You can overwrite the default with an alternative path to your license key file or change it by choosing the Browse button.
Choose the button to proceed.
In this screen, you specify the destination folder to which Natural or Natural Runtime will be installed.
The default path is displayed according to your
%ProgramFiles% system variable setting:
%ProgramFiles%\Software AG\product-name
where product-name is either "Natural" or "Natural Runtime".
You can change this path by choosing the Browse button.
Choose the button to proceed.
This screen appears only if the feature Natural for Tamino has been selected during the file server installation.
In this screen, the path and file name of your Natural for Tamino license key file is required.
If necessary, choose the button to change the path.
Choose the button to proceed.
In this screen, your current settings and the features to be installed are displayed for reviewing.
Confirm the settings by choosing the button. The files are then copied to your system. The progress of the setup status is shown. The Natural or Natural Runtime shortcuts are created on your Windows desktop.
Or review your choices by choosing the button.
Or choose to exit the setup program.
After the files have been copied to your system, the last screen appears. You can display the Readme information now or later.
Complete the installation process by choosing the button.
The latest information will be displayed, unless you deselect this option.
Once the installation process is completed, you can start a Natural or Natural Runtime session.
For Natural, shortcuts for the following product components have been created on your Windows desktop:
If you would like to read more about using Natural, refer to First Steps with Natural.
For Natural Runtime, shortcuts for the following product components have been created on your Windows desktop:
Before using Natural or Natural Runtime, however, you may need to set up parameters and individual settings depending on your environment. If you wish to do so, see Profile Parameter Usage in the Operations documentation. For information on transferring Natural objects from another platform (for example, UNIX), see Object Handler in the Tools and Utilities documentation.
Note:
When Natural or Natural Runtime has been installed in an environment
protected by the Windows firewall and can therefore not be started, see
Configuring the
Microsoft Windows Personal Firewall to Run Natural in the
Operations documentation.
![]() To start Natural
To start Natural
From the Windows menu, choose .
Or:
Use the following shortcut on your Windows desktop.
![]()
Or:
Execute the file natural.exe which is stored on
the server (in the destination folder to which Natural was installed).
Natural Studio, the development environment for Natural, appears.
Note:
Dynamic parameters can be added when Natural is started from a
shortcut.
![]() To start Natural Runtime
To start Natural Runtime
From the Windows menu, choose .
Or:
Use the following shortcut on your Windows desktop.
![]()
Or:
Execute the file naturalr.exe which is stored on
the server (in the destination folder to which Natural Runtime was
installed).
Note:
Dynamic parameters can be added when Natural is started from a
shortcut.
You can only delete a file server environment by deleting its file structure with the normal operating system commands used to delete files and folders.
You can remove a Natural or Natural Runtime installation at any time after Natural has been installed.
Choose the Add/Remove Programs feature of your operating system.
In the list of currently installed programs, select Software AG Natural n.n or Software AG Natural Runtime n.n (where n.n is the current version number).
Choose the button.
Select the option button and choose the button to uninstall your Natural environment.
A file server environment can be updated by installing a new Natural or Natural Runtime version.
Note:
It is only possible to update your environment when the third digit
in the version number, which indicates a correction level, changes.
With a file server installation, it is not possible to migrate parameter files from a parallel installation of another Natural version to the newest version of Natural.
When a Natural or Natural Runtime client session is started and the system detects that the file server installation has been updated since you last accessed it, you will be asked whether you want to update the client installation. If you choose , the installation will be updated immediately. When the installation is completed, you can start your Natural or Natural Runtime session.
Important:
If you are using the Natural Web I/O Interface,
make sure that the required version of Microsoft .NET Framework has already
been installed on the client PC before you start the update
installation. The required version is listed under
Software in the
section Installation Prerequisites.