
The Tables Tab provides the ability to view the available source tables as well as see the status of the last run synchronizations.
Some functions on this screen use icons. The description of these icons will have a hyperlink to the Glossary of Icons which contains a picture of the icon and an explanation of its purpose.
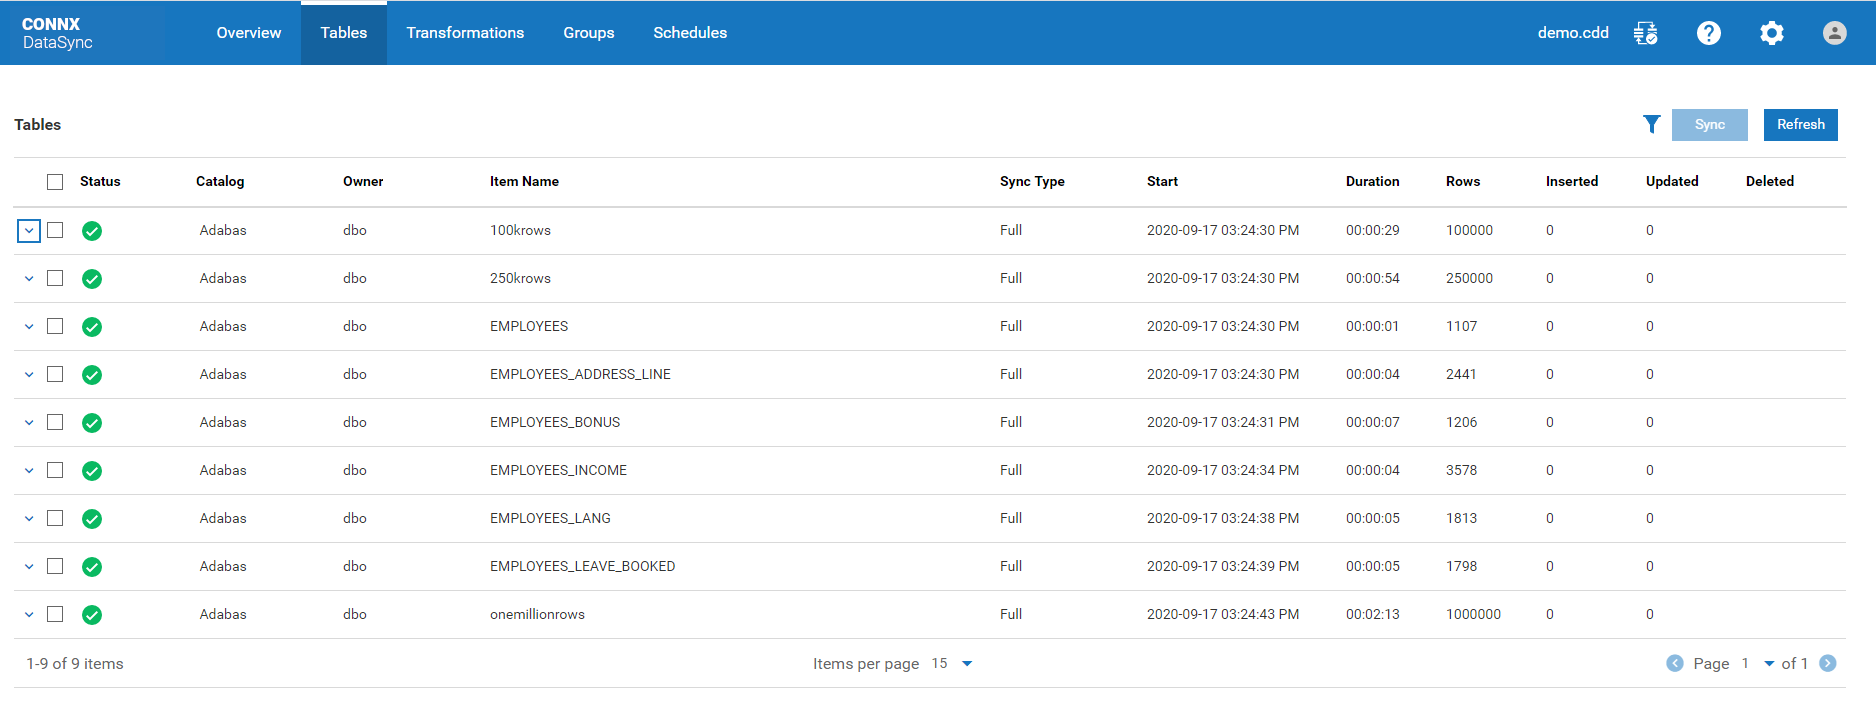
Tables List
The tables list displays information about all the tables available to be used as source tables. Tables in the database specified
as the Default Target database will not be listed. Below is a description of each column in the table:
More|Less Chevron
If more information is present for a row than can be displayed, clicking the more chevron will expand the row. Clicking the less chevron will collapse the information. Below is an example of a row that contains an error message. The more chevron has been clicked to display the additional information.

Selection Checkbox
Click the checkbox next to each row you wish to do an operation against. The row selection checkbox applies to the Duplicate,
Import, Export and Sync functions
Status
The status column will contain either a green success icon or a red error icon depending on whether the last time the transform
was run was successful or resulted in an error. If the table has never been synchronized, the column will be blank. If the
status shows an error, clicking on the more chevron will expand the row and display the error text.
Catalog
This is the name of the catalog the table is in.
Owner
This is the owner name for the table.
Item Name
This is the name of the table.
Sync Type
Displays the type (Automatic, Full, Incremental or Incremental Only) of synchronization from the last time this table was
synchronized.
Start
Timestamp displaying the starting date and time from the most recent synchronization.
Duration
The duration in hours, minutes and seconds (hh:mm:ss) from the most recent synchronization
Rows
Number of rows affected by the operation
Inserted
Number of rows inserted by the operation
Updated
Number of rows updated by the operation
Deleted
Number of rows deleted by the operation
Search Filter
Pressing this button activates search fields for the Status, Catalog, Owner and Item Name fields. To filter the results in
the list of tables, enter a value in one or more of these search fields. For example, entering the word EMPLOYEES in the
Item Name search box will cause only those tables that have the word EMPLOYEES in the Item Name to be displayed.
Sync button
To perform an on demand sync, select a table or tables by clicking the selection checkbox next to the table or tables you want to sync. Once your selection
has been made, press the Sync button. This will start the synchronization process on the selected tables. The view will
switch to the Overview Summary Page where you will be able to monitor the progress.
To perform this synchronization on a regular basis, you can create a schedule. To create a schedule, go to the Schedule tab to establish the timing of the synchronization. See To schedule a synchronization task for more information.
For more information about On Demand Synchronization, see Synchronizing Tables to Target Destination.
Refresh button
The refresh button refreshes the list of tables.