
This document describes the administrative tasks that you can perform with the Data Archiving for Adabas graphical user interface.
Data Archiving for Adabas services is maintained and monitored using Software AG's cross-product and cross-platform product management framework System Management Hub (SMH). If you are not familiar with using SMH, please refer to the SMH documentation for further information.
If System Management Hub is available on your local machine, the install process creates a Start Menu entry; an example screen shot follows:

If no Start Menu entry is available, go to your browser and use http://localhost:10010/smh (assuming defaults have been used for the System Management Hub install) or use your normal entry to the System Management Hub.
The SMH screen is divided into two frames: the navigation frame on the left; and the content frame on the right. You can navigate within the navigation tree using expand (+) and minimize (-), selecting an object and then left clicking or right clicking on the object depending on the type of operation you wish to perform.
The following is a typical SMH screen:
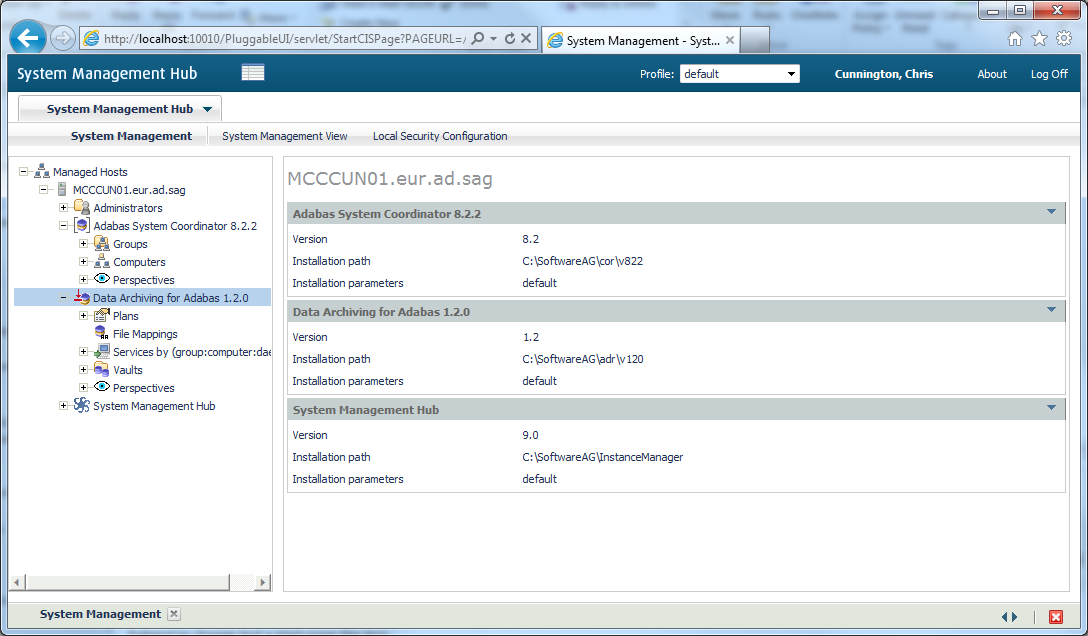
Vaults are flat-file stores which are used to hold archived data and any relevant metadata such as Adabas FDTs.
A Vault must be associated with every Action and contains Archives written as a result of such Actions being run.
Vaults are maintained by selecting the Vaults node within the Data Archiving for Adabas navigation tree. Selecting this node results in the following sub-nodes:
Vault Browse enables Vault content browsing and Archive recall capability.
A Vault contains Archives written as a result of Actions being run. Vault Browse lists these Archives and enables selected Archives to be recalled as required.
For efficiency, a Vault browse cache is maintained which can be refreshed on demand, and filtering enables the browse list content to be applicable to only those Archives of particular interest.
![]() To browse Archives in a Vault
To browse Archives in a Vault
Select the Vaults node within the Data Archiving for Adabas navigation tree
Select the Browse sub-node.
Select the Vault to be browsed.
The Vault Browse window lists all Archives in the selected Vault (subject to any current filter).
The following information is displayed:
| Field | Description |
|---|---|
| Archived At | The date and time when this Archive was created. |
| Archive-ID | The internal identity by which this Archive is known. |
| Group | The name of the Group corresponding to this Archive. |
| Plan | The name of the Plan corresponding to this Archive. |
| Action | The name of the Action corresponding to this Archive. |
| Retention Period |
The retention period currently applied to this Archive. The value can be one of the following: ‘-‘No Retention Period is defined. ‘> n years/months/weeks/days’A Retention Period is defined. " > n" gives an easily understandable indication of when this Archive’s retention period is due to expire. ‘< 1 day’A Retention Period is defined and is due to expire in less than 1 day. ‘Pending’A Retention Period is defined and has already expired. This Archive will be deleted the next time the Vault retention period processing is run. ‘Suspended’A Retention Period is defined but is currently suspended. This Archive is excluded from any Vault retention period processing. ‘Expired’This Archive’s retention period has expired and the data has been deleted. |
| Archived By | The user-id in use when this Archive was created. |
On selection of a particular Vault, sub-nodes of "year" and "month number" may be displayed in the navigation tree depending on the list content. Selection of these sub-nodes will automatically filter the list content in the Vault Browse window to only those Archives which match the particular year and month number of the sub-node selected.
Explicit filtering may also be performed, refer to Setting a Browse Filter for more information.
The following operations (available in the drop-down Operations box) can be performed:
| Operation | Description |
|---|---|
| Detail | Refer to Displaying Archive Detail. |
| Recall | Refer to Recalling Archives. |
| Search | Refer to Searching Archives. |
| FDT Analysis | Refer to FDT Analysis. |
| Retention Period | Refer to Retention Period Maintenance. |
![]() To display Archive details
To display Archive details
Refer to Browsing Archives in a Vault to list the particular Archive(s) for which details are required.
To display Archive Summary information for an individual Archive, click directly on its Archive-ID link. Displaying summary information does not require the associated Archive data itself to be available, for example, its retention period may have expired and the Archive data deleted.
To display Archive Detail information for one or more individual Archives, use the checkboxes for selection and then choose "Detail" from the drop-down Operations box. Displaying detail information does require the associated Archive data to be available.
![]() To set a browse filter
To set a browse filter
A browse filter can be set at the Browse sub-node and also any sub-node below Browse (e.g. Vault name, year number, month number) by simply right clicking on the sub-node and selecting Set Browse Filter.
Filtering is available by Group, Plan, Action and/or by Retention Period status. The filter applies at the user level and only a single filter can be active at any one time. To remove the filter refer to Clearing a Browse Filter.
The keyword "Filter:" in the Vault Browse window indicates whether or not a browse filter is active.
![]() To clear a browse filter
To clear a browse filter
A browse filter can be cleared at the Browse sub-node and also any sub-node below Browse (e.g. Vault name, year number, month number) by simply right clicking on the sub-node and selecting Clear Browse Filter.
For efficiency, a browse cache is maintained at the Vault level. This cache is established the first time a Vault name under the Browse sub-node is selected, and then regularly refreshed automatically when the Vault content changes. The keyword "Vault Contents Cached At:" in the Vault Browse window indicates when the browse cache for the current Vault was last refreshed.
If a more immediate refresh is required, this can be done manually as follows:
![]() To refresh the browse cache
To refresh the browse cache
Select the Vaults node within the Data Archiving for Adabas navigation tree.
Select the Browse sub-node.
Select and right click the Vault whose browse cache is to be refreshed, then select Refresh Browse Cache.
![]() To recall an Archive
To recall an Archive
Refer to Browsing Archives in a Vault to find the particular Archive(s) for which a recall is required.
To recall an individual Archive, use the checkbox for selection and then choose "Recall" from the drop-down Operations box.
Refer to Recall Archived Data for additional information regarding the recall process.
![]() To search an Archive
To search an Archive
Refer to Browsing Archives in a Vault to find the particular Archive(s) for which a search is required.
Use the checkbox for selection and then choose "Search" from the drop-down Operations box.
The Add Search window will appear with the selected Archive-IDs pre-populated in the Scope section (click on the drop-down Archive-ID box within this section to see the selected Archive-IDs).
Note:
Searching Archives can also be performed directly via the
Search sub-node under the Vaults node within the Data
Archiving for Adabas navigation tree.
In either case, refer to Search Archived Data for the additional information required to perform a search.
![]() To analyse on FDTs
To analyse on FDTs
Refer to Browsing Archives in a Vault to find the particular Archive(s) for which an FDT analysis is required.
Use the checkbox for selection and then choose "FDT Analysis" from the drop-down Operations box.
The window in the right hand pane now displays entries for each Group/Plan/Action involved in the Archive(s) selected. If the selection involves multiple Archives for the same Group/Plan/Action then only a single entry is shown for those Archives. Each Group/Plan/Action entry lists all the Source Files present in the Archive(s) for that particular Group/Plan/Action.
For each Group/Plan/Action entry, the following information is displayed:
| Field | Description |
|---|---|
| Source File |
The name of the Source File(s) involved in the Archives. Clicking on the [Source File] link will display the archived FDT corresponding to that particular Source File. If multiple Archives are involved in the selection, the most recent archived FDT is displayed. |
| FDT-Delta | If multiple Archives are involved in the selection, this indicates if changes to the FDT have occurred between Archives. |
Clicking on an FDT-Delta [Yes] or [No] link will display the FDT Analysis: Deltas screen for the corresponding Source File.
The FDT Analysis: Deltas screen provides a detailed FDT analysis report of a particular Source File, enabling comparisons to be made between:
Each of the FDTs in the selected Archives, and
The current FDT (only possible if the Source File is currently defined to the Group/Plan/Action in the Repository and the corresponding database/file is available for reference), and
Any other FDT as specified by the user (only available if the specified database/file is available for reference)
The following information is displayed:
| Field | Description |
|---|---|
| Source file | |
| Name |
The name of the Source File. |
| Action |
The name of the Group:Plan:Action. |
| Deltas | |
| Archives |
In chronological order, an entry for each of the selected Archives indicating the date the FDT was archived, the Archive ID, and the details of the result of an FDT comparison between the current Archive entry and the previous Archive entry. Samples of the type of detail reported: Initial FDT This Archive is the only one selected or, if multiple Archives were selected, this is the first chronologically. No changes There are no FDT differences between this Archive and the previous Archive. Field 01,XX,20,A added The field XX exists in this Archive’s FDT but did not exist in the previous Archive’s FDT. Field 01,XX,20,A removed The field XX does not exist in this Archive’s FDT but it did exist in the previous Archive’s FDT. |
| Source File |
If this Source File is currently defined in the Repository (for this particular Group/Plan/Action) and the corresponding database/file is available then an automatic FDT comparison of this file is performed against the FDT in the most recent of the Archives listed above. Information displayed is the date the file was loaded, the database and file number, and any FDT differences. |
| Other Files | |
|
By specifying a database/file which is currently available, you can perform an FDT comparison of this file against the FDT in the most recent of the Archives listed above. Once you have specified the database/file number, click the Refresh button to include your file in the FDT analysis report. |
|
| Warning: When a specified retention period expires, data is automatically and permanently deleted from the Vault. |
![]() To display/modify Retention Periods
To display/modify Retention Periods
Refer to Browsing Archives in a Vault to find the particular Archive(s) whose Retention Period is to be modified.
Use the checkbox for selection and then choose "Retention Period" from the drop-down Operations box.
The Retention Period window will appear displaying the current Retention Period settings for the selected Archive(s). These settings can be modified.
A Retention Period of Off means no retention period is applied and the data relating to the selected Archive(s) will be retained indefinitely.
A Retention Period of On enables you to specify the period of time for which the data relating to the selected Archive(s) is retained. The retention period can be specified in Years/Months/Weeks/Days.
Note:
Any defined retention period will begin from the "Archived
At" date displayed in the Retention Period window.
A Retention Period of Suspend enables you to temporarily suspend retention period processing for the selected Archive(s), for example, in the event of a legal hold requirement.
Note:
If multiple Archives are selected which have different retention
periods then the longest retention period will be displayed as the default
update value.
When modifying Retention Periods great care must be taken to ensure the correct retention period is specified.
Vault Search enables Vault content searching and Archive recall capability.
A Vault contains Archives written as a result of Actions being run. Vault Search allows searching to be performed against Archives and Vaults, and enables search results to be selectively recalled as required.
Refer to Search Archived Data for more information on searching archived data.
Vault Validation is a Vault management configurable option and is intended to enable the periodic validation of the Vault contents in order to provide an early detection system in the event that the Vault contents become compromised in some way.
The validation process operates asynchronously to normal archiving operations and can be configured according to a defined schedule or simply run on demand.
Log files are created by the validation process and are listed under the corresponding Vault within the Validation sub-node.
Note:
Only Vaults with validation enabled are displayed under the
Validation sub-node.
![]() To define Vault Validation
To define Vault Validation
Vault Validation can be turned On and Off when Adding a Vault or Modifying a Vault.
![]() To run Vault Validation on demand
To run Vault Validation on demand
Select the Vaults node within the Data Archiving for Adabas navigation tree.
Select the Validation sub-node.
Select and right click the Vault to be validated, then select Run Validation Now.
The corresponding validation log will appear in the Logs section of the Vault Validation window
Note:
Vault Validation on demand can only be run against Vaults with
validation enabled.
![]() To display Vault Validation logs
To display Vault Validation logs
Select the Vaults node within the Data Archiving for Adabas navigation tree.
Select the Validation sub-node.
Select the Vault whose validation logs are to be displayed. The Vault Validation window will appear.
The Logs section displays the validation logs (subject to any defined retention period).
![]() To delete Vault Validation logs
To delete Vault Validation logs
Select the Vaults node within the Data Archiving for Adabas navigation tree.
Select the Validation sub-node.
Select the Vault whose validation logs are to be deleted. The Vault Validation window will appear.
To delete individual logs or all logs on the current page use the checkboxes for selection and then choose ‘Delete’ from the drop-down Operations box. Alternatively, to delete all logs, right click the Vault, then select Delete All Logs.
At least one Vault must be configured to enable the storing of archive data, however, multiple Vaults can also be configured allowing the possibility of different business areas using dedicated Vaults.
Vaults are written to by archive processes called Accumulators, which are launched automatically on demand by the Data Archiving Service. An Accumulator which is launched on a particular computer must be able to identify the physical location of the Vault where the archive data is to be stored. It does this by referring to the Vault Path defined for that particular computer in the Vault configuration.
Note:
We recommend that your archived data should be maintained in Vaults
outside of the installation
directory.
![]() To add a Vault
To add a Vault
Select the Vaults node within the Data Archiving for Adabas navigation tree.
Select and right click the Configuration sub-node, then select Add Vault. The Add Vault window will appear.
Enter the following information for the new Vault:
| Field | Description |
|---|---|
| Vault Name |
1-32 characters to be used as the name for the Vault. This is the name that will appear under the Vaults node within the Data Archiving for Adabas navigation tree Names are case-sensitive, the first character must be alphabetic, all other characters can be either alphabetic or numeric. The only special character permitted is underscore. |
| Description |
A textual description of the Vault. |
| Granularity Setting |
Select the level of granularity with respect to the physical directory structure of a Vault.
Refer to Vault Granularity for more information. |
Vault Path defines the access path to the Vault. The Vault Path describes the physical location of the Vault. It can be HFS, a UNC path or a Windows directory.
Note:
If the Vault is to be accessed by Accumulator processes from
multiple computers then each computer requires its own Vault Path defined.
Refer to Adding a Vault
Path for information on defining additional Vault
Paths.
Enter the following information:
| Field | Description |
|---|---|
| Computer |
Select the Computer from the drop-down box whose Vault Path is being defined. |
| Directory |
For the selected Computer, specify the path to be used by the Accumulator process to access the Vault. |
Vault Management requires a designated computer to be specified on which all Vault management activities will be performed. Vault Validation and Vault Retention Period processing are examples of Vault management activities.
Enter the following information:
| Field | Description |
|---|---|
| Computer |
Select the Computer from the drop-down box on which all Vault management activities will be performed. |
Validation Settings control whether or not Vault validation processing is to be performed against the Vault content. Validation processes run on the Vault Management computer defined above. Refer to Vault Validation for additional information.
Enter the following information:
| Field | Description |
|---|---|
| Validation |
Vault Validation processing is On or Off. The default is Off. |
| If On... | |
| Level |
Select one of: Basic The existence of all appropriate files is validated. Intermediate Same as Basic plus all file sizes are validated. Full Same as Intermediate plus all record counts are validated. |
| Next run |
The time of day the validation process will run. |
| Frequency |
The repeating time period that the validation will run. For example, run every 1 day or 1 week etc. |
| Retain logs for |
The period of time log files created by the validation process are kept. Log files are useful to Software AG in cases where a validation alert occurs. |
Retention Settings control whether or not Retention Period processing is to be performed against the Vault content. Retention period processing is run on the Vault Management computer defined above.
Enter the following information:
| Field | Description |
|---|---|
| Retention Period |
Vault Retention Period processing is On or Off. The default is Off. A Retention Period of On means daily retention period processing will be performed against the Vault content. The purpose of this process is to identify and delete data whose retention period has expired. Refer to Adding an Action for information on how to define a particular retention period for an Action. This setting can also be used to temporarily suspend all retention period processing for a particular Vault, for example, in the event of a legal hold requirement. |
Click the Add Vault button to add the new Vault.
![]() To modify a Vault
To modify a Vault
Select the Vaults node within the Data Archiving for Adabas navigation tree.
Select the Configuration sub-node.
Select and right click the Vault to be modified, then select Modify Vault. The Modify Vault window will appear.
Refer to Adding a Vault for an explanation of the modifiable fields
Click the Save Changes button to save the changes.
Note:
When deleting a Vault, only the Vault configuration information is
deleted – the physical vault containing the archived data is not deleted. It is
the responsibility of the user to delete the physical vault if the archive data
within it is no longer required.
![]() To delete a Vault
To delete a Vault
Select the Vaults node within the Data Archiving for Adabas navigation tree.
Select the Configuration sub-node.
Select and right click the Vault to be deleted, then select Delete Vault.
A Vault cannot be deleted if it is currently the active Vault for one or more Plans/Actions. If it is not an active Vault, a confirmation window will appear.
Click the Yes button on the confirmation window to delete the Vault.
![]() To add a Vault Path
To add a Vault Path
Select the Vaults node within the Data Archiving for Adabas navigation tree.
Select the Configuration sub-node.
Select and right click the Vault to be modified, then select Add Vault Path. The Add Vault Path window will appear.
Enter the following information for the new Vault Path:
| Field | Description |
|---|---|
| Computer |
Select the Computer from the drop-down box whose Vault Path is being defined. |
| Path |
For the selected Computer, specify the path to be used by the Accumulator process to access the Vault. |
Click the Add Vault Path button to add the new Vault Path.
![]() To modify a Vault Path
To modify a Vault Path
Select the Vaults node within the Data Archiving for Adabas navigation tree.
Select the Configuration sub-node.
Select the Vault to be modified. The Vault Configuration window will appear.
In the Physical Path(s) to the Vault section, identify the computer whose Vault Path is to be modified and click on the corresponding modify icon. The Modify Vault Path window will appear.
Refer to Adding a Vault Path for an explanation of the modifiable fields.
Click the Save Changes button to save the changes.
![]() To delete a Vault Path
To delete a Vault Path
Select the Vaults node within the Data Archiving for Adabas navigation tree.
Select the Configuration sub-node.
Select the Vault to be modified. The Vault Configuration window will appear.
In the Physical Path(s) to the Vault section, identify the computer whose Vault Path is to be deleted and click on the corresponding delete icon. A confirmation window will appear.
Click the Yes button on the confirmation window to delete the Vault Path.
The Vault Granularity allows you to define the physical directory structure of the Vault, thereby providing control over the location of the Archive files on disk.
Depending on the requirements of your site, using a date-based directory structure for the Vault may help with backup management or the scheduling of date migration disk to tape.
Enter the following information as required:
| Granularity | Description |
|---|---|
| None |
Selecting a granularity of None will cause Archive files to be located in the data subdirectory beneath the directory defined as the Vault path. This is the default setting. |
| Year |
Selecting a granularity of Year will cause a subdirectory corresponding to the current year to be suffixed to the data subdirectory beneath the directory defined as the Vault path, which (for Actions run in 2015) would result in the Archive files being written to the data/2015 subdirectory. When this year rolls over to the next, the suffix will change and the Archive files will be written to the data/2016 subdirectory. |
| Month |
Selecting a granularity of Month will cause a subdirectory corresponding to the current year/month to be suffixed to the data subdirectory beneath the directory defined as the Vault path, which (for April 2015) would result in the Archive files being written to the data/2015/04 subdirectory. When this month rolls over to the next, the suffix will change and the Archive files will be written to the data/2015/05 subdirectory. |
| Day |
Selecting a granularity of Day will cause a subdirectory corresponding to the current year/month/day to be suffixed to the data subdirectory beneath the directory defined as the Vault path, which (for the 30th April 2015) would result in the Archive files being written to the data/2015/04/30 subdirectory. When this day rolls over to the next, the suffix will change and the Archive files will be written to the data/2015/05/01 subdirectory. |
| Custom |
Refer to the Custom Granularity section below. |
As an alternative to the other settings, a Custom granularity option is also provided. This is a user-defined string which can contain replacement patterns or literal characters, as listed in the tables below.
Note:
Excluding subdirectories, this user-defined string is restricted to
a total of 8 patterns, literal characters or date offsets. Date offsets must be
between 0-31 (although higher values can be achieved by specifying multiple
offsets).
| Patterns | Description |
|---|---|
| | | Subdirectory |
| YYYY | 4-digit year. |
| YY | 2-digit year. |
| MM | 2-digit month. |
| DD | 2-digit day. |
| Literals | Description |
|---|---|
| 0-9 | Digits 0 to 9. |
| A-Z | Letters A to Z (will be converted to upper case). |
| # @ $ _ - . | Symbols (restricted for character set and file system compatibility). |
| <space> | Spaces are ignored but may be used as a separator for clarity. |
The custom granularity setting also allows a date offset pattern to be incorporated in order to modify the value used for the replacement of date-based patterns. This enables the subdirectory names to be generated that contain future dates, which may be useful for expiration or retention purposes.
| Date Offset | Description |
|---|---|
| +nD | Increment date by n days. |
| +nM | Increment date by n months. |
| +nY | Increment date by n years. |
| +0D, +0M or +0Y | Reset date to current date. |
In the following examples, the replacement patterns for the custom granularity settings use 30th April 2015 as the current date.
YYYY-MM <vault>/data/2015-04
In this example, the YYYY-MM pattern is replaced with the current year and month.
YYYY-MM. +2Y EYYYY <vault>/data/2015-04.E2017
In this example, the directory names are based on the current year and month, with a suffix indicating that the data will be retained until the end of next year.
+2Y EYYYY +0D .YYYY-MM <vault>/data/E2017.2015-04
In this example, the directory names are based on the current year and month, with a prefix indicating that the data will be retained until the end of next year. Note the use of +0D to reset the date used for the replacements that follow.
Archiving rules are implemented by defining Plans and Actions.
A Plan identifies a collection of one or more related Actions, for example all the Actions required for a particular business application, division, or department.
![]() To add a Plan:
To add a Plan:
Select and right click the Plans node within the Data Archiving for Adabas navigation tree, then select Add Plan. The Add Plan window will appear.
Enter the following information for the new Plan:
| Field | Description |
|---|---|
| Short Name |
1-32 characters to be used as the name for the Plan. This is the name that will appear under the Plans node within the Data Archiving for Adabas navigation tree. Names are case-sensitive, the first character must be alphabetic, all other characters can be either alphabetic or numeric. The only special character permitted is underscore. |
| Group |
The Adabas System Coordinator Group for the Plan. An Adabas System Coordinator Group defines a logical network of computers where Data Archiving Services are available. |
| Description |
A textual description of the Plan. |
| Vault |
The default Vault for use by Actions within this Plan. Individual Actions within this Plan may override this default Vault if required. Refer to Vault Configuration if the Vault has not yet been defined. |
Click the Add Plan button to add the new Plan.
![]() To modify a Plan
To modify a Plan
Select the Plan node within the Data Archiving for Adabas navigation tree.
Select and right click the Plan to be modified, then select Modify Plan. The Modify Plan window will appear.
The following information can be modified:
| Field | Description |
|---|---|
| Description |
A textual description of the Plan. |
| Vault |
The default Vault for use by Actions in this Plan. Individual Actions within this Plan may override this default Vault if required. Notes:
|
Click the Save Changes button to save the changes.
![]() To delete a Plan
To delete a Plan
Select the Plan node within the Data Archiving for Adabas navigation tree.
Select and right click the Plan to be deleted, then select Delete Plan. A confirmation window will appear.
Click the Yes button on the confirmation window to delete the Plan and all associated Actions.
Note:
Deleting a Plan will also delete all Actions within the Plan.
Actions belong to Plans. An Action defines where data is to be extracted from, where it is to go, and the computers on which the respective Extractor and Accumulator processes will run. Together, Actions and Plans are used to define and implement your archiving rules and policies.
![]() To add an Action:
To add an Action:
Select the Plans node within the Data Archiving for Adabas navigation tree.
Select the Plan within which the Action is to be added.
Select and right click the Actions sub-node, then select Add Action. The Add Action window will appear.
Enter the following information for the Action:
| Field | Description |
|---|---|
| Action Name |
1-32 characters to be used as the name for the Action. This is the name that will appear under the Actions sub-node for the selected Plan. This Action name must be unique within the selected Plan. Names are case-sensitive, the first character must be alphabetic, all other characters can be either alphabetic or numeric. The only special character permitted is underscore. |
| Description |
A textual description of the Action. |
Extractor Settings defines the Computer where the Extractor process will run and the data selection mode to be used.
Enter the following information:
| Field | Description |
|---|---|
| Computer |
Select the computer where the Extractor is to run and where the Source File(s) reside. The selectable list of Computers is determined by the Group name defined to the Plan. |
| Mode |
Identify the Data Selection Mode:
Refer to the sections Data Selection Methods and Data Selection Mode for information regarding these different types of selection methods. |
Accumulator Settings defines the Computer where the Accumulator process will run, the Vault to use, and any required Retention Period.
Enter the following information:
| Field | Description | ||
|---|---|---|---|
| Computer |
Select the Computer where the Accumulator is to run (for a TRANSFER operation, this is where the Target File(s) reside). The selectable list of Computers is determined by the Group name defined to the Plan. Note: |
||
| Vault |
Select the Vault to be used by the Accumulator. The default selection is the Vault defined to the Plan but a different Vault can be selected if required. |
||
| Retention Period |
[Optional] Specify a Retention Period for any Archives written to the Vault by the running of this Action. A Retention Period of Off (the default) means no retention period is applied. Archives created by an Action when the Retention Period is set to Off will be retained indefinitely. A Retention Period of On means the specified retention period is applied. The retention period can be specified in Years, Months, Weeks or Days. Archives created by an Action when the Retention Period is set to On will be deleted as soon as the retention period expires. Note:
|
Scheduling Settings defines the scheduling requirements.
Enter the following information:
| Field | Description |
|---|---|
| Schedule Type |
|
Runtime Control Settings defines the runtime characteristics of the Action relating to processing limits, pacing and record locking.
Enter the following information:
| Field | Description |
|---|---|
| Limit Action to a maximum of nnnn objects |
Each run of this Action will stop when the specified number of objects has been processed. The default value of 0 means no limit or "Off". |
| Limit Action to a maximum of nnnn seconds |
Each run of this Action will stop when the specified number of seconds has elapsed. The default value of 0 means no limit or "Off". |
| Pacing |
When set to On, this control regulates the activity level (throughput) of each run of this Action so that a pre-determined level of service can be maintained. This is achieved by defining a maximum setting for the numbers of objects to be processed per second (approximately). The default is Off. |
| Record locking |
When set to On, this control attempts to place a shared (read) lock on the set of records relating to a particular Object when they are selected for processing. This ensures transactional consistency at the Object level if the Action is run against active data. The number of retries and the interval between each attempt to acquire a lock can be specified. If a lock cannot be acquired the Action can be configured to stop or to skip the Object and continue. |
Click the Add Action button to add the new action.
When a new Action is added, the sub-nodes Source Files and Target Files will appear in the navigation tree under the Action. All Adabas files referenced by the Action must be defined in these sub-nodes.
Refer to Adding Source Files and Adding Target Files for information on how to define these files.
![]() To modify an Action
To modify an Action
Select the Plans node within the Data Archiving for Adabas navigation tree.
Select the Plan within which the Action to be modified is located.
Select the Actions sub-node.
Select and right click the Action to be modified, then select Modify Action. The Modify Action window will appear.
Refer to Adding an Action for an explanation of the modifiable fields.
Click the Save Changes button to save any changes.
![]() To delete an Action
To delete an Action
Select the Plans node within the Data Archiving for Adabas navigation tree.
Select the Plan within which the Action to be deleted is located.
Select the Actions sub-node.
Select and right click the Action to be deleted, then select Delete Action. A confirmation window will appear.
Click the Yes button on the confirmation window to delete the Action.
![]() To copy an existing Action
To copy an existing Action
Select the Plans node within the Data Archiving for Adabas navigation tree.
Select the Plan within which the Action to be copied is located.
Select the Actions sub-node.
Select and right click the Action to be copied, then select Copy Action. The Copy Action window will appear.
Enter the following information:
| Field | Description |
|---|---|
| Group |
Select the Adabas System Coordinator group. |
| Plan |
Select the Plan where the current Action will be copied to. |
| Action |
1-32 characters to be used as the name for the copied Action. This is the name that will appear under the Actions sub-node for the selected Plan. This Action name must be unique within the selected Plan. Names are case-sensitive, the first character must be alphabetic, all other characters can be either alphabetic or numeric. The only special character permitted is underscore. |
| Description |
A textual description of the copied Action. |
Click the Copy Action button to copy the Action.
Note:
Retention Periods are not included in the copy process. If a
Retention Period is defined in the Action being copied then you will need to
modify the newly copied Action and re-define any required Retention
Period.
An Action can be run manually at any time.
![]() To run an Action manually
To run an Action manually
Select the Plans node within the Data Archiving for Adabas navigation tree.
Select the Plan within which the Action to be run is located.
Select the Actions sub-node.
Select and right click the Action to be run, then select Run Action ‘name’ Now. A confirmation window will appear.
Click the Yes button on the confirmation window to run the Action.
Each run of an Action is called an Activity. Refer to Monitoring Activities for information on how to monitor such activities.
In order to define an automatic schedule, the Action must first be configured with a Schedule Type of Automatic. Refer to Adding an Action for an explanation of the parameter Schedule Type. Once configured with this setting, a Schedule sub-node will be present in the navigation tree under the Action.
![]() To define an automatic schedule
To define an automatic schedule
Select the Plans node within the Data Archiving for Adabas navigation tree.
Select the Plan within which the Action to be scheduled is located.
Select the Actions sub-node.
Select the Action to be scheduled.
Select and right click the Schedule sub-node, then select Modify Schedule. The Modify Schedule window will appear.
Enter the following information:
| Field | Description |
|---|---|
| Run At |
Define the time of day when the Action is to be run. |
| Occurring:... Daily... Weekly on... Monthly on day... Quarterly on day... Half Yearly on day... Annually on day... Repeat every... |
Define the schedule. |
Click the Save Changes button to save any changes.
Each run of an Action is called an Activity. Refer to Monitoring Activities for information on how to monitor such activities.
In order to define an ad hoc schedule, the Action must first be configured with a Schedule Type of Ad hoc. Refer to Adding an Action for an explanation of the parameter Schedule Type. Once configured with this setting, a Schedule sub-node will be present in the navigation tree under the Action.
![]() To define an ad hoc schedule
To define an ad hoc schedule
Select the Plans node within the Data Archiving for Adabas navigation tree.
Select the Plan within which the Action to be scheduled is located.
Select the Actions sub-node.
Select the Action to be scheduled.
Select the Schedule sub-node. The Schedule window will appear.
Click the Add Schedule Entry button. The Add Schedule Entry window will appear.
Enter the following information:
| Field | Description |
|---|---|
| Time |
Define the time of day when the Action is to be run. |
| Date |
Define the date when the Action is to be run. |
Click the Add Schedule Entry button to add the entry.
Repeat as necessary to define as many Schedule Entries as required.
Each run of an Action is called an Activity. Refer to Monitoring Activities for information on how to monitor such activities.
Individual schedule entries can be modified and deleted by clicking on the respective icon in the Schedule window.
When creating an Action you need to choose the mode of data selection. There are three modes available; Extraction Syntax, To-do List (User-generated archive/transfer lists), and User Library (Record selection plug-in).
![]() To use Extraction Syntax
To use Extraction Syntax
Ensure the Action is defined with a mode of Extraction Syntax. This will create the node Extraction Syntax below the Action.
Select the node Extraction Syntax and the Modify Extraction Syntax window will appear.
Define the required extraction syntax. Refer to Extraction Syntax for more information and examples on using the extraction syntax.
Click the Check Syntax button to validate and check for compilation errors in the syntax. If the validation fails, an indication of the error is provided.
Click the Save button to store the syntax.
Click the Help button for a quick reference guide on the extraction syntax.
![]() To use To-Do List (User-generated archive/transfer list)
To use To-Do List (User-generated archive/transfer list)
Ensure the Action is defined with a mode of To-Do List. This will create the node To-Do List below the Action.
Select the location that will be used to store the To-Do List for the Action. By default this is the Repository but an alternative Adabas file may be specified instead. The file will be created automatically if it does not already exist.
Create the To-Do List content by referencing the supplied Data Archiving for Adabas Application Programming Interface. Refer to Application Programming Interface for more information on using this interface.
Select the node To-Do List from within the Action to display the status of any To-Do List.
![]() To use User Library (Record selection plug-in)
To use User Library (Record selection plug-in)
Ensure the Action is defined with (a) a mode of User Library and (b) the library path for the plug-in. This will create the node Real-Time API Parameters below the Action.
The node Real-Time API Parameters is used to define the parameters which are passed to the plug-in.
Create the Plug-in by referencing the supplied Data Archiving for Adabas Application Programming Interface. Refer to API for the C Programming Language and the section titled User-Lib Interface.
An Action requires all the files that make up the business object be defined under the Source Files node.
![]() To add Source Files for an Action
To add Source Files for an Action
Select and right click on Source File node below the Action, then select Add Source File. The Add Source File window will appear:.
Enter the following information:
| Field | Description |
|---|---|
| File Name |
1-32 characters to be used as the name for the Source File. This is the name that will appear within the Source Files sub-node under the selected Action. This file name must be unique within the Action. Names are case-sensitive, the first character must be alphabetic, all other characters can be either alphabetic or numeric. The only special character permitted is underscore. |
| Adabas |
This identifies the data source. For Adabas data this is the database and file number. |
| File Mapping |
File Mappings can be used in association with a Source File. This allows Adabas Long Field names to be used when the Action’s Data Selection Mode is set to "Extraction Syntax". |
| Description |
A textual description of the Source File. |
| Codepage |
Defines the codepage to be associated with Alphanumeric format field values in the Source File. Select one of: |
Click the Add Source File button to add the new source file.
Note:
Target files are only required if the Action will be using the
TRANSFER feature of Data Archiving for Adabas.
You must define all the Target Files that are involved in making up the business objects to be transferred.
![]() To add Target Files for an Action
To add Target Files for an Action
Select and right click on the Target File node below the Action, then select Add Target File. The Add Target File window will appear.
Enter the following information:
| Field | Description |
|---|---|
| File Name |
1-32 characters to be used as the name for the Target File. This is the name that will appear within the Target Files sub-node under the selected Action. This file name must be unique within the Action. Names are case-sensitive, the first character must be alphabetic, all other characters can be either alphabetic or numeric. The only special character permitted is underscore. |
| Adabas |
This identifies the data target. For Adabas data this is the database and file number. If appropriate, a target LOB file must also be defined. |
| Codepage |
Defines the codepage to be applied to Alphanumeric format field values when transferring data into the Target File. Select one of: |
| Duplicate ISN Handling |
Specifies what action to take when inserting a Transfer record into the Target File and the ISN of this record already exists. Select one of: |
| Duplicate Unique Descriptors |
Specifies what action to take when inserting a Transfer record into the Target File when a duplicate unique descriptor value already exists. Select one of: |
| File Creation Parameters |
If ‘Create File If It Does Not Exist’ is selected then define the appropriate Adabas file parameters. Refer to the Adabas documentation relating to file creation for further information on these parameters. The default parameter settings supplied are for example only. |
Click the Add Target File button to add the new target file.
The Data Archiving Service (also simply referred to as the Archiving Service) manages all archive operations. It runs unattended and, according to any defined Plans and Actions, launches Extractor and Accumulator processes to perform the necessary archiving requirements.
For more information on the Archiving Service, Extractor, and Accumulator components please refer to Components of Data Archiving for Adabas.
Each Data Archiving Service runs within an Adabas System Coordinator Daemon on a Computer which is defined to an Adabas System Coordinator Group. Archiving Services running within the same Group can communicate collaboratively to provide a fully distributed archiving service where the Extractor can run on one computer and the Accumulator can run on another. An individual Archiving Service is referred to by Group:Computer:Daemon.
![]() To monitor Archiving Services
To monitor Archiving Services
Select the Services by (group:computer:daemon) node within the Data Archiving for Adabas navigation tree.
Select the group:computer:daemon for the Archiving Service you wish to monitor. The Archiving Service window will appear.
The following information is displayed:
| Field | Description |
|---|---|
| Group Computer Daemon |
The name of the Group, Computer and Daemon corresponding to the selected Archiving Service. |
| Service Status Information | |
| Status |
The run status of the selected Archiving Service. |
| Install Path |
The installed location of the selected Archiving Service. |
| Version |
The version of the selected Archiving Service. |
| Repository |
The location information for the Repository used by the selected Archiving Service. |
| License Information | |
| File |
The location of the selected Archiving Service’s license file. |
| Status |
The status of the selected Archiving Service’s license. |
| Expires |
The expiry date of the selected Archiving Service’s license. |
Archiving requirements are implemented by defining Plans and Actions. A Plan identifies a collection of one or more related Actions, and an Action defines where data is to be extracted from, where it is to go, and the computers on which the respective Extractor and Accumulator processes will run.
Each run of an Action is called an Activity and the Archiving Service manages and records all pending, current and completed Activities in order to assist the administrator in monitoring and controlling archive operations.
Pending Activities are Activities relating to those Actions that have been scheduled to run in the future. Refer to Running an Action using a Schedule for more information on how to define a schedule for an Action.
![]() To monitor Pending Activities
To monitor Pending Activities
Select the Services by (group:computer:daemon) node within the Data Archiving for Adabas navigation tree.
Select the group:computer:daemon for the Archiving Service you wish to monitor. The Archiving Service window will appear.
Select the Pending Activities sub-node. The Pending Activities window will appear.
If pending Activities are present, the following information is displayed:
| Column | Description |
|---|---|
| Cancel |
To cancel the scheduled Activity, click the icon on the appropriate entry. |
| Type |
The type of operation to be performed by the Activity; for example, Archive or Transfer. |
| Due |
The date and time when this Activity is scheduled to run. |
| Activity-ID |
The internal identity by which this Activity is known. |
| Plan |
The name of the Plan corresponding to the Action for which this Activity has been scheduled. |
| Action |
The name of the Action for which this Activity has been scheduled. |
| Schedule |
The type of schedule defined to the Action for which this Activity has been scheduled; for example, Automatic or Ad Hoc. |
| Status |
The status of the scheduled Activity. |
Current Activities are Activities relating to those Actions that are currently in progress having been submitted to run manually or automatically via a defined schedule. Refer to Running an Action for more information on the options available for running an Action.
![]() To monitor current Activities
To monitor current Activities
Select the Services by (group:computer:daemon) node within the Data Archiving for Adabas navigation tree.
Select the group:computer:daemon for the Archiving Service you wish to monitor. The Archiving Service window will appear.
Select the Current Activities sub-node. The Current Activities window will appear.
If current Activities are present, the following information is displayed:
| Column | Description |
|---|---|
| Started |
The start time of the Activity. |
| Activity-ID |
The internal identity by which this Activity is known. |
| Plan |
The name of the Plan corresponding to the Action for which this Activity has been started. |
| Action |
The name of the Action for which this Activity has been started. |
| Type |
The type of operations being performed by the Activity; for example, Archive, Remove, Transfer or Recall. Remove indicates that records have been deleted from the Source Files by use of the Extraction Syntax statements "ARCHIVE MOVE" or "REMOVE" (or by the equivalent functions in the Natural and C APIs). |
| Overall |
The highest progress count from either the Accumulator process or the Extractor process. |
| Status |
The overall status of the Activity, a combination of the Accumulator and Extractor statuses. |
| Extractor |
The progress count for the Extractor process. |
| Status |
The status of the Extractor. |
| Accumulator |
The progress count for the Accumulator process. |
| Status |
The status of the Accumulator. |
![]() To display details of current Activities
To display details of current Activities
Select the Services by (group:computer:daemon) node within the Data Archiving for Adabas navigation tree.
Select the group:computer:daemon for the Archiving Service you wish to monitor. The Archiving Service window will appear.
Select the Current Activities sub-node. The Current Activities window will appear.
To display the details for an individual Activity, click directly on its Activity-ID link. Alternatively, to display the details for multiple Activities, use the checkboxes for selection and then choose ‘Detail’ from the drop-down Operations box (this method can also be used for an individual Activity).
The Activity Detail window appears which provides additional details about the selected Activity.
Current Activities may be stopped to enable unplanned maintenance to be performed on Activity-involved databases or files by allowing the resources used by such Activities to be released. Refer to Adabas Database and File Maintenance for additional information when considering this operation.
![]() To stop current Activities
To stop current Activities
Select the Services by (group:computer:daemon) node within the Data Archiving for Adabas navigation tree.
Select the group:computer:daemon for the Archiving Service you wish to monitor. The Archiving Service window will appear.
Select the Current Activities sub-node. The Current Activities window will appear.
To stop one or more Activities, use the checkboxes for selection and then choose ‘Stop’ from the drop-down Operations box.
Click the Yes button on the confirmation window to stop the selected Activities.
Current Activities may be paused and resumed to enable unplanned maintenance to be performed on Activity-involved databases or files by allowing the resources used by such Activities to be released. Refer to Adabas Database and File Maintenance for additional information when considering this operation.
![]() To pause and resume current Activities
To pause and resume current Activities
Select the Services by (group:computer:daemon) node within the Data Archiving for Adabas navigation tree.
Select the group:computer:daemon for the Archiving Service you wish to monitor. The Archiving Service window will appear.
Select the Current Activities sub-node. The Current Activities window will appear.
To stop one or more Activities, use the checkboxes for selection and then choose ‘Pause’ from the drop-down Operations box.
Click the Yes button on the confirmation window to pause the selected Activities.
To resume one or more paused Activities, use the checkboxes for selection and then choose ‘Resume’ from the drop-down Operations box.
Click the Yes button on the confirmation window to resume the selected Activities.
Completed Activities are Activities relating to those Actions that have previously been run either successfully or unsuccessfully.
![]() To view completed Activities
To view completed Activities
Select the Services by (group:computer:daemon) node within the Data Archiving for Adabas navigation tree.
Select the group:computer:daemon for the Archiving Service you wish to monitor. The Archiving Service window will appear.
Select the Completed Activities sub-node. The Completed Activities window will appear.
If complete activities are present, the following information is displayed:
| Column | Description |
|---|---|
| Started |
The start time of the Activity. |
| Activity-ID |
The internal identity by which this Activity is known. |
| Plan |
The name of the Plan corresponding to the Action for which this Activity was run. |
| Action |
The name of the Action for which this Activity was run. |
| Type |
The type of operations performed by the Activity; for example, Archive, Remove, Transfer or Recall. Remove indicates that records have been deleted from the Source Files by use of the Extraction Syntax statements "ARCHIVE MOVE" or "REMOVE" (or by the equivalent functions in the Natural and C APIs). |
| Overall |
The highest completed progress count from either the Accumulator process or the Extractor process. |
| Status |
The overall completion status of the Activity, a combination of the Accumulator and Extractor completion statuses. |
| Extractor |
The completed progress count for the Extractor process. |
| Status |
The completion status of the Extractor. |
| Accumulator |
The completed progress count for the Accumulator process. |
| Status |
The completion status of the Accumulator. |
| Ended |
The end time of the Activity. |
![]() To display details of completed Activities
To display details of completed Activities
Select the Services by (group:computer:daemon) node within the Data Archiving for Adabas navigation tree.
Select the group:computer:daemon for the Archiving Service you wish to monitor. The Archiving Service window will appear.
Select the Completed Activities sub-node. The Completed Activities window will appear.
To display the details for an individual Activity, click directly on its Activity-ID link. Alternatively, to display the details for multiple Activities, use the checkboxes for selection and then choose ‘Detail’ from the drop-down Operations box (this method can also be used for an individual Activity).
The Activity Detail window appears which provides additional details about the selected Activity.
![]() To delete completed Activities
To delete completed Activities
Select the Services by (group:computer:daemon) node within the Data Archiving for Adabas navigation tree.
Select the group:computer:daemon for the Archiving Service you wish to monitor. The Archiving Service window will appear.
Select the Completed Activities sub-node. The Completed Activities window will appear.
To delete one or more completed Activities, use the checkboxes for selection and then choose "Delete" from the drop-down Operations box.
To delete all completed Activities, right-click on the Completed Activities sub-node and select "Delete All" from the pop-up menu.
Click the Yes button on the confirmation window to delete the Activities.
An Activity may fail for many reasons; from a database or file not being available, to an unexpected processing error. The restart operation is designed to provide recovery from such failures by checking (and if necessary repairing) the integrity of the current archive files before continuing with the Activity. Log messages are written to provide information relating to the restart operation.
![]() To restart failed Activities
To restart failed Activities
Select the Services by (group:computer:daemon) node within the Data Archiving for Adabas navigation tree.
Select the group:computer:daemon for the Archiving Service you wish to monitor. The Archiving Service window will appear.
Select the Completed Activities sub-node. The Completed Activities window will appear.
To restart one or more completed Activities, use the checkboxes for selection and then choose ‘Restart’ from the drop-down Operations box.
Click the Yes button on the confirmation window to restart the selected Activities.
The configuration data for Data Archiving for Adabas is stored in a Repository. A Perspective defines an access path to a particular Repository. Multiple Perspectives can be defined, enabling configuration data in different Repositories to be maintained from a single Administration machine.
Adding a Perspective allows the Administration machine to maintain different Repositories.
![]() To add a Perspective
To add a Perspective
Select and right click the Perspectives node within the Data Archiving for Adabas navigation tree, then select Add Perspective. The Add Perspective window will appear.
Enter the following information for the new Perspective:
| Field | Description |
|---|---|
| Communication Type |
|
| Hostname |
When using a Daemon as the access point, this is the hostname of the computer where the Adabas System Coordinator Daemon is running. |
| Port |
When using a Daemon as the access point, this is the Group Services port number for the Adabas System Coordinator Daemon running on the computer defined in the “Hostname” field above. |
| Database/File |
When explicitly specifying a Repository, this is the database and file number of the Repository. |
Click the Add button to add the new Perspective.
You can alter your current Perspective by selecting another one. This allows you to administer multiple Repositories from the Administration machine.
![]() To select a Perspective
To select a Perspective
Select the Perspectives node within the Data Archiving for Adabas navigation tree.
Select and right click the Perspective to be selected, then select Select Perspective.
Select and right click the Data Archiving for Adabas node, then select Refresh. This will perform a refresh on the navigation tree to ensure the change in Perspective is correctly registered.
You can discover which computers are using the same Repository for a particular Perspective. This enables you to select alternative access paths to the Repository.
![]() To discover a Perspective
To discover a Perspective
Select the Perspectives node within the Data Archiving for Adabas navigation tree.
Select and right click the Perspective to be discovered, then select Discover Perspectives.
![]() To delete a Perspective
To delete a Perspective
Select the Perspectives node within the Data Archiving for Adabas navigation tree.
Select and right click the Perspective to be deleted, then select Delete Perspective.
Click the Yes button on the confirmation window to delete the Perspective.
File Mappings allow the use of Adabas long field names when using Extraction Syntax as the Data Selection Mode by providing a means to map Adabas short field names to long field names. In effect, a File Mapping is the equivalent of a Natural DDM (a view of a file).
Refer to Adding Source Files for information on how to associate a File Mapping name to a particular Source File when defining Actions.
The File Mappings node within the Data Archiving for Adabas navigation tree provides support for the maintenance and creation of File Mappings; manually, by importing from Adabas FDTs or exporting from Predict or Natural DDMs.
![]() To add a new File Mapping
To add a new File Mapping
Select the File Mappings node within Data Archiving for Adabas navigation tree.
The File Mappings window will appear.
Click the New button, and the Add A New File Mapping window will appear:
Enter the following information:
| Field | Description |
|---|---|
| Mapping Name |
1-32 characters to be used as the name for the File Mapping. This is the name that will appear in the Mappings drop-down selection list of the File Mappings window. Names are case-sensitive, the first character must be alphabetic, and all other characters can be either alphabetic or numeric. The only special character permitted is underscore. |
Click the Add Mapping button to create the new file mapping, the View/Modify File Mapping window will appear.
For each required field, click the Add Field button and the Add Field window will appear.
Field descriptions:
| Field | Description |
|---|---|
| Short Name | Short field name (2 characters, 1st character must be alpha, 2nd character must be alphanumeric. The range E0 to E9 is not allowed.). |
| Long Name | Long Field name (32 characters max., cannot start with a number and must not contain symbols used in Extraction Syntax or space characters). |
Once all fields have been added, the View/Modify File Mapping window allows you to edit, add, delete and reorder the fields within the File Mapping.
Click the Save button to store the new File Mapping or, alternatively, the Save As button to create a differently named File Mapping.
![]() To import a new File Mapping from an Adabas FDT
To import a new File Mapping from an Adabas FDT
Select the File Mappings node within the Data Archiving for Adabas navigation tree.
The File Mappings window will appear.
Click the Import FDT button, and the Import A New File Mapping From FDT window will appear.
Enter the following information:
| Field | Description |
|---|---|
| Mapping Name |
1-32 characters to be used as the name for the File Mapping. This is the name that will appear in the Mappings drop-down selection list of the File Mappings window. Names are case-sensitive, the first character must be alphabetic, and all other characters can be either alphabetic or numeric. The only special character permitted is underscore. |
| Group | The Adabas System Coordinator Group for the Plan and Action which will reference this File Mapping. |
| Computer | Select the computer which can access the Adabas database and file from where the FDT is to be imported. The selectable list of Computers is determined by the Adabas System Coordinator Group name (specified above). |
| Database | The Adabas database number from where the FDT is to be imported. |
| File | The Adabas file number from where the FDT is to be imported. |
Click the Import button to import the FDT from the specified database and file number.
Once imported, the View/Modify File Mapping window will appear which allows you to edit, add, delete and reorder the imported FDT fields.
Note:
The initial long field names will be a duplicate of the short
field names, edit the long field names as necessary
Click the Save button to store the new File Mapping or, alternatively, the Save As button to create a differently named File Mapping.
![]() To export a new File Mapping from Predict
To export a new File Mapping from Predict
Refer to Exporting long Names from Predict for information on how to export Predict file definitions into a new File Mapping.
After a successful export, select the File Mappings node within the Data Archiving for Adabas navigation tree. The File Mappings window will appear.
In the Existing Mappings section, use the Mappings drop-down list to select the newly created File Mapping.
Note:
The File Mapping name will be the same as the exported Predict
file name with the exception that the hyphen character "-" is
replaced by the underscore character "_".
Click the View/Modify button, the View/Modify File Mapping window will appear. This will allow you to edit, add, delete and reorder the fields within the File Mapping.
![]() To export a new File Mapping from a Natural DDM
To export a new File Mapping from a Natural DDM
Refer to Exporting long Names from Natural DDM for information on how to export Natural DDM definitions into a new File Mapping.
After a successful export, select the File Mappings node within the Data Archiving for Adabas navigation tree. The File Mappings window will appear.
In the Existing Mappings section, use the Mappings drop-down list to select the newly created File Mapping.
Note:
The File Mapping name will be the same as the exported Natural
DDM name with the exception that the hyphen character "-" is
replaced by the underscore character "_".
Click the View/Modify button, the View/Modify File Mapping window will appear. This will allow you to edit, add, delete and reorder the fields within the File Mapping.
![]() To view/modify an existing File Mapping
To view/modify an existing File Mapping
Select the File Mappings node within the Data Archiving for Adabas navigation tree.
The File Mappings window will appear.
In the Existing Mappings section, use the Mappings drop-down list to select the appropriate File Mapping.
Click the View/Modify button, the View/Modify File Mapping window will appear. This will allow you to edit, add, delete and reorder the fields within the File Mapping.
Click the Save button to save any changes or, alternatively, the Save As button to create a differently named File Mapping.
![]() To copy an existing File Mapping
To copy an existing File Mapping
Select the File Mappings node within the Data Archiving for Adabas navigation tree. The File Mappings window will appear.
In the Existing Mappings section, use the Mappings drop-down list to select the appropriate File Mapping.
Click the Copy button, the Copy File Mapping window will appear.
Enter the following information:
| Field | Description |
|---|---|
| Copy Mapping Name |
1-32 characters to be used as the name for the File Mapping. This is the name that will appear in the Mappings drop-down selection list of the File Mappings window. Names are case-sensitive, the first character must be alphabetic, and all other characters can be either alphabetic or numeric. The only special character permitted is underscore. |
Click the Copy button to create the new File Mapping.
![]() To synchronize a File Mapping with a current FDT
To synchronize a File Mapping with a current FDT
Select the File Mappings node within the Data Archiving for Adabas navigation tree. The File Mappings window will appear.
In the Existing Mappings section, use the Mappings drop-down list to select the appropriate File Mapping (which must have been created by importing from an Adabas FDT).
Click the View/Modify button, the View/Modify File Mapping window will appear.
Click the Sync With FDT button, the Sync Fields With FDT confirmation window will appear.
Click the Yes button on the confirmation window to perform the File Mapping synchronization with the current FDT.
Note:
The long field names will be maintained across the
synchronization as long as the corresponding short field name still exists in
the current FDT.
Once synchronized, the View/Modify File Mapping window will appear which allows you to edit, add, delete and reorder the synchronized FDT fields.
Click the Save button to save any changes or, alternatively, the Save As button to create a differently named File Mapping.
Archived data is maintained in Archives within Vaults, written as a result of Actions being run.
It is possible to search these Archives and Vaults, and perform selective recalls on the search results as required.
![]() To display the Search Maintenance window
To display the Search Maintenance window
Select the Vaults node within the Data Archiving for Adabas navigation tree.
Select the Search sub-node. The Search Maintenance window will appear.
The following information is displayed:
| Column | Description |
|---|---|
| Name | The name of the Search. |
| Last run At | The date and time of the last run of this Search. |
| Run By | The userid of the person who last ran this Search. |
| Status | The status of the Search:
Ready The Search is ready to be run. Searching The Search is in progress. Click on the status link to view the available search results. Completed The Search has completed successfully. Clink on the status link to view the search results. Completed (with errors) The Search has completed but some Vaults/Archives were unreadable. Click on the status link to view the available search results and error messages. |
The following operations (available in the drop-down Operations box) can be performed:
| Operation | Description |
|---|---|
| Run | Refer to Running a Search. |
| Stop | Refer to Stopping a Search. |
| Copy | Refer to Copying a Search. |
| Delete | Refer to Deleting a Search. |
![]() To add a Search:
To add a Search:
Select the Vaults node within the Data Archiving for Adabas navigation tree.
Select and right click the Search sub-node, then select Add Search. The Search window will appear.
Enter the following information for the new Search:
| Field | Description |
|---|---|
| Search Name |
1-32 characters to be used as the name for the Search. Names are case-sensitive, the first character must be alphabetic, all other characters can be either alphabetic or numeric. The only special character permitted is underscore. |
| Description | A textual description of the Search. |
Scope defines the parameters of the search.
Enter the following information:
| Field | Description |
|---|---|
| Group Plan Action |
Limits the search to those Archives which correspond to a specific Group, a specific Group and Plan, or a specific Group, Plan and Action. No specification (the default) will result in all Archives in all Vaults being included in the search. |
| Use automatically selected Vaults |
This checkbox determines whether Vaults are selected automatically or manually for inclusion into the search. If ticked (the default), Vaults will be automatically selected based on any specification of Group, Plan or Action (see above). In the absence of any specification, all available Vaults are included in the search. If un-ticked, you must manually select which Vaults are to be included in the search from the available Vault list shown. |
|
Vaults: Available: Selected: |
The "Available" box lists those Vaults available for inclusion into the search, and the "Selected" box lists those Vaults selected for inclusion into the search. When "Use automatically selected Vaults" is ticked (see above), these boxes are populated automatically and non-modifiable. In order to manually change the Vault selection, first un-tick "Use automatically selected Vaults", and then use the arrow buttons to select/de-select individual Vaults or all Vaults, as required. |
| Search Computer | Select the Computer where the search is to run. |
| Date | Specify a date range to further narrow down the scope of the search. Enter dates in the format YYYY/MM/DD. |
Query defines the search criteria.
Enter the following information:
| Field | Description |
|---|---|
| Query |
Specify the values to be searched for: String values (fields of format A) must be enclosed in double quotes. eg. "DERBY" Numeric values (fields of format P, U, F, G) must be defined without quotes eg. 1234 Binary values (fields of format B) must be enclosed in double quotes and prefixed with H. eg. H"0001" Multiple values can be specified separated by a space. |
| Operation |
AND / OR When multiple values are specified, separated by a space, you must select the logical condition to be used when the search criteria is evaluated. COMPLEX Choose this operation to allow more complex search criteria. When selected, the query box will support the use of the logical AND operator && and the logical OR operator || in combination with parenthesis. For example: "DERBY" && ("WATSON" || "WOOD") |
Runtime Control Settings defines the runtime characteristics of the search relating to processing limits and pacing.
Enter the following information:
| Field | Description |
|---|---|
| Limit hits to a maximum of nnnn archives | The Search will stop when the specified number of archive hits has been reached. The default is no limit. |
| Limit hits to a maximum of nnnn objects | The Search will stop when the specified number of object hits has been reached. The default is no limit. |
| Pacing |
When set to On, this control regulates the activity level (throughput) of each run of this Search so that a pre-determined level of service can be maintained. This is achieved by defining a maximum setting for the numbers of objects to be processed per minute (approximately). The default is Off. |
Click the Save button to save the new Search or the Save & Run button to save and immediately run the Search.
![]() To modify a Search:
To modify a Search:
Select the Vaults node within the Data Archiving for Adabas navigation tree.
Select the Search sub-node. The Search Maintenance window will appear.
For the Search you wish to modify, click on the Name link. The Search window will appear.
Refer to Adding a Search for an explanation of the fields.
Click the Save button to save the modified Search or the Save & Run button to save and immediately run the modified Search.
![]() To run a Search:
To run a Search:
Select the Vaults node within the Data Archiving for Adabas navigation tree.
Select the Search sub-node. The Search Maintenance window will appear.
To run a Search, use the checkbox for selection and then choose "Run" from the drop-down Operations box.
Click the Yes button on the confirmation window to run the Search.
Optionally, you can run a Search directly after creating or modifying one by clicking the Save & Run button at the bottom of the Search window.
![]() To stop a Search:
To stop a Search:
Select the Vaults node within the Data Archiving for Adabas navigation tree.
Select the Search sub-node. The Search Maintenance window will appear.
To stop one or more Searches, use the checkbox for selection and then choose "Stop" from the drop-down Operations box.
Click the Yes button on the confirmation window to stop the Search(es).
![]() To copy a Search:
To copy a Search:
Select the Vaults node within the Data Archiving for Adabas navigation tree.
Select the Search sub-node. The Search Maintenance window will appear.
To copy a Search, use the checkbox for selection and then choose "Copy" from the drop-down Operations box.
Click the Yes button on the confirmation window to copy the Search.
![]() To delete a Search:
To delete a Search:
Select the Vaults node within the Data Archiving for Adabas navigation tree.
Select the Search sub-node. The Search Maintenance window will appear.
To delete one or more Searches, use the checkboxes for selection and then choose "Delete" from the drop-down Operations box.
Click the Yes button on the confirmation window to delete the Search(es).
![]() To display Search Results:
To display Search Results:
Select the Vaults node within the Data Archiving for Adabas navigation tree.
Select the Search sub-node. The Search Maintenance window will appear.
For the Search you wish to view the results for, click on the Status link. The Search Results window will appear.
Refer to Search Maintenance for an explanation of the search status and the availability of the status link.
The following information is displayed:
| Field | Description |
|---|---|
| Search Name | The name of the Search. |
| Status | The status of the Search. |
| Last Run At | The date and time of the last run of this Search. |
| Run By | The userid of the person who last ran this Search. |
Query displays the search criteria used for the search.
The following information is displayed:
| Field | Description |
|---|---|
| Query | The search criteria used by the Search. |
| Operation | The associated operation/logical condition for the query. |
Statistics displays the statistics generated by the search.
The following information is displayed:
| Field | Description |
|---|---|
| Estimated number of Archives to be searched | An estimation of the number of Archives to be searched based on the defined scope. |
| Number of Archives searched | The number of Archives searched. If the status is "Completed" this is the total number. If the status is "Searching" this is the current number. |
| Number of Hits | The number of objects and records that match the search criteria. If the status is "Completed" this is the total number. If the status is "Searching" this is the current number. |
| Number of unreadable Vaults |
In the event that the Search process has a Vault-level error, this count will be incremented and a row in the Search results will be inserted to record the actual error (one row per Vault). A non-zero value in this field should always be accompanied by a status of "Completed (with errors)". |
| Number of unreadable Archives |
In the event that the Search process has an Archive-level error, this count will be incremented and a row in the Search results will be inserted to record the actual error (one row per Archive). A non-zero value in this field should always be accompanied by a status of "Completed (with errors)". |
Results displays the search results.
Each row in the search results table refers to an Archive in which at least one object and record has matched the search criteria.
The following information is displayed for each of these Archives:
| Column | Description |
|---|---|
| Vault | The name of the Vault in which this Archive resides. |
| Archived At | The date and time when this Archive was created. |
| Archive-ID | The internal identity by which this Archive is known. |
| Group | The name of the Group corresponding to this Archive. |
| Plan | The name of the Plan corresponding to this Archive. |
| Action | The name of the Action corresponding to this Archive. |
| Hits | The number of objects and records that match the search criteria within this Archive. |
Note:
In the event of a Vault-level or Archive-level error, a row is
inserted into the search results table identifying the Vault/Archive in
question and the associated error code.
The following operations (available in the drop-down Operations box) can be performed against the search results:
| Operation | Description |
|---|---|
| Recall | Refer to Recalling Search Results. |
| FDT Analysis | Refer to FDT Analysis Within Results. |
In addition, refer to the relevant section for information on Searching Within Results, and Deleting Search Results.
![]() To recall search results:
To recall search results:
Refer to section Search Results for information on how to display the search results for a particular Search.
To recall an individual search result, use the checkbox for selection and then choose "Recall" from the drop-down Operations box.
Refer to Recall Archived Data for additional information regarding the recall process.
![]() To analyse on FDTs within the search results:
To analyse on FDTs within the search results:
Refer to section Search Results for information on how to display the search results for a particular Search and identify those Archives for which an FDT analysis is required.
Use the checkbox for selection and then choose "FDT Analysis" from the drop-down Operations box.
Refer to FDT Analysis for further detailed information.
![]() To search within results:
To search within results:
Refer to section Search Results for information on how to display the search results for a particular Search.
To search within a particular set of results, click the "Search Within Results" button.
Note:
You can only run a Search Within Results against all the Archives
in an existing search results list, you cannot select individual Archives from
within the list.
This will direct you to the "Add Search" window with the scope section pre-set to the Search name corresponding to the search results you wish to search.
Refer to Adding a Search for information on how to add this new search.
Run this newly added search to create a sub-set of search results based on the previously created search results.
Note:
The "parent" Search must be available for the
duration of the Search within Results process.
![]() To delete search results:
To delete search results:
Refer to section Search Results for information on how to display the search results for a particular Search.
To delete a set of search results, click the "Delete Search Results" button.
This will delete the search results without deleting the Search definition itself.
Note:
It is not necessary to delete search results before re-running a
Search. The initialization process of the Search will delete all previous
search results which exist for the same search name.
You can recall one or more Archives back to an Adabas file at any time.
![]() To recall archived data:
To recall archived data:
Refer to Browsing Archives in a Vault to find the particular Archive(s) for which a recall is required or Recalling Search Results to select an Archive for recall from a search results list.
Use the checkbox to mark the Archive(s) you wish to recall then choose "Recall" from the drop-down Operations box. The Recall screen will appear in the right hand pane.
Enter the following information:
| Field | Description |
|---|---|
| Extractor Computer | Select the computer where the Extractor will run to recall the Archives from the Vault. A Vault Path to the Vault must be defined for the specified computer. |
| Accumulator Computer | Select the computer where the Accumulator will run to store the recalled data into the target database. The target database must be accessible from the specified computer. |
| Target Database | Select the target database into which the Archives will be recalled. For more information refer to Maintaining Target Databases. |
Click the Next button.
The Recall screen in the right hand pane now displays a summary of the selected settings from the previous screen and entries for each Group/Plan/Action involved in the Archives selected for recall. If the recall includes multiple Archives for the same Group/Plan/Action then only a single entry is shown for those Archives. Each Group/Plan/Action entry lists all the Source Files present in the Archive(s) for that particular Group/Plan/Action.
For each entry, enter the following information:
| Field | Description |
|---|---|
| Base File | Specify a target Base file number into which the Source File is to be recalled. By default, if the name of the Source File to be recalled matches that of an existing file on the selected target database then the corresponding file number is reused, otherwise a free file number is used. |
| LOB File | If relevant, specify the associated target LOB file number into which the Source File is to be recalled. By default, if the name of the Source File to be recalled matches that of an existing file on the selected target database then the corresponding file number is reused, otherwise a free file number is used. |
| Recall | Select which Source Files are to be recalled. By default, all Source Files are selected. |
In addition, this screen has a [settings] link (in the Selected Settings section, alongside the Target Database) which enables you to display/modify the "Default File Settings" defined for the target database. These file settings determine the file creation parameters used during the Recall when dynamically creating the specified target files.
For more information on maintaining target databases and their corresponding default file settings refer to Maintaining Target Databases.
Click the Next button.
Additional parameters may be required if multiple Archives were selected for recall or one or more of the target files already exist in the target database.
If no additional parameters are required, the recall will be submitted.
If additional parameters are required, a further Recall screen will be displayed in the right hand pane.
Enter the following information:
| Section | Description |
|---|---|
| Target Files |
Specifies what action to take if the target database already contains the target files. The options are:
|
| Duplicate Unique Descriptors |
Specifies what action to take if target file records have the same value for a unique descriptor as an Archive record. The options are:
|
| Duplicate ISNs |
Specifies what action to take if target file records have the same ISN as an Archive record. The options are:
|
Click the Recall button to submit the recall.
A Recall operation may result in multiple recall activities being submitted. These recall activities can be monitored in exactly the same way as other activities. Refer to Monitoring Activities for more information.
A list of target databases is maintained in the Databases node within the Data Archiving for Adabas navigation tree.
Target databases are required by the recall process to identify the location into which archived data is recalled. Each target database has default file settings which the recall process will use when dynamically creating files.
![]() To add a Database to the List:
To add a Database to the List:
Select and right click the Databases node within the Data Archiving for Adabas navigation tree, then select Add Database. The Add Database screen will appear in the right hand pane.
Enter the following information for the new Database:
| Field | Description |
|---|---|
| Database | Specify a database number to be used as a target for the recalling of archived data. The database must be active for the Add to complete successfully. |
| Computer | Select the computer where the specified database is active. The selectable list of computers is determined by the computers defined to the Adabas System Coordinator. |
Click the Add button to add the new Database to the list.
![]() To display Database details:
To display Database details:
Select the Databases node within the Data Archiving for Adabas navigation tree.
Select the particular database from the list within the Databases node. The Database detail screen will appear in the right hand pane.
The following information is displayed:
| Section | Description |
|---|---|
| Computer | The computer where the database is active. |
| Database |
A summary of database details including name, version, creation date, highest file number, number of files, etc. In addition, this section has a [settings] link which enables you to display/modify the "Default File Settings" defined for this database. These file settings determine the file creation parameters used during a Recall when dynamically creating files on this database. |
| System | The Adabas system files present in the database. |
| Files | A summary of file details including file number, file name, number of records, creation date, etc. |
In the Files section, delete and refresh file maintenance options are available by using the checkbox for selection and choosing "Delete" or "Refresh" from the drop-down Operations box.
![]() To refresh Database details:
To refresh Database details:
Select the Databases node within the Data Archiving for Adabas navigation tree.
Select and right click the particular database from the list within the Databases node.
Select Refresh Database Details. This will refresh the content of the details displayed in the right hand pane.
![]() To display/modify Default File Settings:
To display/modify Default File Settings:
Select the Databases node within the Data Archiving for Adabas navigation tree.
Select the particular database from the list within the Databases node. The Database detail screen will appear in the right hand pane.
Select the [settings] link in the Database section of the detail screen.
The following information is displayed:
| Field | Description |
|---|---|
| ‘A’ Fields |
Controls the content handling of Alphanumeric format fields when recalling archived data into a target database. Options are:
|
| DS/NI/UI Size |
Specifies the count of blocks or bytes to be assigned to a file’s Data Storage/Normal Index/Upper Index. It controls the |
| Maximum ISN |
Specifies the maximum number of ISN mappings in a file’s Address Converter. It controls the |
| Program Refresh |
Specifies whether a user program is allowed to perform a refresh operation on a file. It controls the |
| ISN Reuse |
Specifies whether an ISN freed as the result of deleting a record may be reassigned to a new record. It controls the |
| DS Reuse |
Specifies whether Data Storage space which becomes available is to be reused It controls the |
Click the Save button to save any changes.
![]() To remove a Database from the List:
To remove a Database from the List:
Select the Databases node within the Data Archiving for Adabas navigation tree.
Select and right click the particular database from the list within the Databases node.
Select Remove Database From List.
Each Archiving Service is associated with a license file. Refer to Monitoring Archiving Services for information on how to select an Archiving Service and check the associated license details.