The standard Welcome page gives you quick links to the pages of CentraSite Business UI that you will probably use frequently during your day-to-day work with CentraSite. It also provides links to external web sites that provide useful information related to CentraSite.
The Welcome page consists of a menu bar at the top and a set of portlets below. Each portlet contains a header and content. The header includes a title, some selectable markers (example, to set user configuration of an individual portlet, expand or collapse a portlet etc.) and a close button. Under the header, you can have a list of entries, either representing the result set of a search query, any external HTML page or a graphical image.
The result set of a search query represents a particular type of information, such as recent searches, recently created assets or changes to assets, most popular assets and so on.
An administrator defines the default set of portlets to display in the Welcome page. You can personalize the Welcome page to suit your requirements and preferences; you can add or remove portlets, rearrange portlets anywhere you want by simply dragging them, and customize the settings of individual portlets. For details on the portlet configuration, refer to the below section Installing the Customized Welcome Page.
Using portlets, you can:
Display the list of assets that you own in a single portlet.
Display the list of recently modified assets in a single portlet.
Display the list of active users in CentraSite registry in a single portlet.
Create a quick link to the list of saved searches.
Create a quick link to the list of recent saved searches.
The content is organized under the following topics:
CentraSite Business UI includes several types of portlets that you can add to your Welcome page. Each portlet has features that make the portlet suitable for particular types of content. The following sections describes each type of portlet:
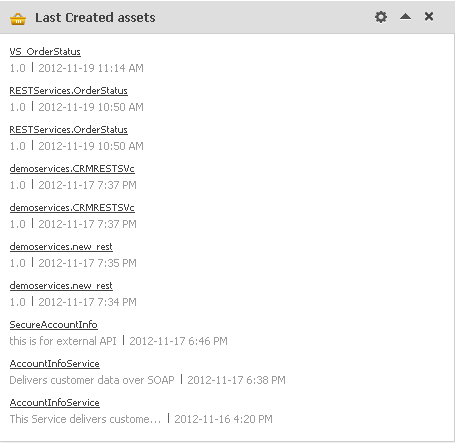
A Text portlet enables you to view and work with content that you find by browsing or using the search tool at design time or runtime. You can create any number of text portlets and add them to your Welcome page. Here is a sample Text portlet:
For information about how to create these portlets, see Creating a Text Portlet.
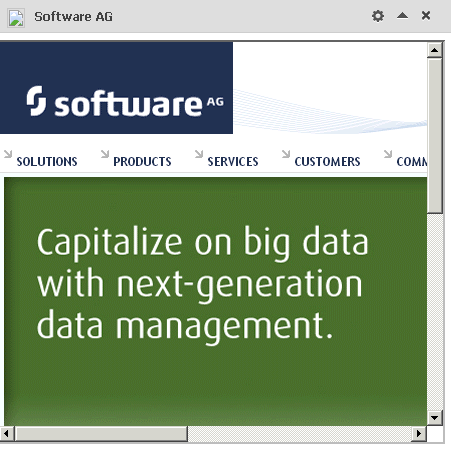
An Inline Frame (IFrame) portlet accesses a specified URL and displays the returned information within a rectangular region that includes scroll bars and borders. You can create any number of IFrame portlets and add them to your Welcome page. When you create an IFrame portlet, you usually supply a URL that points to a complete HTML page, as shown in the following example:
Within this IFRAME, portlets can display many types of content, including HTML, formatted text, images, or elements of an HTML form.
The default height of the frame is "400" pixels. (If necessary, the frame is displayed with scroll bars so that all of the portlet contents can be viewed within the frame.)
For information about how to create these portlets, see Creating an IFrame Portlet.
A Graphical portlet displays a line chart, bar chart, or pie chart of data that is derived from a reporting search. You can create any number of graphical portlets and add them to your Welcome page. Here is a sample Graphical portlet:

For information about how to create these portlets, see Creating a Graphical Portlet.
You can customize the portlets in your Welcome page in these ways:
Add portlets — You can add an existing portlet or new portlet to your Welcome page using the link at the top left corner of the Welcome page. For procedures, see the section Adding Portlets to Your Welcome page.
Remove portlets — You can remove a portlet from your Welcome page by using the close icon at the top right corner. For procedures, see the section Removing Portlets from Your Welcome Page.
Change layout — You can drag and drop a portlet in to the desired position. For procedures, see the section Rearranging Portlets in Your Welcome Page.
Change portlet behavior — The portlet has a gear-shaped icon in the bar at the top, which you can click to display a drop-down. This helps you redefine the behavior of a portlet. For procedures, see the section Configuring a Portlet in Your Welcome Page.
Show/hide portlet contents – You can switch the portlet to show or hide its contents using the expand or collapse icon in the bar at the top right corner. For procedures, see the section Expanding or Collapsing a Portlet in Your Welcome Page.
This section describes the set of design/change-time and run-time report searches that are installed with CentraSite.
| Portlet | Description | Portlet Type | More Information and Configuration Options |
|---|---|---|---|
| Last Created Assets | Lists assets recently added to the CentraSite catalog. | Text | Last Created Assets Portlet |
| Last Updated Assets | Lists assets that have been recently modified in the CentraSite catalog. | Text | Last Updated Assets Portlet |
| Recent LC State Modified Assets | Displays assets that had their LC state recently modified in the CentraSite catalog. | Text | Recent LC State Modified Assets Portlet |
| Top X Most Versioned Services | Lists the top X services that have been versioned for the maximum number of times. | Text | Top X Most Versioned Services Portlet |
| Top X Assets Consumed per Organization | Displays a count of consumed assets in each organization. | Graphical | Top X Assets Consumed per Organization Portlet |
| Top X Assets Provided per Organization | Displays a count of provided assets in each organization. | Graphical | Top X Assets Provided per Organization Portlet |
| Top X Assets by Watchers | Lists the top X assets based on number of watchers. | Text | Top X Assets by Watchers Portlet |
| Top X Assets by Consumers | Lists the top X assets based on number of consumers. | Text | Top X Assets by Consumers Portlet |
| Top X Assets with Watcher and Consumer Count | Lists the top X assets based on the total number of watchers and consumers. | Text | Top X Assets with Watcher and Consumer Count Portlet |
| Top X Assets by Incoming Association | Lists the top X assets based on number of incoming associations. | Text | Top X Assets by Incoming Association Portlet |
| My Favorites | Displays assets that you have marked as favorites. | Text | My Favorites Portlet |
| My List | Shows all lists that you have created. | Text | My List Portlet |
| My Pending Approval Requests | Displays requests for which you were an authorized approver. | Text | My Pending Approval Requests Portlet |
| My Pending Consumer Registration Requests | Displays all pending consumer registration requests for which you were an authorized approver. | Text | My Pending Consumer Registration Requests Portlet |
| Instances per Type | Displays a count of all the instances for each asset type. | Text / Graphical | Instances per Type Portlet |
| Instance Count per State for LCM | Displays a count of all the instances for each LC state. | Text / Graphical | Instance Count per State for LCM Portlet |
| Instance Count per Category for Taxonomy | Displays a count of all the instances for each category (taxonomy). | Text / Graphical | Instance Count per Category for Taxonomy Portlet |
| My Saved Searches | Displays the saved searches of the current user. | Text | My Saved Searches Portlet |
| Portlet | Description | Portlet Type | More Information and Configuration Options |
|---|---|---|---|
| Top X Consumers Based on Runtime Invocations | Lists the top X consumers in CentraSite based on number of runtime invocations on services. | Text | Top X Consumers Based on Runtime Invocations Portlet |
| Top X Services Based on Payload Size | Lists the top X services based on minimum payload size. | Text | Top X Services Based on Payload Size Portlet |
| Top X Services Based on Invocations | Lists the top X services based on runtime invocations for the given number of days. | Text | Top X Services Based on Invocations Portlet |
| Top X Monitoring Events per Services | Lists the top X services based on monitoring events for given number of days. | Text | Top X Monitoring Events per Services Portlet |
| Service Performance Metrics | Shows the performance metrics for a service using the UDDI key, start time and end time. | Text | Service Performance Metrics Portlet |
| Top X Services Based on Runtime Errors | Lists the top X services based on runtime errors. | Text | Top X Services Based on Runtime Errors Portlet |
| Top X Services Based on Runtime Policy Violations | Lists the top X services based on runtime policy violations. | Text | Top X Services Based on Runtime Policy Violations Portlet |
Use the following procedure to view the portlets in your Welcome page.
Important:
The Welcome page only includes portlets that are
"configured", that is, the portlets that have been enabled for
display via the Configure Your Welcome Page dialog will
appear. Portlets that are available to you, but have not yet been enabled for
display in the Configure Your Welcome Page dialog, do not
appear in your Welcome page.
![]() To view your portlets
To view your portlets
In CentraSite Business UI, click the link (in the upper right corner of the page). "This is your Welcome Page" screen appears.
The Welcome page displays one or more portlets that are configured for your view.
Locate the portlet that you want to view. Each portlet contains one to multiple entries that match the data feed defined for the portlet.
A list of entries and attributes for each of these entries will display based on the portlet's configuration.
Click the name of the entry. CentraSite will display the details for the selected entry.
To see all the portlets that are available to you, click the link in the upper left corner of the Welcome page.
You can view a tooltip text for any attribute of the entry in a portlet by moving the cursor to the attribute value. The tooltip text gives the name the attribute. The tooltip text shown is the content of the attribute's Name field, as defined for the asset in the asset type definition. See the CentraSite online documentation section Object Type Managementfor information on defining attributes for asset types.
You can add one or more portlets predefined in the CentraSite or a new custom portlet to your Welcome page.
The following sections describe how to add customized portlets to your Welcome page using the user interface.
Important:
Alternatively, you can add customized portlets to your Welcome
page as GWT extension points. For procedures, see
Add Portlet
.
Use the following procedure to add one or more portlets that are available for your Welcome page.
![]() To add an existing portlet to your Welcome page
To add an existing portlet to your Welcome page
In CentraSite Business UI, access your Welcome page. If you need procedures for this step, see Viewing Your Portlets.
Choose the link in the upper left corner of your Welcome page.
The Configure your Welcome Page dialog opens. This displays the list of portlets that are available to you.
Select the portlet(s) that you want to add to your Welcome page.
When you have finished making your selection, click .
The settings take effect immediately and you will see the personalized Welcome page with the selected portlet(s).
Adding a new portlet to your Welcome page is a two-step process:
Creating a new portlet – either of the Text, IFrame or Graphical type
The following procedures describe how to create each type of portlet:
Important:
If you want to create a new portlet of type
"custom" and add to the Welcome page, refer to the section
Extension
Points.
Use the following procedure to create a portlet of type "Text".
![]() To create a Text portlet
To create a Text portlet
In CentraSite Business UI, access your Welcome page. If you need procedures for this step, see Viewing Your Portlets.
Choose the link in the upper left corner of your Welcome page.
In the Configure Your Welcome Page dialog, click on the link.
Complete the fields in the Add Portlet dialog as follows:
| In this field... | Specify... |
|---|---|
| Name |
Enter a name for the portlet. A portlet name can contain any character (including spaces). A portlet name does not need to be unique within the Welcome page. However, to reduce ambiguity, you should avoid giving multiple portlets of the same type the same name. As a best practice, we recommend that you adopt appropriate naming conventions to ensure that portlets are distinctly named within the Welcome page. |
| Description |
Optional. Enter a comment or descriptive information about the new portlet. |
| Type |
Choose Text. |
| Number of Entries |
Optional. Set the number of entries to display in the portlet. If the number of entries is set to 0, then all the available entries are displayed. |
| Data Feed |
Choose the name of a saved search query available in the CentraSite. |
| Attributes |
Specify values for the attributes that dynamically render depending on the chosen search query. For a list of the available attributes and their data types, refer to the section About the Attributes and Profiles. |
Expand the Advanced Settings and complete the following fields as necessary.
| In this field... | Specify... |
|---|---|
| Actions |
Optional. Choose the actions that you want to add to the portlet. By default, CentraSite supports the following actions:
If you want to specify multiple actions, use the plus button to add additional rows. If you want to remove an action, use the minus button. |
| Icon URL |
Optional. Specify the path to an icon that is to be used to represent this portlet in the Welcome page. Prerequisite:
The icon must be in PNG format. To ensure proper alignment when it is displayed in the user interface, the icon must be 16 x 16 pixels in size. The icon must reside in the folder <CentraSiteInstallDir>\cast\cswebapps\BusinessUI\images\system. The path for the icon should be specified as "images/system/icon.png" |
| Refresh Interval |
Optional. The time interval (in seconds) after which a refresh of the portlet contents will happen. If a value is not specified (or if the value "0" is specified), refresh will not happen. |
Click to create the new text portlet.
The new portlet is created and you will be redirected to the Configure Your Welcome Page dialog. By default, the new portlet will remain unselected and disabled.
If you choose to cancel the settings, you will still be redirected to the Configure Your Welcome Page dialog.
You can choose to add this new portlet in user interface as described in Adding the New Portlet to Your Welcome Page.
Use the following procedure to create a portlet of type "IFrame".
![]() To create an IFrame portlet
To create an IFrame portlet
In CentraSite Business UI, access your Welcome page. If you need procedures for this step, see Viewing Your Portlets.
Choose the link in the upper left corner of your Welcome page.
In the Configure Your Welcome Page dialog, click on the link.
Complete the fields in the Add Portlet dialog as follows:
| In this field... | Specify... |
|---|---|
| Name |
Enter a name for the portlet. A portlet name can contain any character (including spaces). A portlet name does not need to be unique within the Welcome page. However, to reduce ambiguity, you should avoid giving multiple portlets of the same type the same name. As a best practice, we recommend that you adopt appropriate naming conventions to ensure that portlets are distinctly named within the Welcome page. |
| Description |
Optional. Enter a comment or descriptive information about the new portlet. |
| Type |
Choose IFrame. |
| URL |
Specify an arbitrary URL that points to any external HTML page. |
Expand the Advanced Settings and complete the following fields as necessary.
| In this field... | Specify... |
|---|---|
| Actions |
Optional. Choose the actions that you want to add to the portlet. By default, CentraSite supports the following actions:
If you want to specify multiple actions, use the plus button to add additional rows. If you want to remove an action, use the minus button. |
| Icon URL |
Optional. Specify the path to an icon that is to be used to represent this portlet in the Welcome page. Prerequisite:
The icon must be in PNG format. To ensure proper alignment when it is displayed in the user interface, the icon must be 16 x 16 pixels in size. The icon must reside in the folder <CentraSiteInstallDir>\cast\cswebapps\BusinessUI\images\system. The path for the icon should be specified as "images/system/icon.png" |
| Refresh Interval |
Optional. The time interval (in seconds) after which a refresh of the portlet contents will happen. If a value is not specified (or if the value "0" is specified), refresh will not happen. |
Click to create the new IFrame portlet.
The new portlet is created and you will be redirected to the Configure Your Welcome Page dialog. By default, the new portlet will remain unselected and disabled.
If you choose to cancel the settings, you will still be redirected to the Configure Your Welcome Page dialog.
You can choose to add this new portlet in user interface as described in Adding the New Portlet to Your Welcome Page.
Use the following procedure to create a portlet of type "Graphical".
![]() To create a Graphical portlet
To create a Graphical portlet
In CentraSite Business UI, access your Welcome page. If you need procedures for this step, see Viewing Your Portlets.
Choose the link in the upper left corner of your Welcome page.
In the Configure Your Welcome Page dialog, click on the link.
Complete the fields in the Add Portlet dialog as follows:
| In this field... | Specify... |
|---|---|
| Name |
Enter a name for the portlet. A portlet name can contain any character (including spaces). A portlet name does not need to be unique within the Welcome page. However, to reduce ambiguity, you should avoid giving multiple portlets of the same type the same name. As a best practice, we recommend that you adopt appropriate naming conventions to ensure that portlets are distinctly named within the Welcome page. |
| Description |
Optional. Enter a comment or descriptive information about the new portlet. |
| Type |
Choose Graphical. |
| Data Feed |
Choose the name of a saved search query available in the CentraSite. |
| Chart Type |
Choose one of the following chart types as appropriate:
By default, the first option (i.e.,) Bar Chart is selected in
the user interface. |
| X-axis Label and Feed |
For Bar/Line charts. Type in the label that you want to display for the X-axis. A label can contain any character (including spaces). Select the attribute that you want to show in the X-axis, relative to the specified search query. |
| Y-axis Label and Feed |
For Bar/Line charts. Type in the label that you want to display for the Y-axis. A label can contain any character (including spaces). Select the attribute that you want to show in the Y-axis, relative to the specified search query. |
| Vertical Bar |
For Bar/Line charts. Use this option to specify if you want to display data in either a horizontal bar or a vertical bar format. The allowed values are "Yes" or "No". Default "Yes". |
| X-axis Value Orientation |
For Bar/Line charts. Use this option to specify whether you want to display the X-axis data in either a horizontal or a vertical direction. The allowed values are "Vertical" or "Horizontal" with the default being "Vertical". |
| Attribute Label |
For Pie charts. Select an attribute that you want to display in the pie chart, relative to the specified search query. |
| Attribute Value |
For Pie charts. Select a value for the attribute you want to dynamically render in the pie chart, relative to the specified attribute label. |
Expand the Advanced Settings and complete the following fields as necessary.
| In this field... | Specify... |
|---|---|
| Actions |
Optional. Choose the actions that you want to add to the portlet. By default, CentraSite supports the following actions:
If you want to specify multiple actions, use the plus button to add additional rows. If you want to remove an action, use the minus button. |
| Icon URL |
Optional. Specify the path to an icon that is to be used to represent this portlet in the Welcome page. Prerequisite:
The icon must be in PNG format. To ensure proper alignment when it is displayed in the user interface, the icon must be 16 x 16 pixels in size. The icon must reside in the folder <CentraSiteInstallDir>\cast\cswebapps\BusinessUI\images\system. The path for the icon should be specified as "images/system/icon.png" |
| Refresh Interval |
Optional. The time interval (in seconds) after which a refresh of the portlet contents will happen. If a value is not specified (or if the value "0" is specified), refresh will not happen. |
| Show Plot Values |
Use this option to show or hide the data value of a bar, line or pie plot. By default, this option is set to "Yes". |
| Plot Value Position |
Use this option to specify the position of the data value in a bar, line or pie plot. Possible values are "Start", "End", "Outside". The default value for a bar or line chart is "Outside", and for a pie chart is "Start". |
| Show Plot in Different Color |
Use this option to show each bar, line or pie plot in a different color. By default, this option is set to "No". When you set this option to "Yes", specify the colors for each bar, line or pie plot in the centrasite.xml configuration file. You should specify the colors using the HEX color code format. The HEX format is a hash (#) followed by 6 numbers or letters. The position of the numbers/letters correlate to the RGB value. For example, "#0000ff" translates into "blue". |
| Show Legend |
Use this option to show or hide legends in the chart. The legend appears by default — unless you specify to hide it in the graphical chart. |
| Show Tooltip |
Use this option to show or hide tooltips in the chart. The tooltip appears by default — unless you specify to hide it in the graphical chart. |
Click to create the new graphical portlet.
The new portlet is created and you will be redirected to the Configure Your Welcome Page dialog. By default, the new portlet will remain unselected and disabled.
If you choose to cancel the settings, you will still be redirected to the Configure Your Welcome Page dialog.
You can choose to add this new portlet in user interface as described in Adding the New Portlet to Your Welcome Page.
Use the following procedure to add the new portlet to your Welcome page.
![]() To add the new portlet to you Welcome page
To add the new portlet to you Welcome page
After you have created the new portlet in CentraSite Business UI, the portlet is visible in the Configure your Welcome Page dialog.
Select the new portlet and click .
The settings take effect immediately and you will see the personalized Welcome page with the new portlet.
You can configure each portlet in your Welcome page to suit your preferences; modify the portlet configuration parameters, refresh the contents of the portlet and so on.
By default, CentraSite Business UI supports the following configurable options for each type (Text, IFrame and Graphical) of portlet in your Welcome page:
Configure
Refresh
However, you can define your own options for each portlet in the configuration level.
Use the following procedures to perform the predefined configurable options for a portlet in your personalized Welcome page:
Use the following procedure to redefine the functional settings of a portlet in your Welcome page.
![]() To redefine the functional settings of a portlet
To redefine the functional settings of a portlet
In CentraSite Business UI, access your Welcome page. If you need procedures for this step, see Viewing Your Portlets.
Locate the portlet that you want to configure.
Click on the (![]() ) icon and select the Configure
action from its drop-down menu.
) icon and select the Configure
action from its drop-down menu.
To edit a portlet's generic settings (Name, Description, Attributes etc.), place the cursor in the appropriate field and modify the text as required.
To modify the extended settings associated with the portlet, do the following:
Expand the Advanced Settings node.
Make the changes as necessary.
After you have made the required changes, click the button.
Note:
If at any time you wish to abandon all your changes and return
to your previous screen, just click the
button.
The content in your portlet may need to be refreshed periodically if you are examining real-time data. You can reset the refresh intervals for individual portlets on your Welcome page.
Use the following procedure to reset the refresh interval for individual portlets in your Welcome page.
![]() To reset the refresh interval for a portlet in your Welcome page
To reset the refresh interval for a portlet in your Welcome page
In CentraSite Business UI, access your Welcome page. If you need procedures for this step, see Viewing Your Portlets.
Locate the portlet that you want to modify.
Click on the (![]() ) icon and select the Configure
action from its drop-down menu.
) icon and select the Configure
action from its drop-down menu.
Expand the Advanced Settings node and specify the Refresh Interval field as required.
After you have made the required changes, click the button.
Note:
If at any time you wish to abandon all your changes and return
to your previous screen, just click the
button.
Use the following procedure to expand or collapse a portlet in your Welcome page.
![]() To expand or collapse a portlet in your Welcome page
To expand or collapse a portlet in your Welcome page
In CentraSite Business UI, access your Welcome page. If you need procedures for this step, see Viewing Your Portlets.
Locate the portlet that you want to expand or collapse.
Toggle on the (![]() ) icon or
(
) icon or
(![]() ) icon as required.
) icon as required.
Use the following procedure to remove a portlet from your Welcome page.
![]() To remove a portlet from your Welcome page
To remove a portlet from your Welcome page
In CentraSite Business UI, access your Welcome page. If you need procedures for this step, see Viewing Your Portlets.
Choose the link in the upper left corner of your Welcome page. The Configure your Welcome Page dialog opens.
Unselect the checkbox of the portlet that you wish to remove. You can select multiple portlets for removal.
When you have finished removing the portlet, close the dialog.
The settings take effect immediately and you will the see the customized Welcome page.
You can alternatively choose to close (![]() ) the
portlet.
) the
portlet.
Note:
The above operations will temporarily remove the portlet from your
Welcome page. If at a later stage you want to add the portlet, proceed as
described in the section Adding an Existing Portlet to Your
Welcome Page.
Choose the (![]() ) icon in My
Portlets of the User Preferences page to permanently remove the
portlet from CentraSite registry.
) icon in My
Portlets of the User Preferences page to permanently remove the
portlet from CentraSite registry.
You can move a portlet to a different location in a column by grabbing it by the bar at the top of it and dragging it to the desired location.