
This document covers the following topics:
See General Commands for Managing Different Types of Objects for information on how to open, update, delete and save instances.
See also: Specifying an Instance Descriptor and Specifying the Instance Fetch Options.
An instance is created outside the Tamino X-Plorer, using an external tool. After the instance has been created, you can use the Tamino X-Plorer to insert it in the database.
When you insert an instance, you specify the name of the file which contains the instance.
You can insert XML instances and non-XML instances in a collection.
You can also insert instances for which a doctype has not been defined.
You insert these instances in collections for which schema usage is optional
(like ino:etc) or
prohibited.
Note:
Instances containing the attribute ino:id are no longer
accepted by the parser. It is recommended that you delete the attribute
ino:id in these instances.
 To insert a new instance
In the navigation tree, select the collection or group of instances that is to contain the instance.
Notes:
From the menu, choose .
Or:
Choose the following toolbar button:

Or:
Open the context menu on the collection or instance group and choose
.
The following dialog box is displayed if a collection is selected while invoking the Insert Instance dialog box:
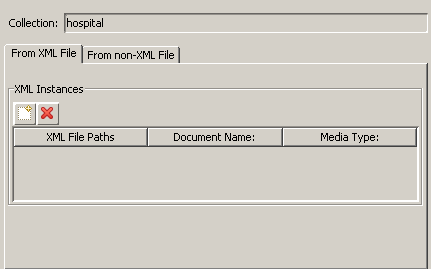
Instances can be inserted from XML as well as non-XML files, using the tabs in the Insert Instance dialog box. Depending on the type that you have selected (XML or non-XML), the following tabs are activated:
Select the desired tab, when the Insert Instances dialog box is invoked from the collection level, and specify all required information as described below under the corresponding heading.
Choose the button.
Caution:
Do not specify information on different pages. When you choose
the button, only the information on the currently
shown page is used.
This dialog box is used to insert an instance from an XML file.
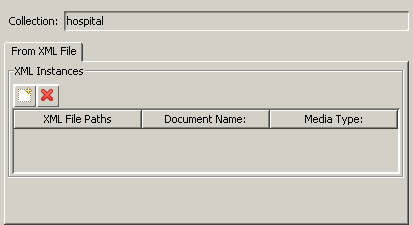
To insert an instance from an XML file
Choose the button ( ) to select the file from a Select
File dialog box.
) to select the file from a Select
File dialog box.
Select the source file, or use CTRL or SHIFT to select multiple files.
Choose the button to add your selection to the Insert Instance dialog box.
You can modify the file name in the Document Name field.
Choose the button to insert the instance(s) into the database.
This dialog box is used to insert a non-XML instance, for example, an image file.
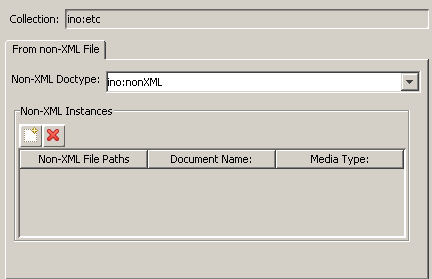
To insert an instance from a non-XML file
Choose the button () to select the file from a Select
File dialog box.
Select the source file, or use CTRL or SHIFT to select multiple files.
Choose the button to add your selection to the Insert Instance dialog box.
You can modify the Document Name and or the Media Type of the document to be inserted.
Choose the button to insert the instance(s) into the database.
Note:
The button ( ) can be used to remove an already selected document
from the list of documents to be inserted.
) can be used to remove an already selected document
from the list of documents to be inserted.
- Non-XML Doctype
Enter a non-XML doctype that is available in the selected collection. Or select the non-XML doctype from the drop-down list box. The drop-down list box provides for selection all non-XML doctypes in the selected collection.
If you want to insert a non-XML instance without a doctype in a collection for which schema usage is optional (like
ino:etc) or prohibited, you have to select the doctypeino:nonXML.- File
Enter the path to the non-XML object or choose the button to select the file from a dialog box.
- Media Type
If you intend to change the media type, refer to Media Types for Non-XML Instances.
The following information applies when the media type "text" has been used (for example, "text/plain" or "text/html"). Behind the media type - separated by a semicolon - specify the character set that has been used when the non-XML object has been created. For example, if you want to insert an instance containing Japanese text which has been created using the media type "text/plain" and the character set Shift-JIS, the Media Type field must contain the following:
text/plain; charset=Shift-JIS
It is possible to cut, copy and paste instances within the X-Plorer for easier handling of instances.
To cut, copy and paste instances
Select the instance in the navigation pane.
From the context menu, choose to remove or to copy the selected instance.
Right-click on the target collection to paste the cut or copied instance.
You can insert instances from the file system into a collection, using X-Plorer's system clipboard integration features:
Select and copy files from your file system.
In the X-Plorer window, right-click on the target collection, then choose to find the selected files to be inserted as instances. You are prompted for a confirmation if the file to be inserted is a non-XML file.
It is also possible to paste the content of an XML instance from the X-Plorer to an external editor using the Copy functionality of the X-Plorer and the Paste functionality of an external editor. The instance can be edited in the external editor and pasted back into the X-Plorer as a new instance.
You can also copy the content of an XML file from an external editor and use the Paste functionality of the X-Plorer to insert the copied content into a collection as an instance.
You can edit text documents (XML and non-XML documents) in the plain text view.
To edit a text document
Choose the instance in the navigation view. The contents are then displayed in the Content pane.
If the plain text view is not already active in the Content pane, change to the plain text view.
Edit the text as required.
Save your changes by using one of the following methods:
In the navigation pane, choose another object. You will be prompted if you want to save the current changes.
Or:
Choose from the main
menu.
Or:
Press CTRL+S.
You can add the ino:docname attribute to an instance. You can also
modify or remove the ino:docname attribute of an instance that has
it already defined.
To rename an instance
Select the instance that you want to rename in the navigation pane.
Or:
Choose from the context menu of
the instance to be renamed.
The following dialog box is displayed, if the instance does not have
an already defined ino:docname:
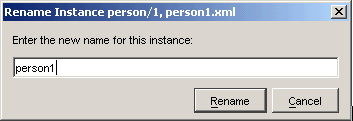
If the instance has an ino:docname, the rename
functionality provides an additional feature as shown in the following dialog
box:
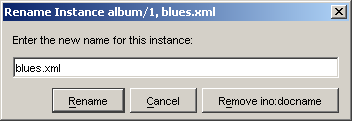
Enter the new name and choose the button to rename the instance.
Or:
Select the button to
remove the ino:docname attribute of the instance.
You can delete multiple instances in the X-Plorer. To do so, select the
instances, while holding down the CTRL key. Delete the instances
with the Delete icon (), available from the toolbar.
Using a filter, you can reduce the number of instances that are shown in the navigation tree of the application window.
For example, you can define a filter which only shows the instances starting with a specific surname. When "name/surname between 'B', 'C'" has been defined as the filter, only surnames beginning with the letter B are shown.
The filter is an XQuery expression. See XQuery User Guide and XQuery Reference Guide in the Tamino XML Server documentation for detailed information on XQuery expressions.
For each group of instances (doctype) you can specify exactly one filter. When a filter is active, a filter symbol is shown with the group node in the navigation tree. For example:

The corresponding filter expression for the group of instances is shown in the properties pane. For example:

To filter instances
In the navigation tree, select the group of instances to which you want to apply the filter.
From the menu, choose .
Or:
Choose the following toolbar button:

Or:
From the context menu of the doctype, choose
.
The Filter Instances dialog box appears. The current doctype is indicated in the title bar. When a filter has already been defined, an XQuery expression is shown in the dialog box. When a filter has not yet been defined, the dialog box is empty.
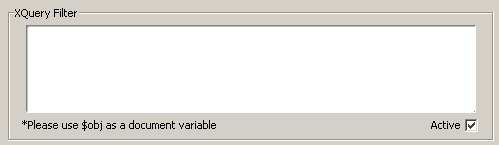
Specify the XQuery expression that is to be used as a filter.
It is only possible to specify the where-clause part of the valid XQuery. The where-clause expression can use the instance with the predefined instance variable name $obj. For example:
$obj/name/surname between 'B', 'C'
For comparison, this is the X-Query equivalent with square brackets:
/person[name/surname between 'B', 'C']
Make sure that the Active check box is selected.
If this check box is not selected, your filter is not applied. This is useful if you want to deactivate your filter temporarily.
Choose the button to display the first pack of instances that meet your filter criteria in the navigation tree.
You can export all instances of an instance group into the Tamino standard format for mass-loading.
To export instances for mass-loading
Select the doctype that contains the instances.
From the context menu, choose .
Select the export location and enter the output filename in the Save dialog box. This starts the export process.
The following dialog box is displayed, indicating the status of the export process:
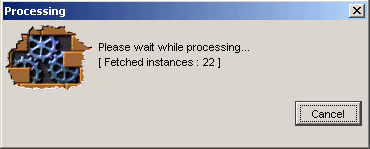
Note:
If the number of instances in the selected instance group is
quite high, the process will take some time.
When the export process completes, the output file that you specified will contain the concatenated contents of all of the selected instances.
You can print both XML and non-XML instances. Select the instances to be printed and choose from the menu. The Print Preview page is displayed, showing the contents of the selected instances.
Choose the Print icon (![]() ) from the toolbar to print the page.
) from the toolbar to print the page.
You can also print an instance directly, without previewing it, by selecting the instance and choosing from the menu.