
This document describes how to administer the EntireX RPC Server for XML/SOAP, using the Command Central graphical user interface. It covers the following topics:
See also Administering the RPC Server for XML/SOAP using the Command Central Command Line. The core Command Central documentation is provided separately and is also available under Guides for Tools Shared by Software AG Products on the Software AG documentation website.
Open an Internet browser and specify the URL of the Command Central Server as follows: http://<Command_Central_host>:<Command_Central_port>. This takes you to the Command Central Login page.
On Windows you can also get to the Login page from the Command Central Start Menu entry.
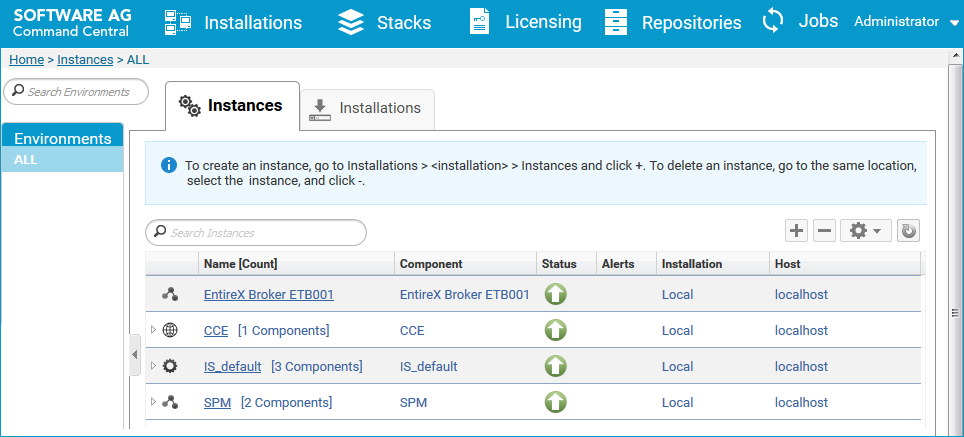
Provide your user credentials in the Login page and click Log In. This takes you to the page Home > Instances:
 To create an RPC Server for XML/SOAP instance
In the Command Central home page, click the Installations tab.
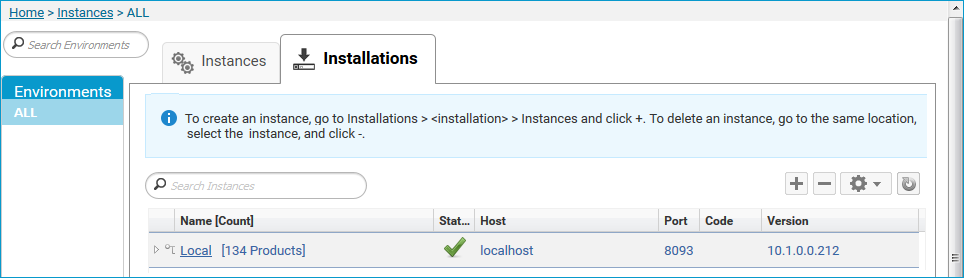
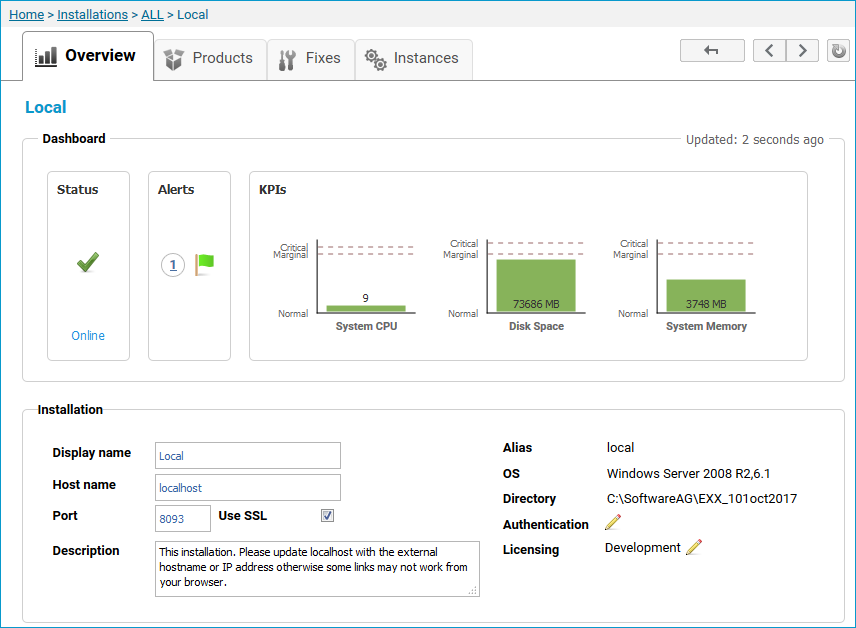
Click on the desired installation, for example Local, where you want to add an RPC Server for XML/SOAP instance.
Click the Instances tab.
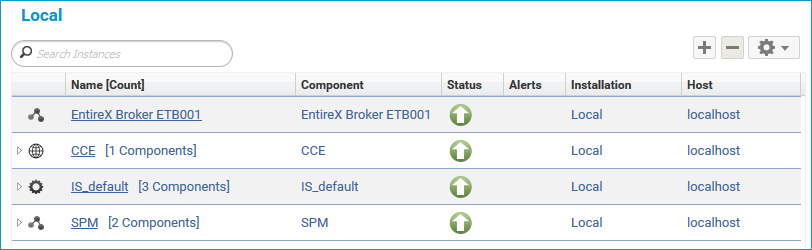
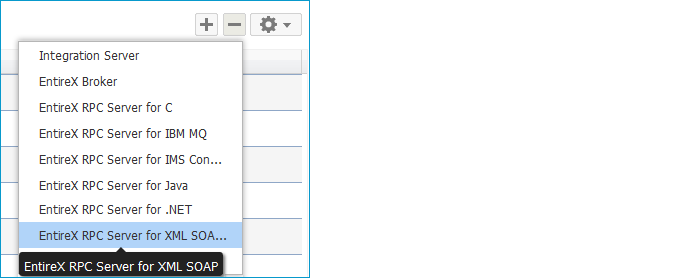
Click the  button in the upper right corner above the list and choose .
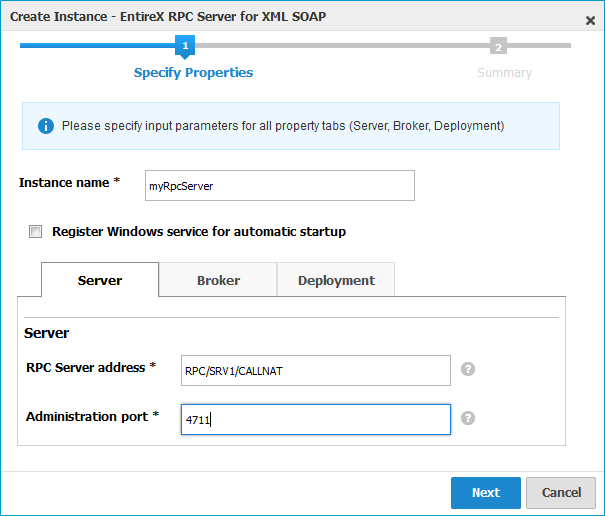
In the Create Instance wizard, fill in the fields in the main screen and in the Server, Broker and Deployment tabs.
| Parameter | Description |
|---|---|
| Instance name | Required. Name of the runtime component, for example "MyRpcServer". |
| Register Windows Service for automatic startup | Optional. Register Windows Service for automatic startup. Default is not checked. If this parameter is checked, the RPC server can be controlled by the Windows Service Control Manager. |
| Parameter | Description |
|---|---|
| RPC Server address | Required. The case-sensitive RPC server address has the format: CLASS/SERVER/SERVICE.
|
| Administration port | Required. The administration port in range from 1025 to 65535. |
| Parameter | Description |
|---|---|
| Connection | |
| Transport | Transport over TCP or SSL. Default is TCP.
|
| Broker host | Required. EntireX Broker host name or IP address. |
| Broker port | Required. Port number in range from 1025 to 65535. |
| SSL trust store | Optional. Specifies the location of SSL trust store. |
| Credentials | |
| User | Optional. The user ID for secured access to the broker. |
| Password | Optional. The password for secured access to the broker. |
Here you can enable the RPC Server for XML/SOAP to accept dynamic configuration and deployment of XML mapping files with the Designer.
| Parameter | Description |
|---|---|
| Allow dynamic configuration and deployment of XML Mapping Files (*.xmm). | Default is false.
|
Press to get to the Summary page to verify your input.
Press .
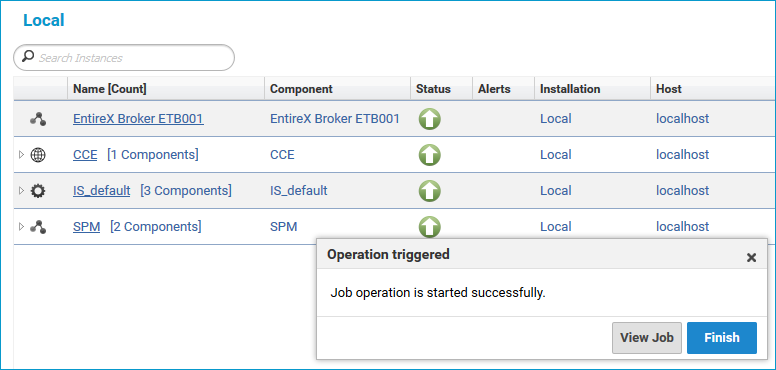
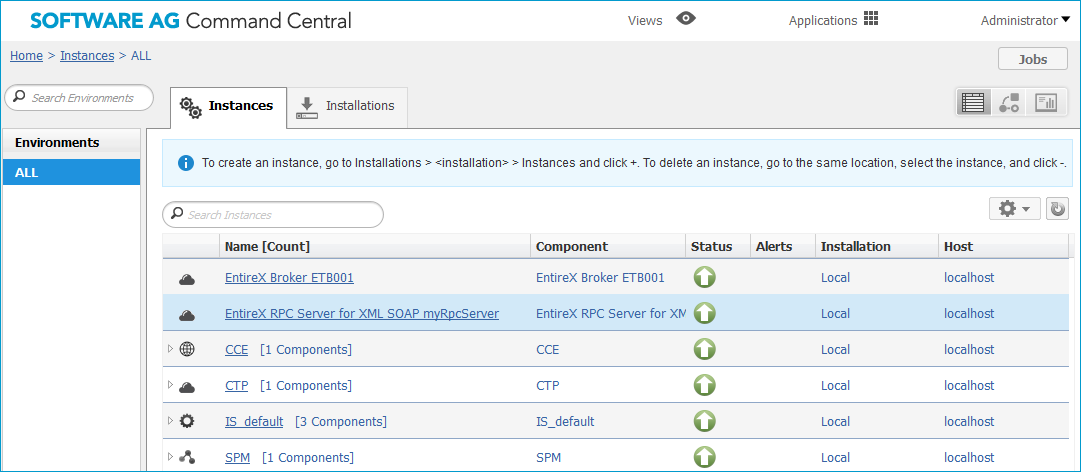
The new instance myRpcServer appears in the list.
After you have created an RPC Server for XML/SOAP using Command Central, you can copy an existing configuration file entirex.xmlrpcserver.configuration.xml to your newly created server.
To migrate an existing configuration file to an RPC Server for XML/SOAP that was created using Command Central
Copy file entirex.xmlrpcserver.configuration.xml to <EntireX home>/config/rpc/EntireXCore-RpcServerXml-<instance name>.
Remove file connections.cfg.
Rename file entirex.xmlrpcserver.configuration.xml to connections.cfg.
To configure an RPC Server for XML/SOAP instance
In the Command Central home page, click the Instances tab.
Click on the link associated with this instance to select the RPC server instance you want to configure.
Click the Configuration tab. EntireX supports the following configuration types, which are presented in a drop-down box when you click the down arrow below the Configuration tab label:
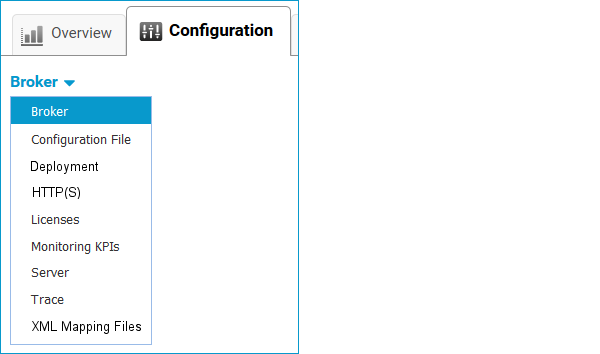
Note:
All configuration changes require a restart of the instance to take effect.
| Parameter | Description |
|---|---|
| Connection | |
| Transport | Transport over TCP or SSL. Default is TCP.
|
| Broker host | Required. EntireX Broker host name or IP address. |
| Broker port | Required. Port number in range from 1025 to 65535. |
| Encoding | Required. Encoding used for the communication between the RPC server and EntireX Broker. |
| SSL trust store | Optional. Specifies the location of SSL trust store. |
| SSL verify server | Optional. The RPC server as SSL client checks the identity of the broker as SSL server. |
| Credentials | |
| User | Optional. The user ID for secured access to the broker. |
| Password | Optional. The password for secured access to the broker. |
Here you can view/edit the configuration file of the RPC Server for XML/SOAP.
Here you can enable the RPC Server for XML/SOAP to accept dynamic configuration and deployment of XML mapping files with Software AG designer.
| Parameter | Description |
|---|---|
| Allow dynamic configuration and deployment of XML Mapping Files (*.xmm). | Default is false.
|
Here you can modify the HTTP(S) parameters of the RPC Server for XML/SOAP.
| Parameter | Description |
|---|---|
| Proxy Setting for HTTP | |
| Host | Optional. The host name or IP address of the proxy server for HTTP connection. |
| Port | Optional. The port number of the proxy server for HTTP connection. |
| User | Optional. The user name of the proxy server for HTTP connection. |
| Password | Optional. The password of the proxy server for HTTP connection. |
| Proxy Setting for HTTPS | |
| Host | Optional. The host name or IP address of the proxy server for HTTPS connection. |
| Port | Optional. The port number of the proxy server for HTTPS connection. |
| User | Optional. The user name of the proxy server for HTTPS connection. |
| Password | Optional. The password of the proxy server for HTTPS connection. |
| SSL Trust Store | |
| Location | Optional. Specifies the location of the SSL trust store used for HTTPS connection. |
| Non Proxy Hosts | |
| Host name | Optional. List of the hosts that should be accessed without going through the proxy. Asterisk notation is allowed. |
Here you can view/set the license file in the EntireX installation. For details see Point to the License Key for an Instance or Component under Working with Standalone Product Installation in the Command Central documentation.
Note:
The license file is used for all EntireX instances in this installation.
Here you can modify margins of monitored key performance indicators (KPIs) available for the RPC Server for XML/SOAP: Active Workers and Busy Workers.
Key performance indicators (KPIs) enable you to monitor the health of your RPC Server for XML/SOAP. The following KPIs help you administer, troubleshoot, and resolve performance issues:
| KPI | Setting |
|---|---|
| Absolute number of Active Workers | entirex.generic.kpi.1.max=20 |
| Critical alert relative to maximum | entirex.generic.kpi.1.critical=0.95 |
| Marginal alert relative to maximum | entirex.generic.kpi.1.marginal=0.80 |
| Absolute number of Busy Workers | entirex.generic.kpi.2.max=20 |
| Critical alert relative to maximum | entirex.generic.kpi.2.critical=0.95 |
| Marginal alert relative to maximum | entirex.generic.kpi.2.marginal=0.80 |
Do not change the other properties!
Here you can specify the RPC Server settings.
| Parameter | Description |
|---|---|
| RPC Server | |
| RPC Server address | Required. The case-sensitive RPC server address has the format: CLASS/SERVER/SERVICE.
|
| Administration port | Required. The administration port in range from 1025 to 65535. |
| Reconnection attempts | Required. Number of reconnection attempts to the broker. When the number of attempts is reached and a connection to the broker is not possible, the RPC Server for XML/SOAP stops. |
| Worker Scalability | |
| Worker model | You can either have a fixed or dynamic number of workers. Default is dynamic (true). For more information see Worker Models.
|
| Fixed number | Required. Fixed number of workers. Must be a number in range from 1 to 255. |
| Minimum number | Required. Minimum number of workers. Must be a number in range from 1 to 255. |
| Maximum number | Required. Maximum number of workers. Must be a number in range from 1 to 255. |
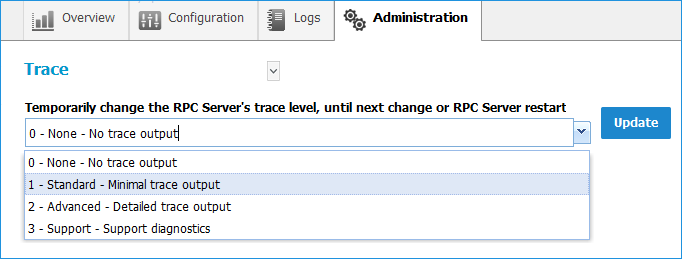
Here you can set the trace level of the RPC Server for XML/SOAP.
| Parameter | Value | Description |
|---|---|---|
| Trace level | 0-3 |
One of the following levels: 0 - None - No trace output (default). 1 - Standard - Minimal trace output. 2 - Advanced - Detailed trace output. 3 - Support - Support diagnostic. Use only when requested by Software AG support. |
Here you can show the list of XML mapping files configured for this RPC server. You can add/delete XML mapping files or modify the settings for a listed XML mapping file.
| Parameter | Description | ||||||
|---|---|---|---|---|---|---|---|
| Mapping | |||||||
| XML Mapping file | Required. Absolute location including name of XML mapping file. | ||||||
| Web service connection URL | Required. URL of the web service to call. | ||||||
| Time Out (sec.) | HTTP(S) connection timeout (seconds). | ||||||
| Soap version | |||||||
| SOAP version | RPC Server for XML/SOAP communicates with SOAP version 1.1 or 1.2.
Note: |
||||||
| Web Service Transport Security | |||||||
| Basic authentication | Disable/enable the basic authentication for web service connection.
|
||||||
| User | User for basic authentication. | ||||||
| Password | Password for basic authentication. | ||||||
| Web Service Message Security | |||||||
| UsernameToken type | Authenticate user with UsernameToken security.
|
||||||
| WSDL for Advanced Configuration of Web Service e.g. Schema Validation or WS Policy | |||||||
| Wsdl file | Optional. Absolute location including name of WSDL file. If you are using a WSDL file, the address of the web service is retrieved from this. | ||||||
| Wsdl service | Optional. The service name to use must be defined in WSDL file and match the selected SOAP version. If the service name is unique for the SOAP version, it can be omitted. | ||||||
| Wsdl port | Optional. The port name to use must be defined in WSDL file and match the selected SOAP version. If the port name is unique for the SOAP version, it can be omitted. | ||||||
Click to modify the parameters on your selected configuration type.
Click to check the correctness of your input or to save your changes.
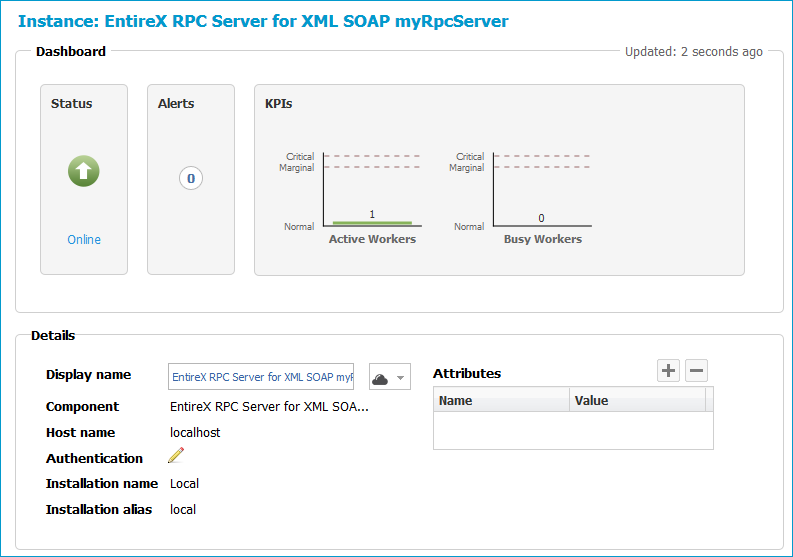
To view the runtime status of the RPC server instance
In the Command Central Home page, click the Instances tab and select the RPC Server for XML/SOAP instance for which you want to see the runtime status (same as Step 1 under Configuring a Broker Instance).

The visual key performance indicators (KPIs) and alerts enable you to monitor the RPC Server for XML/SOAP's health.
| KPI | Description |
|---|---|
| Active Workers | Number of active workers. |
| Busy Workers | Number of busy workers. |
To start an RPC Server for XML/SOAP instance from the Instances tab
In the Command Central home page, click the Instances tab.
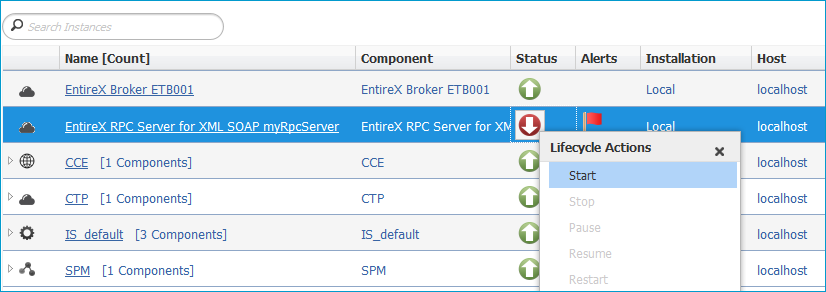
Select the status, and from the context menu choose .
To start an RPC Server for XML/SOAP instance from its Overview tab
In the Command Central home page, click the Instances tab and select the RPC Server for XML/SOAP instance you want to start (same as Step 1 under Configuring a Broker Instance).
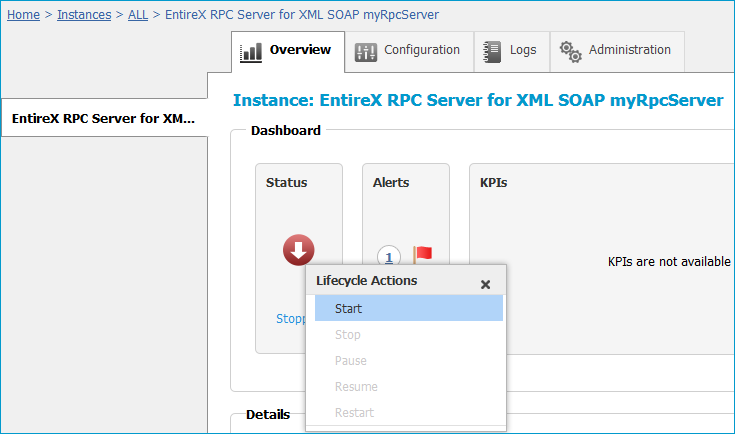
Select the status, and from the context menu choose .
To stop an RPC Server for XML/SOAP instance from the Instances tab
In the Command Central home page, click the Instances tab.
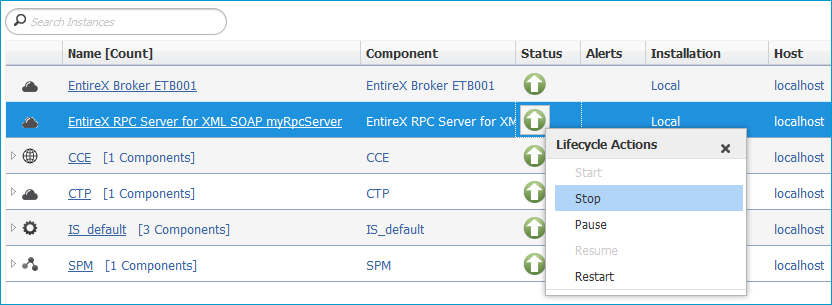
Select the status, and from the context menu choose .
To stop an RPC Server for XML/SOAP instance from its Overview tab
In the Command Central home page, click the Instances tab and select the RPC Server for XML/SOAP instance you want to stop (same as Step 1 under Configuring a Broker Instance).
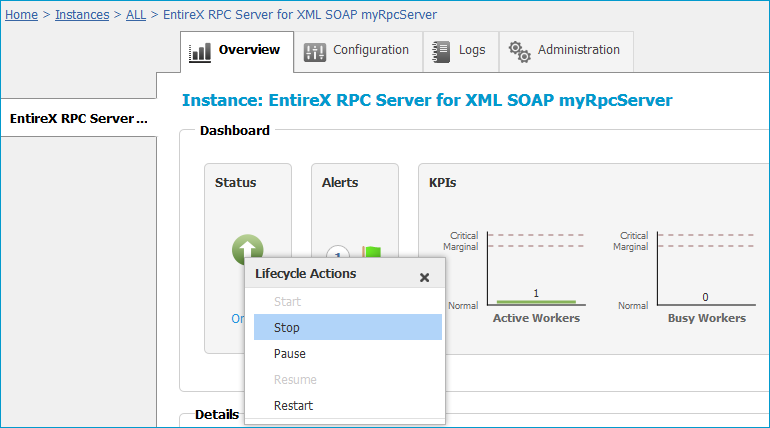
Select the status, and from the context menu choose .
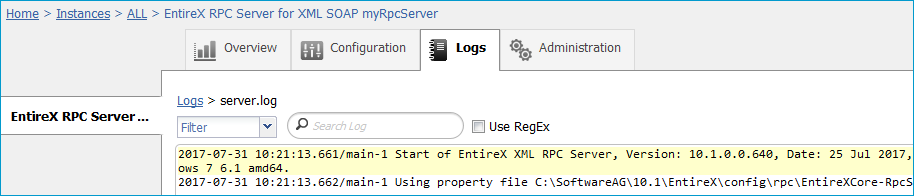
To inspect the log files of an RPC Server for XML/SOAP instance
In the Command Central home page, click the Instances tab, then click the link associated with the RPC Server for XML/SOAP instance for which you want to inspect the log files (same as Step 1 under Configuring a Broker Instance).
Click the Logs tab:

In the Alias column, click the link of the log file you want to inspect, for example server.log:
To temporarily change the trace level of an RPC Server for XML/SOAP instance
In the Command Central home page, click the Instances tab then click the link associated with the RPC Server for XML/SOAP instance for which you want change the trace level temporarily (same as Step 1 under Configuring a Broker Instance).
In the Administration tab, select the trace level and press .
Note:
If you want to set the trace level permanently, see Trace Level under Configuring an RPC Server Instance.
To delete an RPC Server for XML/SOAP instance
In the list of EntireX RPC Server for XML/SOAP instances for your selected installation (for example Local), select the instance
you want to delete and click the  button in the upper right corner above the list.
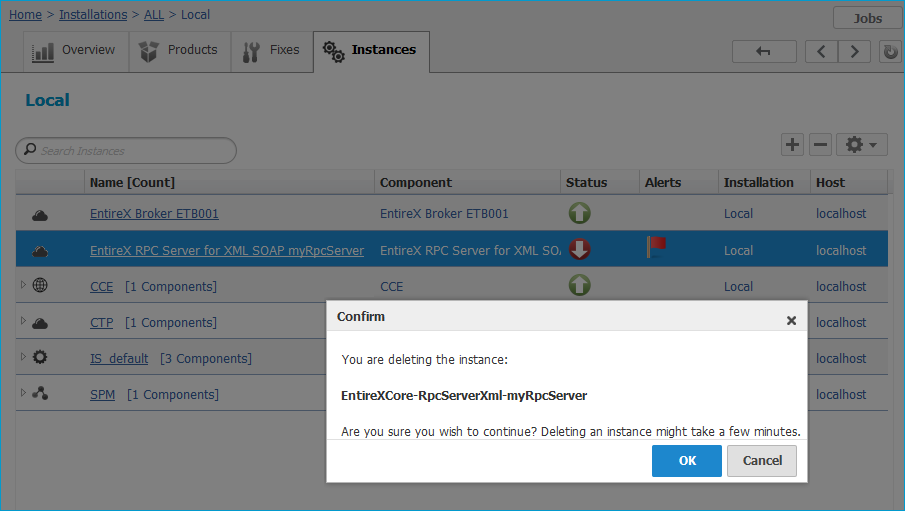
Click to confirm the uninstall of this RPC Server for XML/SOAP instance.
In the next window, click . The selected instance is removed from the list.