
This document applies to EntireX brokers under UNIX and Windows and covers the following topics:
See also Introduction and Administering EntireX Broker using the Command Central Command Line.
Open an Internet browser and specify the URL of the Command Central Server as follows: http://<Command_Central_host>:<Command_Central_port>. This takes you to the Command Central Login page.
On Windows you can also get to the Login page from the Command Central Start Menu entry.
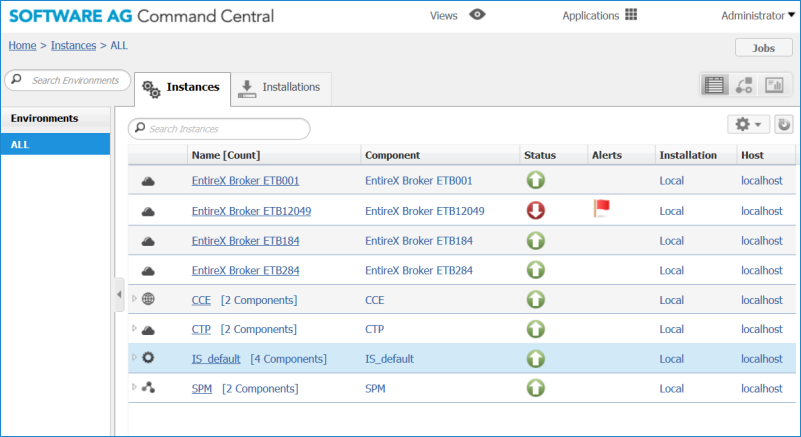
Provide your user credentials in the Login page and click . This takes you to the page Home > Instances:
 To create a new broker
In the Command Central Home page, click the Installations tab.
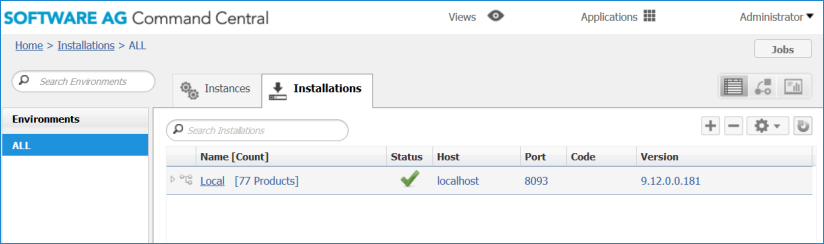
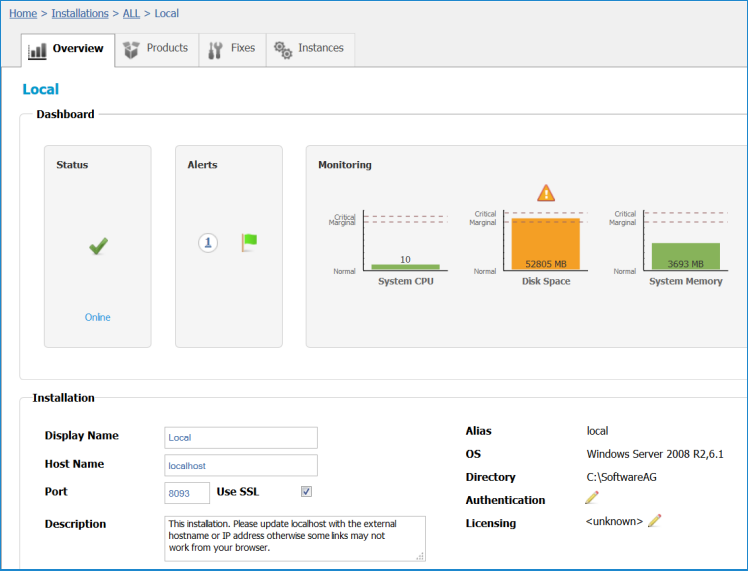
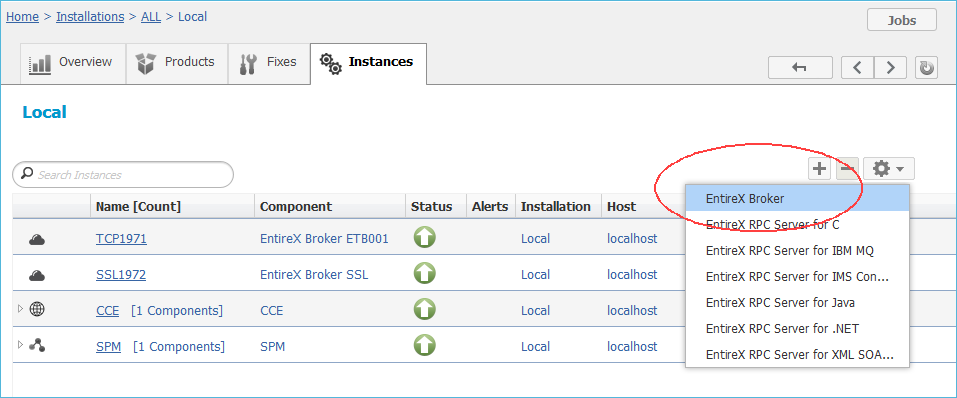
Click on the desired installation, for example Local, for which you want to create a new broker instance:
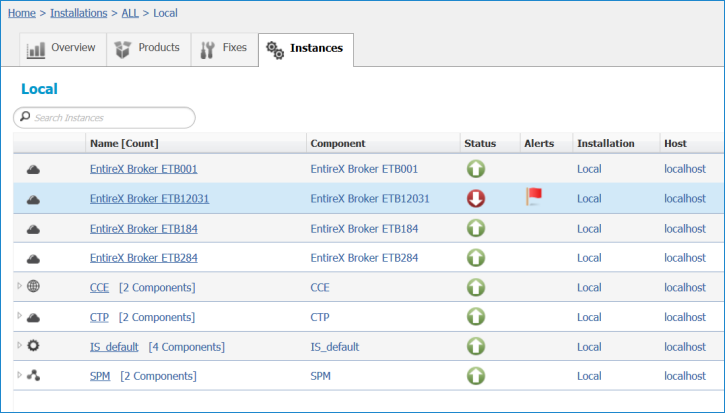
Click the Instances tab.
Click the  button in the upper right corner above the list and choose EntireX Broker.
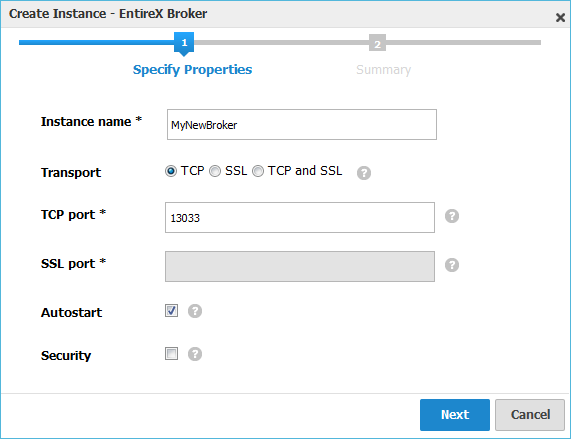
Specify the desired properties and press Next.
| Parameter | Description |
|---|---|
| Broker name | Required. Name of broker. |
| TCP port | Required if SSL port is not set; optional if SSL port is set. TCP port number in range from 1025 to 65535. |
| SSL port | Required if TCP port is not set; optional if TCP port is set. SSL port number in range from 1025 to 65535. |
| Autostart | Enables/disables autostart. Default is no (disabled). If autostart is enabled, the broker starts automatically with the next system start.
|
| Security | Enables/disables EntireX Security. Default is no (disabled).
|
Press Finish.
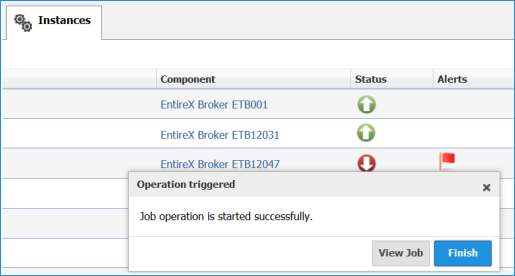
The new instance MyNewBroker appears in the list.
To configure a Broker instance
In the Command Central Home page, click the Instances tab and select the broker instance you wish to configure.
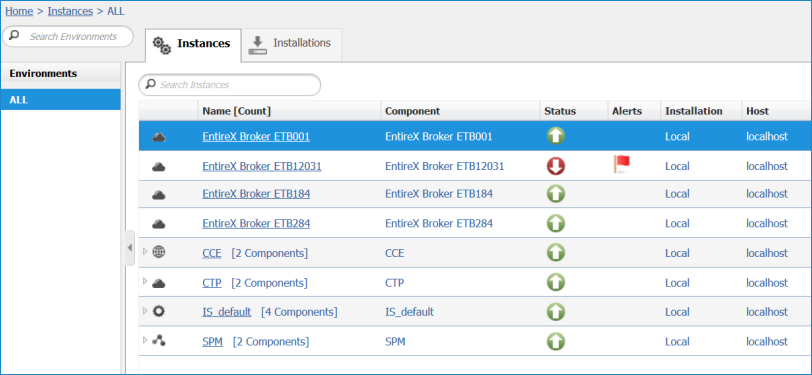
Click the link associated with the Broker instance you want to configure. This takes you to the following page:
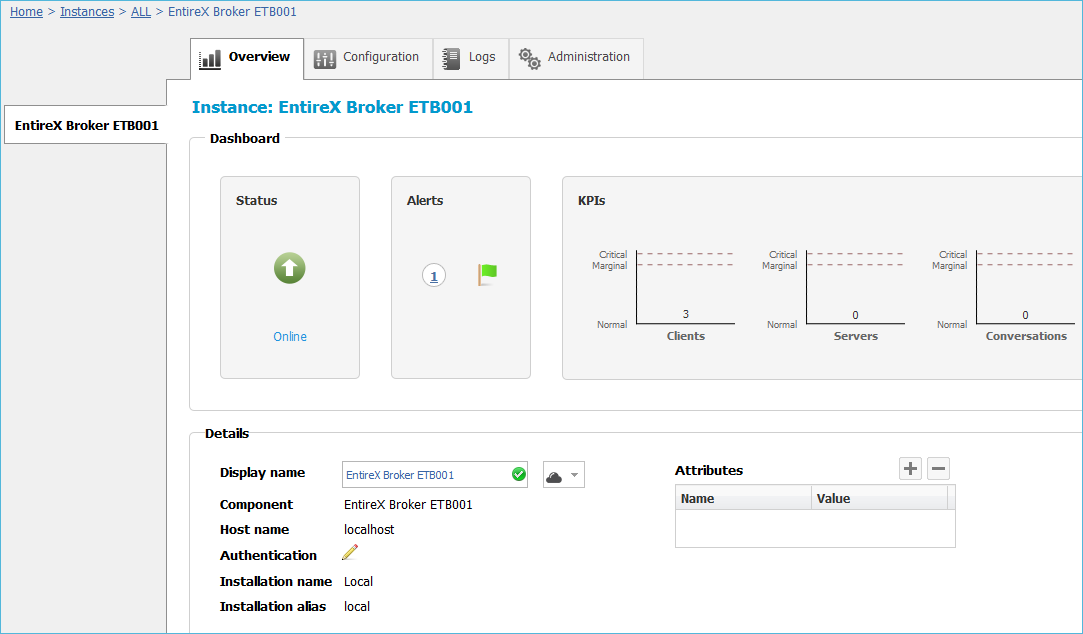
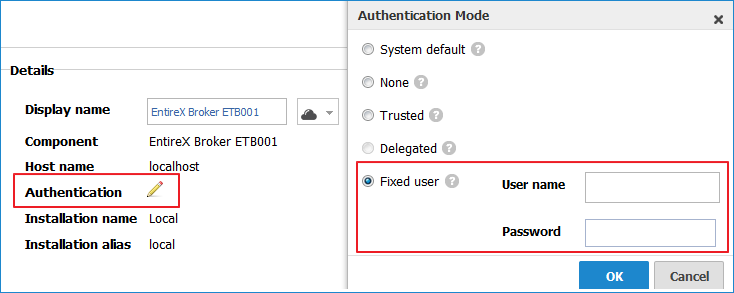
If you want to monitor a secure broker instance, add under Authentication a user name and password combination that is allowed to access and administer the broker by the security system used by the broker. For example:
If SECURITY-SYSTEM in the broker attribute file is set to OS (or not specified), enter a user name and password valid for the local operating
system where the broker is running.
If SECURITY-SYSTEM in the broker attribute file is set to LDAP, enter a valid LDAP user name and password.
See also SECURITY-SYSTEM under Broker Attributes.
Note:
You cannot change credentials accepted by this broker. This has to be done in the security system used by the broker.
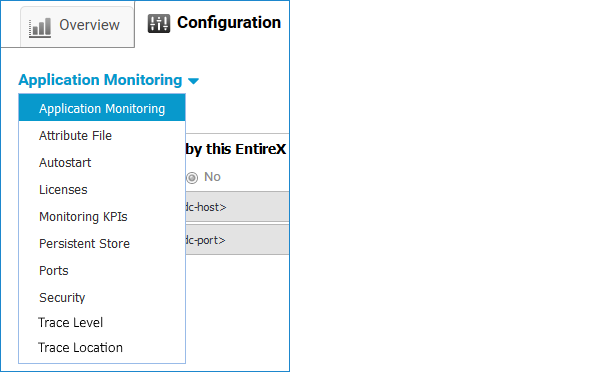
Click the Configuration tab. EntireX supports the following configuration types, which are presented in a drop-down box when you click the down arrow below the Configuration tab label:
Click to modify the parameters. The parameters are described in the tables below.
Here you can modify the Application Monitoring configuration.
| Parameter | Description |
|---|---|
| Set Data Collector used by this EntireX Broker | |
| Enabled | Enable/disable application monitoring in EntireX Broker. Default is false (disabled).
|
| Host name | Required. The host name on which the Application Monitoring Data Collector accepts the monitoring data. |
| Port | Required. The TCP/IP port on which the Application Monitoring Data Collector accepts the monitoring data. |
Here you can view/edit the attribute file of the broker. See Broker Attributes for description of attributes.
Here you can control the start behavior of an EntireX Broker.
| Parameter | Description |
|---|---|
| Autostart | Enables/disables autostart. Default is no (disabled). If autostart is enabled, the broker starts automatically with the next system start.
|
Here you can view/set the license file in the EntireX installation. For details see Point to the License Key for an Instance or Component under Working with Standalone Product Installation in the Command Central documentation.
Note:
The license file is used for all EntireX instances in this installation.
Here you can modify margins of monitored key performance indicators (KPIs) available for the broker: Clients, Servers and Conversations.
Key performance indicators (KPIs) enable you to monitor the health of your broker. The following KPIs help you administer, troubleshoot, and resolve performance issues:
| Parameter | Description |
|---|---|
| Clients | |
| Maximum | Maximum number of clients in the overview graph. |
| Marginal | Marginal limit for numbers of clients in the overview graph. |
| Critical | Critical limit for numbers of clients in the overview graph. |
| Servers | |
| Maximum | Maximum number of servers in the overview graph. |
| Marginal | Marginal limit for numbers of servers in the overview graph. |
| Critical | Critical limit for numbers of servers in graph. |
| Conversations | |
| Maximum | Maximum number of conversations in the overview graph. |
| Marginal | Marginal limit for numbers of conversations in the overview graph. |
| Critical | Critical limit for numbers of conversations in the overview graph. |
Here you can modify the EntireX Broker persistent store configuration.
| Parameter | Description |
|---|---|
| Set Persistent Store | |
| Enabled | Enable/disable the persistent store in EntireX Broker. Default is false (disabled). See Concepts of Persistent Messaging.
|
| Initialization mode | Defines the status of the persistent store at broker startup, including the condition of persistent units of work (UOWs):COLD - Default. Persistent UOWs are not restored during initialization, and the persistent store is considered empty. HOT - Persistent UOWs are restored to their prior state during initialization.
|
| Type | The type of persistent store driver required:CTREE - Default. c-tree database.ADABAS - Adabas database.
|
| Configure Adabas as Persistent Store | |
| Database ID | Required for type ADABAS. The ID of the Adabas database where the persistent store resides.
|
| File number | Required for type ADABAS. The file number of the broker persistent store file.
|
Here you can modify the EntireX Broker SSL port configuration. Select a port in the list for configuring the port.
| Parameter | Description |
|---|---|
| Enabled | Enable/disable the SSL port. Default is false (disabled).
|
| Port number | Required. The port number in range from 1025 to 65535. |
| Key file | Required. The name of file that contains the broker's private key. |
| Key password encrypted | Required. The encrypted password used to protect the private key. |
| Key store | Required. The location of the store containing SSL certificate; may contain the private key. |
| Trust store | Required. The location of the store containing certificates of trust Certificate Authorities (or CAs). |
| Client-side trust store | Required. The location of the trust store used by the platform manager. |
Here you can modify the EntireX Broker TCP port configuration. Select a port in the list for configuring the port.
| Parameter | Description |
|---|---|
| Enabled | Enable/disable the TCP port. Default is true (enabled).
|
| Port number | Required. The port number in range from 1025 to 65535. |
Here you can modify the EntireX Broker security configuration.
| Parameter | Description |
|---|---|
| Set EntireX Broker Security | |
| Enabled | Enable/disable EntireX Broker Security. Default is false (disabled).
|
| Authentication type | Authentication Type. Operating System - Default. Authentication is performed against the local operating system. LDAP - Authentication and authorization are performed against the LDAP repository. |
| Configure LDAP for EntireX Broker Security | |
| Repository URL | Required for authentication type LDAP: URL of the LDAP repository. |
| Distinguished name | Required for authentication type LDAP: The distinguished name of user for authenticated access to the LDAP server. Default value: cn=admin,dc=software-ag,dc=de |
Here you can modify the EntireX Broker trace level configuration.
| Parameter | Description |
|---|---|
| Configure the EntireX Broker trace level | |
| Trace level | One of the following levels:0 - Default. No tracing.1 - Incoming request, outgoing replies, resource usage and conversion errors if SAGTRPC is used.2 - All of trace level 1, plus all main routines executed.3 - All of trace level 2, plus all routines executed.4 - All of trace level 3, plus EntireX Broker ACI control block displays.
|
Here you can modify the EntireX Broker trace location configuration. This specifies the directory that contains the EntireX Broker trace file.
| Parameter | Description |
|---|---|
| Configure the EntireX Broker trace location | |
| Trace location | The location of the EntireX Broker trace file. If left empty, the default location in your EntireX installation is used. |
Click to check the correctness of your input or to save your changes.
To view the runtime status of a Broker instance
In the Command Central Home page, click the Instances tab and select the Broker instance for which you want to see the runtime status (same as Step 1 under Configuring a Broker Instance).
The visual key performance indicators (KPIs) and alerts enable you to monitor EntireX Broker's health.
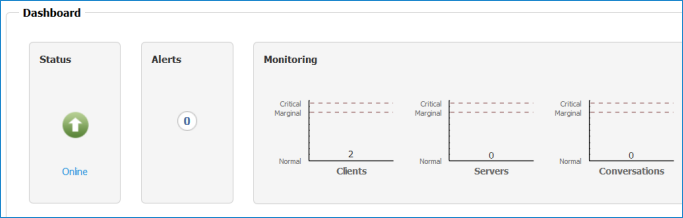
The following KPIs help you administer, troubleshoot, and resolve performance issues in EntireX Broker:
| KPI | Description |
|---|---|
| Clients | Number of active clients. |
| Servers | Number of active servers. |
| Conversations | Number of active conversations. |
To start a Broker instance from the Instances tab
In the Command Central home page, click the Instances tab.
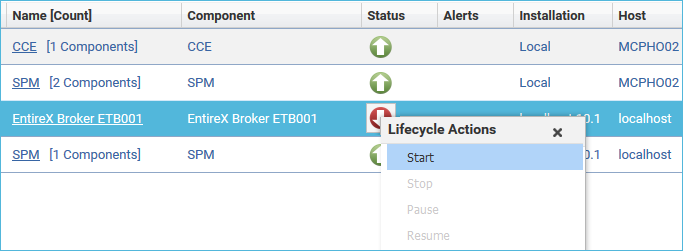
Select the status, and from the context menu choose .
To start a Broker instance from its Overview tab
In the Command Central home page, click the Instances tab and select the Broker instance you want to start (same as Step 1 under Configuring a Broker Instance).
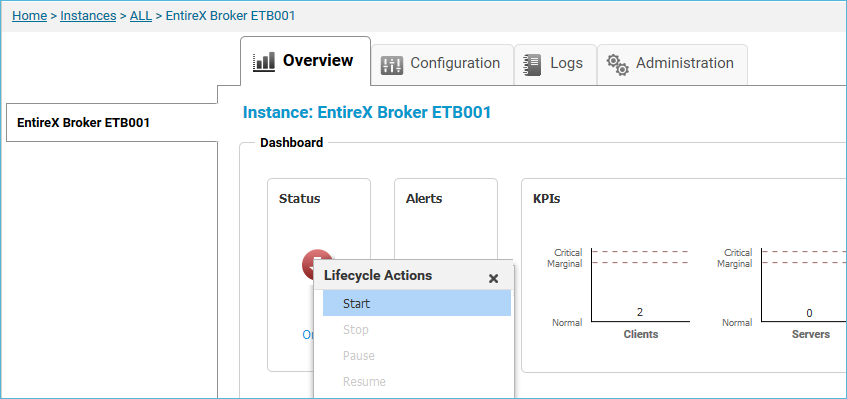
Select the status, and from the context menu choose .
To stop a Broker instance from the Instances tab
In the Command Central home page, click the Instances tab.
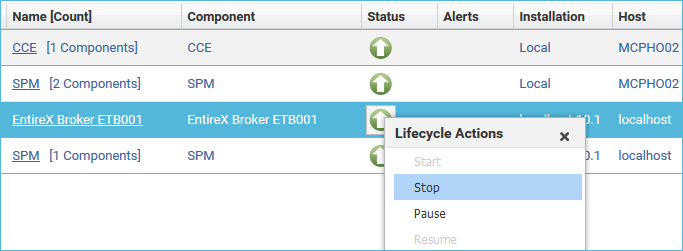
Select the status, and from the context menu choose .
To stop a Broker instance from its Overview tab
In the Command Central home page, click the Instances tab and select the Broker instance you want to stop (same as Step 1 under Configuring a Broker Instance).
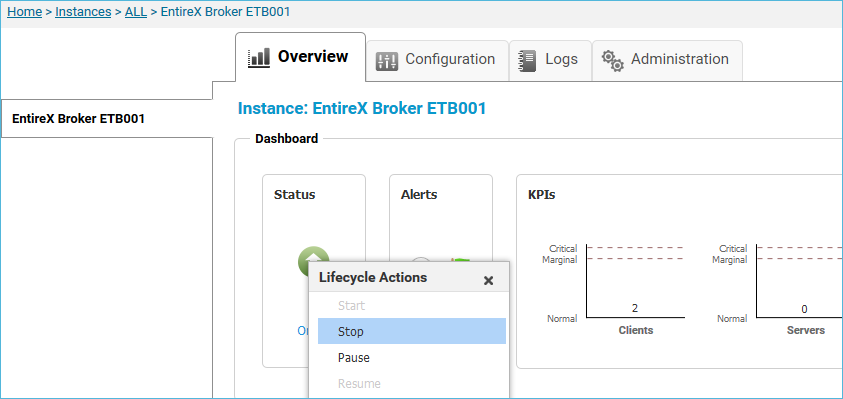
Select the status, and from the context menu choose .
To inspect the log files of a Broker instance
In the Command Central Home page, click the Instances tab then click the link associated with the Broker instance for which you want to inspect the log files (same as Step 1 under Configuring a Broker Instance).
Click the Logs tab:
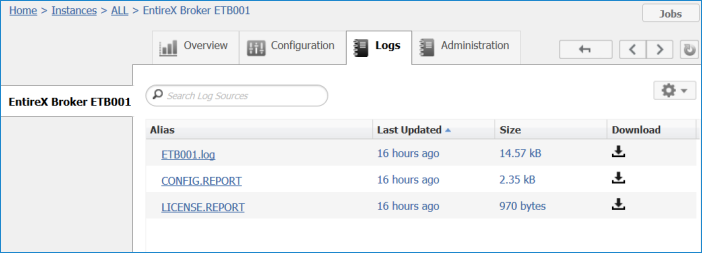
In the Alias column, click the link of the log file you want to inspect, for example ETB001.log:
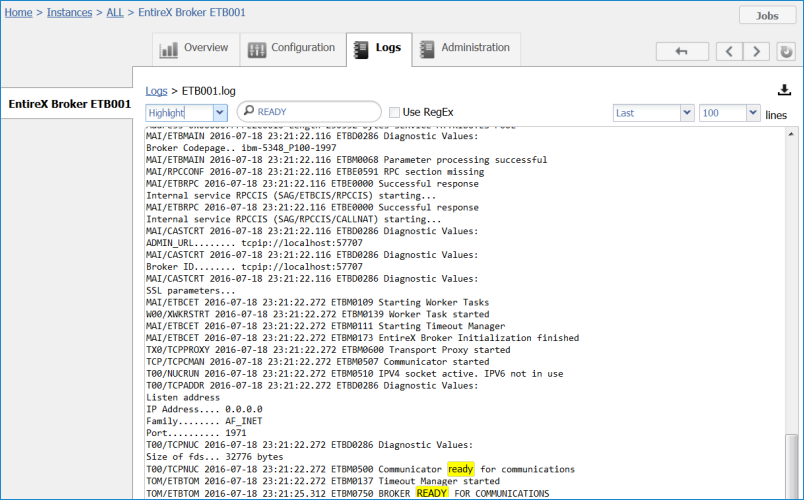
Here you can search for certain text and highlight or filter the matching lines, specify how many first or last lines of the log you would like to see. You can also download the whole file.
To display the Statistics of a running Broker instance
In the Command Central Home page, click the Instances tab, then click the link associated with the Broker instance for which you want to see its statistics (same as Step 1 under Configuring a Broker Instance).
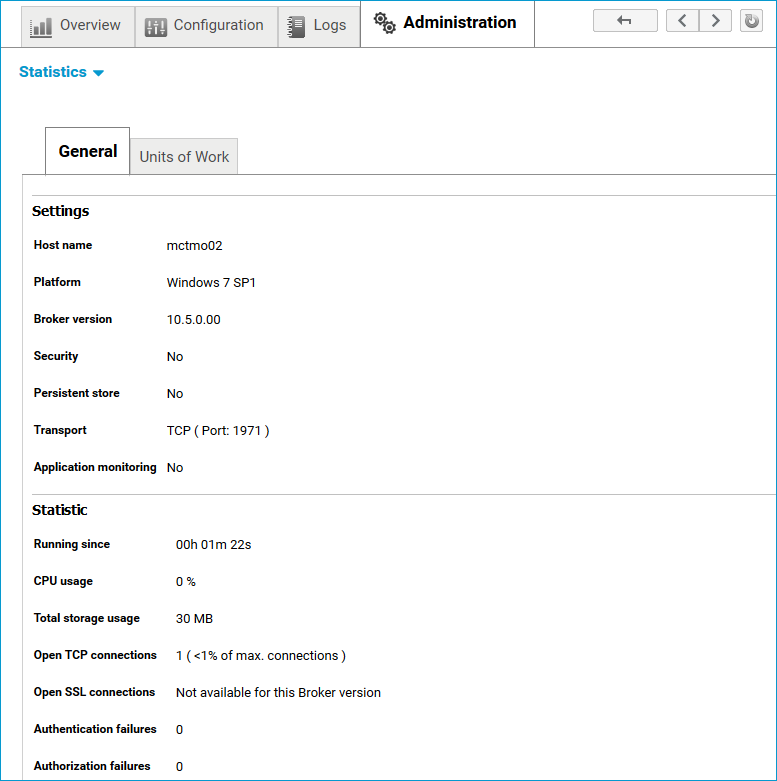
Click on the Administration tab
Choose Statistics in the drop-down box.
Choose tab General to see important setings and statistics, or choose tab Units of Work to see UOW statistics (summarized per service).
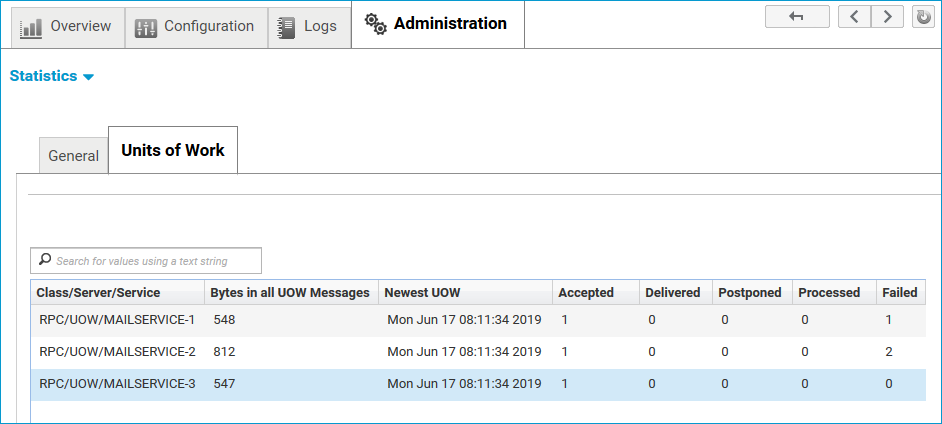
Note:
The returned value "UOWStatusFailed" represents the sum of UOW status "backed-out", "cancelled", "timeout" and "discarded".
To display services registered with a Broker instance
In the Command Central Home page, click the Instances tab, then click the link associated with the Broker instance for which you want to see its registered services. (same as Step 1 under Configuring a Broker Instance).
Click on the Administration tab:
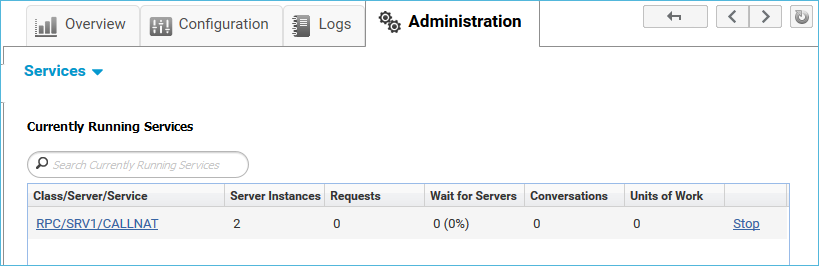
To stop a service
In the Command Central home page, click the Instances tab then click the link associated with the broker instance for which you want to stop a service (same as Step 1 under Configuring a Broker Instance).
Click on the Administration tab (same as Displaying Services).
To stop the service, click on Stop at the end of the service row.
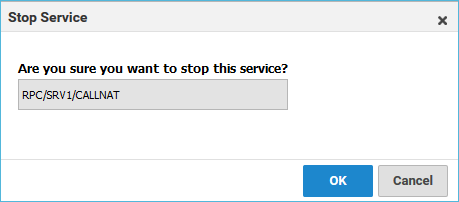
Press to confirm. The selected service is removed from the list of currently running services.
To display server instances of a service
In the Command Central home page, click the Instances tab then click the link associated with the broker instance for which you want to display server instances of a service (same as Step 1 under Configuring a Broker Instance).
Click on the Administration tab (same as Displaying Services).
In the Class/Server/Service column of the Services table, click the link of the service for which you want to see the associated server instances:

The Start Time is displayed in the time zone of the Broker instance in sortable ISO-format.
To temporarily change the trace level of running broker
In the Command Central home page, click the Instances tab then click the link associated with the broker instance for which you want change the trace level temporarily (same as Step 1 under Configuring a Broker Instance).
In the Administration tab, select the trace level and press .
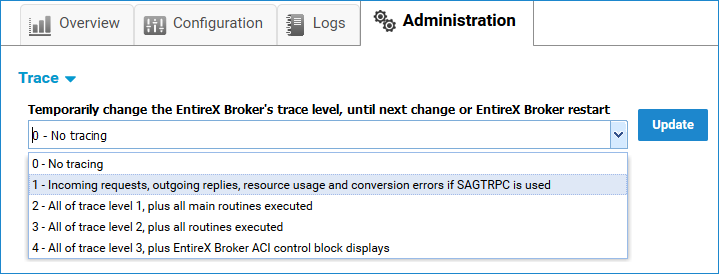
The change is effective immediately; there is no need to restart the EntireX Broker.
To dynamically change the application monitoring settings of a running broker
In the Command Central home page, click the Instances tab then click the link associated with the broker instance for which you want change the application monitoring settings dynamically (same as Step 1 under Configuring a Broker Instance).
In the Administration tab, enter the application monitoring settings and press .
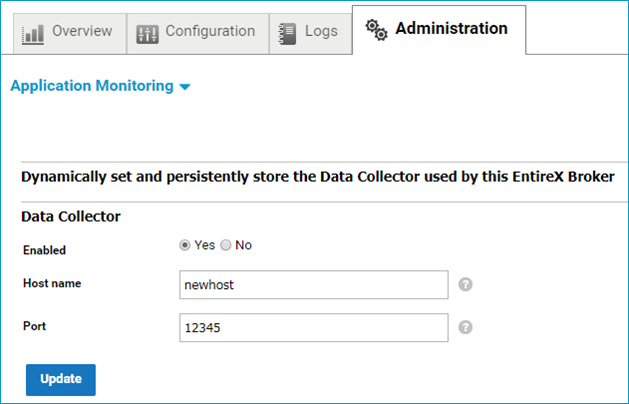
The change is effective immediately; there is no need to restart the EntireX Broker.
To delete a Broker instance
In the Command Central Home page, click the Instances tab and select the Broker instance you want to delete (same as Step 1 under Configuring a Broker Instance).
Click the  button in the upper right corner above the list:
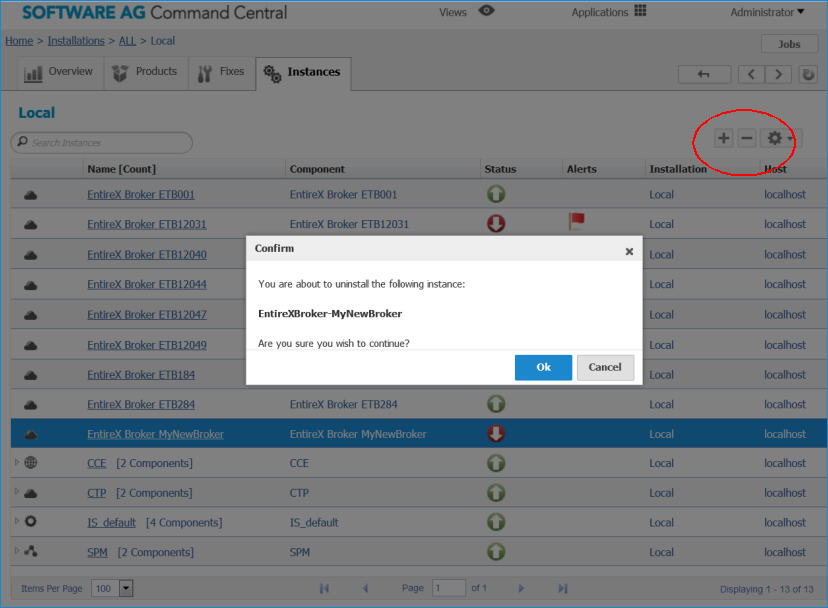
Click to confirm the uninstall of this Broker instance.
In the next window, click . The selected instance is removed from the list.
If a broker that you previously defined is not shown, one possible cause is that the Broker Administration service is not running and needs to be restarted.
Windows
Select the broker instance with Administration Tools > Services > Software AG EntireX Broker Admin 10.5 <installation_number>, and from the context menu choose then or
UNIX
In directory <inst_root>/EntireX/bin, execute the following commands:
sagexx105 stop
and
sagexx105 start
or
sagexx105 restart