
This document covers the following topics:
 To invoke the tree view window containing all documentation
objects
To invoke the tree view window containing all documentation
objects
From the context menu of a server connection in the Natural Server view, choose .
The tree view window appears. It contains the top-level node Documentation Objects.
When you expand the Documentation Objects node, nodes for all object types (predefined object types and user-defined object types) are shown. The object types to be shown can be reduced using a filter; see Defining the Object Types to be Shown.
When you expand the node for an object type, the defined documentation objects of that type are shown. You can also apply a filter to an object type, for example, to show only databases of type Adabas; see Applying a Filter to an Object Type.
When you expand the node for a documentation object, nodes for all active associations of that object are shown. Some of these nodes can be expanded further.
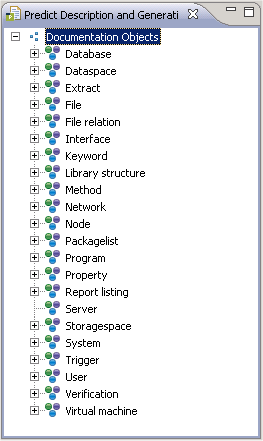
The following icons are shown for the nodes in the tree:
Using a filter, you can reduce the number of items that are shown in the tree. The filter criteria are saved individually for each user.
The following topics are covered below:
You can reduce the number of predefined and user-defined object types. For example, you can define a filter which only shows your own user-defined objects.
To define the object types to be shown
In the tree, select the node Documentation Objects.
Invoke the context menu and choose .
The Select Filter dialog box appears. The object types that are currently shown are selected. For example:
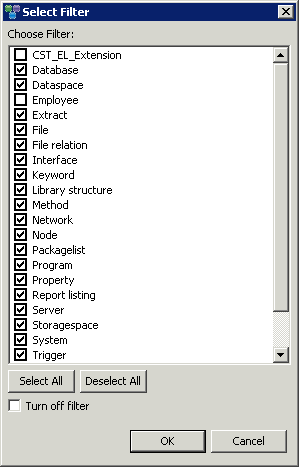
Select the object types that are to be shown, and/or deselect the object types that are not to be shown. You can use the Select All or Deselect All button to select or deselect all displayed objects types.
When you select the Turn off filter check box, your filter is not applied. This is useful if you want to deactivate your filter temporarily.
Choose the button.
The content of the tree changes. The tree now only shows the object types that you have defined in your filter.
You can reduce the number of objects that are shown for a specific object type. For example, you can define a filter for the predefined object type Database which only shows the databases of type Adabas. When a filter has been applied to an object type, the following icon is shown in the tree:
![]()
To apply a filter to an object type
Select the object type to which you want to apply a filter (for example, the predefined object type Database).
Invoke the context menu and choose .
The Filter dialog box appears. The type(s) that are currently shown are listed in the text box of the Type drop-down list box (only as much as fit in the text box). Example for the object type Database:
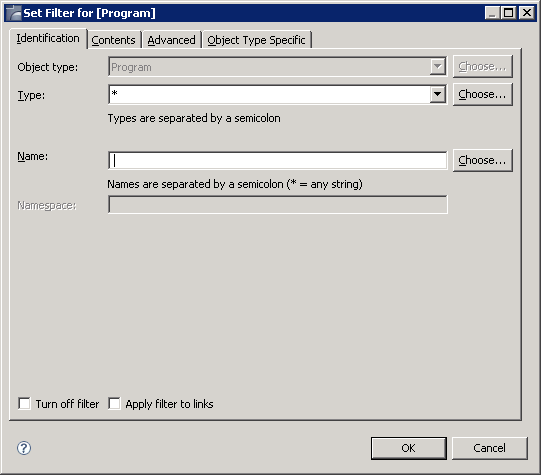
When you select the Turn off filter check box, your filter is not applied. This is useful if you want to deactivate your filter temporarily.
When you select the Apply filter to links check box, your filter is also applied to links.
If you only want to define a filter for a single type, select the type from the Type drop-down list box.
Or:
If you want to define a filter for more than one type,
click the button which is shown next to the
Type drop-down list box.
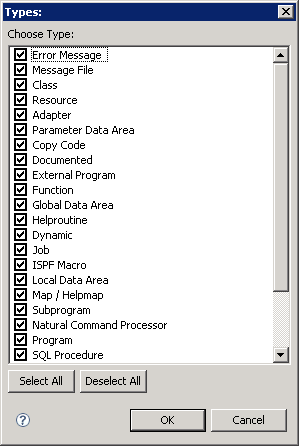
The Types dialog box appears. The types that are currently shown are selected. Example for the object type Database:

Select the types that are to be shown, and/or deselect the types that are not to be shown. You can use the Select All or Deselect All button to select or deselect all types.
Choose the button to close the Types dialog box. In the Filter dialog box, the selected types (as much as fit in the text box) are now shown in the text box of the Type drop-down list box.
If you want to further restrict your filter selection to object types with a specific name, you can enter the name or the first character(s) of the name followed by an asterisk (*) in the Name text box.
Or:
If you want to define a filter for more than one name,
click the button which is shown next to the
Name text box.
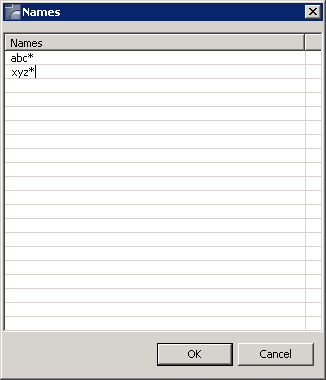
The Names box appears.
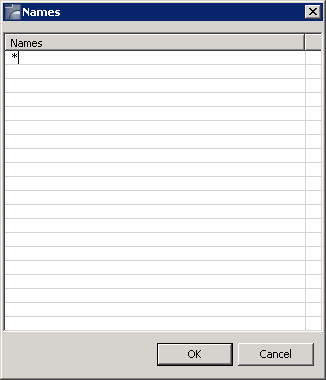
Enter the names or the first character(s) of the name(s) followed by an asterisk (*). Choose the button to close the Names dialog box. In the Filter dialog box, the defined names (as much as fit in the text box) are now shown in the Name text box.
You can specify further filter criteria on the different tabs of the Filter dialog box. The same tabs are used in the Find Documentation Objects dialog box. See Finding Documentation Objects for information on these tabs.
When you have defined all filter criteria, choose the button to close the Filter dialog box.
When the node for the selected object type is currently open in the tree, you can see that its contents changes. Only nodes for the types that you have selected are now shown.
You can search for objects of a given type. The found objects are shown in a list view window.
To find an object
From the Natural Server connection choose .
Or:
In the
view select
either the top node or a documentation object and from the context
menu, choose .
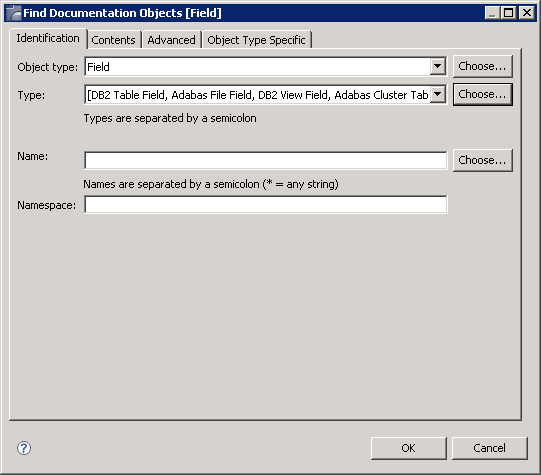
The Find Documentation Objects dialog box appears. This dialog box provides several tabs (some of these tabs are only shown for specific object types):
Specify your search criteria on the different tabs as described below.
Click the button.
The Find Documentation Objects dialog box is closed and all found objects are shown in a list view window. Example:
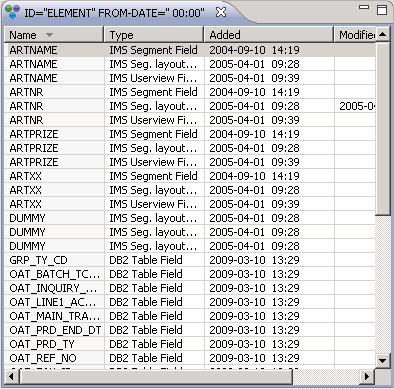
You can manage the found objects using the context menu. For example, you can open, display or create a report of an object.
You can print the list view content (or a
selection of it) using the standard Eclipse functions: From the
menu choose or
click the
![]() button.
button.
When no objects meeting the specified search criteria are found, the above window is empty.
All available object types are provided in a drop-down list box .
Multiple objects can be selected using the button.
When a documentation object was selected before issuing the command, the object type and, if appropriate, type of the selected documentation object are automatically preselected.
| Option | Description |
|---|---|
| Object type | The object type to which the find function applies. |
| Type | Only available for documentation
objects with different types.
|
| Name | If you know the name of the desired
object, enter it in this text box. You can also specify the first character(s)
of the name followed by an asterisk (*) to find all object names that start
with these characters.
If you want to specify more than one name, click the button which is shown next to the Name text box. The Names dialog box appears. See the example below. |
| Namespace | For objects of type Field only. Enter the name of a file. Asterisk notation is possible. |
The following dialog box appears.
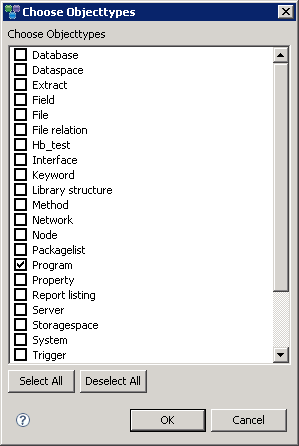
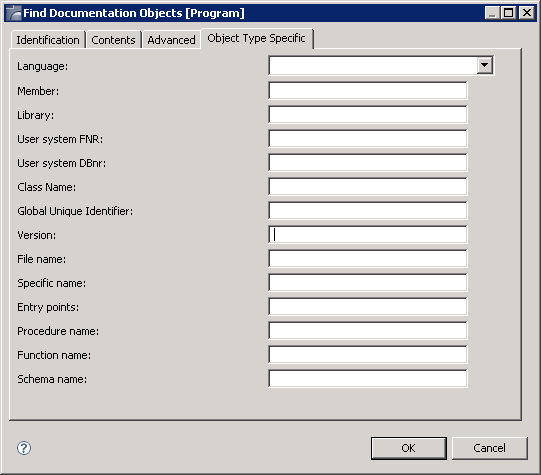
The following dialog box appears for object type Program.
The currently defined types are selected. You can now select the required types, or deselect the types that are not to be considered in your search. Choose the button to close the Types dialog box. On the Identification tab, the selected types (as much as fit in the text box) are now shown in the text box of the Type drop-down list box.
The following dialog box appears when click the button next to the Name text box. When names have already been defined, they are shown in the dialog box.
You can enter the names or the first character(s) of the name(s) followed by an asterisk (*). Choose the button to close the Names dialog box. On the Identification tab, the specified names (as much as fit in the text box) are now shown in the text box of the Name text box.
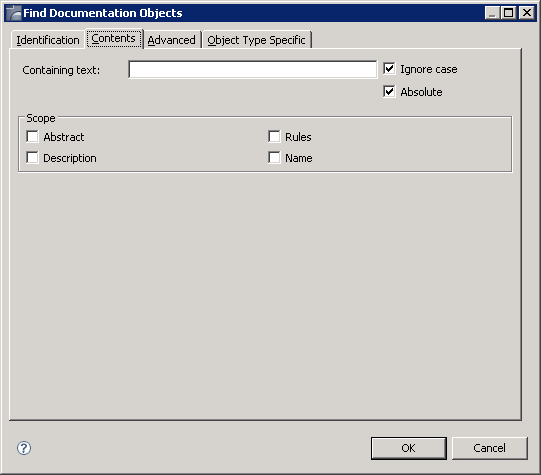
You can search for objects that contain specific text.
| Option | Description |
|---|---|
| Containing text | Specify the text. The check boxes on this tab are only available when you have entered text in this text box. |
| Abstract | If selected, the abstract is searched for the specified text. |
| Description | If selected, the extended description is searched for the specified text. |
| Absolute | If selected, embedded text strings are found (for example, the embedded text string "mari" in "primarily"). If not selected, only occurrences of the search string that are delimited by blanks or special characters are found. |
| Rules | If selected, rules are to be scanned for the search string. This option applies exclusively to verifications. With objects of other types, this check box is disabled. |
| Name | If selected, objects will only be selected if the specified text occurs in the name (object ID). |
| Ignore case | If selected, no distinction is made between upper-case and lower-case characters. |
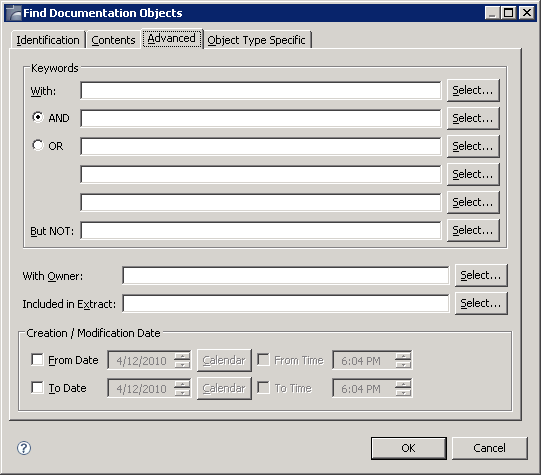
You can search, for example, for objects which contain specific keywords or which have a specific owner.
| Option | Description |
|---|---|
| With | Only objects with the given keywords are included in the selection. Up to five keywords can be specified. Asterisk notation is possible. |
| AND/OR | When the option button AND is selected, the object must contain all specified keywords. When the option button OR is selected, the object must contain one of the specified keywords. |
| But NOT | Objects with the given keyword are excluded. Asterisk notation is possible. |
| With Owner | Only objects with the given owner are included in the selection. Asterisk notation is possible. |
| Included in Extract | Only objects contained in the specified extract are included in the selection. With asterisk notation you can specify a range of extracts. |
| From Date/Time | Only objects that were added or modified on or after this date will be selected. If a modification date exists, this will be evaluated. If no modification date exists for an object, the creation date is evaluated. Format "MM/DD/YYYY" for the date and "HH:II" for the time. You can also click on or use the arrow buttons to specify a certain date or time. |
| To Date/Time | Only objects that were added or modified on or before this date will be selected. If a modification date exists, this will be evaluated. If no modification date exists for an object, the creation date is evaluated. Format "MM/DD/YYYY" for the date and "HH:II" for the time. You can also click on or use the arrow buttons to specify a certain date or time. |
The search options on this tab depend on the object type that has been selected on the Identification tab. This tab does not appear for all object types or if more than one object type is selected. Example for programs:
Specify all required search options.
In Predict Description and Generation, the properties for the selected node are automatically shown in the standard Eclipse Properties view (Show View > Other > General > Properties).
In this view, the context menu provides the command, which can be used to copy the content of the selected row to the Clipboard.
Different property information is shown, depending on the selected node:
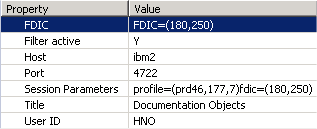
Top-level Documentation
Objects node
You can see the information that was specified when the
connection was created and the version of Predict which is installed in the
remote environment and the FDIC database ID and file number.
You can see whether a filter is active (Y/N). See also Defining the Object Types to be Shown.
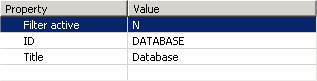
Node for an object type
You can see whether a filter exists and whether it is active
(Y/N). See also Applying a
Filter to an Object Type.
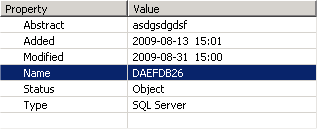
Node for an object of a specific type
You can see when and by whom the object has been added and,
if applicable, last modified. When an abstract has been specified, it is also
shown.
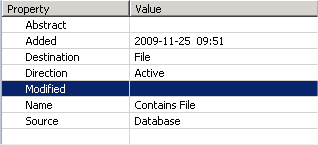
Node for an association
You can see name, source, destination and direction, and
when and by whom the association was added and, if applicable, last modified.
When an abstract has been specified, it is also shown.
You can refresh each node of a connection, so that the latest changes to the documentation objects are available in the Predict Description and Generation view. When you refresh a node, only the subtree of this node is refreshed.
Caution:
For external objects, a command with a similar name,
, is available. Do not confuse this
command with the command. See
Refreshing an External
Object for further information.
To refresh the tree
Select the node that you want to refresh.
Invoke the context menu and choose Refresh.