
In the Mainframe Navigation view, the z/OS jobs are shown when you expand the Jobs folder of a z/OS node.
This document covers the following topics:
Before displaying z/OS jobs, you can define a filter so that only those jobs are shown which correspond to your filter criteria.
 To define a filter
In the Mainframe Navigation view, select the Jobs folder in the appropriate node.
Invoke the context menu and choose .
Or:
Press F3.
The following dialog box appears:
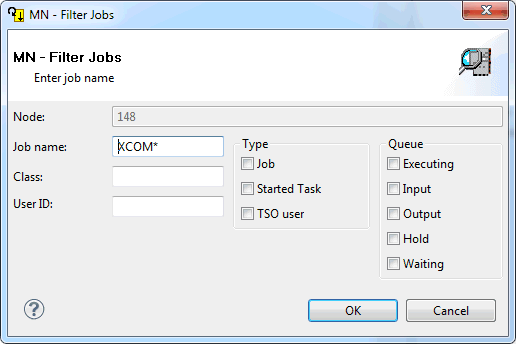
Enter the filter criteria.
| Option | Description | |
|---|---|---|
| Job name | Job name on the job card. You can use a combination of strings and wildcards (* and _) to display the jobs matching the job name pattern. | |
| Class | JES job class or output class. | |
| User ID | ID of the user who submitted the job. | |
| Type | If you are only
interested in a specific type of job, you can activate one or more of the
following check boxes:
Job (standard operating system job) When none of these check boxes is selected, all information is always shown. |
|
| Queue | If you are only interested in specific queues, you can activate up to four check boxes for the JES queue type: | |
| Executing | Executing queue. | |
| Input | Input queue (held and non-held jobs). | |
| Output | Output queue. | |
| Hold | Output queue jobs on hold. | |
| Waiting | Input queue jobs on hold. | |
| When none of these check boxes is selected, the information from all queues is always shown. | ||
Choose the button.
When you display the condition codes of a job, they are shown in a read-only editor window.
To display the condition codes of a z/OS job
Select a job in the Mainframe Navigation view.
Invoke the context menu and choose .
Or:
Press CTRL+ALT+C.
A read-only editor window appears.
See also Commands for Browsing an Object.