
To avoid compile errors for Construct-generated modules in the server environment, Natural Construct on the server is delivered with all the required runtime/compile time modules in the SYSTEM library. Since these modules are combined with other modules and products in SYSTEM, the Natural Construct component on the client delivers the required modules in the Construct runtime project. The modules in this project will eliminate compile and parsing errors caused by missing Natural Construct resources and will provide more detailed information in the Dependencies view. This project is available for use by both the client generation wizards and the Construct generation wizards.
If uploading runtime modules to the server causes compile or runtime errors to existing server modules, try regenerating the server modules to incorporate the changes in the uploaded runtime modules. Likewise, if the compilation or execution of generated code results in errors on the server, try rebuilding the Construct runtime project on the server to ensure that you are using the most recent version of this project.
This section covers the following topics:
Replace the Construct Runtime Project with the Latest Version
Build the Construct Runtime Project in a non-Construct Server Environment
When Natural code is generated by a Code Generation wizard, the wizard verifies whether the required runtime/compile-time modules are available in the local environment. If they are not, a window is displayed prompting you to add the Construct runtime project to your workspace. For example:
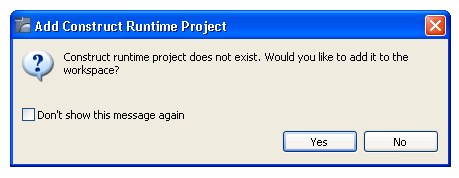
If you select Yes, the project is added to the workspace and referenced from the current project.
You can also add the Construct runtime project to your workspace manually.
 To add the Construct runtime project manually
Open the context menu for any node in the Project Explorer.
Select .
The project is added to the view. For example:
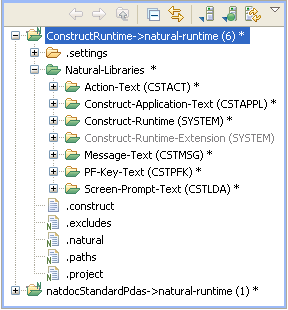
The current version of the Construct runtime project is defined in the .construct file. For example:

Note:
The information in the .construct file is used internally and
should not be modified.
The local version information is compared to the version information delivered in the Construct runtime project at startup and during generation and regeneration. If the version has changed on the server, the local project will be updated.
This section describes how to update an existing Construct runtime project to the latest version of the project. Updated modules in the shipped version are copied to the workspace (and overwritten when necessary).
| Warning: Any customizations of the Construct runtime project modules will be lost unless you exclude the modules from the update processing. For information, see Exclude Modules from the Update or Replace Process. |
To update the Construct runtime project to the latest
version
Open the context menu for the ConstructRuntime project in the Project Explorer.
Select .
Note:
When the Construct runtime project is updated, the
project modules are copied to the SYSTEM library on the FUSER, but when the
project is built, the project modules are copied to the SYSTEM library on the
FNAT.
This section describes how to replace an existing Construct runtime project with the latest shipped version of the project. All modules in the shipped version are copied to the workspace (and overwritten when necessary).
| Warning: Any customizations of the Construct runtime project modules will be lost unless you exclude the modules from the replace processing. For information, see Exclude Modules from the Update or Replace Process. |
To replace the Construct runtime project with the latest
version
Open the context menu for the ConstructRuntime project in the Project Explorer.
Select .
This section describes how to exclude (and subsequently include) Construct runtime project resources from being overwritten during the update or replace process. You can use this functionality to protect changes to these modules from being overwritten during the update or replace process.
Notes:
To exclude modules in the Construct runtime project from the
update or replace processing
Open the context menu for a Construct runtime resource in the Project Explorer.
Select .
The selected resource is added to the .construct-excludes file in the project. For example:
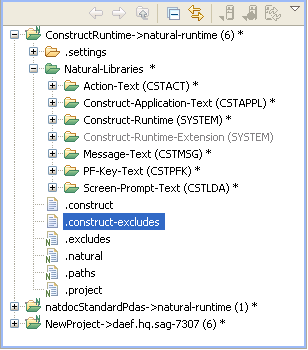
Excluded resources will never be updated or replaced with the latest shipped version (triggered automatically at startup, generation, regeneration or by selecting the or Replace with Latest Version context menu actions).
Note:
You can view the .construct-excludes file to determine
which resources are currently excluded, but you should never modify the file
manually.
To include modules in the Construct runtime project update or
replace processing
Open the context menu for the excluded Construct runtime resource in the Project Explorer.
Select .
The selected resource is removed from the .construct-excludes file and will now be overwritten during an update or replace process.
If you have customized any of the required modules on the server, you must add these customizations to the local Construct runtime project. This project is imported from an archived file called ConstructRuntime.zip in the installation folder for the Natural Construct component.
To add customized modules to the Construct runtime project
Make a backup copy of the ConstructRuntime.zip file.
Import the ConstructRuntime.zip file into your workspace.
Open the zip file and copy the customized modules into the Construct runtime project.
Export the modified Construct runtime project from your workspace to the ConstructRuntime.zip file.
Your customizations will overwrite the supplied Construct runtime project in the Natural Construct installation folder.
The customized Construct runtime project now can be used as the basis for loading runtime projects in a customized environment.
The Construct runtime project allows Construct-generated modules to be compiled in NaturalONE and executed in a non-Construct Natural server environment. If Natural Construct is installed on the server (including the compiled version only), a Construct-generated application can be compiled and/or executed on that server. If Natural Construct is not installed on the server (for example, in a NaturalONE local server environment), a Construct-generated application can be compiled on that server if the Construct runtime project has been installed.
The Construct runtime project is copied to the environment defined in the Properties window for the project (for example, Projectname > Properties > Natural > Runtime).
For a Construct-generated application to compile in a NaturalONE local environment:
The referenced application DDMs must be copied into the NaturalONE local environment.
The Construct runtime project must be available in the workspace and referenced.
The SYSTEM library must be in the steplib chain.
The runtime folder does not require a Construct physical file. If Construct help is being used, the Construct physical file must be installed on the server and both the runtime and the CST-Help folders should be updated on the server.
Notes:
To build the Construct runtime project in a non-Construct
server environment
Open the context menu for the ConstructRuntime project in the Project Explorer.
Select .
The Define the Build Details panel is displayed. For example:
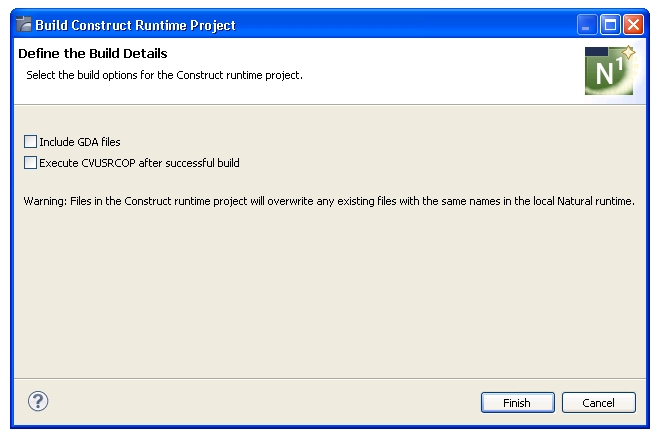
Select .
The Construct runtime project is built with all defaults.
Or:
Select one or more of the following options:
| Option | Description |
|---|---|
| Include GDA files | Select this option to include all
global data area files.
The wizard ignores any global data areas. To include them, select Include GDA files. Note: |
| Execute CVUSRCOP after successful build | Select this option to execute the CVUSRCOP utility, which copies the Natural utility routines to the SYSTEM library after the Construct runtime project has been successfully built on the server. For more information, see Natural Business Services Installation on Mainframes. |
Select .
The Construct runtime project is built with the selected options.