
This section explains what a user exit is and how to select and define one in NaturalONE. The following topics are covered:
By default, the generated source code is protected from editing and changes can only be made within user exits, positions within the generated code where you can insert customized or specialized processing. Changes to the user exit code are always preserved upon subsequent regeneration of the module. We recommend that you only add custom code within user exits.
| Warning: Although it is not recommended, you can edit the protected lines in the generated source code outside of the user exits. However, your changes will not be preserved upon regeneration. For information about the protected lines in the generated source code, see Using the Source Editor/Protected Lines in Sources Generated by Construct or Code Generation in Using NaturalONE. |
The code generation wizards provide a wide variety of user exits, which vary based on
the type of module you are generating. Some exits contain sample code or subprograms,
while others generate the **SAG DEFINE EXIT and **SAG END-EXIT
tags only — you provide the actual code. You can modify any user exit code generated
into the edit buffer.
Notes:
When a generated module is open in the Eclipse editor, all available user exits for the module are displayed in the Outline view. This section covers the following topics:
Tip:
If the user exits are not displayed in the Outline view, select
![]() on the toolbar.
on the toolbar.
 To access a user exit
Select the user exit in the Outline view.
Open the context menu for the user exit.
For example:
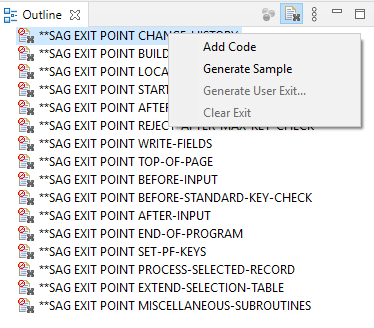
Select one of the options listed.
The user exit is displayed in the editor view. For example:
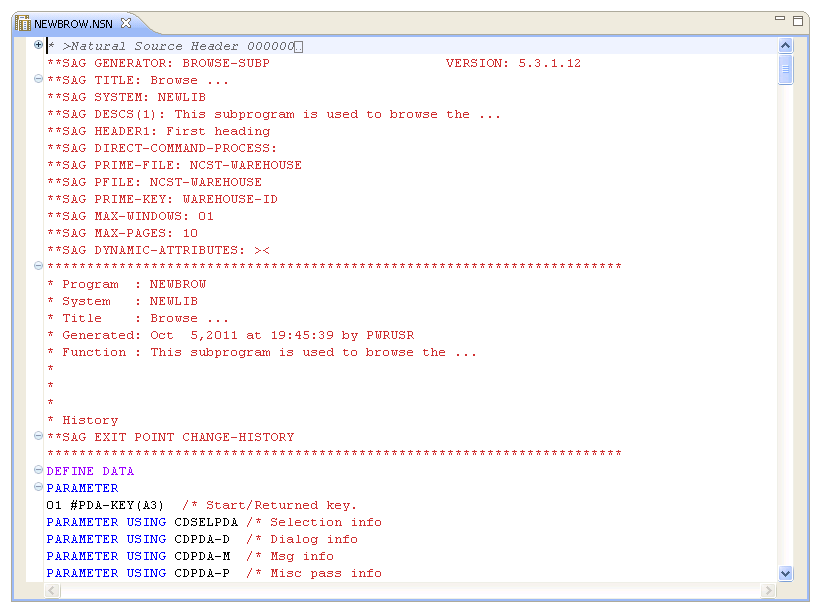
The **SAG EXIT POINT tag indicates that the exit does not exist
and you must use the Outline view to add code or generate
sample code.
To add code to a user exit
Open the context menu for the user exit.
Select .
The exit is displayed in the editor view. For example:
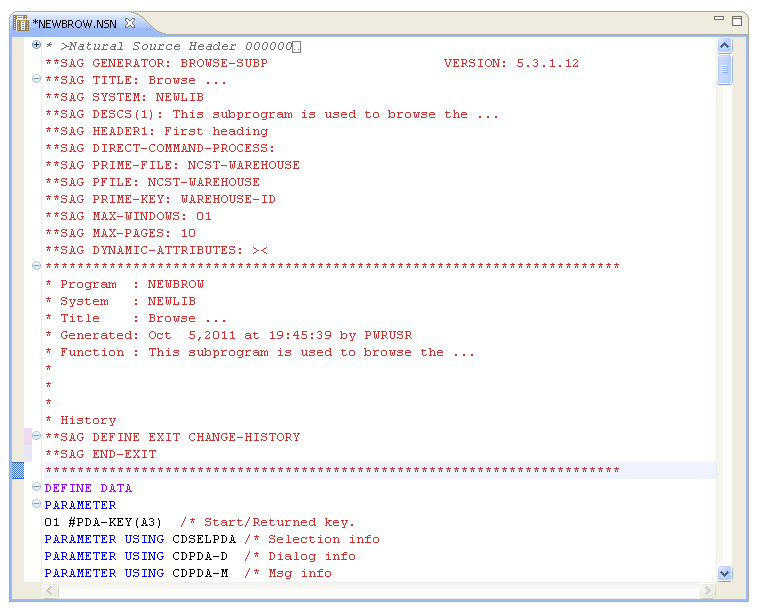
The **SAG DEFINE EXIT and **SAG END-EXIT tags
indicate that the user exit exists, even when there is currently no code in it,
and you can define or modify the exit directly in the editor.
Move the cursor to the end of the **SAG DEFINE EXIT
user-exit-name line.
Select Enter.
Add the code on the lines provided.
To add code to a user exit
Open the context menu for the user exit.
Select .
The **SAG DEFINE EXIT and **SAG END-EXIT lines are
displayed with sample code. For example:
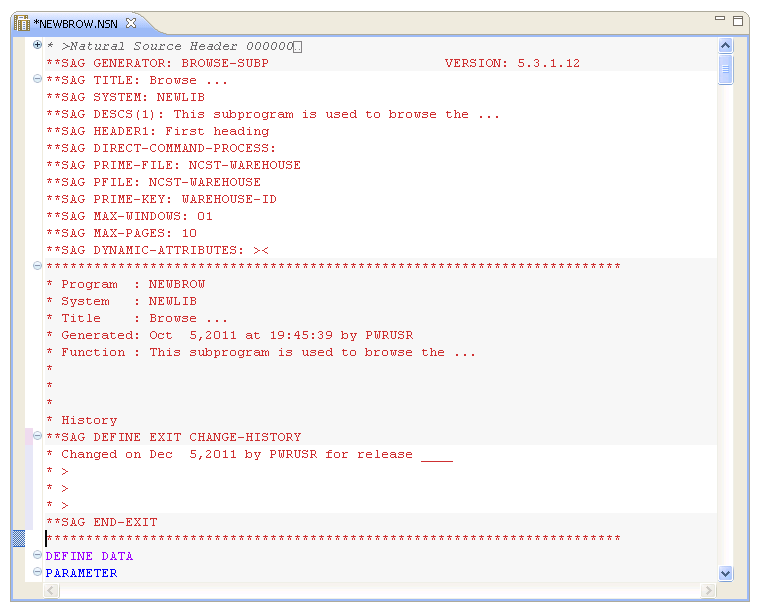
Move the cursor to the end of the **SAG DEFINE EXIT
user-exit-name line.
Modify the sample code as required.
This context menu is enabled only for special user exits such as WRITE-FIELDS and LOCAL-DATA. If you select this option, a dialog wizard that collects data for generating a user exit code is displayed.
To use this functionality you need to install Natural Business Services version 8.2.2.6 or higher on the NDV server.
If you specify a program view name on a Browse, Browse-Select, or Object-Browse model specification wizard panel, you must define the view for the file as a LOCAL-DATA user exit.
To generate a Local-Data user exit
Open the context menu for the user exit.
Select . The user exit dialog wizard is displayed.
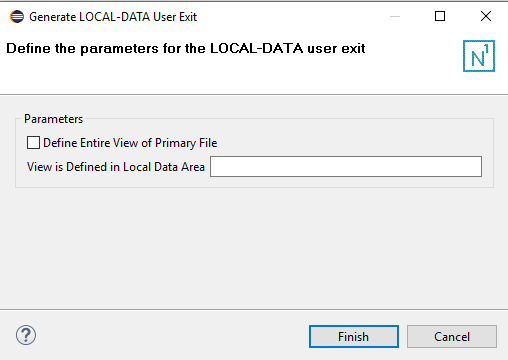
Using this widow, you can:
| Field | Description |
|---|---|
| Define Entire View of Primary File | Mark this field to define the entire view of a primary file within a user exit. You can then edit the sample code and delete the fields you do not want. |
| View is Defined in Local Data Area | If the view is defined in a local data area (LDA), enter the name of the LDA in this field. |
Modify this wizard as desired.
Click to generate the user exit contents.
Note:
If you are using the LOCAL-DATA user exit with a model that is not a Browse,
Browse-Select, or Object-Browse model, no wizard is displayed.
The WRITE-FIELDS user exit offers the possibility to generate more complex user exit code based on the contents of the #PANEL variable.
To generate a Write-Fields user exit
Open the context menu for the user exit.
Select . The user exit dialog wizard is displayed.
On the page, you can select up to six Predict views. The Predict view from the model is added by default.
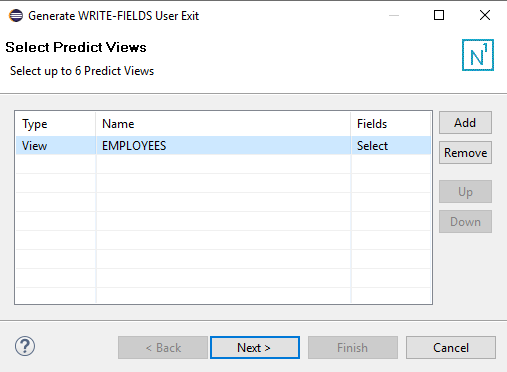
The following fields and buttons are available on this wizard page:
| Field/Button | Description |
|---|---|
| Name | Shows name of the view. |
| Fields | Choose to display a selection page from which you can select the fields or to select all the fields from the corresponding view. |
| Add | Shows a list of all available Predict views and adds the view you have selected. |
| Remove | Removes the selected view. |
| Up | Moves the selected view up. |
| Down | Moves the selected view down. |
Modify this wizard as desired.
Click .
The is displayed. It shows all fields from all Predict views whose Fields parameter you have set to Select.
Select the fields to be used for the WRITE-FIELDS code.
If you select a group field, all children of the group will be selected.
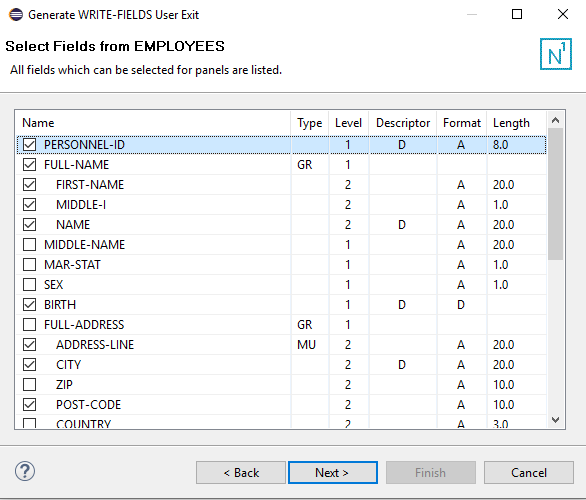
Click .
The page is displayed. On this wizard page you can specify the statement type, size, and spacing of the report.
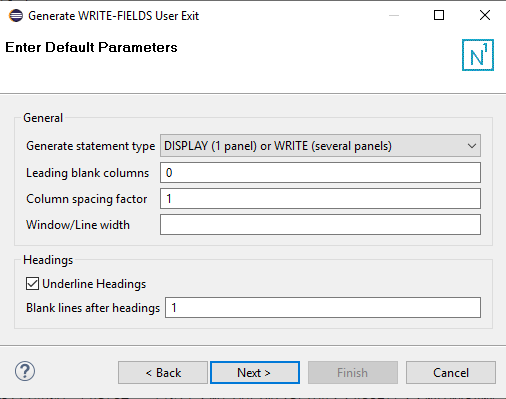
The following fields and buttons are available on this wizard page:
| Field/Button | Description |
|---|---|
| Generate statement type | Type of Natural statement (DISPLAY or WRITE) used for the report. By default, DISPLAY is selected. If more than one panel is generated, but you have selected DISPLAY, the code will, nevertheless, be created using WRITE statements. |
| Leading blank columns | Number of blank columns preceding the report columns. |
| Column spacing factor | Number of spaces between fields on the report. The default is one space. |
| Window/Line width | Number of columns used for the generated report. If this field is empty, 80 is used. |
| Underline Headings | Tick this box to add or remove a line under headings. This field is selected by default. |
| Blank lines after headings | Number of blank lines below the header to be displayed in the ready report. |
Modify this wizard as desired.
Click .
The page appears. On this wizard page you can define the layout of the WRITE-FIELDS panels.
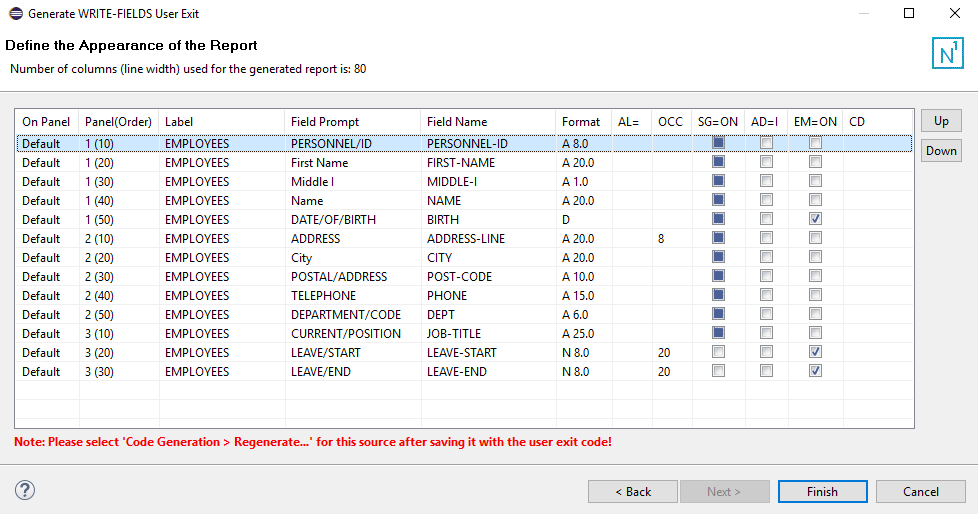
The position of the fields is calculated automatically for any change affecting the field width, field order, or the line width of the report.
If new fields are selected by going back to the wizard page, these fields are added at the end of the report.
The following fields and buttons are available on this wizard page:
| Field/Button | Modifiable | Description |
|---|---|---|
| On Panel | x | Pick either Default or All from the drop-down list. displays the field on all panels, and in such case the value will be . Default displays the field on one panel, and this case the Panel value will be the number of the panel where the field is located. |
| Panel(Order) | Number of the panel and order on this panel where the corresponding field will be displayed. | |
| Label | x | Qualifier of the field. By default, the name of the view is selected. |
| Field Prompt | x | Field names displayed on the report. The default headings in Predict are displayed. Entering a slash (/) can split the header over several rows. |
| Field Name | The name of the field. | |
| Format | The format and length of the field. | |
| AL= | x | To override the default length of the corresponding field, type the new length in this field. |
| OCC | depends on field | Number of occurrences of the corresponding field. If a fixed number is specified, that number is always displayed on the report (even if some occurrences are empty). |
| SG=ON | depends on field | Sign option. Check this box to include a sign option for the corresponding field (SG=ON) in the generated report. |
| AD=I | x | Check this box to intensify the corresponding field (AD=I). |
| EM=ON | depends on field | Check this box to use the Predict edit mask for the corresponding field (EM=ON). |
| CD | x | Select the color definition for the corresponding field from the drop-down list. |
| Up | Moves the selected field up. | |
| Down | Moves the selected field down. |
Click to generate the user exit.
Depending on the input values, this generation could also create code in the user exits BUILD-REPORT-LOCAL-VARS and TOP-OF-PAGE.
Note:
After creating the user exit code in the model source, you must save the source
and regenerate it. Regeneration can be achieved by selecting the menu
for the source.
To clear code from an existing user exit
Open the context menu for the user exit in the Outline view.
Select .
All lines of code within the selected exit are deleted and the comment line that identifies the insertion point for the exit within the editor is restored.
To modify code in a user exit
Select the user exit in the Outline view.
The user exit is displayed in the editor.
Modify and save the user exit.
Note:
You can make changes to user exits equivalent to the and options by modifying
these lines in the editor view — without using the context menu for the
Outline view. If you do this, ensure you do not change the **
SAG comment lines.