
This document covers the following topics:
Using the mouse, you can drag each dockable window within the Natural Studio window to another position so that it is shown
at another position within the Natural Studio window, or
in a window of its own, for example:
You can move the window freely on your screen. You can move it back to the Natural Studio window (for example, back to its original position) so that it is no longer shown in a window. This process is called "docking".
 To enable/disable docking for a window
When the library workspace, application workspace or results window is currently docked, move the mouse pointer to title bar of the window.
When the command line, menu bar or a toolbar is currently docked, move the mouse pointer to the two lines which are shown with the docked window. For example, when docked horizontally, the two lines are shown as follows to the left of the docked window:
![]()
Or:
When the window is currently undocked, move the mouse pointer to the
title bar of the window.
Invoke the context menu.
When a check mark is shown next to , the window can be docked. When a check mark is not shown, the window cannot be docked.
If you want to toggle the docking status, choose .
Note:
When you disable docking for a window which is currently docked,
the window is undocked.
To undock/dock a window using the mouse
This requires that docking is enabled (see above).
Double-click the title bar of a docked window, or double-click the two lines which are shown for specific types of docked windows (see above).
Or:
Double-click the title bar of an undocked window.
When the window is currently docked, it is undocked. When the window is currently undocked, it is docked at its previous position.
To drag a docked window to another position
This requires that docking is enabled (see above).
Move the mouse pointer to the title bar of a docked window or to the two lines which are shown for specific types of docked windows (see above).
Press the mouse button and drag the window to another position.
An outline of the window is shown. The outline indicates the position at which the window can be docked.
If you want to prevent docking (that is, if you want to undock the window), press CTRL while dragging the window.
Release the mouse button.
To drag an undocked window back to the Natural Studio window
This requires that docking is enabled (see above).
Move the mouse pointer to title bar of an undocked window.
Press the mouse button and drag the window to the position at which you want to dock it.
An outline of the window is shown. The outline indicates the position at which the window can be docked.
Release the mouse button.
Note:
When you exit Natural Studio, the settings in the
menu as well as position and size of the Natural Studio
window and its subwindows are stored in the Windows registry. The next time you
start Natural Studio, its window is restored as it appeared when you last used
it.
You can modify the size of each window within the Natural Studio window.
In this exercise, you will resize the library workspace window which is initially docked within the Natural Studio window.
To resize a docked window
Move the mouse pointer over the right border of the library workspace window until the pointer changes, showing two arrows pointing in opposite directions.
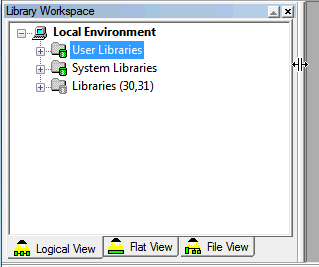
Click and hold down the mouse button.
Drag the mouse to make the window larger or smaller.
When the window has the desired size, release the mouse button.
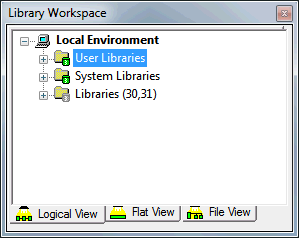
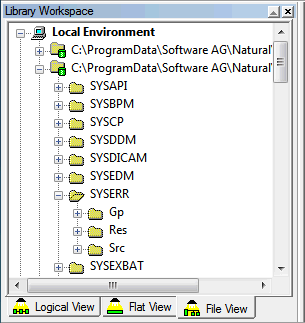
The library workspace window provides tabs for different views:
Logical View
In the logical view, different nodes are provided for user libraries,
system libraries and DDMs (FDIC). The objects in a library are grouped into
different folders, according to their types.
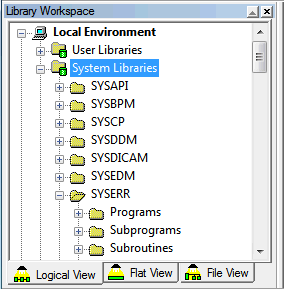
For example, all programs are shown in a folder called "Programs". Thus, if you want to view the available programs in a library, you must first open the corresponding folder (for example, by clicking the plus sign next to the folder name). This is not required in the flat view.
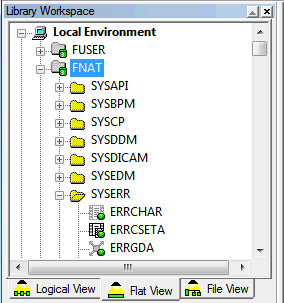
Flat View
In the flat view, different nodes are provided for the Natural
parameters: FUSER, FNAT and
FDIC. The objects in a library are displayed without any
grouping. However, the object type is always indicated by the icon next to an
object.
File View
In the file view, the name of each mapped remote database is shown
with database ID and file number (mapping is explained later in
this tutorial). Different folders are provided for each library (provided that
the corresponding objects exist in this library):
"Src" contains all Natural sources,
"Gp" contains all generated programs (object code).
Folders for other subdirectories (for example, "Res"
for resources or "Err" for error codes) may also be
available.
In the different views, icons are shown for the Natural objects. For example:
|
|
This icon is shown for a program. |
|
|
When both source code and a generated program are available for an object, a green dot is displayed on the icon. |
|
|
When only a generated program is available and no source code, the icon is gray. |
Note:
If you want to see more icons for the different object types, expand
the node for SYSMAIN in the logical view and then expand the nodes
for the different folders.
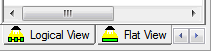
When you resize the library workspace window, it may happen that the window is not wide enough to display all tabs at the bottom. In this case, arrow buttons are provided. To display another view, you can either enlarge the window and select the corresponding tab, or you can use an arrow button to display the corresponding view.
Natural Studio provides several toolbars. Only a few of them are initially shown in the Natural Studio window.
In this exercise, you will activate the Tools toolbar which provides buttons for commands that you will use later in this tutorial:
![]()
Note:
You can undock and dock each toolbar that is shown in the Natural
Studio window as described above for the library workspace window.
To display the Tools toolbar
From the menu, choose .
The Customize dialog box appears.
Choose the Toolbars tab.
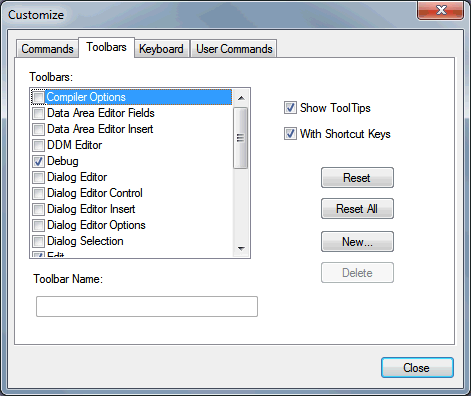
To proceed to the bottom of the list box, use the scroll bar or the down arrow.
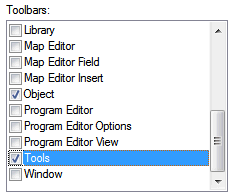
Initially, the Tools check box is not selected. This means that the Tools toolbar is currently not shown in the Natural Studio window.
Select the Tools check box so that a check mark is shown in the box.
Each toolbar that you activate is immediately shown in the Natural Studio window. It is always shown in its last state (either docked or undocked).
Choose the button.
You can issue all Natural commands directly from the command line. An example is given later in this tutorial.
![]()
Note:
You can undock and dock the command line as described above for the
library workspace window.
Initially, the command line is not shown.
To toggle command line display
From the menu, choose .
Or:
Press ALT+3.
When the command line is displayed in the Natural Studio window, a check mark is shown next to the command.
You can now proceed with the next exercise: Local and Remote Environment.