
In Natural Studio, an application is a collection of Natural objects and non-Natural objects which build a functional unit from the business point of view.
There are two types of applications:
Base Application
A set of Natural objects that are stored in the same user system file
(FUSER). You can link objects of different libraries to a base
application.
Compound Application
You can link several base applications to a compound application. A
compound application can be spread across different hosts.
For detailed information, see SPoD Application Concept.
This document covers the following topics:
Note:
The applications that you will create with the exercises below do not
run. Their purpose is just to demonstrate the basics for handling
applications.
It is assumed for the following exercises that you have:
copied the contents of the system library SYSSPODA to
your user library SPODLIB,
moved all subprograms from library SPODLIB to library
SPODADD,
copied the program PGMCHECK from library
SPODLIB to library SPODTEST
as described previously in this tutorial.
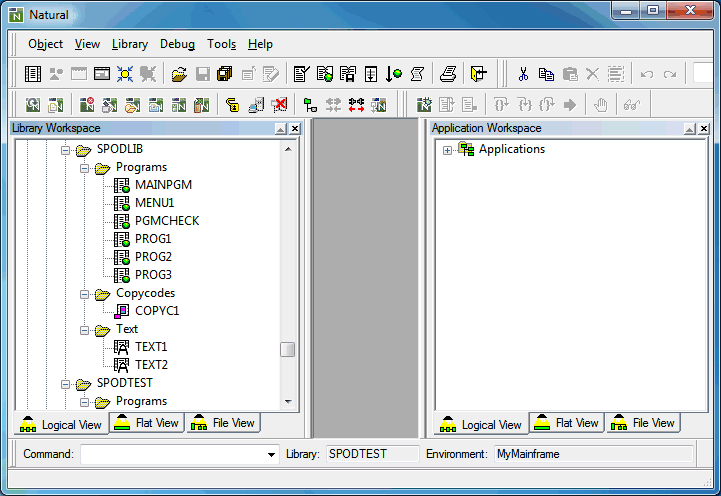
The application workspace is the area in which all known applications can be displayed. It provides the same views as the library workspace (logical view, flat view and file view). Your application workspace is initially empty.
When you start Natural Studio for the first time, your application workspace is not shown. The exercise below explains how to display it. It is initially displayed at the right of the Natural Studio window.
 To toggle application workspace display
From the menu, choose .
Or:
Press ALT+2.
When the application workspace is displayed in the Natural Studio window, a check mark is shown next to the Application Workspace command.
You will now create two base applications with the names
SPODAPPL1 and SPODAPPL2. You will create them on the
same development server that you have previously mapped in the library
workspace.
To create a new base application
In the application workspace, select the "Applications" node.
Invoke the context menu and choose .
When you work with applications for the first time, the Connect Application Server dialog box appears. You have to enter all required information for starting a session on the development server. This session, which is called "application server session", is used to access application data.
When you start Natural Studio the next time and expand the "Applications" node, the application server session is automatically started. The Connect Application Server dialog box will appear only if additional information (for example, a password) is required.
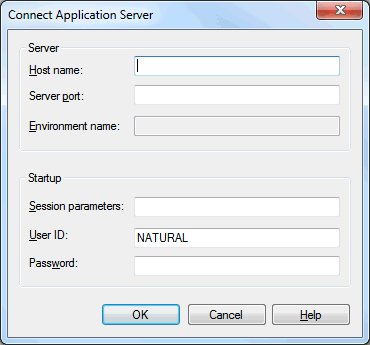
In the Host name text box, enter the name of the development server on which the application data are stored.
In the Server port text box, enter the TCP/IP port number of the development server.
If Natural Security is installed on the development server, specify the required password in the Password text box. Otherwise, leave this text box blank.
Choose the button.
The application server is connected.
Since you have chosen the command from the the context menu, the New Application - Base Settings dialog box appears.
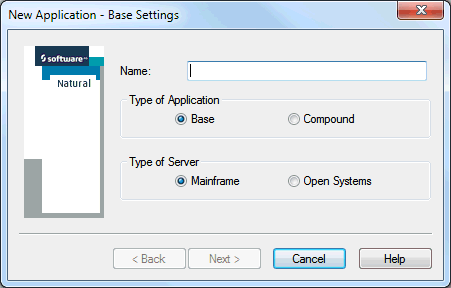
Enter the name SPODAPPL1 for your first base
application.
Make sure that the Base option button is selected.
Select the option button for the type of server: since this tutorial assumes that you have mapped to a remote mainframe environment, choose the Mainframe option button.
Choose the button.
The New Application - Description dialog box appears.
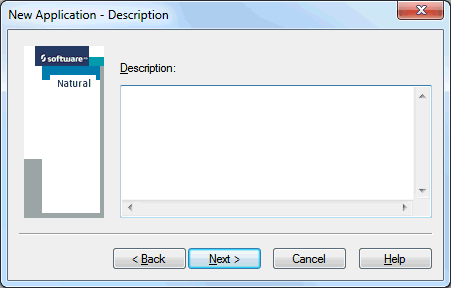
Optional. Enter a description for your application. This can be any text.
Choose the button.
The New Application - Environment Settings dialog box appears.
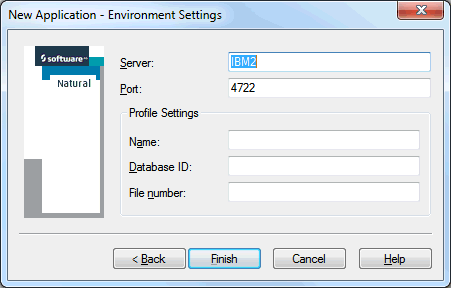
The name and port number of the application server that you have previously mapped in the Connect Application Server dialog box are provided as the default values for the new application. For this tutorial, we will use the default values.
Note:
It is also possible to use another development server.
Optional. Specify the profile settings (name, database ID and file number) to control the session settings as on the mainframe.
Choose the button.
Note:
If a password is required, the dialog box in which you have
specified the connection information is shown again. Server name, port number
and session parameters cannot be changed in this dialog box. They are fixed for
an application. If this dialog box appears, specify the password and choose the
button.
The new application is now mapped. It is shown in the application window. Each time you map an application, a new development server session is started for this application.
Repeat the above steps to create the second base application with the
name SPODAPPL2. You will later link objects to these two base
applications.
Note:
Since you have already defined the connection information, the
Connect Application Server dialog box is not shown for
your second application.
You will now create a compound application with the name
SPODCOMP.
To create a new compound application
In the application workspace, select the "Applications" node.
Invoke the context menu and choose .
The New Application - Base Settings dialog box appears.
Enter the name SPODCOMP for your compound
application.
This time, select the option button Compound.
Choose the button.
The New Application - Description dialog box appears.
Optionally. Enter a description for your application. This can be any text.
Choose the button.
You will later link your two base applications to this compound application.
Note:
If a password is required, a dialog box appears in which you have
to specify the password.
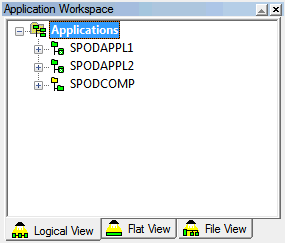
Your application workspace should now look as follows:
You can link any existing Natural object of the attached development server (for example, a program or map) to your application.
With the exercise below, you will link the following objects to your base applications:
| SPODAPPL1 | SPODAPPL2 | |
|---|---|---|
| SPODADD |
SUB1 |
SUB2 |
| SPODLIB |
MAINPGM |
MENU1 |
| SPODTEST | PGMCHECK |
To link objects to a base application
In the application workspace, select your base application
SPODAPPL1.
Invoke the context menu and choose .
The Link Objects to Application dialog box appears.
From the Look in drop-down list box, select the
library SPODADD.
The content of the selected library is now shown in the dialog box.
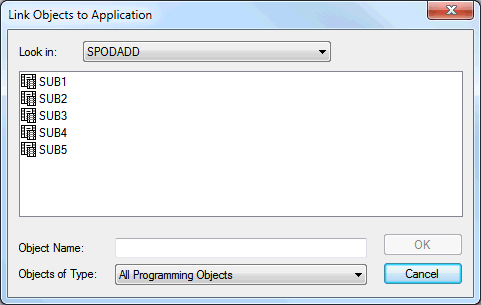
Press and hold down CTRL and select the objects
SUB1 and SUB2.
Choose the button.
When you expand the nodes for the application SPODAPPL1
in the application workspace, the linked objects are shown.
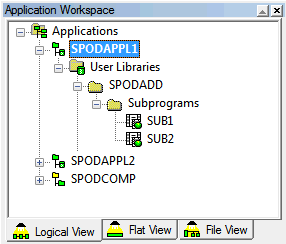
Note:
In the logical view, the selected objects are automatically placed
in the corresponding folders (for example, a
"Subprograms" folder is shown for all subprograms
that you have selected).
Repeat the above steps to link the remaining objects as indicated in the above table.
Note:
If you notice that you have linked a wrong object to your base
application, you can unlink it. To do so, select the wrong object in the
application workspace, invoke the context menu and choose
.
You can link any existing base application on the connected application server to a compound application. You can also link base applications which have different development server settings (that is, the session that is started for the application server may run on a different development server). A compound application thus allows you to combine objects that cannot be combined in the library workspace.
You will now link your two base applications SPODAPPL1 and
SPODAPPL2 to your compound application SPODCOMP.
To link base applications to a compound application
In the application workspace, select your compound application
SPODCOMP.
Invoke the context menu and choose .
The Link Application to Application dialog box appears.
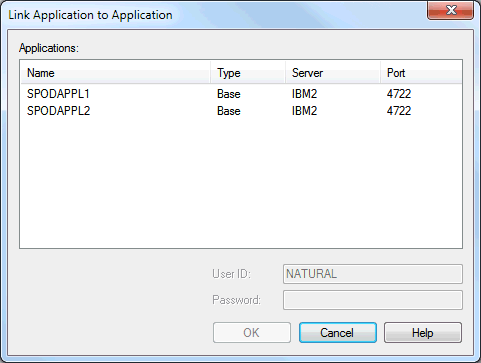
Select your first base application named SPODAPPL1.
Note:
If a password is required, specify it in the
Password text box. If you do not specify a required
password, an additional dialog box will later prompt you for this
information.
Choose the button.
Repeat above steps to link second base application named
SPODAPPL2.
The objects in the application workspace are just references (or links) to the objects on the development server. They are not copies. For example, when you add a new program it will be visible in both the library workspace and the application workspace.
When you want to modify an object, you can do this either in the library workspace or in the application workspace. When an object is currently being modified by another user, the corresponding lock message is shown. A lock message is also shown when you try to open an object in the library workspace that you are currently modifying in the application workspace (and vice versa).
Note:
Not all commands are available in the application workspace. For
example, the commands and
are only available in library
workspace.
The following exception applies in the application workspace when
cataloging (CATALL)
the objects in a library: only the objects that have been linked with the
application are cataloged (i.e. only the objects that are shown in the
application workspace). The objects that are only shown in the library
workspace are ignored. To find out which objects have been cataloged for the
library that is currently selected in library workspace, issue the
LIST * command from the command line. You can then
check the catalog date in the resulting window.
In addition to the applications you create yourself, you can also map applications from other users so that they are shown in the application workspace. You can map all applications that have already been defined on the development server that you have defined in the Connect Application Server dialog box.
Each time you restart Natural Studio, your application workspace is empty. To display the previously mapped applications, expand the "Applications" node. As a result, all previously mapped applications are mapped again. If a password is required, further dialog boxes may appear in which you have to specify the missing information.
The following exercise explains how to map applications that you have not previously created.
To map an application
In the application workspace, select the "Applications" node.
Invoke the context menu and choose .
The Map Application dialog box appears providing a list of all defined applications.
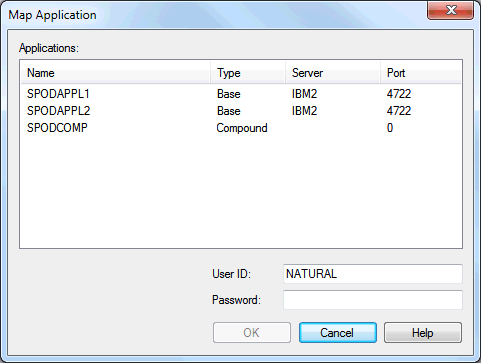
Select the application you want to map.
Note:
If a password is required, specify it in the
Password text box. If you do not specify a required
password, an additional dialog box will later prompt you for this
information.
Choose the button.
The mapped application is now shown in the application workspace.
If you need information about an application in the application workspace or if you want to change the settings of the application, you can display its properties.
To display the properties of an application
In the application workspace, select the application for which you want to display the properties.
Invoke the context menu and choose .
Or:
Press ALT+ENTER.
A dialog box appears displaying the properties for the selected application. Example for a base application:
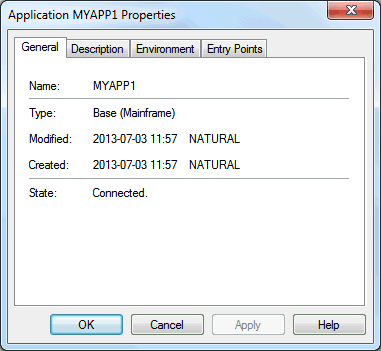
Select the tabs in this dialog box to view the corresponding properties.
Choose the button to close the dialog box.
You have now successfully completed this tutorial.