Managing Migration Events
This document covers the following topics:
Creating a Migration Event
Instead of creating migration events that are automatically authorized and submitted (see Checking Objects In and Out), you can also create migration events manually. In this case, you (or another user with authorization rights) have to authorize and submit the migration events manually.
![]() To create a new migration event
To create a new migration event
-
From the menu, choose .
Or:
Choose the following toolbar button:
The Event window appears. This window provides the following tabs:
-
Specify all required information on the different tabs as described below.
-
Choose the button.
Your event is added to the list of migration events. Its processing state is either "Validated" (when the migration list has successfully been validated on the Migration List tab) or "Pending". For information on how to invoke the list of migration events, see Finding a Migration Event.
General
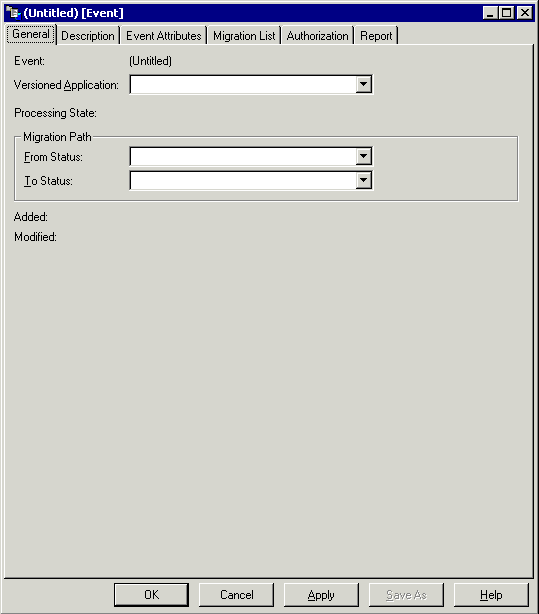
Specify the following information:
| Option | Description |
|---|---|
| Versioned Application | This drop-down list box contains all defined versioned applications. Select the versioned application that you want to migrate. |
| From Status | This drop-down list box provides all defined From statuses for the selected versioned application. Select the name (or alias) of the status from which the objects are to be migrated (origin status). |
| To Status | This drop-down list box provides all defined To statuses which correspond to the selected From status. Select the name (or alias) of the status to which the objects are to be migrated (destination status). |
Note:
To define a different To status, it may be necessary to delete the
entry for the From status first, and vice versa.
Description
You can enter a description for the migration event (optional).
Event Attributes
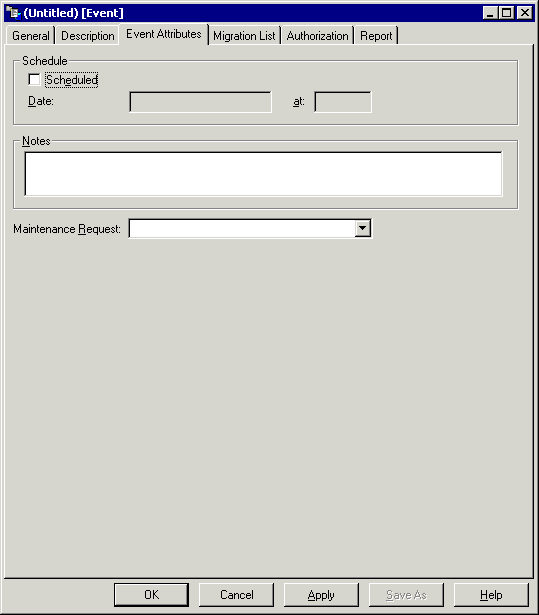
You can specify the following event attributes (optional):
| Option | Description |
|---|---|
| Scheduled | When this check box is selected, the date and time information is used (see below). When this check box is not selected, the specified date and time are ignored and the migration event is scheduled to be processed immediately. |
| Date / at | When the Scheduled check box has been selected, you can specify the date and time at which the migration event is to be processed. Specify the date in the format yyyy-mm-dd and the time in the format hh:ii. If no date and time are entered, the default is the current date and time. |
| Notes | You can enter comments relevant to the migration event. |
| Maintenance Request | If you want to link the migration event to an existing maintenance request ID, you can select the request ID from this drop-down list box. The maintenance request must have been defined previously. This enables PAC to keep track of objects processed to or from maintenance status types. |
Migration List
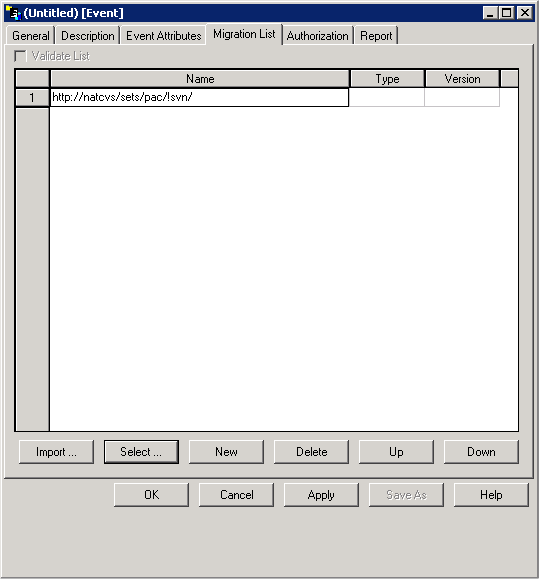
You have to define the objects that are to be migrated. The following command buttons are available for this purpose:
| Command Button | Description |
|---|---|
| Invokes the Import Transfer List dialog box. See below. | |
| Invokes the Select Objects dialog box. See below. | |
| Adds an empty row to the list in which you can specify the required information manually. | |
| Deletes the selected objects from the migration list. | |
| Moves the selected objects one position up in the migration list. | |
| Moves the selected objects one position down in the migration list. |
Import Transfer List
The following dialog box appears when you choose the button:
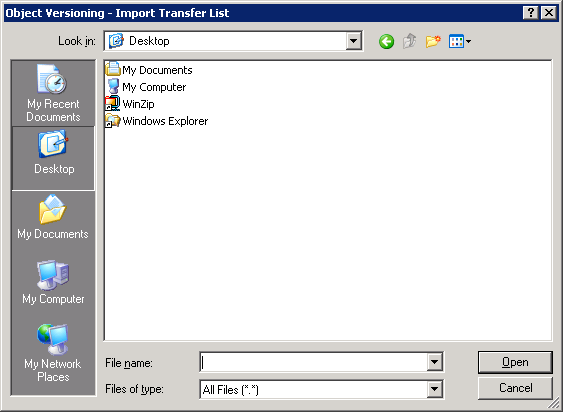
You can specify a transfer list file. This file can contain objects and/or paths (such as URLs) that are then imported.
Select Objects
The following dialog box appears when you choose the button:
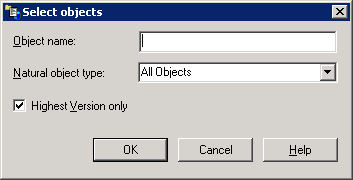
You can specify the objects to be imported. You have the option to import all objects or only objects of a specific type (for example, programs only). It is possible to restrict the list to objects with specific names (for example, to import all objects that start with the letters PGM, you have to specify "PGM*"). You can also specify that only the highest version is to be imported.
For events with From Status External, the following dialog box is displayed:
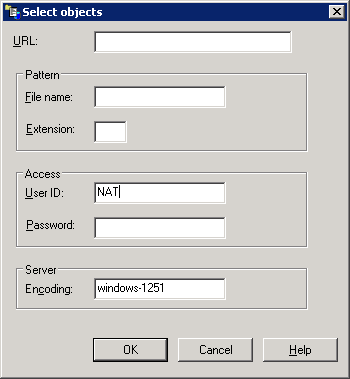
In this dialog box you can specify the user ID, password and server encoding used to access a repository in an external version control software. You can either select all objects below a root URL or select and expand a specific node (a new window will be opened for each node) from the root URL.
In addition, you can further narrow down the list of objects to be
selected by specifying a pattern (file name and/or extension). For example
using .NS* as input in the Extension field
would only select Natural sources for the migration list.
Validate List
Once you have defined the objects that are to be migrated, you can validate the migration list. You can either do this immediately or you can do this at a later time. However, the migration list must be validated before the migration event can be authorized or at the time it is authorized.
When the Validate List check box is selected, your migration list is validated immediately (when you choose the button). The objects in your list are compared with those held in the origin status for consistency of object name, type, and version number. When the list can be validated successfully, it is possible to save the migration event.
When the Validate List check box is not selected, the migration list is saved, but not validated. This choice allows you to include other objects in the list. This is a possibility if the event is scheduled to run at some time in the future.
Note:
For events with From Status External the
Validate List option is always deactivated.
Authorization
It is not possible to enter any information on this tab when creating a new migration event. After the migration event has been added, you have to use the command. See Authorizing a Migration Event for further information.
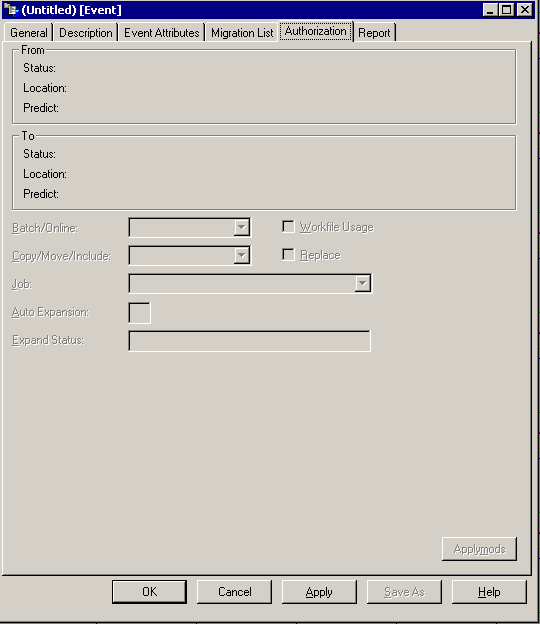
When you invoke this tab using the command, you can specify the following information:
| Option | Description | ||||||||||||
|---|---|---|---|---|---|---|---|---|---|---|---|---|---|
| Batch/Online | Information only - it is only possible to add batch events. | ||||||||||||
| Workfile Usage | When this check box is selected, the objects are to be unloaded to an intermediate work file during event processing. When this check box is not selected, the objects are to be migrated directly without using an intermediate work file. This is not valid for Predict objects. For Predict migrations, workfile usage is not applicable. This attribute is protected in some cases, for example, for migration paths Control to Archive, or Archive to Control. | ||||||||||||
| Copy/Move/Include |
|
||||||||||||
| Replace | When this check box is selected, the objects that exist in the destination status are to be overridden (replaced) with the object being migrated. When this check box is not selected, the objects are not to be replaced. | ||||||||||||
| Job | Select the job name for a batch migration from the drop-down list box. | ||||||||||||
| Auto Expansion |
|
||||||||||||
| Expand Status | If you entered an auto-expansion type, enter the name of the expand status. | ||||||||||||
Applymods
The following window appears when you choose the button:

You can select one or more applymods to be used for the current migration event.
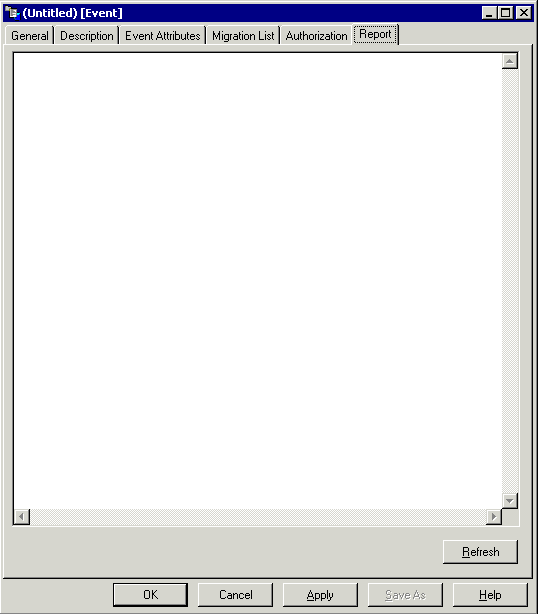
Report
Information on this tab is only available after the migration event has been completed. The report gives a detailed listing of all actions that have taken place and any errors that have occurred in the form of PAC messages.
Finding a Migration Event
You can display a list containing defined migration events. You can either display all migration events (which may take some time) or you can restrict the list by defining the required find criteria.
![]() To find a migration event
To find a migration event
-
From the menu, choose .
Or:
Choose the following toolbar button:
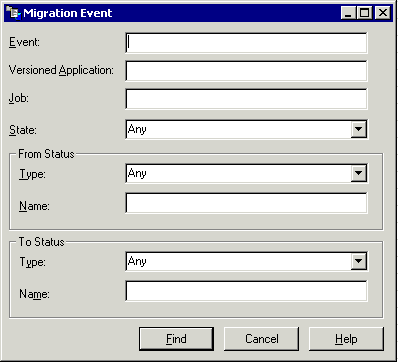
The Migration Event dialog box appears.
-
You can enter one or more of the following find criteria:
Option Description Event You can restrict the list to migration events with specific names. For example, to find all migration events that start with the letters DBA, you have to specify "DBA*". Versioned Application You can restrict the list to migration events with specific versioned applications. For example, to find all versioned applications that start with the letters FH, you have to specify "FH*". Job You can restrict the list to migration events with specific jobs for batch migration. For example, to find all jobs that start with the letters JOB, you have to specify "JOB*". State You can restrict the list to migration events with a specific processing state. For example, to find all pending events, select Pending from the drop-down list box. Type This drop-down list box is available for the From status and for the To status. You can restrict the list to migration events with a specific status type. Select the required status type (such as development or maintenance) from the corresponding drop-down list box. Name This text box is available for the From status and for the To status. You can restrict the list to migration events with a specific status name. For example, to find all status names that start with the letters MYSTAT, you have to specify "MYSTAT*" in the corresponding text box. Note:
If you want to display all migration events, you need not specify any information in this dialog box. You can simply choose the button. -
Choose the button.
The Migration Events window appears, listing all migration events that match your find criteria.
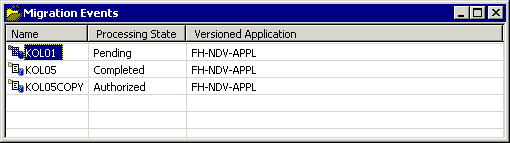
You can now manage (for example, authorize or submit) the migration events as described below.
Authorizing a Migration Event
It is common usage that migration events can only be authorized by specific users with special authorization rights. Therefore, a migration event can only be authorized after the migration event has been created and when its processing state is either "Validated" or "Pending".
It may be possible that you do not have authorization rights.
![]() To authorize a migration event
To authorize a migration event
-
Display the list of migration events as described above under Finding a Migration Event.
-
Select the migration event that is to be authorized.
-
Invoke the context menu and choose .
The Event window appears and the Authorization tab is shown.
-
Specify all required information on the Authorization tab. For detailed information, see the description of the Authorization tab in the section Creating a Migration Event.
-
Choose the button.
The migration event is authorized and its processing state changes to "Authorized".
Submitting a Migration Event
A migration event can only be submitted when its processing state is "Authorized".
![]() To submit a migration event
To submit a migration event
-
Display the list of migration events as described above under Finding a Migration Event.
-
Select the migration event that you want to submit.
-
Invoke the context menu and choose .
A dialog box appears asking whether you are sure that you want to submit the migration event.
-
Choose the button.
The migration event is submitted and its processing state changes first to "Submitted" and then to "Completed".
Opening/Displaying a Migration Event
Two different commands are available for invoking the Event window for a previously defined migration event. For a description of this window, see Creating a Migration Event.
| Command | Description |
|---|---|
|
With this command it is possible to modify the settings of a migration event. Modifications are only possible when the migration event has not yet been authorized, that is: when its processing state is "Pending". When you use the command with an authorized migration object, you are informed that the authorization will be removed if you choose to continue. In this case, the processing state is reverted to "Pending". |
|
|
With this command it is only possible to view the settings of a migration event, it is not possible to modify them. This command can be used irrespective of the processing state. When the processing state is "Completed", it is possible to view the report. See the description of the Report tab in the section Creating a Migration Event. |
Copying a Migration Event
A migration event can only be submitted once. If you want to create a similar migration event, you can copy a migration event.
![]() To copy a migration event
To copy a migration event
-
Display the list of migration events as described above under Finding a Migration Event.
-
Select the migration event that you want to copy.
-
Invoke the context menu and choose .
The Event window appears and you can make all required changes.
-
Choose the button.
A Save As dialog box appears.
-
Specify a unique name for the new migration event and choose the button.
The new event is added to the list of migration events. The initial processing state of a copied migration event is "Pending".
Note:
It may be possible that you have to display the list of migration events once more using different find criteria (for example when all migration events in the current list start with the letters DBA and the name of your new migration event starts with different letters).
Deleting a Migration Event
Migration events can be deleted in all processing states.
![]() To delete a migration event
To delete a migration event
-
Display the list of migration events as described above under Finding a Migration Event.
-
Select the migration event that you want to delete.
-
Invoke the context menu and choose .
A dialog box appears asking whether you are sure that you want to purge the migration event.
-
Choose the button.
The migration event is deleted.