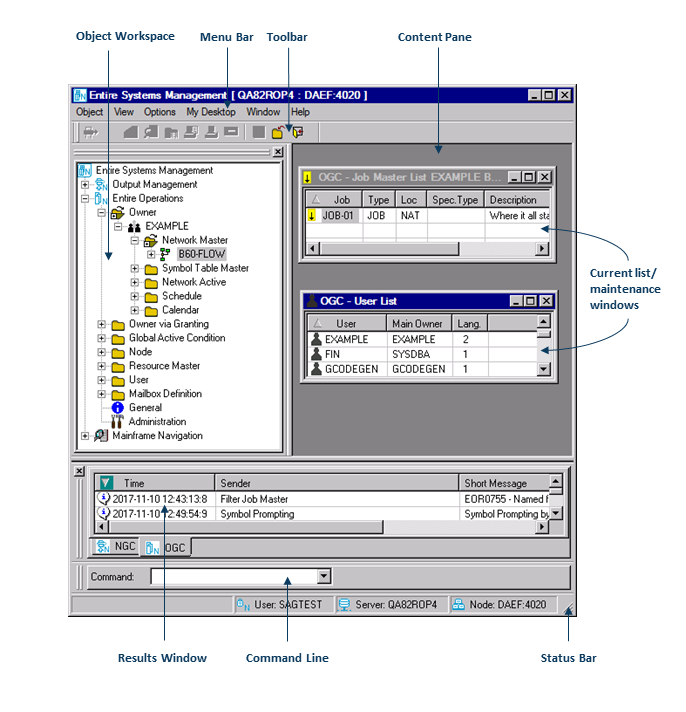
When you start the Entire Operations GUI Client, an Entire Systems Management main application window similar to the example below opens:
The main application window contains the
object workspace
with the Entire Operations tree view on the left and the
content pane on the right. To
modify the size of a pane, move the mouse pointer over the border separating
the panes until the pointer changes, showing two arrows pointing in opposite
directions  . Then drag the
border using the mouse until the panes have the required size.
. Then drag the
border using the mouse until the panes have the required size.
In addition to the object workspace and the content pane, the main application window contains the menu bar, the toolbar, the command line, the result list and the status bar.
Note:
You can hide application nodes that cannot be accessed for different
reasons by using the ESUEX01N user exit routine for the System Automation Tools
server. For details, see the source object ZSUEX01N (supplied for ESUEX01N) in
the Natural SYSSAT system library.
The following topics are covered below:
The Entire Operations object workspace with the tree view is on the left side of the main application window:
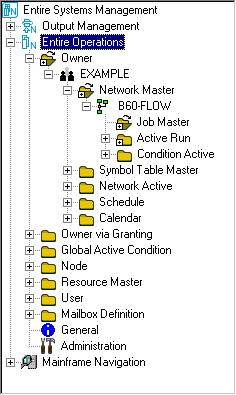
In the object workspace, all available Entire Operation objects are hierarchically listed as the nodes of a tree view. You can create and maintain objects by using the functions provided by the context menu of a selected node or subnode.
![]() To show or hide the workspace
To show or hide the workspace
In the View menu, mark or unmark Object Workspace to show (default) or hide the object workspace respectively.
You can expand or collapse a tree node to list and access all objects contained in a node or subnode.
![]() To expand or collapse a tree node
To expand or collapse a tree node
With the left mouse button, click on the plus or minus sign in front of the node you want to expand or collapse respectively.
An object preceded by a minus sign is fully expanded; an object preceded by a plus sign is fully collapsed.
Or:
Use the Expanded workspace tree option of the
menu item My Desktop > Options
described in My Desktop
Menu.
![]() To navigate within the tree view
To navigate within the tree view
Press UP ARROW or DOWN ARROW to move the selection up or down in the tree view or list view.
Or:
Press LEFT ARROW or RIGHT ARROW to select or
collapse an object in the tree view within the same hierarchy.
Or:
Press ENTER or double-click on an object to perform the
default function for the currently selected object. It also collapses or
selects an object, depending on its current state.
Or:
Press HOME or END to select the first or the
last object within the tree view or list view.
![]() To add an object
To add an object
Select an object for which the New function is available in the context menu.
Press the INSERT key to trigger the New function.
A Create new window opens where you can enter all definitions required to add a new object.
![]() To delete an object
To delete an object
If the Delete function exists for the respective object:
Select an object for which the Delete function is available in the context menu.
Press DELETE.
The selected object is deleted.
The menu bar is at the top of the main application window on the left:

This section covers the following topics:
![]() To choose a menu from the menu bar
To choose a menu from the menu bar
Select the appropriate menu.
A drop-down menu of options appears.
From the drop-down menu, choose the required function and object options.
The following menus are available:
| Menu | Function |
|---|---|
| Object | Filter, list, create, modify, display or perform other functions on the selected objects. Exit the Entire Operations GUI Client. |
| View | Show or hide the object workspace, command line, result list and/or status bar. |
| Options | Select either German or English, modify trace options. Select trace level and trace writing mode (continuous or overwrite), set refresh mode (current level or recursive). See Options Menu for detailed information. |
| My Desktop | Individual desktop settings described in My Desktop Menu. |
| Window | Select the next, previous or required content pane. Close all panes. |
| Help | For a selected Entire Operations node:
Content: Display the main overview of the Entire Operations GUI Client documentation. See also Online Help. About Entire Operations: Display the current version of Entire Operations. |
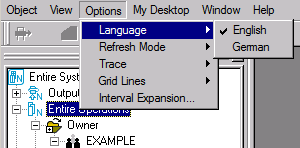
The Options menu provides the following:
- Language
Select the required language:
- Refresh Mode
Set the refresh mode (current level or recursive):
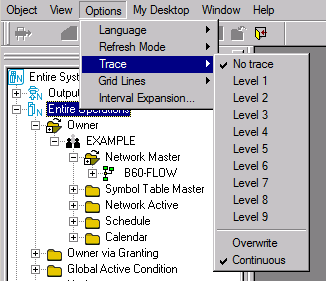
- Trace
Set trace options:
No trace (default): No trace is written to the log file provided that the log file previously used is closed.
Level 1 to Level 9: A trace is written to the log file with different complexity (1 is low, 9 is high) provided that the log file is open from a previous use.
Overwrite: Single log file with name
%temp%/estrace.log. Each time the log is newly started, the file will be overwritten.Continuous (default): Multiple log files with name
%temp%/estrace_date_time.log. Each time the log is newly started, a new file is generated, wheredateandtimewill be replaced with this specific date and time, for example,estrace_161115_082545.log. See also Date and Time Formats.Writing of the specific log file will be started if:
The trace level is set from No trace to a level of 1 to 9.
During startup if the last session is closed with active trace level 1 to 9.
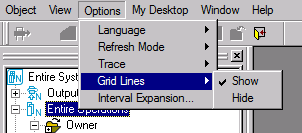
- Grid Lines
Display or hide grid lines for list views.
See also Showing or Hiding Grid Lines.
- Interval Expansion
Applies to Output Management only.
This section covers the following topics:
The options provided by the My Desktop menu are used to customize or reset your Entire Systems Management environment. You can save the tree nodes and/or dialogs opened during the current session and the filters set to use them at the startup of a future session.
The following states can be saved:
Opened dialogs and views;
Expanded tree view of the object workspace;
Defined filters.
You can save the My Desktop configuration in two ways:
Manually with the menu item My Desktop > Catch, or
Automatically on Entire Systems Management shutdown.
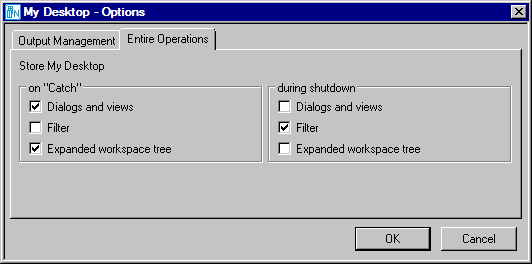
You can choose the save options with the menu item My Desktop > Options.
You can select only one option. Selecting both options (on Catch and during shutdown) simultaneously is not possible. The settings are stored for each user separately in the user profile.
You can manually reset the complete My Desktop configuration or parts of with the menu item My Desktop > Reset. The following options are available:
All
Dialogs and views
Filter
Expanded workspace tree
The menu items My Desktop > Catch and My Desktop > Reset are only enabled when at least one option of My Desktop is saved in Catch mode.
It is possible to temporarily disable the My Desktop functionality on Entire Systems Management startup. This can be useful, when for a current session My Desktop functionality is not required or in case of a My Desktop startup problem. You can store your setup in the user profile for the next sessions by setting the Restore My Desktop option in the Software AG ESM Logon dialog (see Starting Entire Operations GUI Client).
The toolbar is just below the menu bar at the top of the screen.

![]() To perform a function from the toolbar
To perform a function from the toolbar
Choose the appropriate function icon. If an icon is greyed-out, the function is not available for the selected object.
The content pane takes up the right side of the main application window. The appropriate list, window, diagram or dialog appears here, when you perform a function for an object.
The Results window (shown by default) contains a list of messages that report hints, errors and warnings that occur during the session as a result of function processing.

A context menu is available where you can get detailed information for a specific line and can delete one or all messages in the result list.

Click on the button or use the View menu option to close the Results window.
The command line is the Command input field shown above the status bar:

In the command line, you can enter an Entire Operations direct command if you want to directly execute an Entire Operations function.
From the drop-down list box, you can also select a direct command you executed previously during the current session.
For a description of all Entire Operations direct commands available and instructions on issuing a direct command, refer to the Direct Commands documentation.
The status bar is the horizontal information line at the bottom of the main application window:

It can contain the following information:
The current user, server and node
The total number of data records listed in an active window, for
example: 7 data records received from server.
Or:
For an active editor window (example above): the current cursor position (line and column number), the total number of source lines and the edit mode (if OVR is activated, input overwrites existing text).
For a selected item in a context menu: a brief description of the menu
item, for example, the Filter menu item shows
Store filter criteria for a list in the status bar.
A context menu allows you to perform a function on an object listed in the tree view of the object workspace or in the list or diagram view (see Viewing and Maintaining a Job Network Diagram) of an active window in the content pane.
In addition, a context menu can also be available for a name selected in the input field of an active maintenance window, for example, the name of a node, a file or a symbol table.
![]() To choose a function from the context menu
To choose a function from the context menu
Select an object from the object workspace, open a list or diagram window, or select a name input field in a maintenance window.
Click the right mouse button.
Or:
Press SHIFT+F10.
Or:
Press MENU (application key).
The context menu opens.
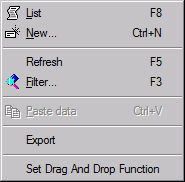
The example above shows the context menu for the Network Master metanode selected in the object workspace.
Choose the required function.
Functions that are greyed-out are not available for the selected object.