
![]() To define messages and exits
To define messages and exits
In the object workspace, select .
Invoke the context menu and select .
A Messages and Exits window similar to the example below opens:
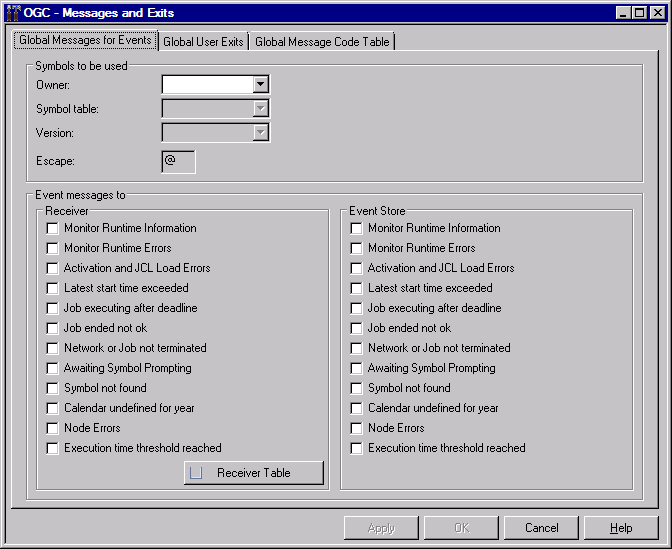
If you want to distribute a message among specified receivers:
In the Receiver section on the tabbed page Global Messages for Events, check all events for which you want to send a message.
The  icon
of the Receiver Table button indicates that message
recipients have already been defined for events.
icon
of the Receiver Table button indicates that message
recipients have already been defined for events.
 indicates that no
recipient has yet been defined.
indicates that no
recipient has yet been defined.
Choose :
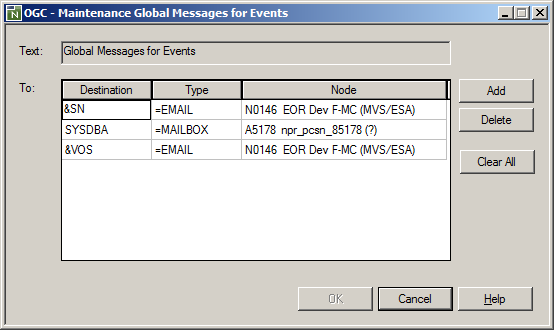
Define all recipients for the selected events and choose OK.
If you want to save a message in the event store of System Automation tool:
In the Event Store section on the tabbed page Global Messages for Events, check all events for which you want to save a message in the event store.
Note:
For further information, see Global Messages for
Events.
Make your specifications on the tabbed page Global User Exits.
The existence of the defined global user exits is checked during the Entire Operations Monitor startup. If at least one of these exits cannot be found, the Entire Operations Monitor performs an immediate shutdown. Each global user exit may exist only once within the whole Entire Operations installation. All global user exits are optional. The exits must reside as Natural objects in any defined steplib.
Note:
For further information, see Global User
Exits.
Make your specifications on the tabbed page Global Message Code Table.
This function allows you to select message codes to be checked by default after each job termination.
Note:
For further information, see Global Message Code
Table.
![]() To export a global user exit
To export a global user exit
Select the Global User Exit tab, select the button and then, select .
The Export Objects window opens. Proceed as described in Exporting Objects in the Import/Export Functions documentation.