Several SNA vendors implement two-tier direct-connect products, including Attachmate and RUMBA. You can configure CONNX to work with these SNA clients, provided that the CONNX client is installed on the same client PC as the SNA vendor client. CONNX detects the supported SNA client stacks automatically.
Select Start, point to Programs, and then select the Attachmate Extra! Personal Client 32-bit or Extra! Office 32-bit Client application. Select APPN Node+APPN Configurator from the menu.
Under Sections, select Node Definition, and then click the Add button. The Local Node tab appears. The values in this tab define the local computer to the network. For this example, the network name is APPN;
the CP (Control Point) Name is CONNXPC. Select Data Link Control under Sections, and then click the Add button.
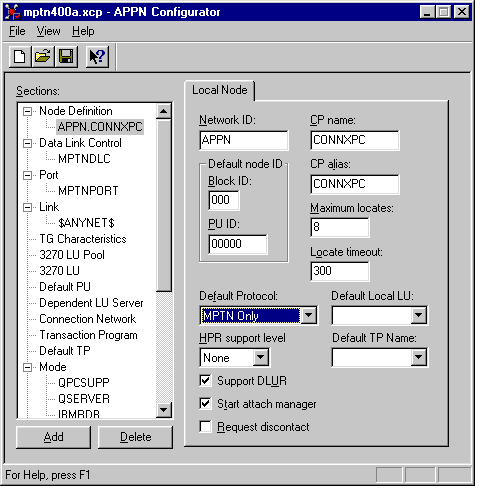
The Add Data Link Control dialog box appears. Select MPTN as the DLC type in the DLC Type list box, and then click the OK button. The MPTN tab appears in the APPN Configurator window. Enter a symbolic name, in this case MPTNDLC.
Select Port under Sections in the APPN Configurator window, and then click the Add button. The Add Port Definition dialog box appears. Select MPTN as the DLC Type in the DLC Type list box, and then click the OK button to return to the APPN Configurator window.
The Port tab appears in the right pane. Representative information is complete.
Select Link under Sections, and then click the Add button. The Add Link Definition dialog box appears. Select MPTN as the DLC link type in the DLC Type list box, and then click the OK button to return to the APPN Configurator window.
The Definition Tab appears in the right pane. Accept the defaults.
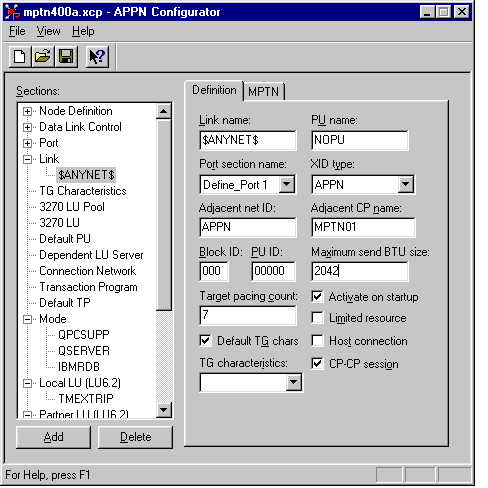
Select the MPTN tab in the right pane. Check the Swap NetID/LU Name in the Domain check box. (not shown)
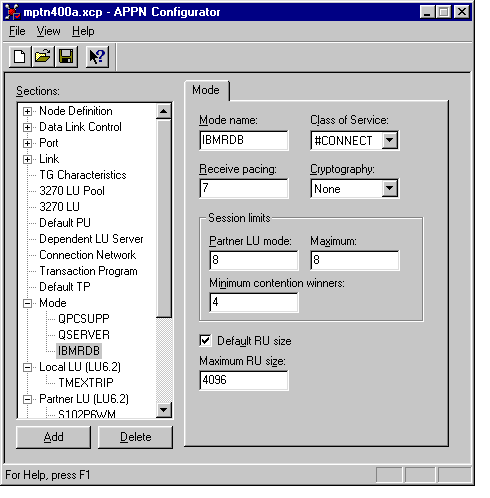
Select Mode under Sections, and click the Add button. The Mode tab appears. Enter the IBMRDB mode name in the Mode Name text box. These values are compatible with the IBMRDB mode definition as displayed by the OS/400 DSPMODD command.
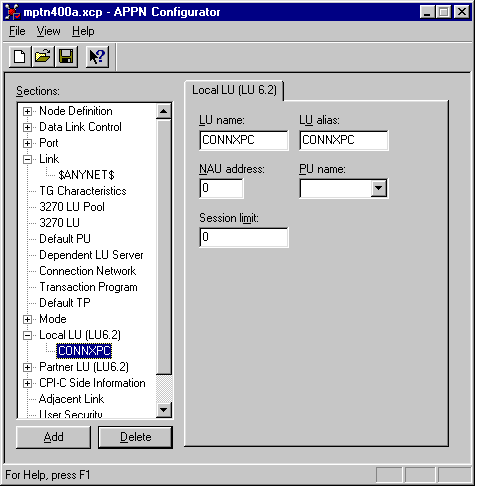
Select Local LU 6.2 under Sections, and then click the Add button. The Local LU (LU 6.2) tab appears. In keeping with previous examples, both the Local LU name and the Local LU alias
are defined as CONNXPC. Note that the NAU address field is 0; this value defines an independent local LU.
Select Partner LU (LU 6.2) under Sections, and then click the Add button. The Partner LU (LU 6.2) tab appears. As in previous examples, the target AS/400 is defined as APPN.CONNX400, as is the owning control point name. The Attachmate MPTN driver maps the dotted TCP/IP address to a netid.luname via the hosts file, which is located in either the \winnt\system32\drivers\etc or the \windows directory for Windows. For example:
012.345.678.901 connx400.appn.sna.ibm.com #Anynet
Note that the host file transposes the netid.luname. The sna.ibm.com suffix is discarded.
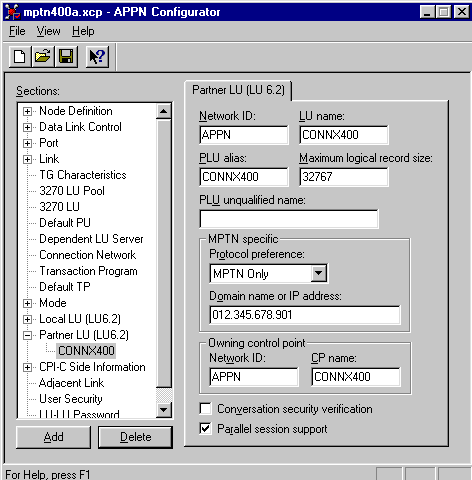
The Attachmate MPTN configuration is complete. These values are used later in the CONNX client configuration dialog box.