Select Start, point to Programs, and then select the RUMBA APPC configuration utility. The RUMBA APPC Configuration window appears. For this example, enter APPN as the network name.
Type the 1- to 8-character name of your client computer in the Control Point Name text box.
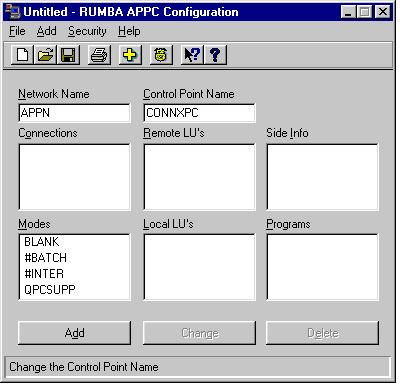
Click within the Connections pane, and then click the Add button. The Select a Connection dialog box appears. Select 802.2 DLC (Token Ring and Ethernet), and then click the OK button.
The 802.2 DLC Configuration dialog box appears.
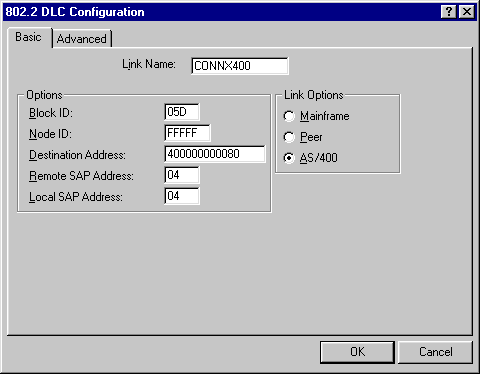
Select the Basic tab. In the Link Name dialog box, type a user-defined 1- to 8-character link name. This example uses a link name of CONNX400. In the Block ID text box under Options, enter the block identification number, which should match the first 3 digits of the Exchange Identifier field, as displayed by entering the WRKLIND command.
Enter the Destination Address of the host machine. The value of this field must match the LAN adapter address for the target system, which can be displayed
via the OS/400 WRKLIND command. If you are not authorized to use this command, ask your OS/400 systems administrator for the
target machine LAN adapter (MAC) address.
In the Node ID text box under Options, enter the node identification number, which should match the last 5 digits of the Exchange Identifier field, as displayed
by entering the WRKLIND command.
Select the Advanced tab (not shown). Accept the default values, and then click the OK button to return to the RUMBA APPC Configuration window.
Click within the Remote LU’s pane, and then click the Add button. The Configure Remote LU’s dialog box appears.
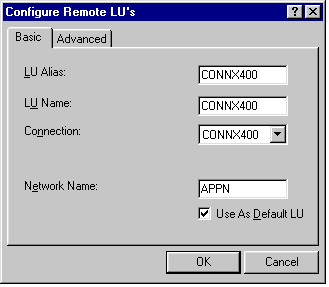
Select the Basic tab. In the LU Alias text box, type a symbolic 1- to 8-character LU alias. In the LU Name text box, type a 1- to 8-character LU name, which should match the local control point name field as displayed by the OS/400 DSPNETA command. Select the previously defined CONNX400 connection from the Connection list box.
In the Network Name text box, type a 1- to 8-character network name, which should match the Local Network ID field as displayed by the OS/400 DSPNETA command.
Thus, the SNA netid.luname is appn.connx400, which should match the target system name as displayed in the OS/400 DSPNETA command output.
Click the OK button to return to the RUMBA APPC Configuration window.
Click within the Modes pane, and then click the Add button.
The Configure Modes dialog box appears.
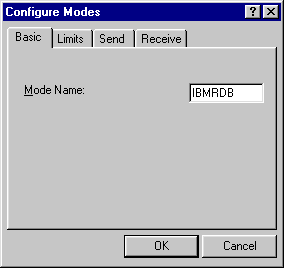
Enter IBMRDB in the Mode Name text box. Select the Limits tab; enter the corresponding information, which should match the information from the OS/400 DSPMODD command for mode IBMRDB.
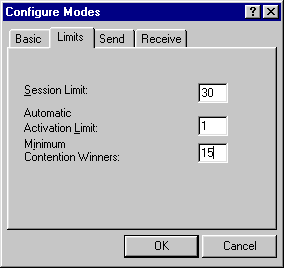
Session Limit = Maximum number of sessions
Automatic Activation Limit = Number of pre-established sessions
Minimum Contention Winners = Number of locally controlled sessions
Click the Send tab, and verify that the default RU length is set to 4096, and that the Pacing Count is set to 7.
Click the Receive tab, and verify that the default RU length is set to 4096, and that the Pacing Count is set to 7. Click the OK button to return to the RUMBA APPC Configuration window.
Click within the Local LUs pane, and then click the Add button. The Configure Local LUs dialog box appears.
Select the Basic tab. For purposes of this example, the client machine (Local LU name) is defined as CONNXPC, and its LU alias is also CONNXPC.
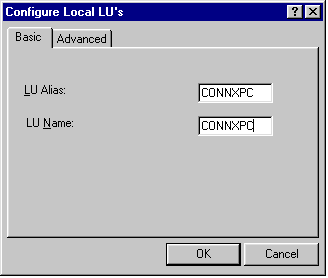
Select the Advanced tab. The default LU Address should be 00. You can make this Local LU the default by selecting the Use As Default LU option. Click the OK button to return to the RUMBA APPC Configuration window.
Select Save on the File menu in the RUMBA APPC Configuration window. You will need the information defined in this file when you connect via the CONNX CDD Import dialog box.