
Datasync offers a way to provide Index Mapping to the designated Transformation. The Index Mapping tab offers the following functionality:
For Single Table Transforms, and Aggregate Transforms, the defaults given might not require any user intervention. The goal of index mapping is to select which indexes will be added to the target table. It is essential that a unique key be created in order for Incremental Synchronization to work. A unique key is not required in cases where Incremental Synchronization is not desired. When these transforms are synchronized, a full synchronization will be performed.
The screen may appear as:

The actions that are available to the user are: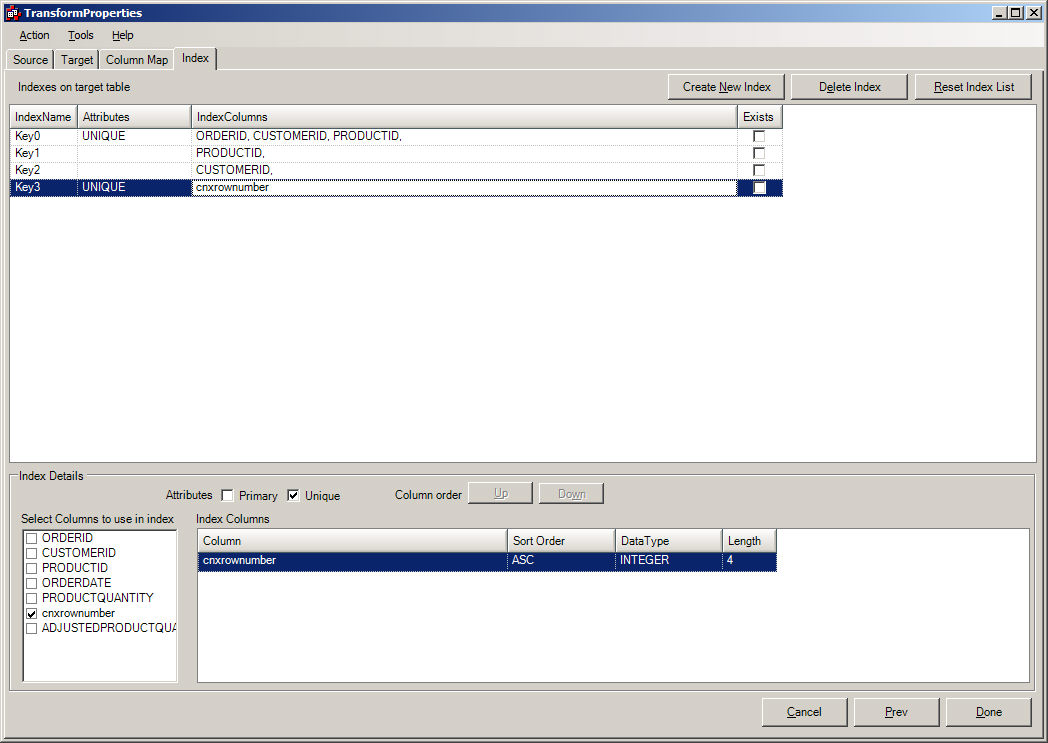
| Create an Index | By doing this, the user will be prompted to select the appropriate columns that make up the index. They will also determine whether it is unique, and the order of the columns (in case it is a compound key). This is caused by selecting the "CREATE INDEX" button. |
| Delete an Index | This will delete the index from the target table. This is caused by selecting the "DELETE INDEX" button. |
| Reset Index List | This will reset the indexes so that they appear as they were before entering this screen. |
Examples:
Deleting an Index
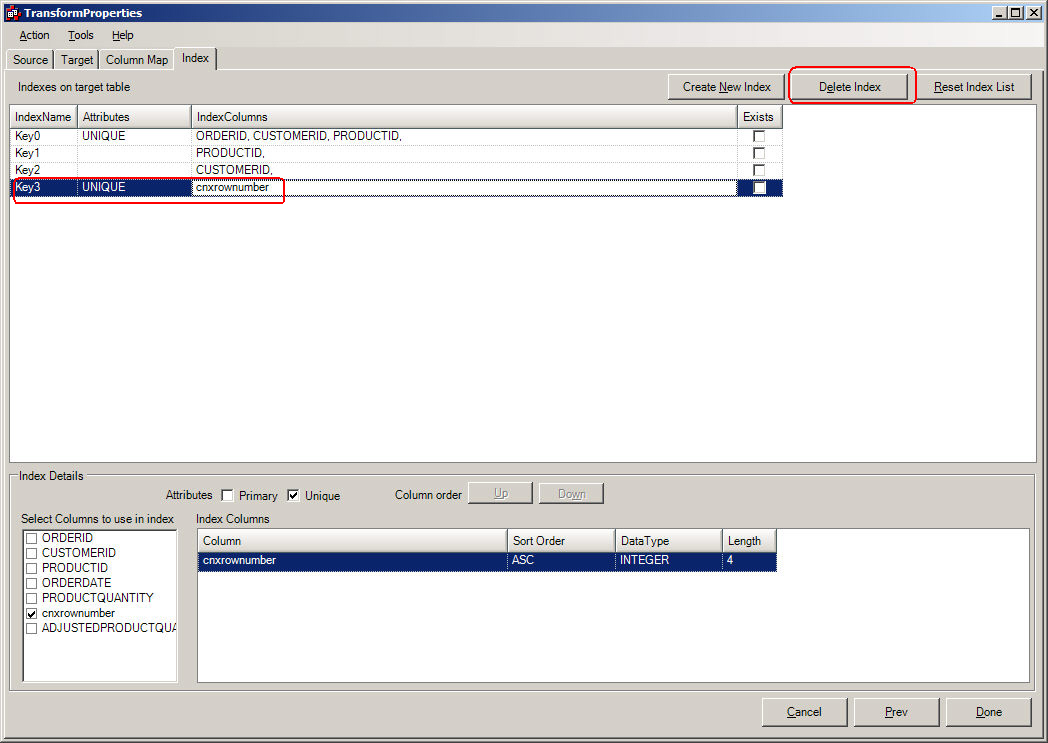
After this has been done, their will be a prompt:

If Yes is the selection, the Index will be deleted.
Adding an Index
By pressing the Create Index Button, an empty row will appear.
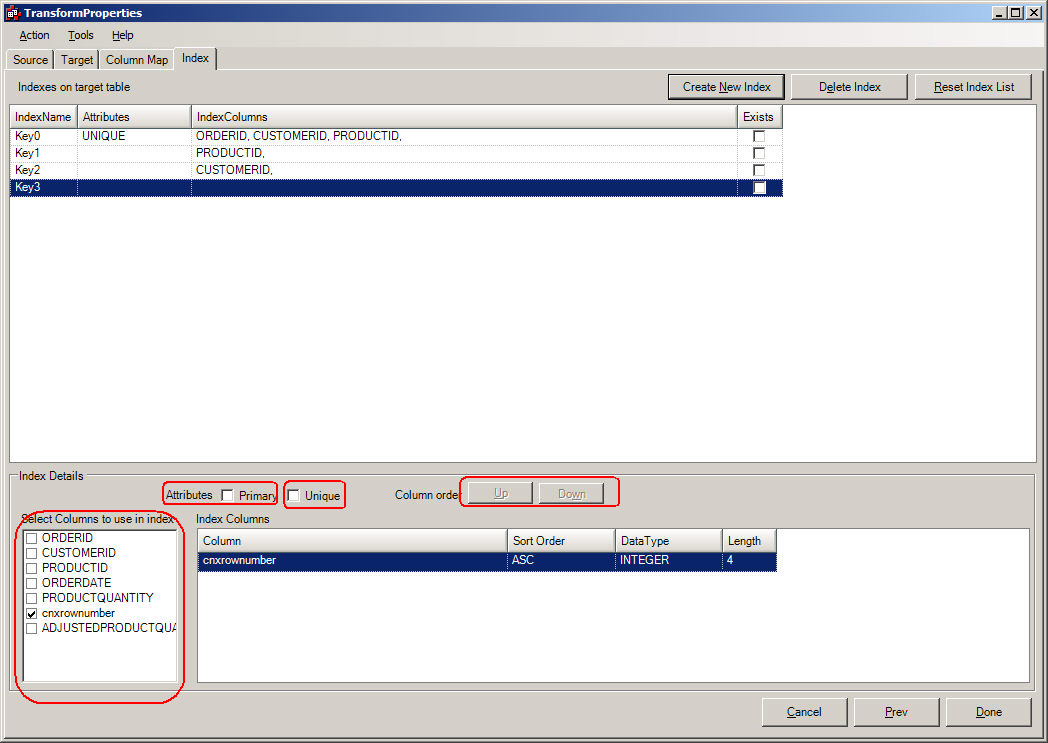
The items that are circled are controls in which the user can influence the column(s) that make up the Index in the Index Columns Pane.
Creating a Unique Index for a Transform that has multiple tables
DataSync attempts to determine all of the possible keys that a transform might have. To do this, it looks at the source feed that makes up the transform, and checks to see whether these column(s) are indexed. If they are, they are possible candidates for target table indexes. It is up to the designer to decide whether the default indexes that are shown are valid for the target feed.
When a transform is composed of more than a single table, all potential keys are extracted from the source table inputs and are listed as defaults. Datasync cannot determine whether the key is unique, due to the fact that it is a "joined" table, and a unique key for a single table, might not be a unique key for the joined transform.
Consider this example:
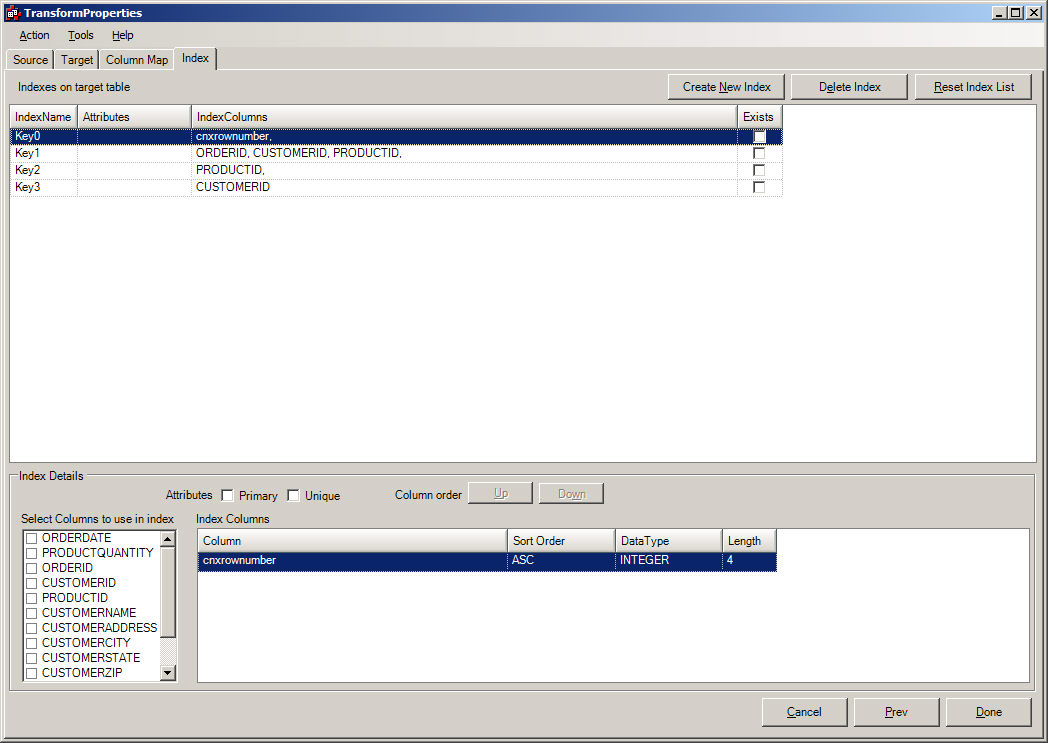
When the Index Mapper screen is reached, it displays all of the indexes that make up this transformation. It has retrieved this index information by displaying all the indexes for:
Orders_cisam
Customers_cisam

None of the Indexes show an unique key (If one existed, it would show up in the Attributes column for the specified key. Therefore, this transformation CANNOT be incrementally synchronized. The designer might intuitively know that a unique key could be composed of ORDERID, CUSTOMERID, PRODUCTID. In fact, the ORDERS_CISAM table recognizes that combination as an unique key. If the designer needs assistance on determining how to make an unique key, the following steps should be followed:
In the two table join, which table is considered the "child" table. This means when they are connected to each other, which table will produce more than 1 occurrence if there are matches. A good way to determine this is to examine the column(s) that join the tables. Which table represents the joined column(s) as an unique key. This is generally the Parent Table (Customers_cisam in this example). Thefore, the other table will be the Child Table (Orders_cisam).
Go to
TOOLS/Launch CONNX Data Dictionary Tool from the Menu bar, and look
for the Orders_cisam table. When you have found this table, look at
the indexes for this table.
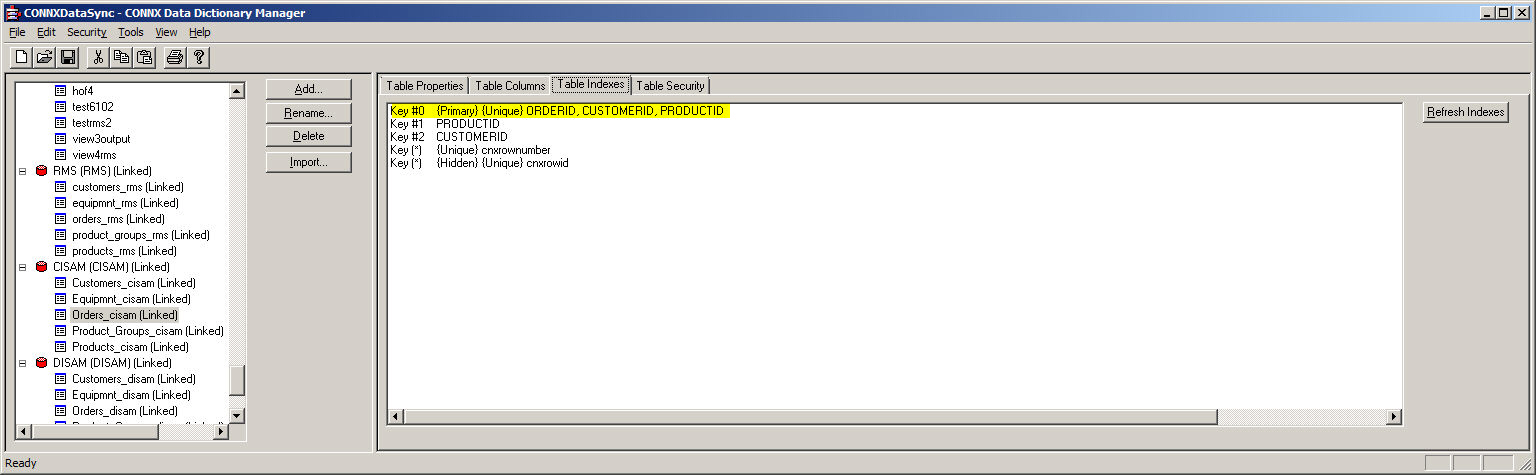
The highlighted Key #0 is unique, which represents the ORDERID, CUSTOMERID, and PRODUCTID. This could be considered a valid unique key.
Go back
to the Index Mapper screen, and complete the Index Transformation.
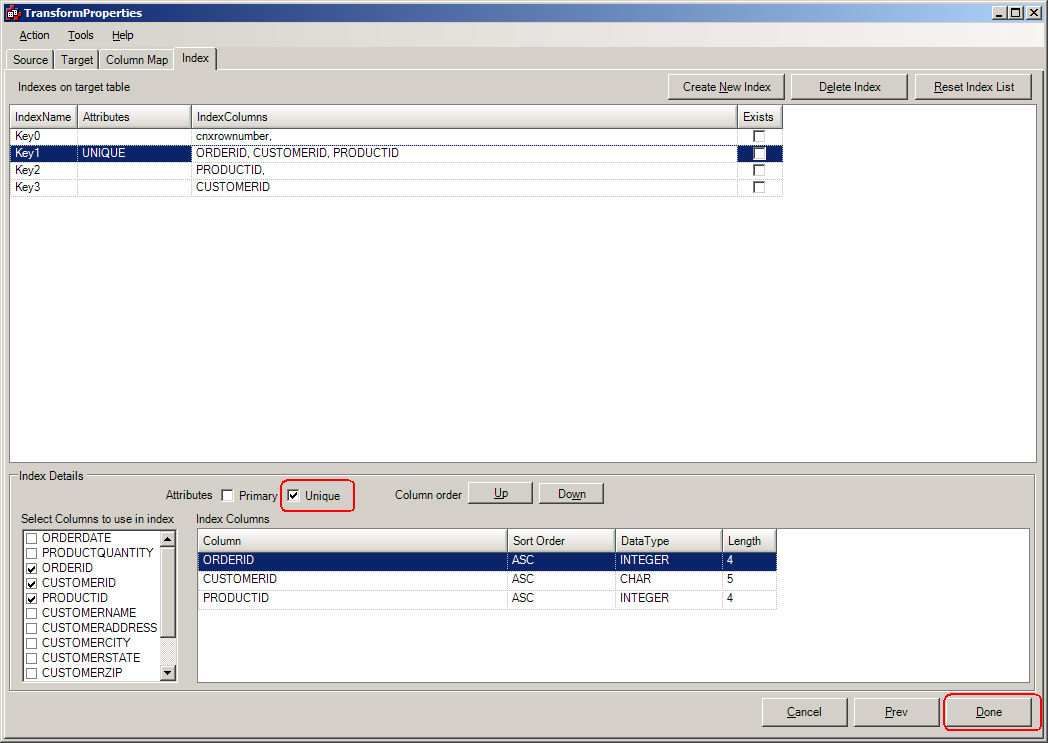
Click
Unique checkbox, and then Click the Done button. This action will
result in the Target Table having a unique key of ORDERID, CUSTOMERID,
and PRODUCTID. The only way to determine whether the key is actually
unique is to run a manual synchronization of this transformation.
If there is a duplicate, an error will result, and the Transformation
should be edited to identify a proper unique key.
Creating a Unique Index
for a Transform that does not show a potential unique or non-unique key
in the default list
When the potential indexes are shown, the user might not see a potential key that could be used as an unique key. The user has two choices:
If the Index is not shown, this could be due to the fact that a column that potentially identifies the unique key was not part of the transformation. Consider the last example. If PRODUCTID was not part of the select list, the key (ORDERID, CUSTOMERID, PRODUCTID) would not be displayed. The designer might have to revise the transformation to include this column.
If
the index is not shown, the user might have to create an unique key
by selecting the CREATE INDEX button from above. This button can be
used in creating all types of keys (unique, composite, non-unique).
To demonstrate this feature, the DELETE INDEX functionality will be
demonstrated. The example will delete the ORDERID, CUSTOMERID, PRODUCTID
composite key, and then add it back. The first step is to click the
DELETE INDEX button. This will produce the screen:
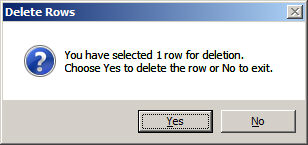
After clicking yes, then the Index Mapper will not see that Index.
Click the CREATE INDEX button.
This
will produce a new display that shows an empty row, which will be
filled in automatically when the designer tells which columns to use.
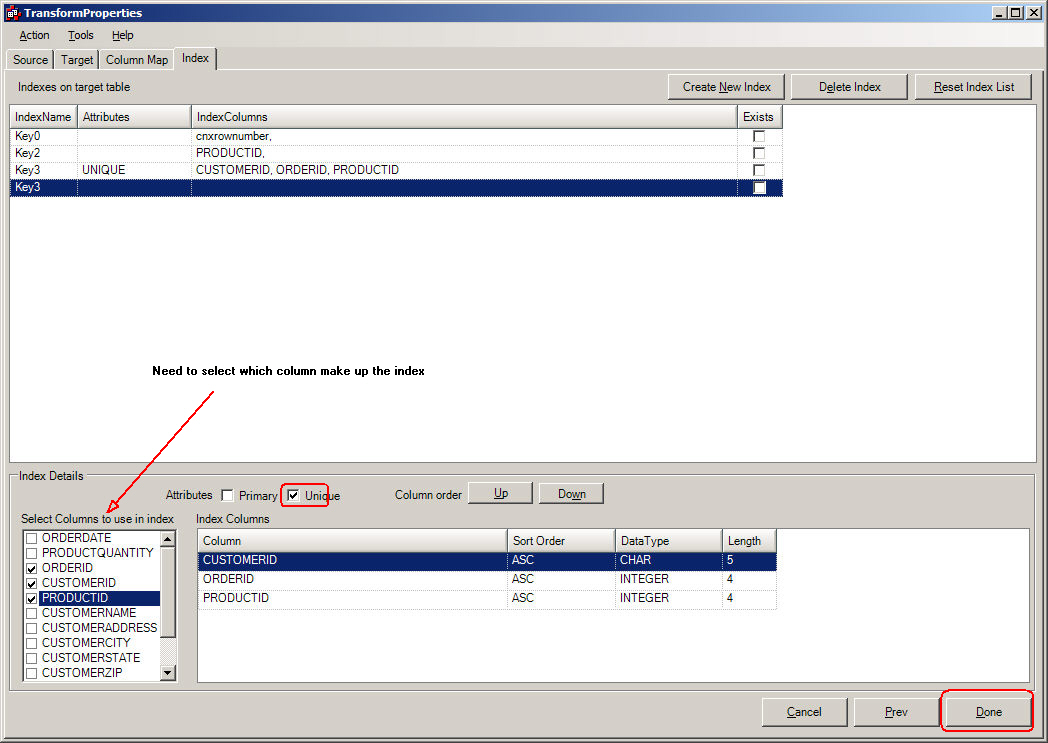
After
filling in the appropriate fields: UNIQUE must be checked in order
to do incremental sync's, the DONE button should be pressed.
After the Index Mapping has been done, the main window will be displayed, and the transformation can be checked by running a manual synchronization on it.