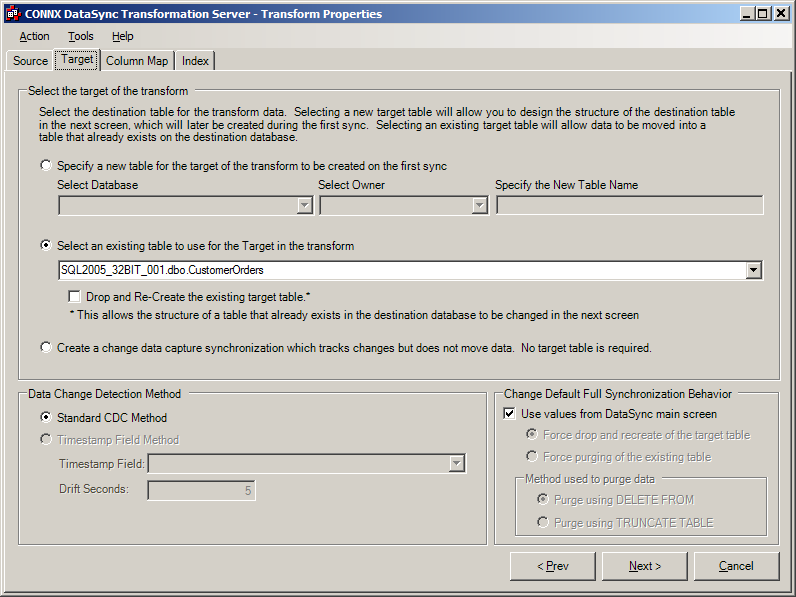
During the creation of the change data capture transform, select the source as before. Then on the Target Tab, check the "Create a change data capture..." button, and press "Next". The column mapping tab will be skipped because there is no target table, the transform is just tracking the changes on the source table. On the index tab, select or specify a unique index if there is one and press "Done".
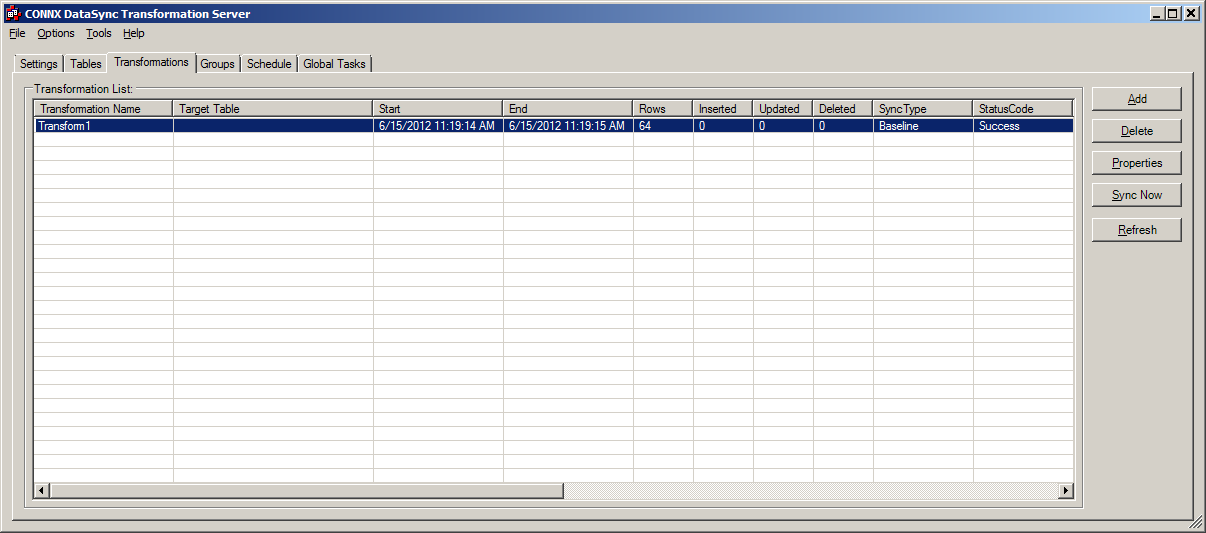
After pressing done you are returned to datasync on the Transformations tab. Select the change data capture transform that was just created and press the "Sync Now" button. The Synchronize window will appear the first time a change data capture transformation is synced, it must create a baseline that future changes will be compared to. To do this select the "CRC Baseline" option, if there is no baseline and "CRC Savepoint" is checked the baseline will still be created. Press OK, the transform will be synced.

As we can see looking at the statistics for the baseline sync, 64 rows were synced, and since this is a baseline, there were no Inserts updates or deletes. In a separate application, in this case I used Infonaut to add, update and delete some rows in the source table. To see those changes, in DataSync with the same cdc transform selected, press the "Sync Now" button again.
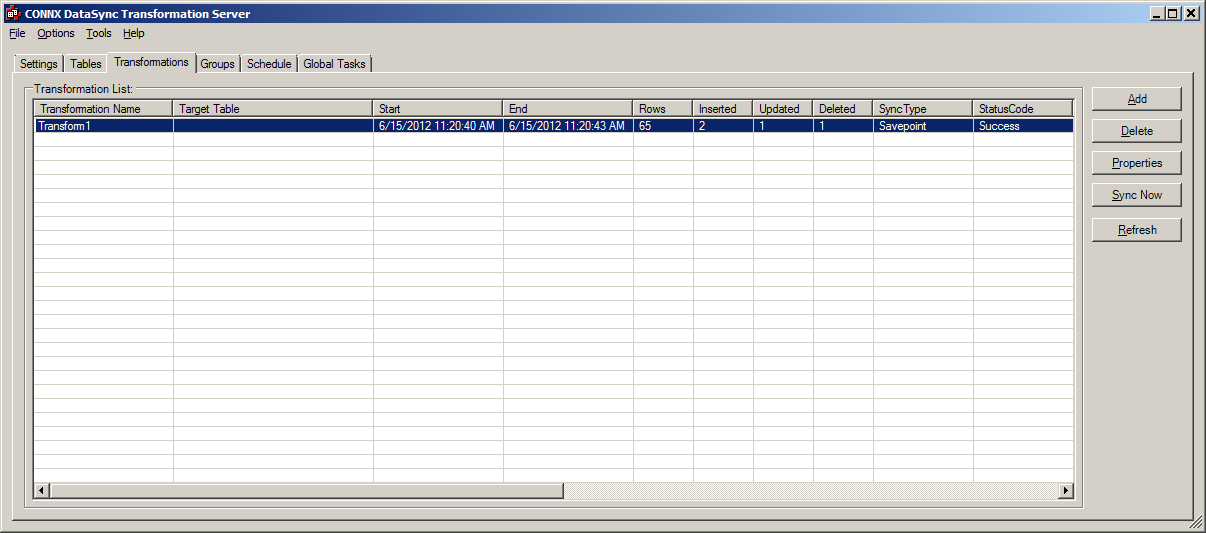
This time in the Synchronize window, leave CRC Savepoint checked. That will tell DataSync to only get the changes from the last time a baseline was run. Press OK and the sync will run and return to the DataSync Transformations tab.

Looking at the statistics on the transform, we can see that since the baseline was run, 2 rows were inserted, 1 was updated and 1 deleted. Now we have the change data that can be used in SQL Server Integration Services.