
Click the Sync Now button to start the synchronization process.
The Synchronize dialog box appears.
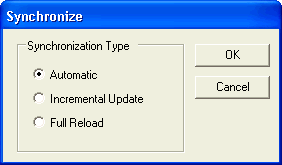
Select the synchronization type, depending on whether an incremental update or a full reload is preferred. The recommended synchronization for the select database is displayed.
Click the OK button to start the synchronization process.
The Processing Estimates screen appears.
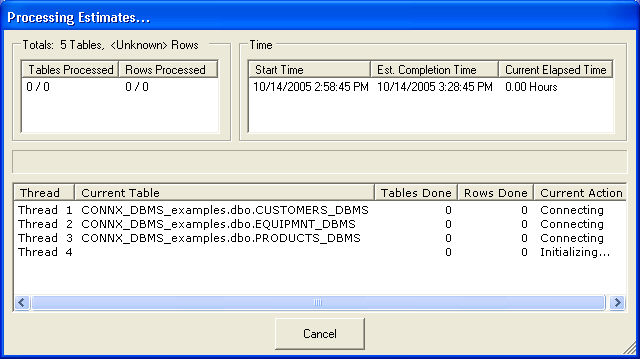
The top left pane in the Synchronizing screen displays the number of tables and rows that have been processed so far. The totals from a previous run (if any) appears as a text string below the pane.
The upper right pane displays the start time, estimated completion time, and time spent so far in synchronization. The estimated completion time and elapsed time change as synchronization progresses.
The slider bar below the left pane gives a visual estimate of time until completion.
The bottom pane displays the variety of thread tasks. The first column contains the number of threads being run, the second column contains the name of the table. The third column contains the number of tables completed. The fourth column contains the number of rows. The final column explains the active function of the currently running thread. When complete, the CONNX Data Synchronization window appears.
If you wish to perform this synchronization on a regular basis, you can create a schedule. To create a schedule, click the
Schedule tab to establish the timing of the synchronization. See To schedule a synchronization task for more information.