
The installation procedure for the CONNX Data Synchronization tool comprises several steps, including pre-installation of CONNX. See the CONNX Installation Guide for more information.
Install CONNX (version
11 and above). The DataSync
module must be licensed and selected before continuing with installation.
Click the Next button.
Important:
If you already have one or more
CONNX licenses, you must select the check box for each database for
which you are licensed. Failure to do so will cause the license for
that database to uninstall.

Once CONNX & DataSync is installed, you may need to restart your computer. Please do so if prompted.
Confirm that CONNXStore Database Server Service and the CONNX DataSync Schedule Service are running by going to the Start menu. Point to Settings, and then click Control Panel. Click Administrative Tools, and then click Services. The Status column for both services should read Started. Close Control Panel.
Click the Start
button and then point to All Programs.
Point to CONNX Solutions,
then point to CONNX and then
click CONNX Data Dictionary.
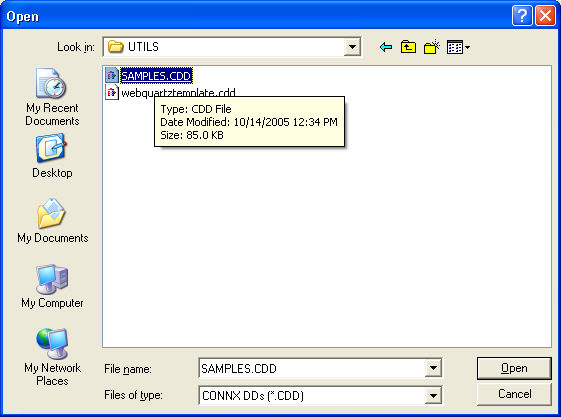
The Open dialog box appears.
Important: Do not run the
CONNX CDD Administrator and the CONNX Data Synchronization Administrator
at the same time since both actively modify the CONNX CDD.
Build a .cdd as described
in the CONNX User Reference Online
Help or CONNX Security and
Administration Guide, or select a .cdd file from the list shown.
Click the Browse button to
locate a .cdd file on the network, or click the Cancel
button if you intend to create a new .cdd in the CONNX
Data Dictionary Manager.
There must be one or more source database in the .cdd file and one
or more target database, although the selected target database does
not need to be populated initially.
Important: You will be using
the same .cdd file as both synchronization data source and target
so it must contain more than one database type.
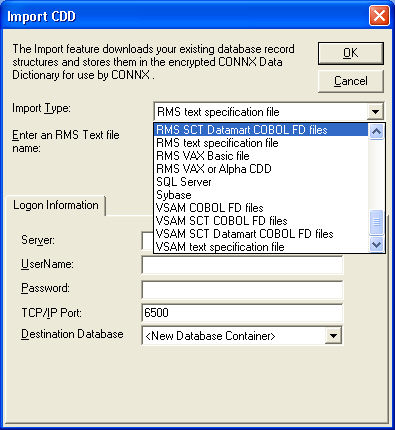
If you are creating a
new .cdd and are importing a target database type, click the Include System Tables check box
in the Import CDD dialog box and then select at least one of the tables
for the targeted data warehouse or datamart.
Verify the CONNX settings
required by the CONNX Data Synchronization Tool. Click Security
on the menu bar.
Verify that Default Access = Read Only and Default Access = None are unchecked.
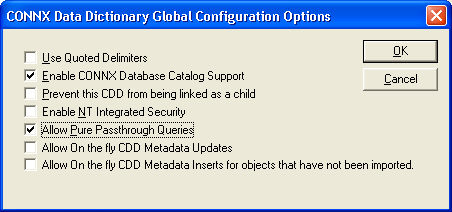
Select Tools
on the menu bar, and then select Options.
The CONNX Data Dictionary Global
Configuration Options dialog box appears. Verify that Enable CONNX Database Catalog Support
is checked and that Allow Pure Passthrough Queries is
checked.
Click the OK button to return to the CONNX Data Dictionary Manager. On the File menu, click Save, and then click Exit.
Click the Start
button, and then point to All Programs.
Point to CONNX Solutions,
point to DataSync, and click
CONNX DataSync Administrator.
The CONNX Data Synchronization tool window appears.
In the CONNX Data Synchronization
Tool, under File on the menu
bar, select Select Data Source.
The CONNX Data Dictionary Selection
dialog box appears.

Enter the name of a CONNX
Data Dictionary (CDD) in the Data Dictionary text box, or click the
Browse button to locate a
CDD, and then click the OK
button.

The CONNX
Integrated Logon dialog box appears. Enter a user id used with
the .cdd you selected, along with a password. Click the Change
button to change the password.
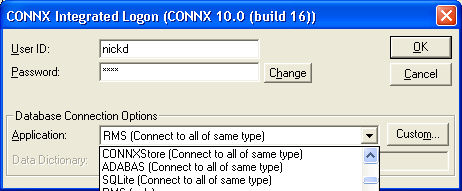
Click the Custom button to customize the databases you wish to use with the CONNX Data Synchronization tool.
The CONNX
Database Logon Selection dialog box appears. Select the databases
you wish to use for synchronization, and then click the OK
button.
Note: CONNXDataSync may appear in the list of database selections depending
on your initial setup of CONNX. Select it along with your source and
target databases. If CONNXDataSync does not appear, it is automatically
created.

Click the OK button in the CONNX integrated logon dialog box to continue. If you add new databases to a .cdd during synchronization tasks, you must log on to the database server.
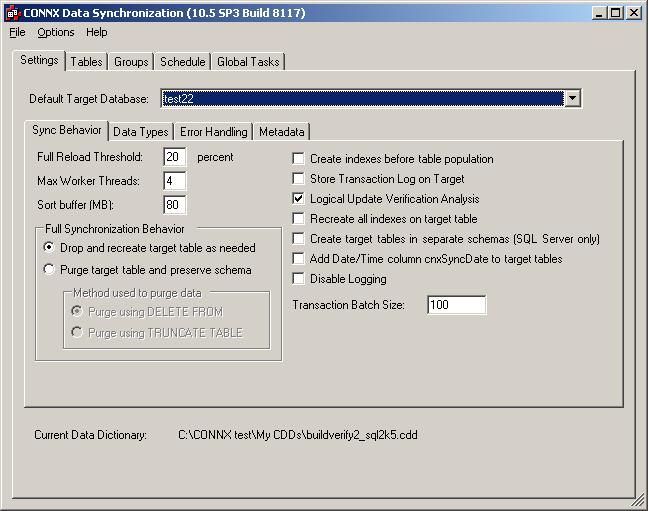
The CONNX
Data Synchronization Tool appears. In the Settings
tab, click the Sync Behavior
sub-tab. Select a target in Default
Target Database.
The Target Database is the location in which you intend to create a
data warehouse or repository that contains copies of data tables from
the other database systems in your CONNX CDD. For instance, if you
wanted to duplicate your VSAM files in an Oracle database, the Oracle
database is your Target Database.
Enter a number in Full Reload Threshold text box.
If more than this percentage of rows has changed in a table, you must
perform a full reload instead of an incremental update on your data.
Normally, this number should be fairly small, in the range of 3 to
20 percent. The actual value that is best for your system depends
on many variables and offers an opportunity for tuning your system
to its maximum performance levels.
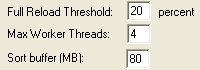
Enter a number in the
Max Worker Threads text box.
(Recommended = 4 threads per CPU on the Data Sync machine) The maximum
number is the number of threads on the PC (and also the number of
servers on the host database server) that can be used when processing
the synchronization. For example, if there are 1000 tables of the
same size, 1 out of 3 threads would process about 333 tables each.
Increasing the number of threads uses more resources on the PC and
on the host database server, but can also increase performance.
On the other hand, increasing the thread count to a level that is too
high can severely impact performance and possibly cause failures.
It is strongly recommended that you do not exceed ten threads per
CPU available on the Data Synchronization machine and also to consider
the system’s total memory, since each thread can allocate large blocks
of memory when processing large tables (see Step 33 for more information).
In order to test the effects of multiple threads, create a group and
then synchronize the group.
Tip: A few tests with different
threading values can determine a good level for Max Worker Threads
for your system through examination of the group synchronization time.
In the Sort buffer text box, enter the maximum amount of memory used to sort files per thread. The number should reflect the amount of memory available on the machine used as the sorting buffer and the number of threads used. The actual amount used may be much smaller if the tables being synchronized are small. The default sort buffer of 80 megabytes may be compatible with most systems that follow our recommended guidelines for minimal machine configuration.
In the Full
Synchronization Behavior combo box, select the Drop
and recreate target table as needed radio button to perform
that function. If, for example, the schema has been altered on the
source table, the target table reflects the changes. This feature
also makes it faster to drop and recreate data than to delete rows
and refill them. This setting is the default.
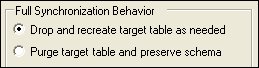
Select the Purge
table and preserve schema radio button to delete all the data
in the target table and repopulate the data by insertion. This method
works to the advantage of people who make custom modifications to
the target schema. Preserving the schema allows the modifications
to be saved. However, the system is no longer “self-healing” to schema
changes on the source table; the only way a new copy of the table
is created on the target service is if the table does not already
exist on the target.
There are two options for Purge target table and preserve schema:
Purge using DELETE FROM
Choose the Delete feature when all deletes are logged, and can be rolled back in case something goes wrong.
If there is an error on a Truncate command, the database is left in the state of the error, as the command is permanent. If a Delete command has problems, the database rolls back to the previous state on transaction failure.
Purge using TRUNCATE TABLE (for target servers where truncate is available).
The CONNX Data Synchronization tool may perform a Truncate more quickly than a Delete. Choose Truncate if:
You do not want to delete indexes in the target table that are not in the source table. This could happen if the target table is used for specialized reporting.
or
Your security policy does not allow you to drop tables.
Truncate does not activate
triggers, referential integrity constraints, or other database restrictions.
Since database integrity is maintained on the source database for
the synchronization, choose Truncate if performance is a concern: .
To reorder the synchronization
process so that indexes are created first, click Create
indexes before table population. This can have either a negative
or positive effect on performance and space requirements of a full
synchronization, depending upon the database system. For instance,
if the target is Oracle, it will be faster to create the indexes after
the load of the data. Inserting rows with an existing index updates
the indexes on every insert, whereas creation of an index at the end
of the synchronization is somewhat more efficient.
On the other hand, with RMS as the target system, if indexes are created
as the synchronization completes, then two entire copies of the file
will exist on the target system, as a sequential file is converted
into an indexed file with a CONVERT/FDL command. The best choice depends
strongly on the type of database system you are using and on the amount
of resources available for performing the synchronizations.
To create a transaction
log which is stored in the target database, click the Store
Transaction Log on Target check box. If this option is not
selected, the transaction log is not created. A transaction log is
a table that contains the unique index information for each row that
was inserted, updated, or deleted along with a flag that tells what
sort of action was performed on each row. By using a transaction log,
systems that need an audit process can tell exactly what was changed
and what sort of operation was performed on the data. It should be
noted, however, that the creation of a transaction log may slow synchronizations.
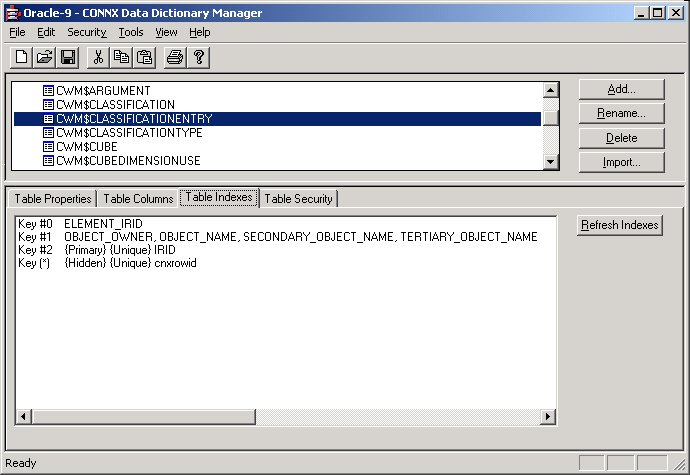
In the following example, an Oracle table “CWM$CLASSIFICATIONENTRY”
was synchronized.
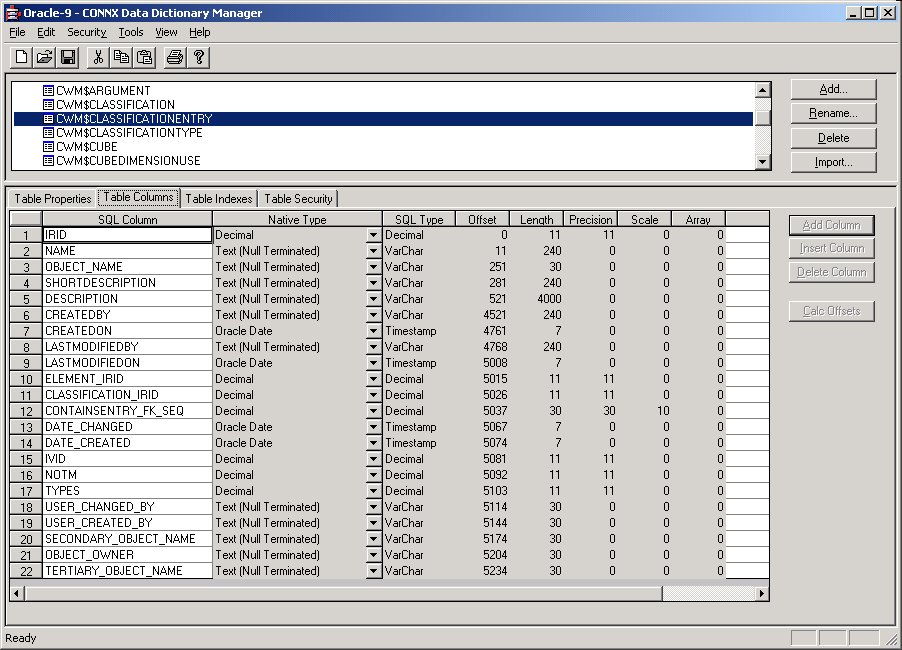
A unique ID, IRID, appears on the Table Indexes tab.
The table is successfully synchronized and appears in the CONNX Data
Synchronization tool on the Tables tab.
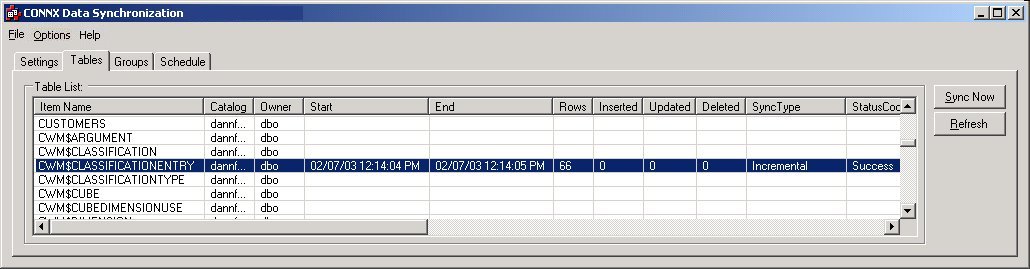
In fact, two tables have been created on the target system, CWM$CLASSIFICATIONENTRY
and CWM$CLASSIFICATIONENTRY_ACD, which contains the index information
and operation type of all of the adds, changes, and deletes performed
on the target table.
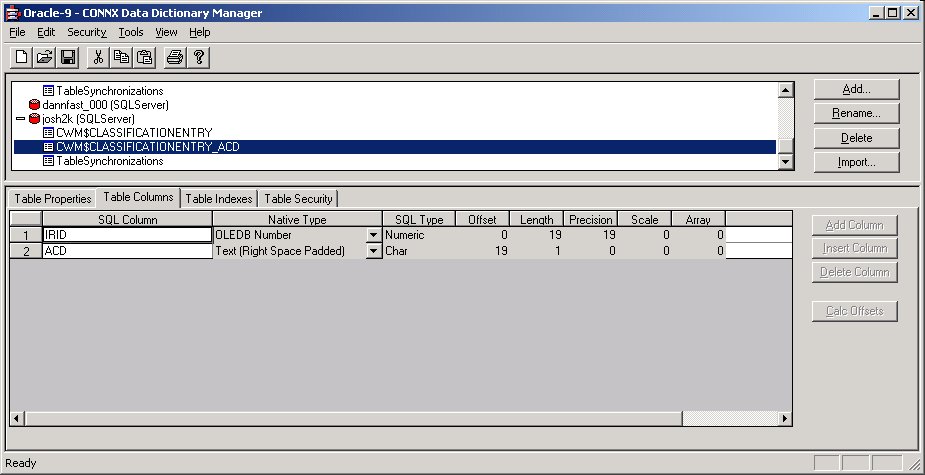
If information has been inserted, then column ACD will be equal to
‘I’. If information has been changed by an update of an existing row,
then column ACD will be equal to ‘C’. If information has been deleted
from the source table, then column ACD will be equal to ‘D’.
In addition to the transaction table, a comprehensive table called
TableSynchronizations in the target database tracks what has been
happening for all of the tables being synchronized.
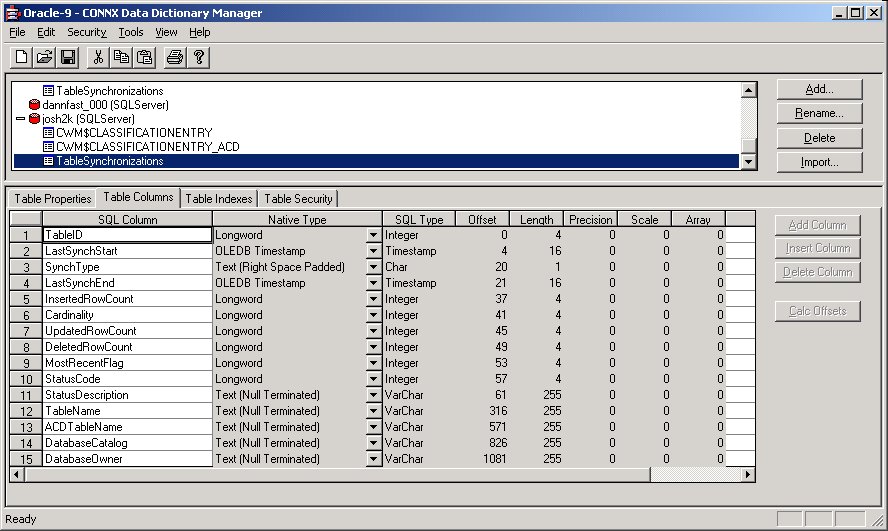
The following definitions apply to the above example:
• TableID is an INTEGER that uniquely identifies each table.
• LastSynchStart is a DATE that tells when the synchronization started.
• SynchType is a single CHAR that tells if the synchronization was full or incremental.
• LastSynchEnd is a DATE that tells when the synchronization ended.
• InsertedRowCount is an INTEGER that tells how many rows were inserted for the synchronization. It will be zero for a full synchronization. For a full sync, the number of rows processed is stored in the cardinality field.
• Cardinality is an INTEGER that tells how many rows are in the synchronized target table.
• UpdatedRowCount is an INTEGER that tells how many rows were updated for this synchronization. It is zero for a full synchronization.
• DeletedRowCount is an INTEGER that tells how many rows were deleted in the target table for this synchronization. It is zero for a full synchronization.
• MostRecentFlag is an INTEGER that is reserved for future usage. Currently, it is set to 1.
• StatusCode is an INTEGER that indicates success or failure. A value of zero indicates failure. A value of -1 indicates success.
• StatusDescription is a VARCHAR(255) field that describes any errors that occurred. A more detailed message is found in the data synchronization log.
• TableName is a VARCHAR(255) field that contains the name of the table synchronized.
• ACDTableName is a VARCHAR(255) field that holds the name of the key data transaction log. In the above example, for TableName CWM$CLASSIFICATIONENTRY, this field contains the value “CWM$CLASSIFICATIONENTRY_ACD”.
• DatabaseCatalog is a VARCHAR(255) field that contains the name of the database catalog for the synchronized table.
• DatabaseOwner is a VARCHAR(255) field that contains the name of the database owner for the synchronized table.
Logical Update
Verification Analysis is used in conjunction with the Store
Transaction Log on Target option. For each change verified,
the target table transaction log will change the ‘C’ (for changed)
in the ACD column of the transaction log to ‘V’ (for verified). If
Logical Update Verification Analysis is selected, for each row that
has had a change detected via CRC differences, a column by column
search is performed to confirm a difference.
This option should be selected in rare cases where the physical bits
in the data have changed, but the actual meaning remains the same.
Some examples might include the following:
1. Multiple physical values with different internal representations but the same physical meaning, such as:
a. Positive and negative zero on one’s complement machines.
b. Positive signed and unsigned decimal numbers (e.g. signed +1 and unsigned +1 have the same meaning but different internal representation).
2. Insignificant changes. If (for instance) the very last bit of a floating point number changed in the mantissa, the actual meaning of what is stored may not really have changed. For instance, someone might have edited a field that contained the value “2.1” as a floating point number. Though no changes were made, the value was saved again into the database. It is possible that the number will differ slightly due to the nature of floating point. A comparison shows that both the source and target numbers are intended as 2.1, but a CRC comparison shows that some bit has changed and consider them as completely different.
3. Masked values. If (for instance) a null-terminated string is stored in the source database, anything after the null string terminator is a physical difference that causes a different CRC. But the data stored may be the same. For instance, the string of bytes ‘D’, ‘o’, ‘g’, 0, ‘f’, ‘o’, ‘o’, ‘d’,0 will be interpreted simply as “Dog” since a null terminator (zero) follows the ‘g’. The string of bytes ‘D’, ‘o’, ‘g’, 0, ‘f’, ‘i’, ‘g’, ‘h’, ‘t’, 0 will also be interpreted simply as “Dog” since a null terminator (zero) follows the first ‘g’. Anything beyond the null terminator has no meaning as far as the database is concerned. But CRC values will indicate that there has been a change.
Logical Update Verification Analysis should only be used in special cases, where a careful analysis has shown that more data is being processed than is necessary. Selecting this option makes the synchronizations run more slowly, since for every change detected, every single column in the record is compared from source to target — one a column at a time. If a post-process step that is very slow must be performed on the changes (for example some expensive ETL operations) then logical update verification analysis might be worthwhile.
By default, only the unique index used to perform incremental updates is created on the target table after synchronization. Check the Recreate all indexes on target table check box to recreate all indexes from the source table on the target table.
If you are using SQL Server
as a target database, click the Create target
tables in separate schemas (SQL Server only) check box
to create target tables under different SQL Server owners. DataSync
creates a SQL Server user for the purpose of creating tables with
identical table names from different source catalogs. For example,
if you want to synchronize both the test and production version of
a table into a single SQL Server database, CONNX fully qualifies the
target name (product.table or test.table) so that there is no name
collision.
![]()
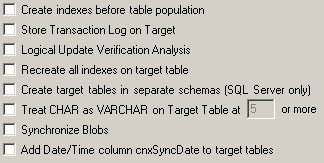
On the Settings
tab, click the Data Types
sub-tab. To reduce the amount of space required by the synchronization
of source files using CHAR () fixed-width data types, click the Treat
CHAR as VARCHAR on Target Table check box. You can change
CHAR () fixed-width data types to VARCHAR data types by entering the
length in the text box. In this example, CHAR () fixed-width data
types of five or more characters are automatically converted to VARCHAR
data types. Determining this threshold is very important, since very
small VARCHAR fields waste more space than they save. They are also
less efficient on some database systems when performing certain tasks,
such as indexing.
![]()
Continue with the synchronization processes as described in To select a CONNX Data Dictionary for the data synchronization process.