
SOA Gateway enables physical assets (tables, files, etc.) to be exposed as "atomic" WebServices, which is useful when direct access to these resources is required. However, it is often the case that a single physical table or file does not represent an object that is of use in a business sense. A typical business function will generally consist of data from more than one physical file/table/...
For this purpose, SOA Gateway introduces the concept of Business Data Views (BDVs). This will enable the building of "compound" services around logical views of data, combining the relevant elements from the underlying physical assets. This way WebServices can be created to list, add, update, delete, get and select objects that will represent data in a business sense as against the physical view.
All businesses have enormous amounts of data which is exposed via various interfaces and applications, however, rarely, if ever, does one application, one database table or one file represent a complete piece of business related data. The reason for this is straightforward in that most IT projects tend to focus on the ‘data model’ and the efficiency of getting at data as the primary driver when designing such systems. This is still core to system design today to ensure that the physical architecture can handle the loads anticipated for a given system. However, it generally means that new projects must deal with data models that are sometimes hard to understand from a business perspective. SOA Gateway technology now offers the ability to map the existing data and business logic assets into composite views that reflect the business view of the data. This means that newer projects can deal with business related concepts and objects when viewing or updating the core assets.
Taking a very simple example where an organization has two tables or files containing information about the owner of a vehicle and the vehicle details itself. Assume the data model here is as follows:
The Owner Table or File (The "Personnel" File)
Note:
This contains details about the owners of a vehicle. For the
purposes of this illustration, we will assume the following fields:
The owners unique ID which identifies the owner and will be referred to as the OID in this example. This is the primary key for this table/file.
The owners First Name which will be referred to as ‘Name’ in this example.
The owners surname which will be referred to as ‘Surname’ in this example.
The Vehicle Table or File
Note:
This will contain details about the vehicles that are owned by
owners. For the purposes of this illustration, we will assume the following
fields:
The owners unique ID which identifies the owner and will be referred to as the OID in this example. This is the foreign key for this table/file which links it to the "owner" file.
The vehicles registration number which will be referred to as ‘Regnum’ in this example. This is the primary key for this table/file.
The vehicles manufacturer which will be referred to as ‘Make’ in this example.
The vehicle’s model will be referred to as ‘Model’ in this example.
In the following sections, the traditional approach is discussed and the issues there are with such an approach followed by the SOA Gateway approach.
In order to access and update this data, applications must understand that there are two different tables or files and must understand the association between the files. They must also understand the requirements to keep these files consistent. In this case, when an owner is added with a OID number, the vehicles file must have a vehicle entry with that particular OID number. The access will normally be direct as per the following diagram:
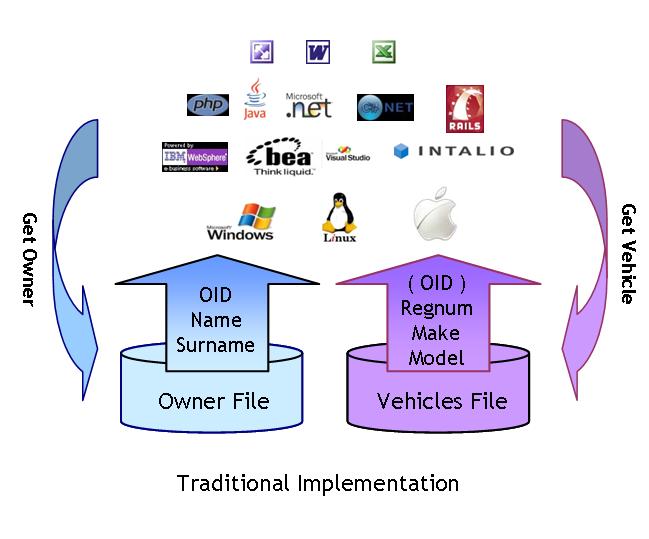
There are a number of issues with this scenario:
For each request to get the data there is a requirement to make two requests to the back end database across what will normally be a busy network.
The application needs to understand that the ‘OID’ returned is used to get the associated entry in the Vehicles table/file. While in this case, the OID number may be of value to the client, it may not be necessary for the client to see or know this. In many cases, keys are used simply as a means to locate a unique record and have no value outside the database itself. However, these must still be understood and manipulated by the programmer.
For traditional access, software must be installed on the client system to access the back end databases. This costs time and money to keep up to date and, in many cases, has additional license costs associated with it.
If the data model is not clear to the programmers developing on the client side, the databases may end up with inconsistent data.
If the data is in multiple databases, there may be an issue with synchronizing updates to those databases unless an infrastructure supporting the two-phase-commit (2PC) protocol is available and in use.
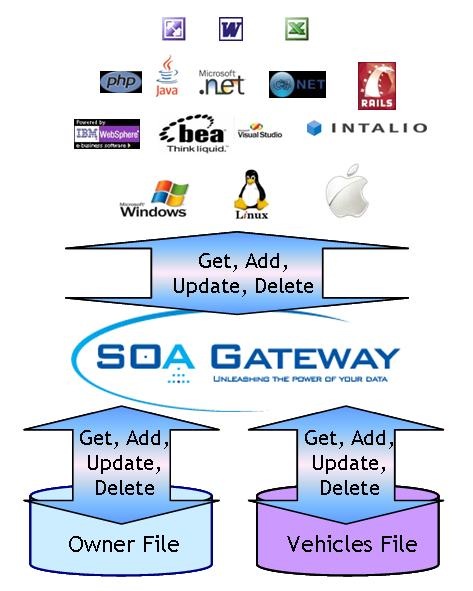
This scenario offers a number of substantial advantages:
Only one trip to the back end system is required to retrieve or update the composite object.
The programmer does not have to know or understand internal links between tables or files and just has to deal with the fields and columns of relevance to the application.
SOA Gateway needs to be installed on the server where the data is resident only, thus no software has to be installed or maintained on the client system apart from the client business logic itself.
The owner of the data defines the model and thus programmers always deal with the business data view and need no understanding of how the data model looks in the background.
SOA Gateway can take care of any transactional issues with data from different databases using the transactional capabilities of the backend system. This requires two-phase-commit (2PC) infrastructure to be present on the system, SOA Gateway will interface with it to guarantee transaction integrity.
A BusinessDataView based WebService is created in SOA Gateway based on existing "physical" WebServices. The physical service is the service that is created to directly expose a table, file or piece of business logic. This means that existing services defined to SOA Gateway may be reused in one or more Business Data Views. The Eclipse Control Center supplied with SOA Gateway is used to create the business data view as illustrated in the following diagram:
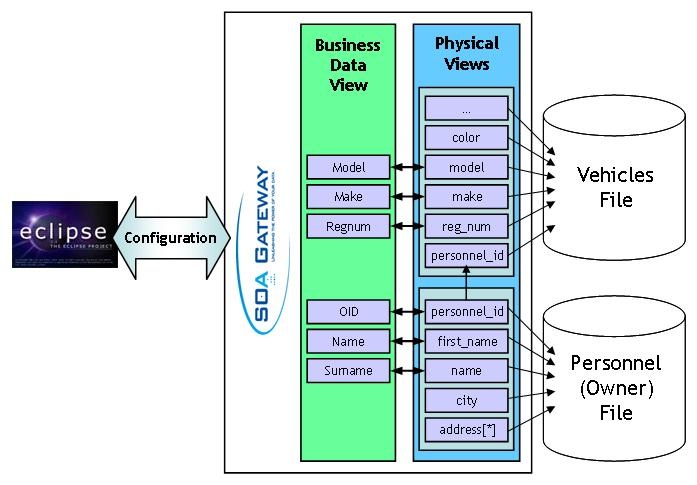
As can be seen from the above, the BusinessDataView is built as a separate entity to reflect the "business entity" and is then linked to the physical data views. Some notes about the concepts:
Only the fields / columns that are required in the BusinessDataView must be selected from the physical view. In the example above, city and address in the Owner (Personnel) table/file and color (and others) in the Vehicles table/file are not used in the BusinessDataView.
Fields or columns in the physical view may be passed and parsed internally though not form part of the actually BusinessDataView. This is useful for passing internal keys to data which can sometimes be meaningless values simply to find data and thus have no value in being shown to a user.
This is all achieved using a GUI provided as part of the Eclipse Control Center with SOA Gateway.
Once the BusinessDataView Service has been created, it can be used in precisely the same way as any other SOA Gateway WebService. If the service is called ‘OwnerVehicle’ for example, the WSDL for the SOAP requests may be returned using the following URL:
http://<host>:<port>/OwnerVehicle?WSDL
This WSDL will expose the standard database CRUD services offered today for physical services by SOA Gateway namely ADD, DELETE, UPDATE, GET, LIST and the various SELECT methods. In the same way, to use the REST based interface, the following request will return the BusinessDataView for the Owner id ‘12345678’:
http://<host>:<port>/OwnerVehicle?F=GET&OID=12345678
All owners with an ID starting 1234 could be listed using the following URL:
http://<host>:<port>/OwnerVehicle?F=LIST&OID=1234*
The following subsections show how the BusinessDataView Service processes the various types of requests.
SOA Gateway can make this sample BusinessDataView object available as follows using the standard REST or SOAP Based access available with SOA Gateway:
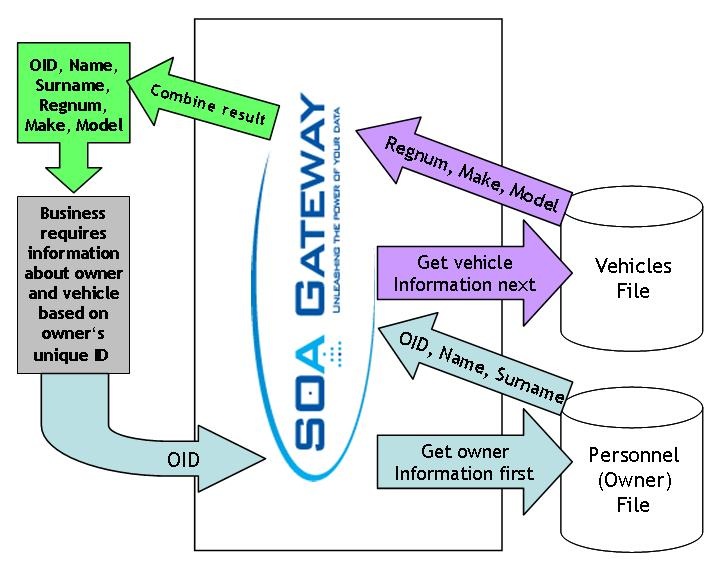
Some notes about the above:
If the key for the vehicles file is not the same as the input key (here: OID) for the owner file it may be derived from data on the owner’s table/file.
The OID only appears once in the output but it doesn’t have to appear at all.
Any data from either table/file may be returned as part of the BusinessDataView object
Using the SOA Gateway LIST functionality, it would be possible to get a list of owners and their vehicles using this service, or all vehicles for a single owner.
When a new owner and vehicle(s) must be added or updated, SOA Gateway can achieve this as one standard REST or SOAP request:
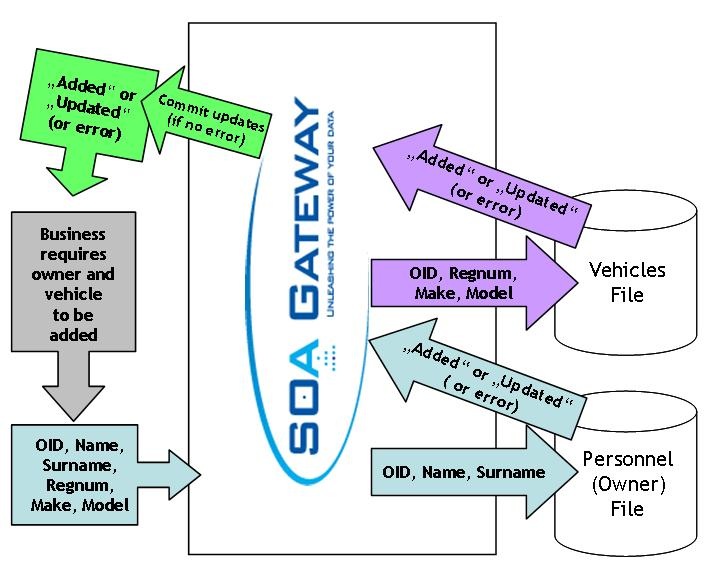
Some notes about the above:
Either both adds to the physical database work or neither do using a transactional semantic and thus the database remains consistent. When more than one database is involved in the transaction two-phase-commit (2PC) capabilities are required to guarantee consistent transactions.
All data is supplied in one request, this avoids the need for two round trips between the client and the server to add or update the objects (physical DataViews).
When an owner and vehicle(s) must be deleted, SOA Gateway can achieve this as one standard REST or SOAP request:
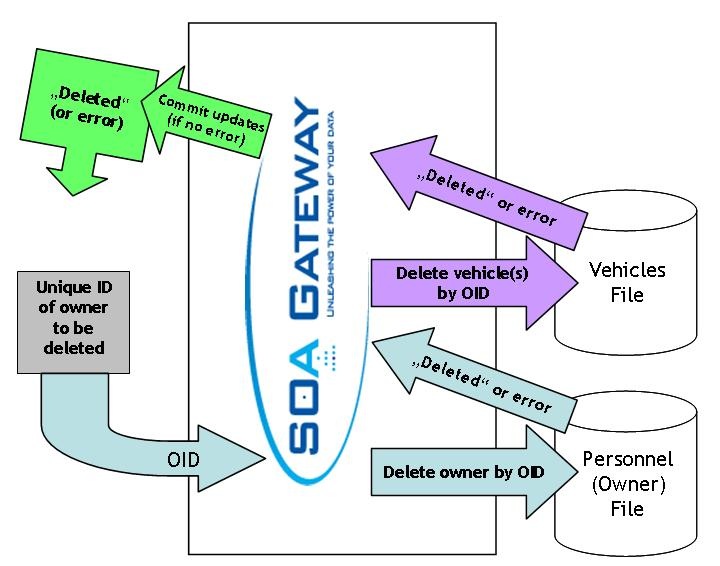
Some notes about the above:
Either both (all) deletes from the physical database work or neither do using a transactional semantic and thus the database remains consistent.
All data is supplied in one request, this avoids the need for two round trips between the client and the server to delete the objects (physical DataViews).
While only primary keys for all affected files are required to delete the records, the same BDV used for add or update requests can be used.
It is clear that the Business Data View concept in SOA Gateway can provide an incredible level of flexibility to an organization in the following ways:
Avoid the need for new projects to understand legacy data models. Enable them to work with the business model which is more natural for them. Once the data model is understood and turned into a BusinessDataView new projects will benefit in terms of faster and more reliable implementations.
Create Business Data View models from multiple sources including different databases as required.
Ensure consistency in your data by exposing services that prevent applications creating inconsistencies in the data. Two-phase-commit (2PC) support is required when more than one database is involved in a transaction.
Create abstract business services that may be used again and again from any technologies including Java, c#.net, vb.net, php, Ruby, Excel, Word, Internet Explorer and so on.
Secure your assets based on the business view of the data and not the physical view of the data which is where the security is really required.
Follow these steps to create a BDV
Exposing BusinessDataViews as WebServices requires a BusinessDataView driver to be defined, if there is none already, proceed as follows
In the Drivers tab of the Server properties, click the Add button.
or
Right-click on the server and select Add driver to server
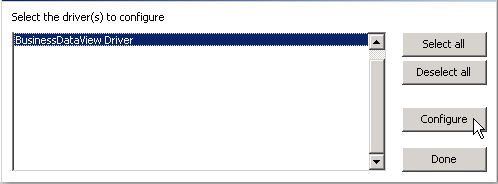
Select the BusinessDataView Driver and click Configure.
The Adabas demo file "Employees" is keyed on personnel number and the "Vehicles" file also has a personnel number which determines which car is owned by which employee. We wish to define a BusinessDataView which gives us personnel id and surname of the employee and, if present, one instance of their vehicles car registration and date acquired.
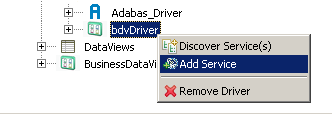
In the Servers View, right-click on bdvDriver under Services and select 'Add Service'
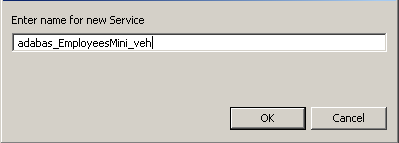
Name it "adabas_EmployeesMini_veh", click OK
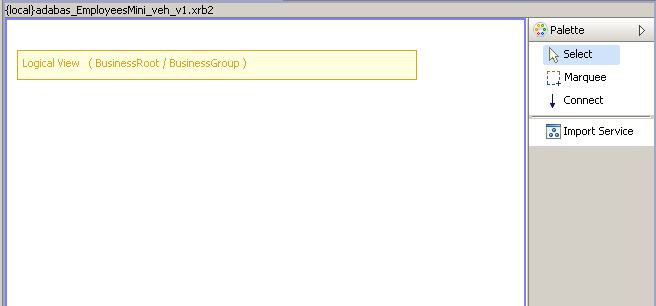
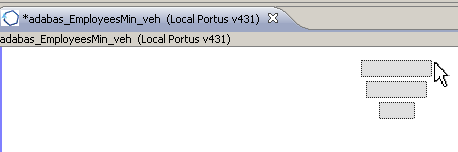
This will open the BusinessDataView Editor with an initially empty "Logical View" created
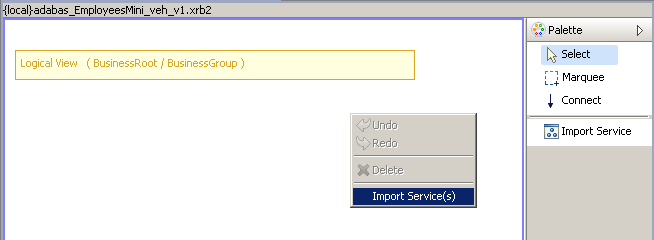
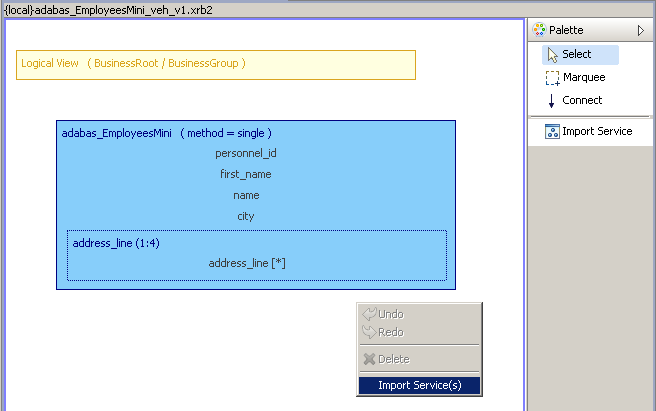
Right-click anywhere within the blank area of the BusinessDataView Editor, select the Import Service(s) function from the context menu
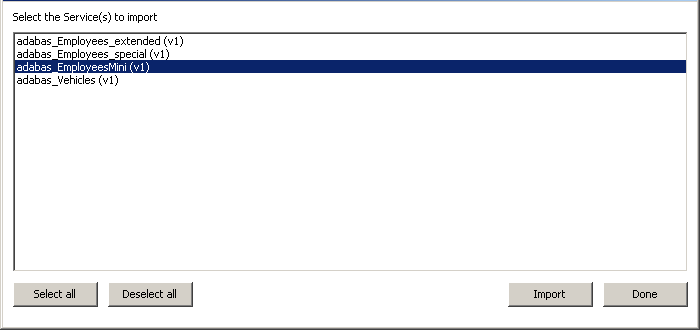
Select the adabas_EmployeesMini WebService service and click Import.
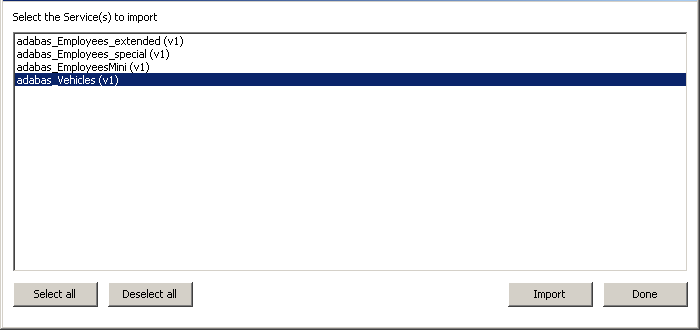
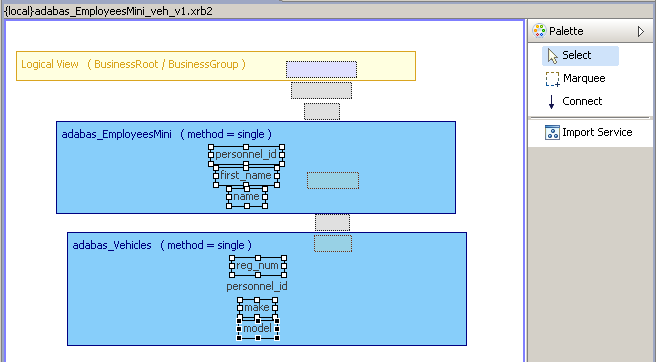
A visual representation of the elements of this web service appears as shown below. Right-click beneath this view as shown and select the Import Service(s) function from the context menu
Select the adabas_Vehicles WebService service and click Import.
Select the "Physical View" items not required for the time being (shown selected below) and hit the <DEL> key to remove them. There is no requirement whatsoever to use all of the "base WebService" fields within the BusinessDataView's "physical resource(s)". Note that there is also no requirement to remove them as they can stay in the Physical View if so desired.
Note:
Select the city item first and, holding down the Ctrl
key, select the other items.
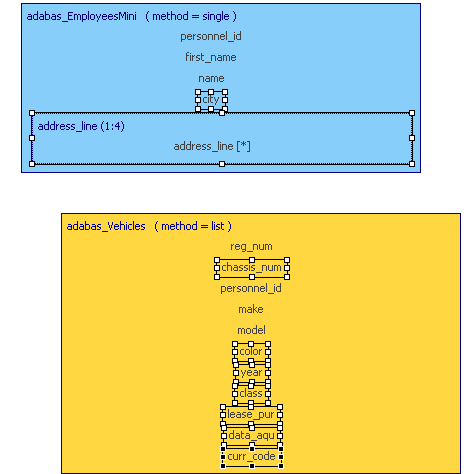
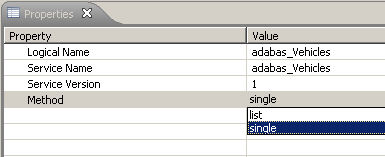
This will leave you with the following items. For this example we are only interested in one vehicle per employee so we need to change the method from list to single. Our next example will demonstrate the use of the list method.
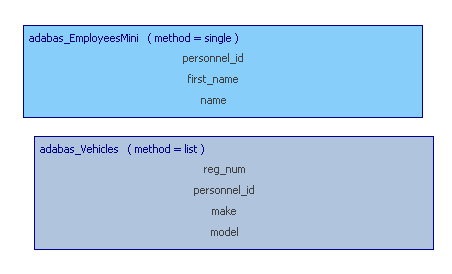
Click on an empty area within the adabas_Vehicles physical view. The Properties view should display the properties for this Physical Resource. If the Properties view is not visible, select menu item Window -> Show View -> Properties. Change the Method to single as shown. Ctrl+S to save.
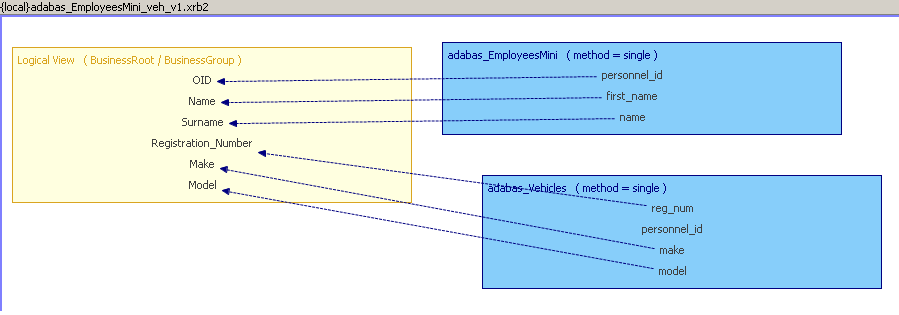
Select all fields, but NOT the personnel_id field within adabas_Vehicles. Drag them across to the "Logical View" (LV) and drop them there. Note that there is a shadow view of the items selected. There is also a red circle with a line through it (not shown here) which disappears when the drop into the LV is possible.
The BDV editor screen will scroll if the elements being dragged are held close to the editor boundary
This will add the selected fields to the "Logical View", and also create their connections to the source "Physical View" fields at the same time. Note that the various views can be moved around to get a clearer picture. It is a good idea to save the BDV at this stage (Ctrl+S).
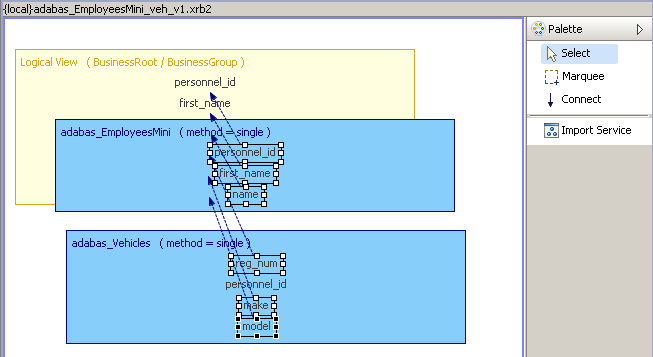
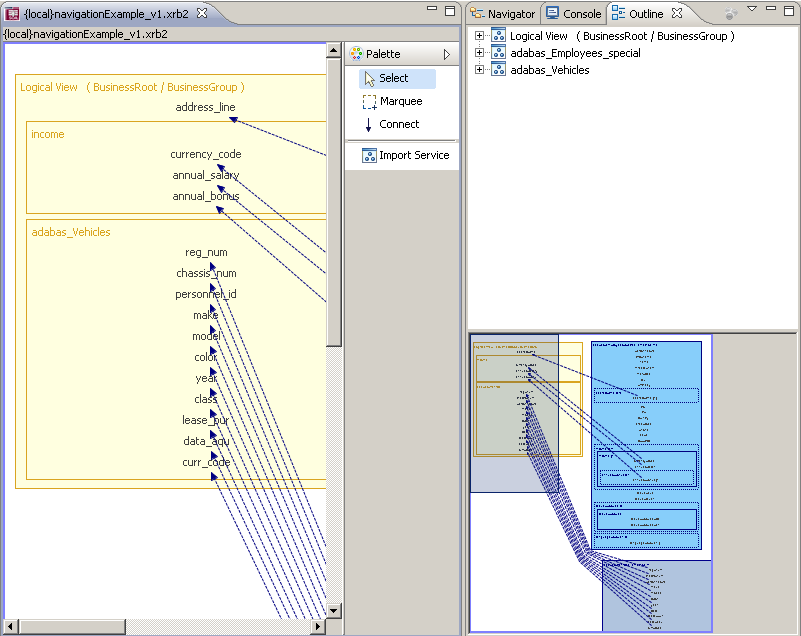
Now go to the "Logical View" and select the personnel_id field. In the Properties view change the node name to OID by changing its XML-Name value.
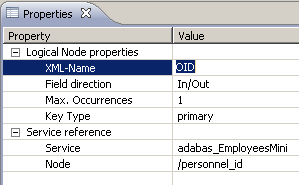
Change all field names as required, the picture should now look like this. Note again that this is not compulsory. The names can be left as is if so desired.
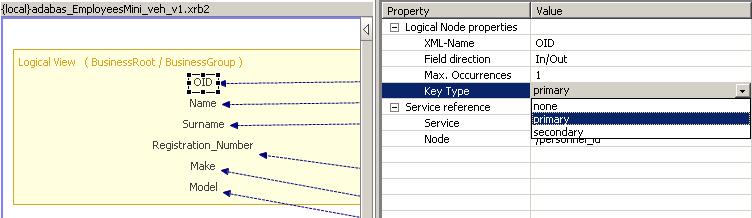
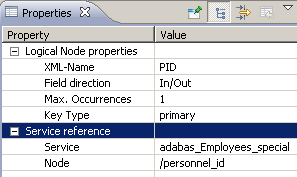
Recall that this BDV will enable us to query employee details and their vehicle details. There are 2 steps to creating this link in the BDV. The first step involves setting the appropriate field to be a primary or secondary key. In this example we need to set the OID field in the LV to primary. This is done by selecting the field in the LV and setting the key to primary in the associated Properties view as follows:
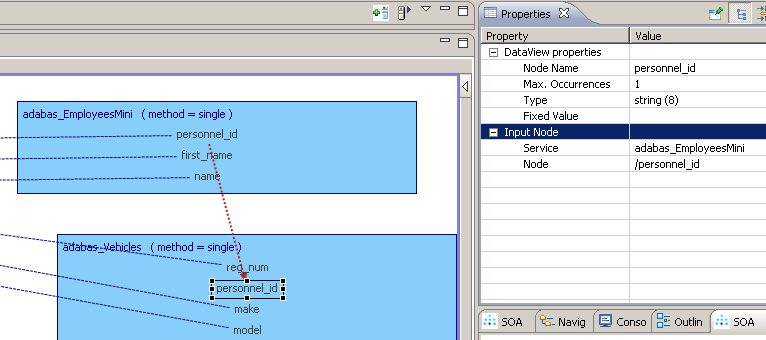
The next step involves creating a connection or link between the appropriate field of one physical resource to a field in another physical resource. Select Connect item from the Palette. Select the personnel_id field of adabas_EmployeesMini view and move the cursor away. As you can see this marks the starting point for the connection:

Now click the personnel_id field within the adabas_Vehicles view.
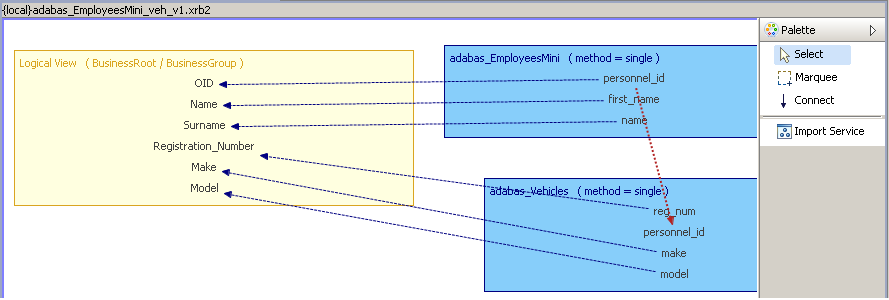
This "links" the "base (physical) WebServices" together and indicates that the personnel_id from adabas_EmployeesMini is to be passed on and input into the personnel_id field of adabas_Vehicles. When the WebService based on the BusinessDataView is invoked, the "Employees" file is read first, the personnel_id taken from the result is then used to access the related Vehicles record.
Click the Save icon, or File->Save, or Ctrl+S to save the BusinessDataView on your SOA Gateway server
Open the URI next to WSDL URL is .. in the Properties view.
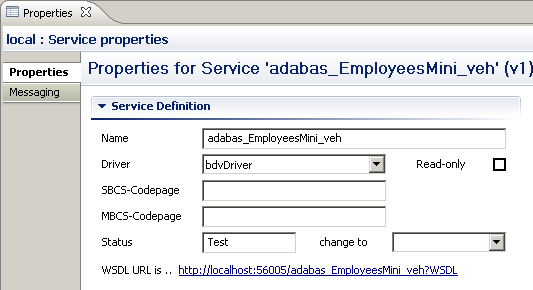
The WSDL for a WebService based on a BusinessDataView looks just like one for a "basic" (= "physical") WebService, exposing all available access functions (add, delete, get, list, select, etc).
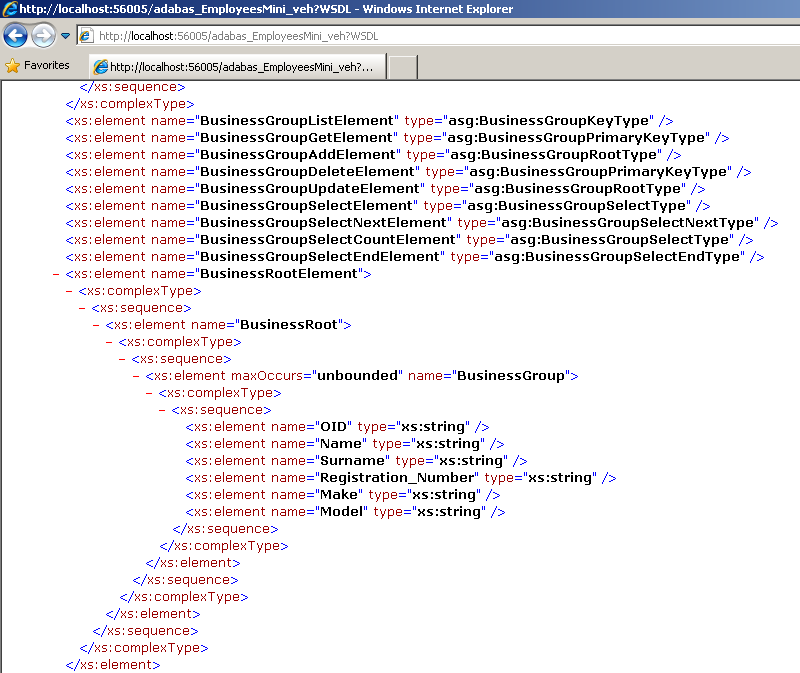
Change the WSDL directive in the URI to LIST&OID=20021*, this will show the surname for the selected Employees record(s), plus the (first) car's registration, make and model for every employee whose OID (personnel_id) begins with 20021.

We now define a BusinessDataView which provides more employee details plus a list of vehicle(s) for the employee..
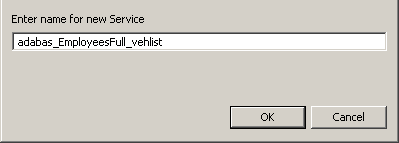
In the Servers View, right-click on bdvDriver under Services and select 'Add Service'
Name it adabas_EmployeesFull_vehlist and click OK
This will open the BusinessDataView Editor with an initially empty "Logical View" (LV) created
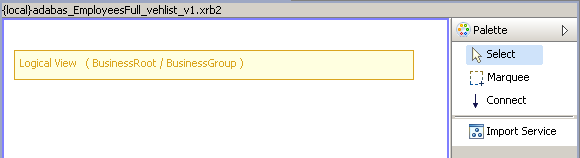
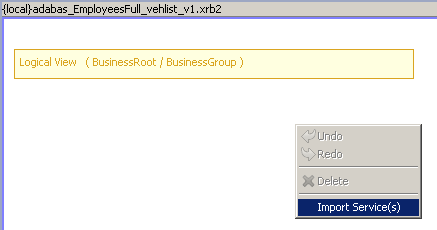
Right-click anywhere within the blank area of the BusinessDataView Editor, select the Import Service(s) function from the context menu
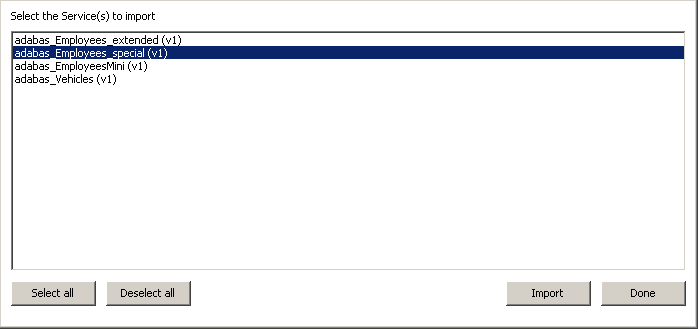
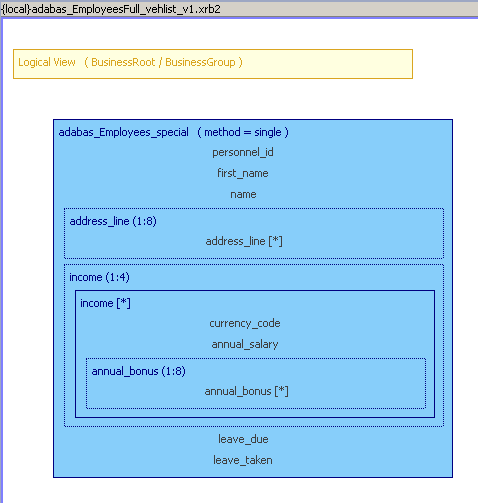
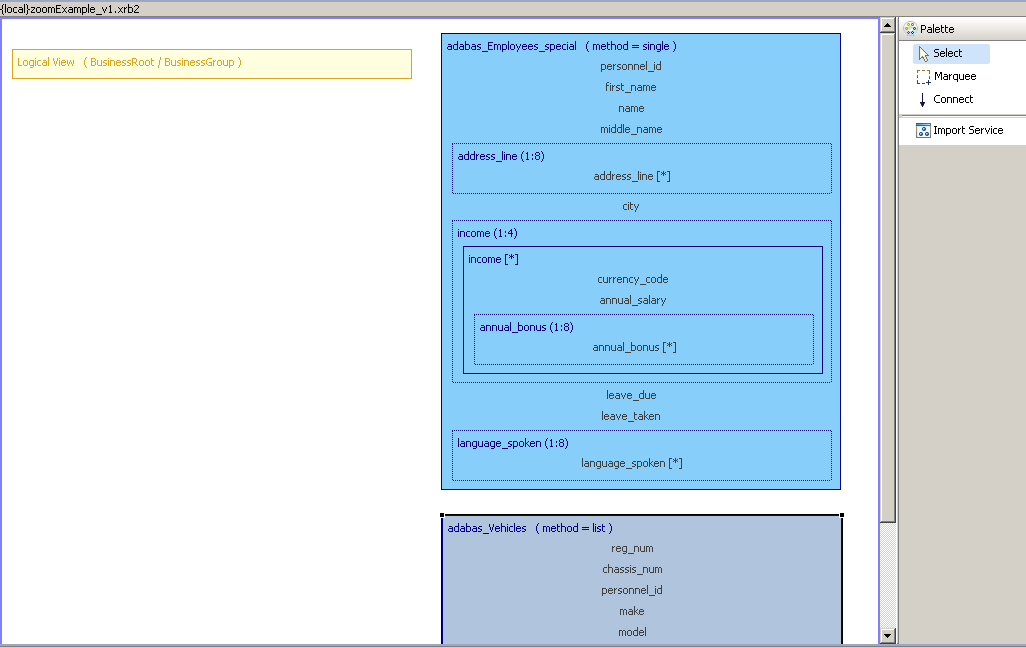
Select the adabas_Employees_special service, click Import
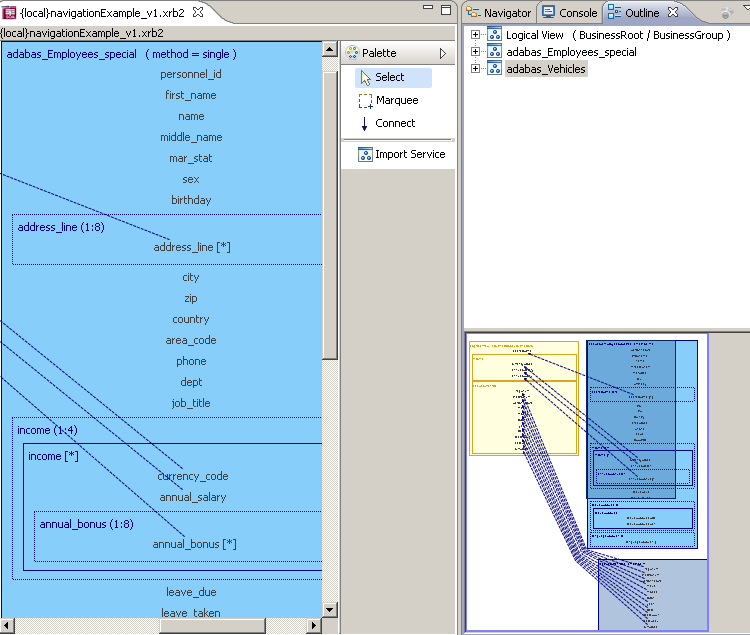
Again in this example, we wish to use only certain fields in our BDV. Select the items not required and hit the <Del> key to remove them. Select the first item and, holding down the Ctrl key select the others. This can be done in batches if so desired. Note again that this is not compulsory to do. Here are the fields we wish to retain for this BDV:
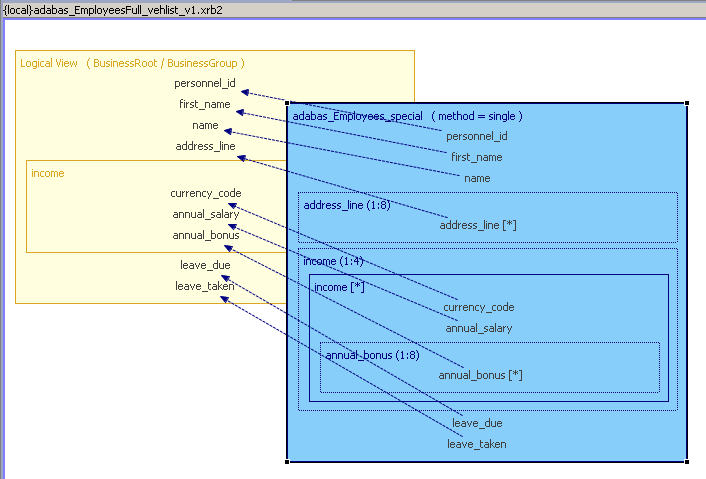
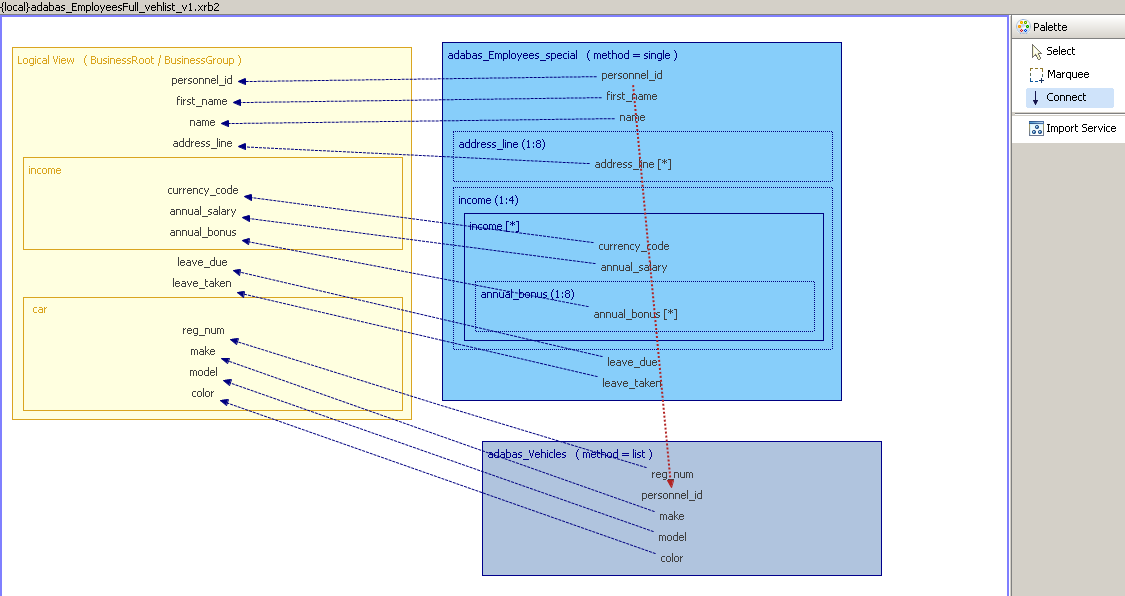
It is good practice to save frequently (Ctrl+S, select the Save icon, File->Save). Select the entire adabas_Employees_special view, drag it to the LV and drop it there.
This will add the fields to the LV, and also create their connections to the source "Physical View" (PV) fields at the same time.
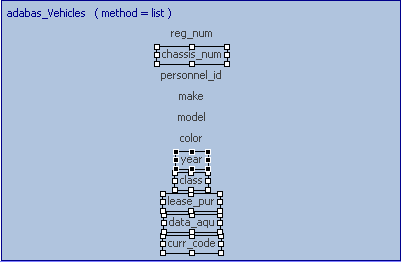
Import the adabas_Vehicles WebService.
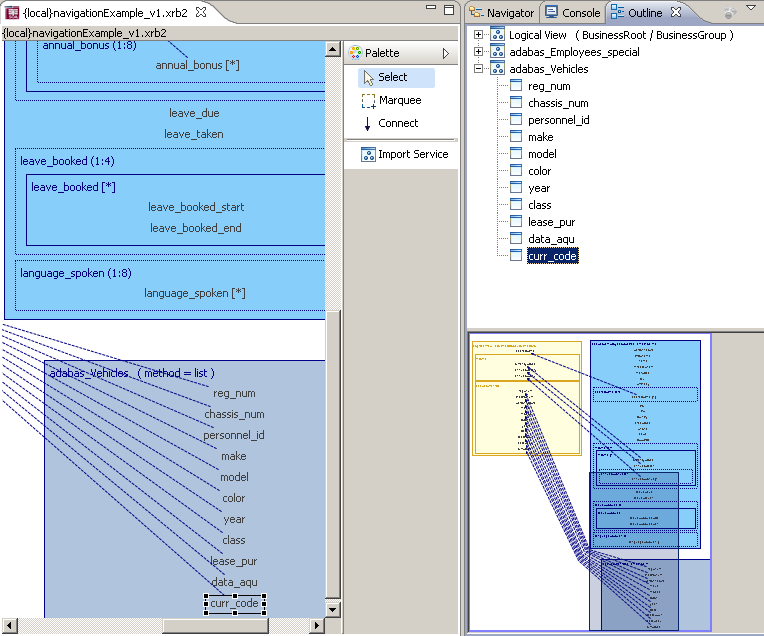
Select the nodes which are NOT to be included in the "Logical View", as shown here, hit the <DEL> key or right-click and select Delete.
Drag the adabas_Vehicles view and drop it into the "Logical View".
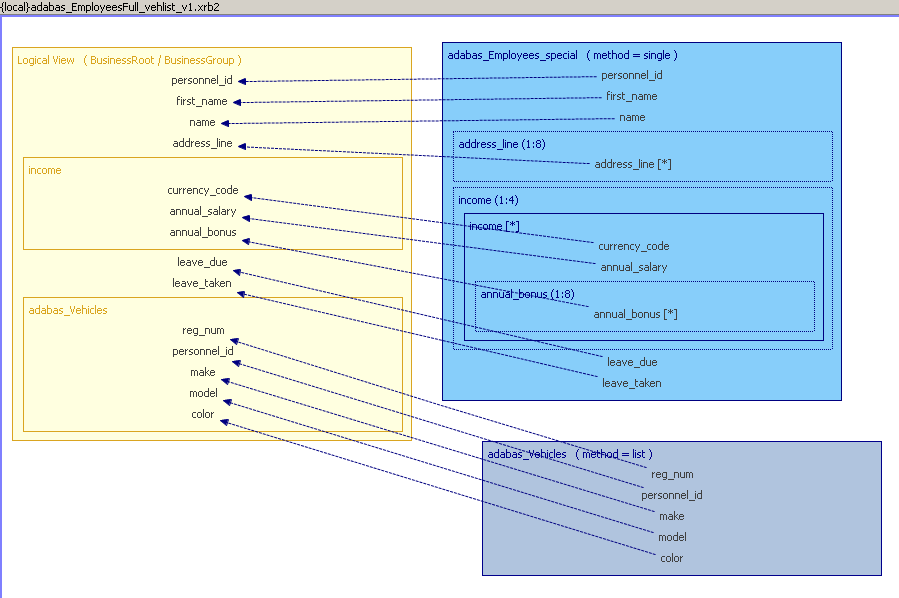
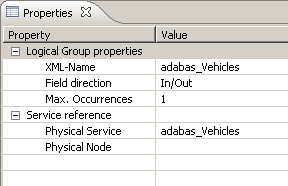
Note that the elements from the PR have been wrapped in a container or logical group which by default is given the same name as the source PR. This happens automatically when the PR method is set to list. The group name can be changed as follows. Click the newly created group to select it. In the Properties View change the XML-Name from "adabas_Vehicles" to "car".
At this point we have 2 elements in the LV named personnel_id. As shown in Example 1 a connection can be made in the PRs which enables the value for the source PR to be used as input to the target PR. Therfore we have no need for personnel_id in the CARS group so select the field and delete it. Connect the personnel_id fields from adabas_Employees_special and adabas_Vehicles as follows.
Select the Connect item from the Palette. Select the personnel_id field of adabas_Employees_special view and move the cursor away. Now select personnel_id field of adabas_Vehicles. The BDV should now look like this:
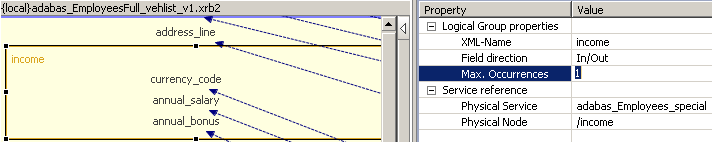
We have already seen that the LV can be a subset of the underlying data. It can also represent that data in a different format e.g. the fields names can be changed and occurances of fields such as addreess_line can be reduced.
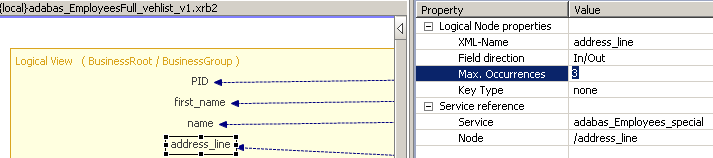
For these changes select the field and open its Property View.
Rename the personnel_id field within the LV to PID (optional).
Change the key type for the PID field to primary (mandatory).
Change the Max. Occurrences property for the address_line field to 3.
Change the Max. Occurrences property for the income group field to 1.
Click the Save icon, or File->Save, or Ctrl + S to save the BusinessDataView on your SOA Gateway server
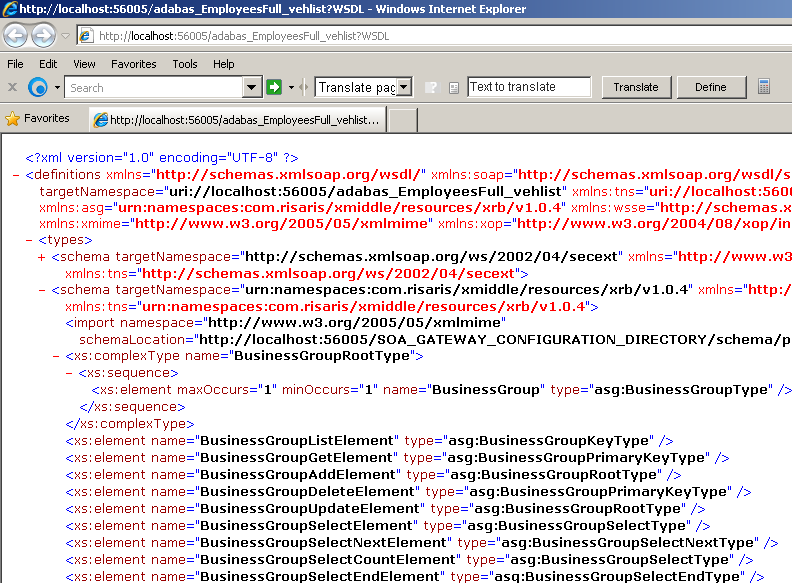
Click the URI next to WSDL URL is ... (This can be found in the Service properties for the BDV just created. Select the web service under bdvDriver as shown and open the Property View.
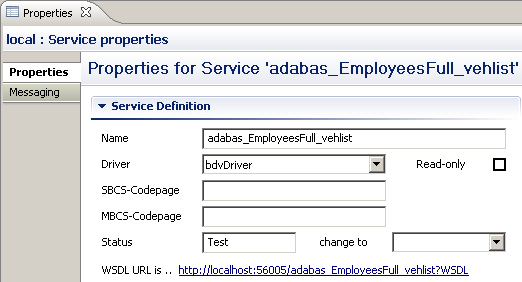
The WSDL for a WebService based on a BusinessDataView looks just like one for a "basic" (= "physical") WebService, exposing all available access functions (add, delete, get, list, select, etc).
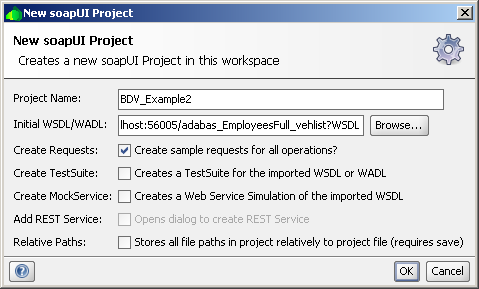
We will now use soapUI (see the Introduction in the Tutorials section) to access the BDV-based WebService. First of all, create a new soapUI project based on the WSDL URL shown above.
Double-click the default request created for the get method, this opens up the request window.
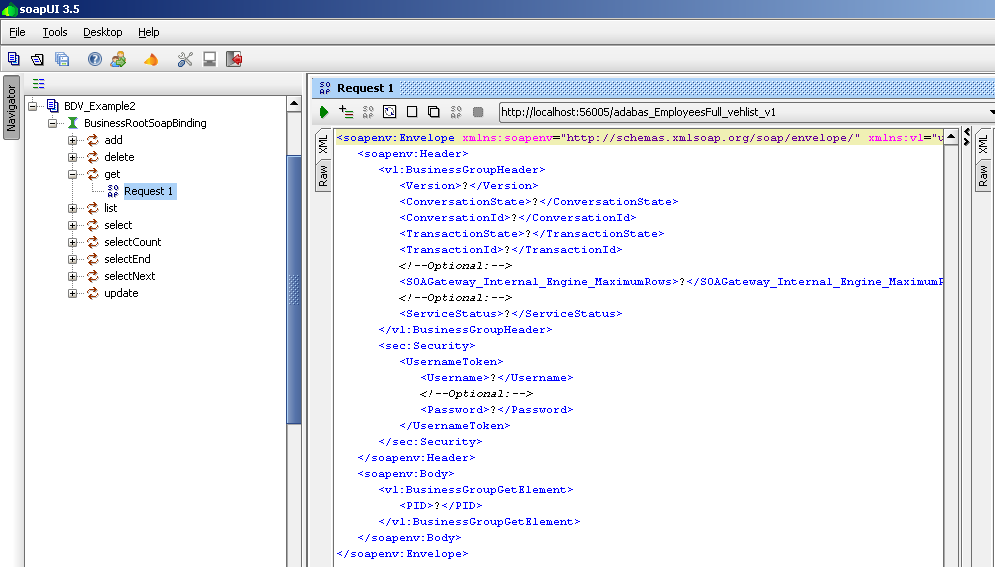
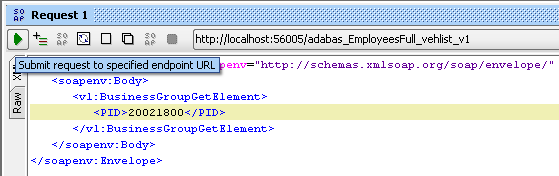
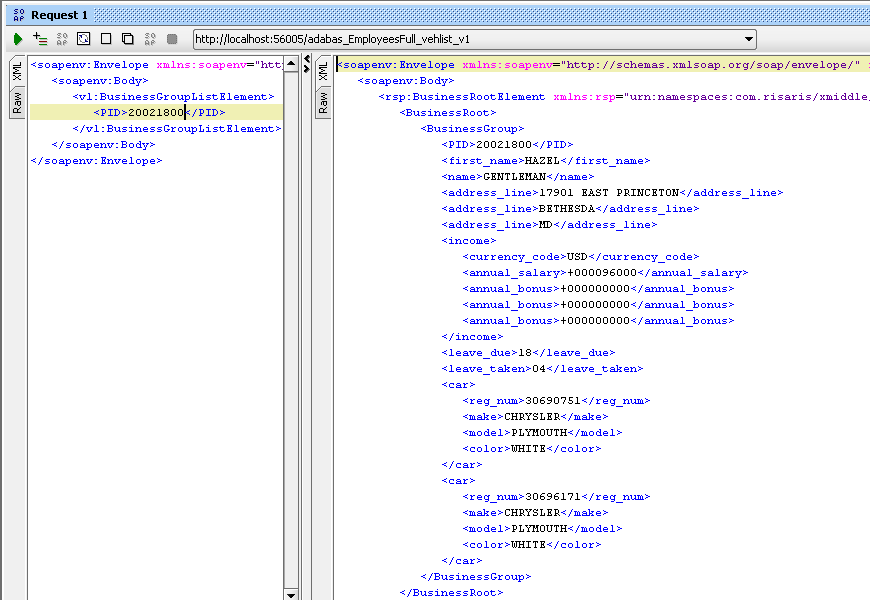
Remove the entire soapenv:Header section from the request, specify a PID of 20021800. Click the submit icon to send the request to the SOA Gateway server.
The result will be a compound set of data from both the Employees and Vehicles files.
This section provides you with a number of general purpose hints for making your life easier in respect to editing BusinessDataViews.
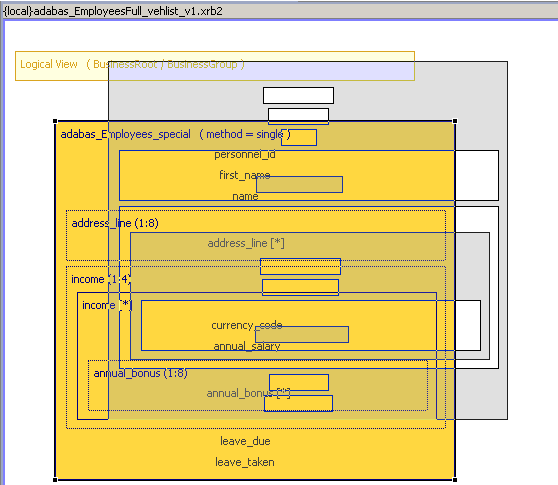
When the BusinessDataView is too big, or the screen is to small to display it in its entirety at a resolution of 100%, or if you want to see some element(s) in more detail, the zoom level can be changed accordingly.
The initial display at 100%, not all details are visible.
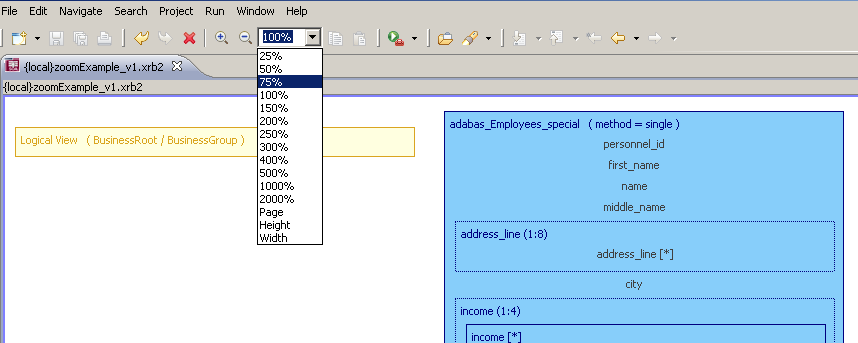
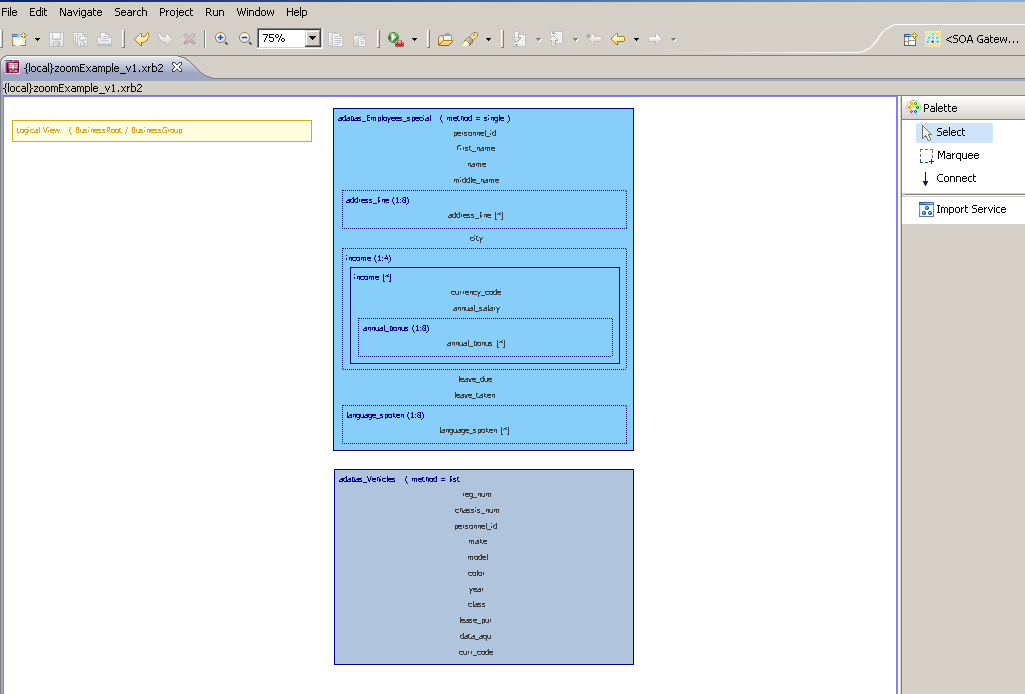
Reduce the zoom level, from the combo box located in the toolbar area, as required to see the entire graph.
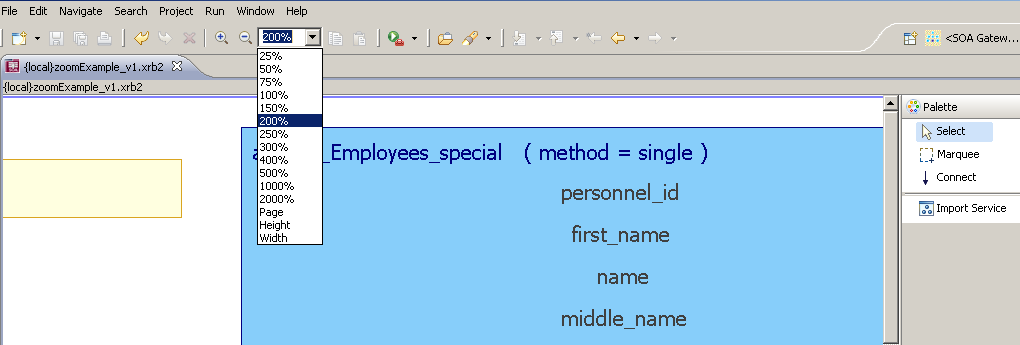
Increase the zoom level to a value above 100% to see more details.
In a busy BDV where there are several elements, it can be tedious to navigate using the scrollbars etc. There are 2 useful techniques available to make this easier, both using the Outline View.
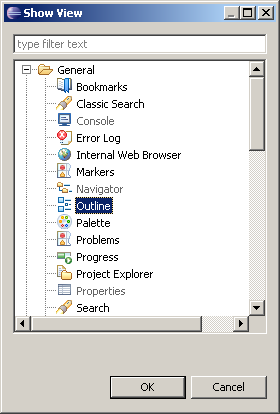
If the Outline view is not visible, from the menu select Window -> Show View -> Other..., select Outline in the General folder and hit OK.
In this example we have a populated LV plus 2 PRs, with the employees PR partially visible. To make the vehicles, select the entry in the Outline view as
To make the vehicles PR visible, select the entry (adabas_Vehicles in this instance) in the Outline view as shown below. The view will align itself with the PR selected. Notice also how the aerial view in the bottom right-hand corner has also moved the focus to the PR, with the darker blue rectangle reflecting the view in the BDV editor.

The latter is the other way focus can be shifted around the BDV editor. Select the darker rectangle and move it around its area. The moves will again be reflected in the editor.
Finally the view can be more fine grained. Open a tree view in the Outline view and select an individual field in the PRs or LV. The focus will shift to that selected.
Or more precisely, when the DataView associated with an imported WebService changes.
Currently there is no way of automatically reacting to changes in underlying WebService DataViews, so when new fields are added which are to be used in the Logical View, there is no way of updating the imported Physical View within the BusinessDataView.
The only way to deal with such a situation is to remove the Physical View from the BDV, re-import it, copy the required fields to the Logical view and recreate the links between the Physical Views.
Following versions of the SOA Gateway Control Center will provide functions to capture changes to the underlying DataView(s) without having to recreate the Physical View and the links from scratch.