
Important:
Before beginning to install the ADR package, you must ensure that
all the latest operating system updates have been
applied.
The components of Data Archiving for Adabas are installed using the Software AG Installer from the Software AG download center. Please refer to the Data Archiving for Adabas Software AG Installer section Component Installation for information on how to perform this part of the installation.
During the Activation process you will be prompted for the location of a license key file.
For UNIX the availability of a license key is mandatory.
For Windows it is not mandatory and the installation can be performed without a license key. Refer to Using Data Archiving for Adabas without a License Key for more information.
Once the Software AG Installer has prepared the install download image or you have copied the downloaded install image to the computer where the installation is required you must finally activate the software before it can be used.
Once you start the activation process, you will be required to provide configuration information within a number of activation tabs but before you start make sure:
Your license key is in a file that is available to the installation activation unless you are going to use the software without a license (see License Key Requirements).
You can identify the location of the Repository. Please refer to the section Installation Planning and Preparation for information on how to manage that part of the installation.
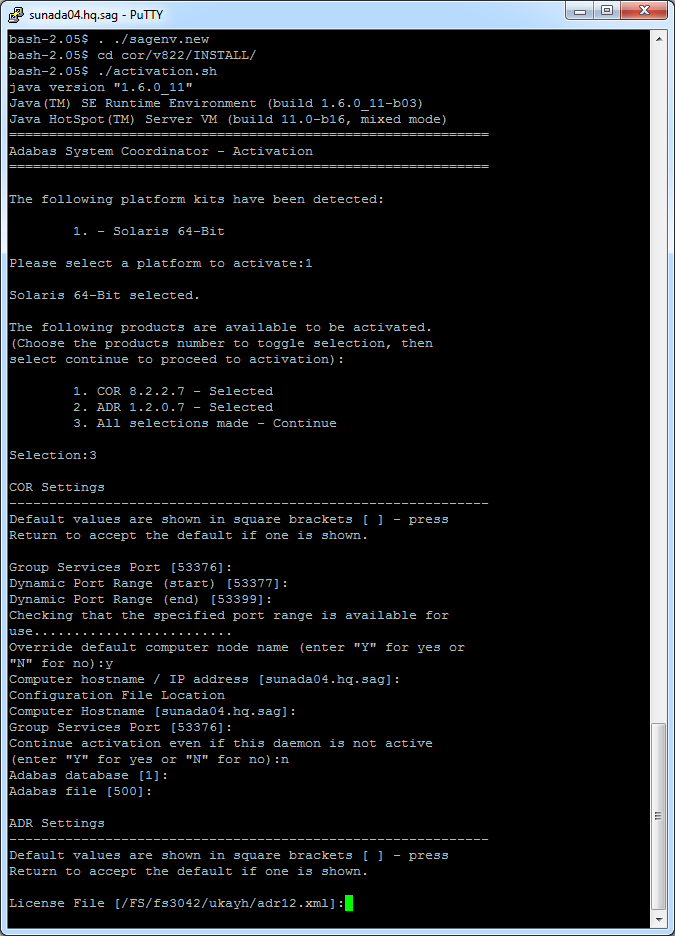
Run the activation script ./activation.sh from the installation library $SAG/cor/vvrs/INSTALL where vrs is the product version.
Note:
In UNIX, if the activation detects that a User Interface is not
available then it will automatically use the console mode. Refer to
Activation in UNIX from the
Console.
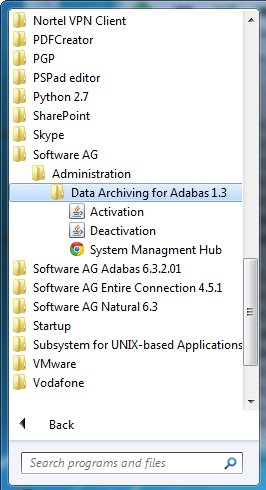
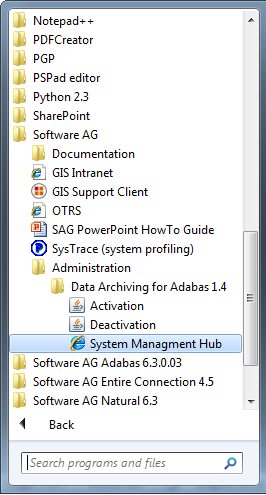
The Installer creates a Start Menu entry for activation (and deactivation); an example screen shot follows:
Note:
Windows Vista, 7, 8 and Server 2008, 2012 requires that you start
the activation using right-click and run as administrator.
Once you start the activation process, you are required to progress through a number of activation tabs:
Products
COR (Adabas System Coordinator)
ADR (Data Archiving for Adabas)
Activate
The first tab in the activation requires that you select the platform that you are activating and the products too.
The following screenshot shows the tab for the Windows platform (UNIX is similar):

The COR tab requires you to provide information about port numbers, computer names and Repository location.
The following screenshot shows the COR tab:
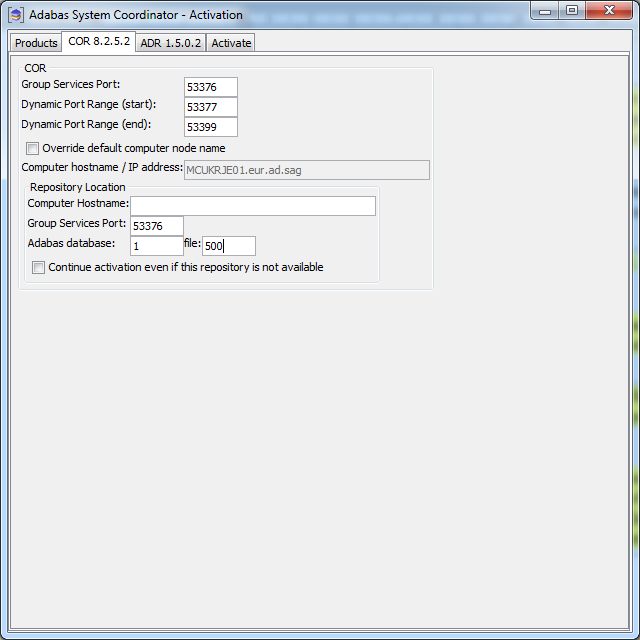
Enter the following information (or accept the defaults):
| Field | Description |
|---|---|
| Group Services Port |
System Coordinator uses ports for communication between components. This setting defines the port number to be used for communicating with the System Coordinator daemon residing on the computer defined in the “Computer hostname / IP address” field below. Normally the default setting is used. |
| Dynamic Port Range start/end |
System Coordinator also uses dynamic ports for communication between components. Normally the default settings are used. |
| Override default computer name |
Sometimes a machine is configured in such a way that the automatically detected computer hostname does not match the one that needs to be used (e.g. multiple network interfaces or multiple IP stacks). In this case you can override the detected computer hostname with a user defined hostname or IP address to be used at runtime. To do this, select the checkbox and enter the value to be used in the (now enabled) “Computer hostname / IP address” field. |
| Computer hostname / IP address |
This is the automatically detected hostname. This is display only unless the “Override default computer node name” checkbox has been selected in which case it can be overridden. The “Group Services Port” number defined above is used to communicate to the System Coordinator daemon residing on the computer name shown here. |
| Repository Location | |
| Computer hostname |
This is the computer hostname where the Repository is already located or, if this is the first installation, where the Repository is to be located (in which case it should be defined to be the local computer hostname). |
| Group Services Port |
This setting defines the port number to be used for communicating with the System Coordinator daemon residing on the computer defined in the “Computer hostname” field above. |
| Adabas database / file |
This is the database and file number of the Repository. Note: |
| Continue activation even if this daemon is not active |
By default, when leaving this COR tab, a connection check will be performed using the above Repository location “Computer hostname” and “Group Services Port”. When this option is selected, the connection check is not done, enabling the activation to continue without the System Coordinator daemon (residing on the “Computer hostname” and “Group Services Port” defined above), used to access the Repository, being active. |
Licensing has to be identified in the ADR tab.
The following screenshot shows the ADR tab for the Windows platform:
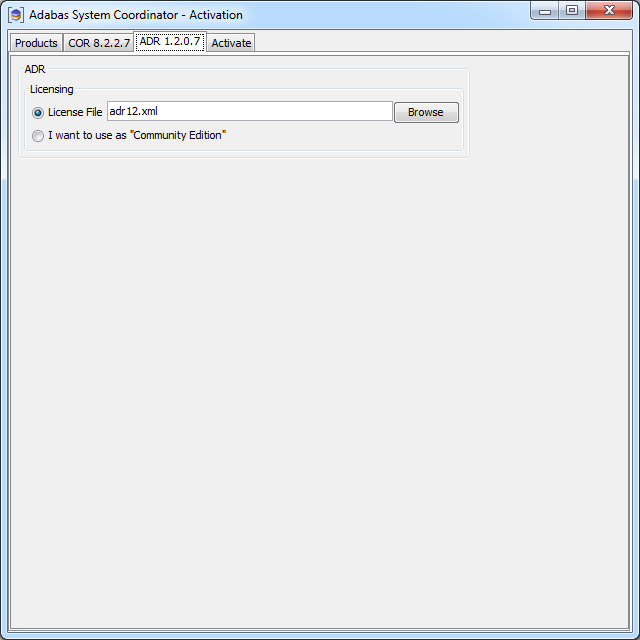
Enter the following information:
| Field | Description |
|---|---|
| License File | Specify the location of the license key file. |
| I want to use as "Community Edition" | For Windows only, you can use the software without a license by selecting this option (see Using Data Archiving for Adabas without a License Key). |
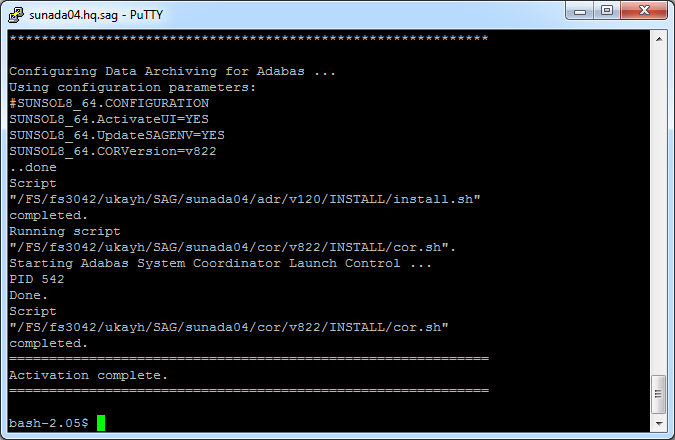
Once all options have been selected the activate tab shows the empty activation log screen. Start the activation by clicking the Activate button below.
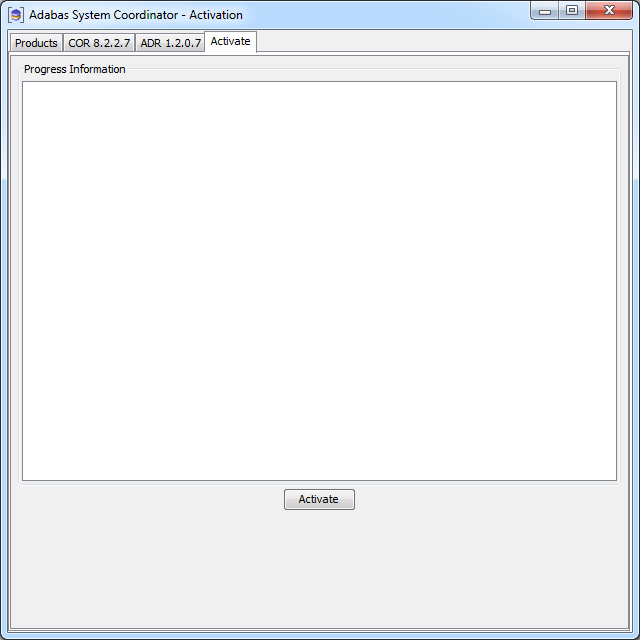
The activation log screen shows progress during execution which may contain important information if a problem occurs (such as permissions failure). Here is a successful activation execution completion:

The activation detects when a GUI is unavailable and will use the console mode automatically.
The full activation process is shown in this screenshot:
![]() To use the software
To use the software
Restart the System Management Hub services (for Windows) or daemons (for UNIX) in order to detect the newly activated products.
Restart the “Software AG System Management Hub” and “Software AG Runtime” services:

Restart the CTP and InstanceManager daemons by running the following scripts:
$SAG/InstanceManager/bin/shutdown.sh
$SAG/profiles/CTP/bin/restart.sh
$SAG/InstanceManager/bin/startup.sh
For more information on how to do this, refer to the System Management Hub documentation available from the Software AG Documentation Web site.
If System Management Hub is available on your local machine, the install process creates a Start Menu entry; an example screen shot follows:
If no Start Menu entry is available, go to your browser and use http://localhost:10010/smh (assuming defaults have been used for the System Management Hub install) or use your normal entry to the System Management Hub.
Within System Management Hub, expand the tree and select the Data Archiving for Adabas node.
If only the Administration component was installed, you will be directed immediately to the Add Perspectives window where you will need to define the access path to an appropriate Repository (refer to Perspectives for more information).
Select the Services by (group:computer:daemon) node within the Data Archiving for Adabas navigation tree.
You should see an Archiving Service designated by group:computer:daemon where computer is the name of the computer where Data Archiving for Adabas has just been installed. This Archiving Service should show a green traffic light which indicates that the service is active.
This is a screenshot of an example tree structure:
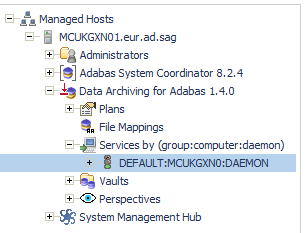
Select an Archiving Service and the Archiving Service window will
appear. In the example screenshot above there is only a single Archiving
Service designated by DEFAULT:MCUKGXN0:DAEMON
The Archiving Service window displays the following information:
| Field | Description |
|---|---|
| Group Computer Daemon | The name of the Group, Computer and Daemon corresponding to the selected Archiving Service. |
| Service Status Information | |
| Status | The run status of the selected Archiving Service. |
| Install Path | The installed location of the selected Archiving Service. |
| Version | The version of the selected Archiving Service. |
| Repository | The location information for the Repository used by the selected Archiving Service. |
| License Information | |
| File | The location of the selected Archiving Service’s license file. |
| Status | The status of the selected Archiving Service’s license. |
| Expires | The expiry date of the selected Archiving Service’s license. |
Verify:
The green traffic light described earlier should correspond to an Archiving Service status of "Started".
The License Information status should be "Valid", or, if you are using Data Archiving for Adabas without a license key, "Community Edition".
The installation is now complete. You can begin using Data Archiving for Adabas. See the section Getting Started for further information.