
Note:
For more information on using the Software AG Installer refer to the
document Using the Software AG Installer in the Software
AG documentation, found on Software AG's
Empower
web site.
Data Archiving for Adabas is installed using the Software AG Installer from the Software AG download center. The Software AG Installer is sensitive to the products for which you are licensed. When you log on to it, you see all the products that you are able to install.
You select the appropriate Data Archiving for Adabas components for your current installation requirements and the Software AG Installer will automatically select all other Product and Infrastructure component dependencies.
The installer will do the following under your direction:
Download the install files to the computer location you request (or will arrange to ship a CD, DVD, etc.).
Copy the files to the install location that you choose.
Define the required local service (Windows only).
Launch (or make available to launch) the product-specific activation component to finish off the installation.
The component installation for Data Archiving for Adabas consists of the following steps:
On the Software AG welcome screen identify yourself to the Installer by logging in with your credentials (user name and password). The Installer will then acquire information about a) all the products for which you are licensed, and b) those products which are able to be installed using the Installer.
Next, once the Installer has acquired all licensing information for your site, it shows the default installation directory. You can alter this if you wish.
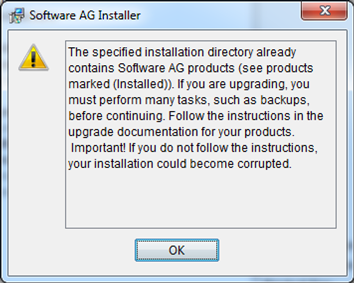
Note:
Depending on your choice of installation directory, you may
subsequently see the following warning dialog from the Software AG Installer.
This can arise if you already have Data Archiving for Adabas or its related
components (e.g. System Management Hub) installed in the selected directory.
Please ensure you have selected the correct directory before continuing.
Next, once the installation directory has been identified, you can now choose the Data Archiving for Adabas components that you wish to install. Selecting the Data Archiving for Adabas node will automatically select the default installation components or, alternatively, you can select the individual components manually.
The following screenshot shows the component selection for the default installation. These are the required components for a typical installation on a Windows, Linux, or UNIX platform in order to (a) perform Administration, and (b) implement Archiving Services.
Note:
Adabas System Coordinator dependent components will automatically be
selected based on your chosen Data Archiving for Adabas components.
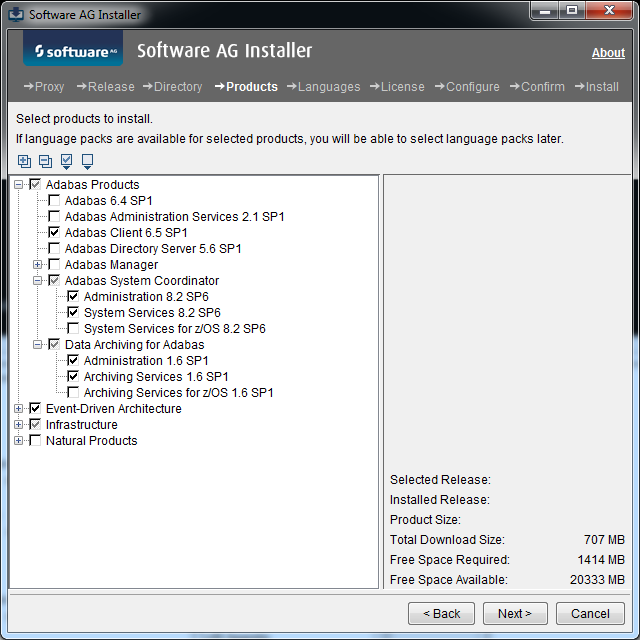
For other types of installation, the individual Data Archiving for Adabas components must be selected manually.
| Component | Description |
|---|---|
| Data Archiving for Adabas | |
| Administration |
Select this if you wish to administer Data Archiving for Adabas from this installation platform. |
| Archiving Services |
Select this if you wish to implement Archiving Services on this installation platform. |
| Archiving Services for z/OS |
Select this if you wish to implement Archiving Services on z/OS from this installation platform. |
| Adabas System Coordinator |
The following components will be selected automatically based on the above Data Archiving for Adabas component selection. |
| Administration |
Selected only if the Data Archiving for Adabas Administration component is selected. |
| Archiving Services |
Selected only if the Data Archiving for Adabas Archiving Services component is selected. |
| Archiving Services for z/OS |
Selected only if the Data Archiving for Adabas Archiving Services for z/OS component is selected. |
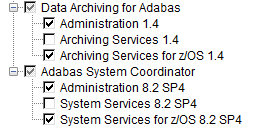
For example, the following screenshot shows the required components for an installation on z/OS in order to (a) perform Administration on the installation platform, and (b) implement Archiving Services on a z/OS platform:
Finally, a list of the selected products and their components are shown for confirmation before installation begins into the specified installation directory.
Note:
If the Administration component was selected then installation will
also include the following:
Platform Manager
Platform Manager is an agent that allows remote administration of one or more selected products from Command Central. This is not a prerequisite for Data Archiving for Adabas therefore choose Install as Application in order to conserve system resources. However, if you do plan to use this capability for a different product in this installation then choose Install as Service.
System Management Hub
System Management Hub is a prerequisite for administering Data Archiving for Adabas. During installation of the System Management Hub several interactive screens will be presented to you where the defaults can be taken. If you wish to alter these defaults, please refer to the System Management Hub documentation available from the Software AG Documentation Web site.