Continuing to Install the Android SDK on Any Platform
The prerequisite to perform the following steps is, that the procedure
Installing the Android SDK on
Windows or
Installing the Android SDK on
Macintosh must be completed first.
1. Android Studio may prompt you to import your settings from a previous version of Android Studio. Doing so is beyond the scope of this document and it is recommended to choose the default option I do not have a previous version of Studio or I do not want to import my settings.
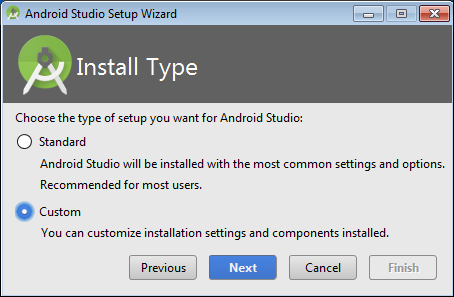
2. The Android Studio setup wizard will start. Select the Custom installation type.
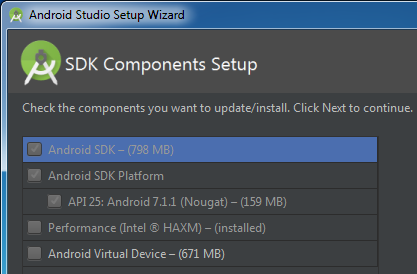
3. Select a UI theme, and then move on to the SDK components setup. Ensure that Android SDK and Android SDK Platform are ticked by default. If the installation is intended for a development workstation, it may be useful to install the Android Virtual Device and the Performance (Intel (r) HAXM) components also.
Note: | Full performance of the Intel (r) HAXM simulators may not be possible until the OS is rebooted. |
4. Click Next, review the changes, and then click Finish. Android will then download and update any missing components. Once this process has completed successfully, click Finish again.
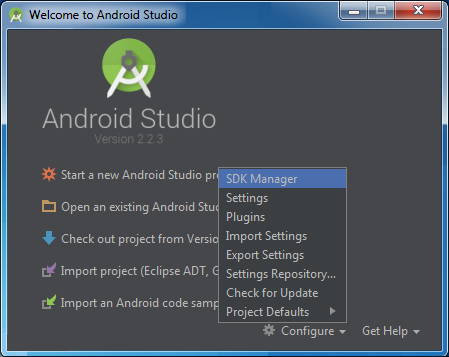
5. Android Studio will then open a welcome screen. From here, select the Configure dropdown at the bottom of the page, and select SDK Manager.
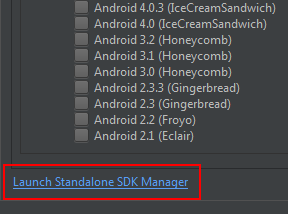
6. When the SDK Manager opens, select Launch Standalone SDK Manager. Prerequisite: standalone JVM is installed.
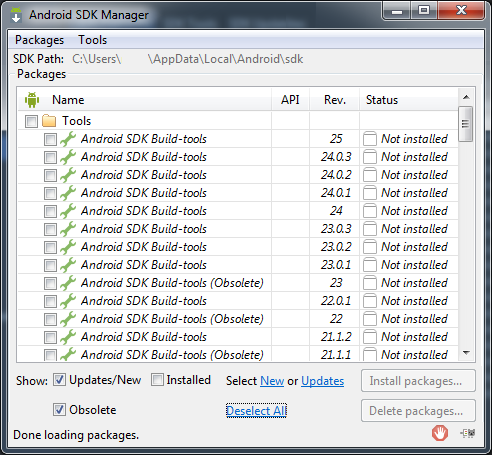
7. Ensure that the Obsolete and Updates/New check boxes are ticked, and the Installed checkbox is clear. Select Deselect All in order to deselect any pending updates at this time.
8. Ensure that

Android 6.0 (API 23),
Android 5.0.1 (API 21),
and any other Android SDK version that you want to ensure compatibility are ticked.
Optionally, any other SDK versions that you might need.
Note: | If required, other SDK versions may be installed later by starting Android Studio and selecting the Configure > SDK Manager option from the starting screen, or by selecting Tools > Android > SDK Manager when in the IDE itself. |
9. Scroll down the list to Extras and select the Google Cloud Messaging for Android Library (Obsolete) and Google Play Services.
10. Click Install Packages. When the packages are downloaded and installed, close Android Studio. If you are prompted to restart the ADB command line tool, select Yes.
Note: | The ADB tool is a tool you can run manually and also has a background service component that manages communications to and from Android devices, both virtual and physical. When installing the Android SDK, the Android SDK Manager restarts the ADB tool to restart the background service. |