
When placing the ApplinX application on the target server for the first time, it is necessary to export both the application configuration and the entities. Once the ApplinX application has been created on the target server, it is only necessary to export the entities.
Note:
When there are changes in the configuration, you may need to delete
the ApplinX application and import it again or manually make the configuration
changes on the target server.
![]() To deploy the ApplinX application
To deploy the ApplinX application
Export the ApplinX application's configuration and entities (refer to Exporting an Application Configuration or Entities). A GXAR file is created in the defined target folder.
Import the exported file to the target ApplinX server (refer to Importing an Application Configuration or Entities).
Note:
In the production environment it is possible to use the export
file as a read only repository.
Confirm that the option to trace files is disabled (refer to Application Properties>Host Tab Parameters>Record section). It is recommended not to produce trace files when in production, as this can affect performance.
Edit and configure the log settings (refer to Server Properties>Log). It is recommended to set the Log Level field to Warning.
When relevant, follow the steps detailed in Deploying an ApplinX Web Application.
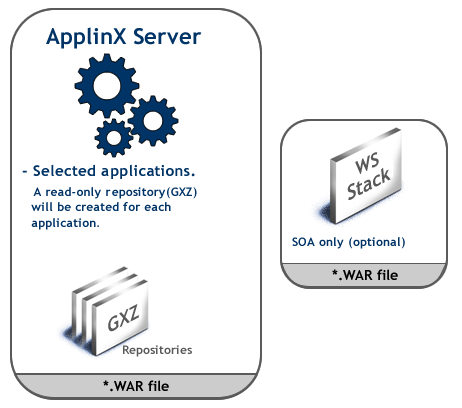
![]() To deploy the ApplinX Server as a WAR File (Java Web Archive)
To deploy the ApplinX Server as a WAR File (Java Web Archive)
Right-click on the relevant application and choose . The Deployment Manager wizard is displayed.
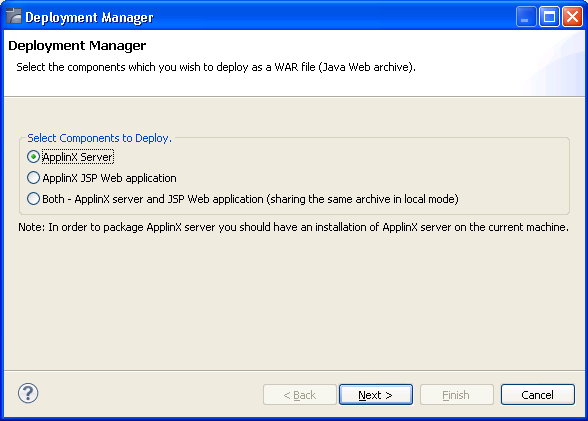
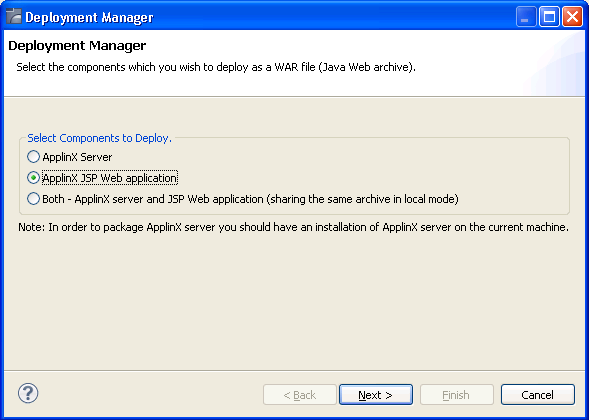
Ensure that the ApplinX server option is selected.
Click . The Select ApplinX Applications screen is displayed.
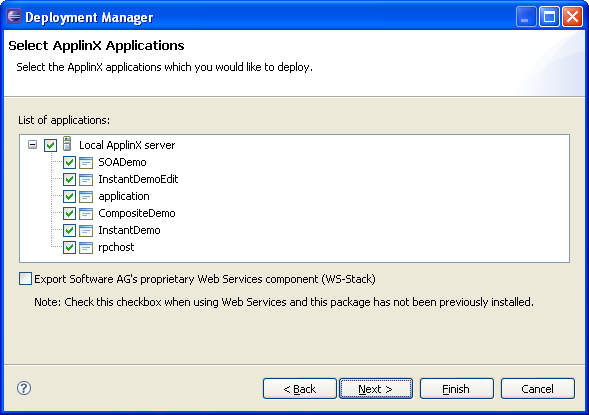
Select the Web applications to deploy.
Select the Export Software AG's proprietary Web Services component (WS-Stack) when using Web services, and WS-Stack has not already been installed.
Click . The Select Package Parameters screen is displayed.
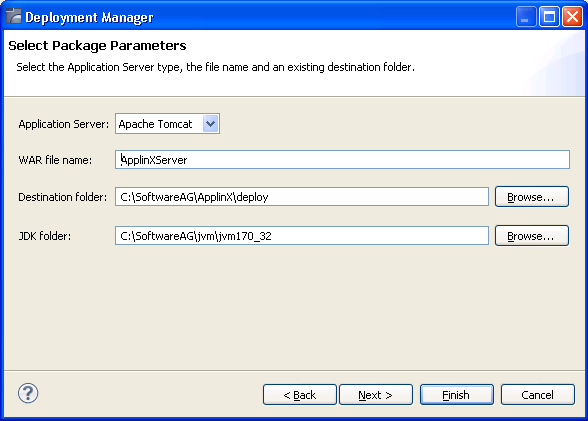
From the list of Application Servers select the server to which you are going to deploy ApplinX server.
Enter the WAR file name, the destination folder where the output file will be placed and the JDK folder (ensure that the JAVA_HOME parameter points to the JDK installation folder).
Click . The Configure ApplinX Server on Target Machine screen is displayed.
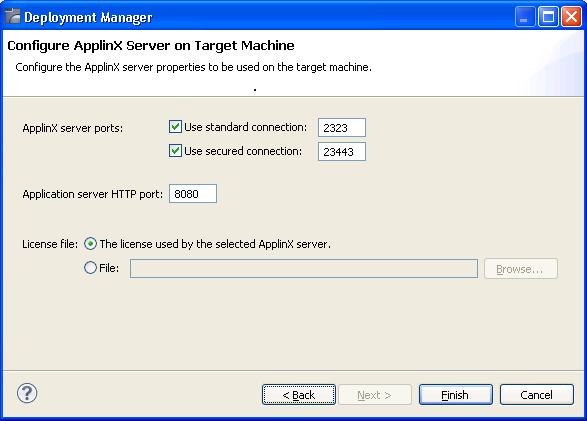
In this screen, configure the ApplinX server parameters to be used on the target machine: the ports, and the license file.
![]() To deploy the Web application:
To deploy the Web application:
Right-click on the relevant application and choose . The Deployment Manager wizard is displayed.
Ensure that the ApplinX for JSP Web application option is selected.
Click Next. The Select ApplinX Application screen is displayed.
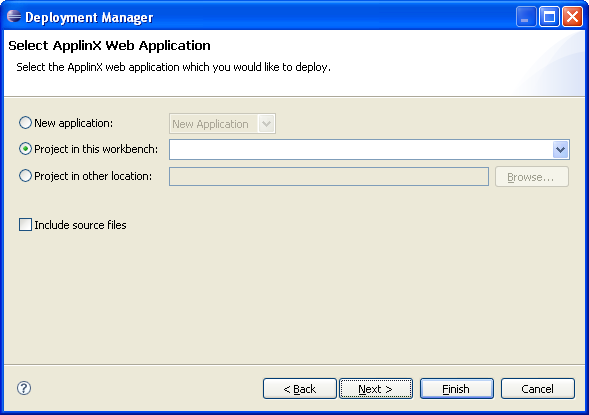
Select whether to deploy a new application or HTML emulation, or a project from within the workbench, or a project from a different location.
Select Include source files to include the Java files as well as the compiled classes. Click . The Select Package Parameters screen is displayed.
From the list of Application Servers, select the server to which you are going to deploy ApplinX server.
Enter the WAR file name, the destination folder where the output file will be placed and the JDK folder (ensure that the JAVA_HOME parameter points to the JDK installation folder).
Note:
When selecting WebLogic, you need to manually extract the content
of the generated ZIP archive file.
Click . The Select Target ApplinX Server screen is displayed.

In this screen, enter the ApplinX server and the port with which the Web application will connect. Also enter the ApplinX application name.
Click .
In the console area, it is possible to see whether the process succeeded or failed. The WAR file created should be placed in your Web server directory.
![]() Consider changing the following for production use
Consider changing the following for production use
Change the framework logging according to your needs either by accessing the "Framework Configuration Editor" or in config/gx_logConfig.xml file. For example:
<category additivity="false" name="com.sabratec">
          <level value=" ERROR"/> <!-- Sets the log to Errors only -->
           <appender-ref ref="FRAMEWORK_LOG"/>
</category>
Possible values are:
INFO - Normal
WARN - Warnings
ERROR - Errors only
DEBUG - Debug
Disable the Performance monitor either by accessing the "Framework Configuration Editor" or in config/gx_appConfig.xml file set the WritePerformanceLog to false (this is the default configuration).
Disable the Javascript log using the config/gx_clientConfig.xml by setting LogLevel to 0 and ShowLogConsole to false (this is the default configuration).
Remove "Framework Configuration Editor" link from index page: delete the folder z_admin and remove the link to "configuration editor" from the index page.
This deployment type is typically used when the server and application are to be deployed to the same machine under a Java Application Server. This kind of configuration as the ApplinX server and the Web application share the same memory. Refer to supported application servers within Recommended Software.

![]() To deploy both the ApplinX server and JSP Web application
To deploy both the ApplinX server and JSP Web application
Right-click on the relevant application and choose . The Deployment Manager wizard is displayed.
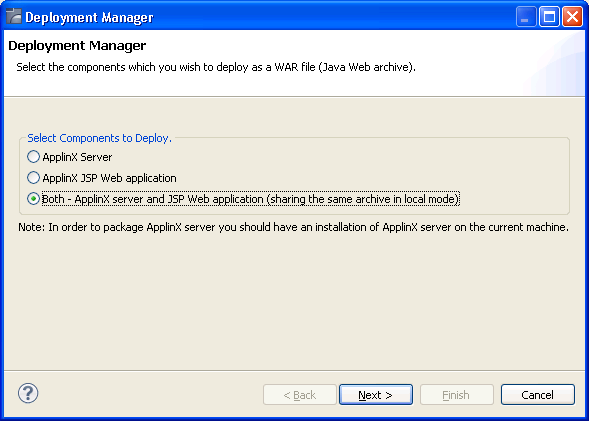
Ensure that the Both - ApplinX server and JSP Web application option is selected.
Click . The Select ApplinX Application screen is displayed.
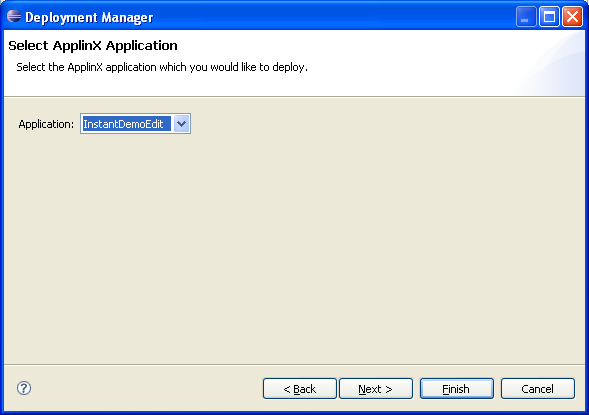
Select the ApplinX application to deploy. Click . The Select ApplinX Web Application screen is displayed.
Select whether to deploy a new application or HTML emulation, or a project from within the workbench, or a project from a different location.
Select Include source files to include the Java files as well as the compiled classes. Click . The Select Package Parameters screen is displayed.
From the list of Application Servers select the server to which you are going to deploy ApplinX server.
Enter the WAR file name, the destination folder where the output file will be placed and the JDK folder (ensure that the JAVA_HOME parameter points to the JDK installation folder).
Note:
When selecting WebLogic, you need to manually extract the content
of the generated ZIP archive file.
Click . The Configure ApplinX Server on Target Machine screen is displayed.
In this screen, configure the ApplinX server parameters to be used on the target machine: the ports, and the license file.
Click .
In the console area, it is possible to see whether the process succeeded or failed. The WAR file created should be deployed to your Java Application Server.
![]() Consider changing the following for production use
Consider changing the following for production use
Change the framework logging according to your needs either by accessing the "Framework Configuration Editor" or in config/gx_logConfig.xml file. For example:
<category additivity="false" name="com.sabratec">
          <level value=" ERROR"/> <!-- Sets the log to Errors only -->
           <appender-ref ref="FRAMEWORK_LOG"/>
</category>
Possible values are:
INFO - Normal
WARN - Warnings
ERROR - Errors only
DEBUG - Debug
Disable the Performance monitor either by accessing the "Framework Configuration Editor" or in config/gx_appConfig.xml file set the WritePerformanceLog to false (this is the default configuration).
Disable the Javascript log using the config/gx_clientConfig.xml by setting LogLevel to 0 and ShowLogConsole to false (this is the default configuration).
Remove "Framework Configuration Editor" link from index page: delete the folder z_admin and remove the link to "configuration editor" from the index page.
Note:
When connecting to an external application server (any server that is
not Tomcat), the changes performed in the Designer will not be saved.
Note:
ApplinX framework supports .NET clustering in a Web farm
environment.
![]() To deploy the Web application
To deploy the Web application
Copy the entire Web application into a temporary working folder.
In the config/gx_logConfig.xml file edit the Logger settings according to your needs (enable/disable the log, target path and log level). For example:
<logger name="com.sabratec">
          <level value="INFO"/> <!"sets the log to normal mode
          <appender-ref ref="FRAMEWORK_LOG"/>
</logger>
When you do not require the performance log, ensure that the last two category nodes in the XML file are commented.
Change the definition of designMode in
config/gx_appConfig.xml to
"false".
Change the definition of the serverURL and applicationName in config/gx_appConfig.xml to the target server.
Copy the updated folder to the relevant Web server.
Map this folder as a virtual directory under the server.
Note:
See
Software Requirements for supported versions.
The following pre-installation steps are only required the first time.
Download and install the Microsoft Visual J# 2.0 Redistributable Package, Second Edition (X64). You can find it under http://www.microsoft.com/en-us/download/confirmation.aspx?id=15468.
Open the Windows Add/Remove Programs on Windows 7 or the Server roles on the Windows Server and select the web server (IIS) component and add to the server the following components:
Security:
Basic Authentication
Client Certificate Mapping Authentication
Digest Authentication
IP security
Request Filtering
IIS Client Certificate Mapping Authentication
URL Authorization
Windows Authentication
Application Development Features (Web-App-Development Component)
.NET Extensibility
ASP
ASP.NET
CGI
ISAPI Extensions
ISAPI Filters
Server Side Includes
Common HTTP Features (Web-Common-Http Component)
Static Content
Default Document
Directory Browsing
HTTP Errors
From Windows Add/Remove Features, also add the Microsoft .NET Framework. See Software Requirements for supported versions.
After deploying the ApplinX application on the IIS server using the ApplinX Web manager, perform the following steps:
Open the IIS Manager
Under , convert the virtual directory created by the ApplinX Web Manager to Application.
Change the Application pool to Classic .NET AppPool.
Add to the default documents section the index.aspx page.
On the security page, add write-permission to IIS users.