Editing an Existing Dimension
Important:
Exercise extreme caution when editing a dimension. Changing a dimension's attributes will cause the destruction of all associated definitions: event map definitions, dimension hierarchies, KPI, rules and all their collected runtime data. Only dimension name and intelligent link information can be safely modified.

To edit an existing dimension
1. In My webMethods: Navigate > Applications > Administration > Analytics > KPIs > Dimensions.
Optimize displays the Dimensions page.
2. Click  Edit beside the dimension you want to edit.
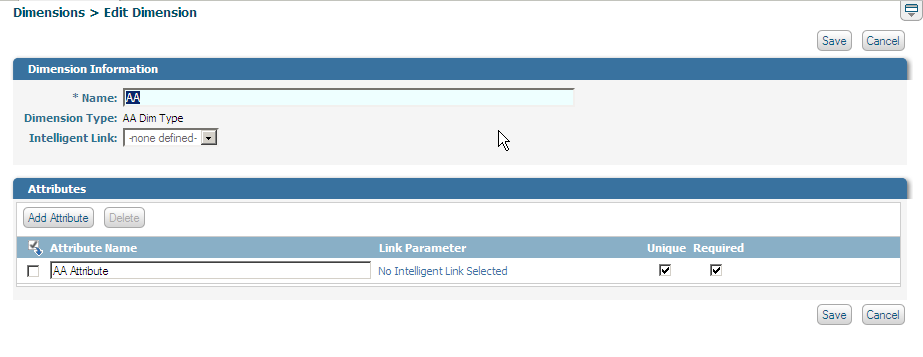
 The Edit Dimension page is displayed.
Note:
Only dimensions that have been configured through the user interface can be modified at the Edit Dimension page. You can view system-defined dimensions such as Step or Database, but you can make only limited modifications.
3. You can change the name of the dimension or enter a new name.
4. You cannot change the Dimension Type from its original setting.
5. To associate an intelligent link with this dimension, select an option from the Intelligent Link list box.
For more information about intelligent links, see
Defining Intelligent Links. The
Intelligent Link list box appears here only if intelligent links already have been configured. Once configured, intelligent links appear on the following
My webMethods pages:

Problems page
KPI Instance Detail page, on the data version of the page (as opposed to the graph/detail version of the page)
Process Instance Detail page
Step Instance Detail page
6. In the Attributes panel, do the following:
a. To change the name of an existing attribute, enter a new unique name in the Attribute Name field. Attributes that are imported from a dimension type cannot be renamed.
b. To add a new attribute for this dimension, click Add Attribute. Optimize inserts a new row at the bottom of the Attributes list. In the Attribute Name field, type a unique name for the attribute.
c. If an intelligent link is associated with the dimension, you can specify a parameter to use with the intelligent link for this attribute by selecting from the Link Parameter drop-down menu.
d. To indicate that the attribute is a unique identifier for the dimension, select the Unique check box. Clear the check box to indicate that the attribute is not a unique identifier for the dimension. For example, a Customer Number attribute might be unique but a Region attribute might not. You must identify at least one unique attribute for the dimension.
e. If the attribute is required, select the Required check box. Clear the check box to indicate that the attribute is not required for the dimension.
Keep in mind that if you set an attribute to Required, a new record for that dimension will be rejected if that attribute is not available. A dimension can have more than one Required attribute. For example, assume you have a Customer dimension that has the attributes Customer ID and Customer Name. Customer ID is set to both Unique and Required, and Customer Name is set only to Required. Whenever you create a new record for the Customer dimension, the record will be rejected unless both Customer ID and Customer Name are supplied. However, only the Customer ID attribute must be unique.
f. To delete an attribute, select the check box beside the attribute name and click Delete.
7. If you are ready for Optimize to create a database table and begin collecting dimension data, click Save.
When you click Save, Optimize allocates database tables to store the dimension attributes in the database and also begins to process incoming data for the dimension. When you save a dimension, any changes to dimension attributes will cause previously collected data to be discarded.