Creating Interfaces
This section describes how to create interfaces for a realm. For general information about interfaces, see
TCP Interfaces, IP Multicast and Shared Memory.
To reach the dialog for defining and managing interfaces for a realm, proceed as follows:
1. In the namespace tree in the navigation frame, select the realm for which you want to create an interface.
2. Select the Comms tab in the Realm Details frame.
3. Select the Interfaces tab.
You now see a table containing all of the available interfaces on a the selected realm.
The default interface is
nsp (Universal Messaging Socket Protocol) and it binds to 0.0.0.0 (i.e. all known interfaces) on port 9000. Refer to the section
Usage of 0.0.0.0 When Defining Interfaces below for related information.
Please note that adding an SSL enabled interface (see
Creating an SSL network interface to a Universal Messaging Realm
Server) for either SSL enabled sockets or HTTPS requires some additional steps.
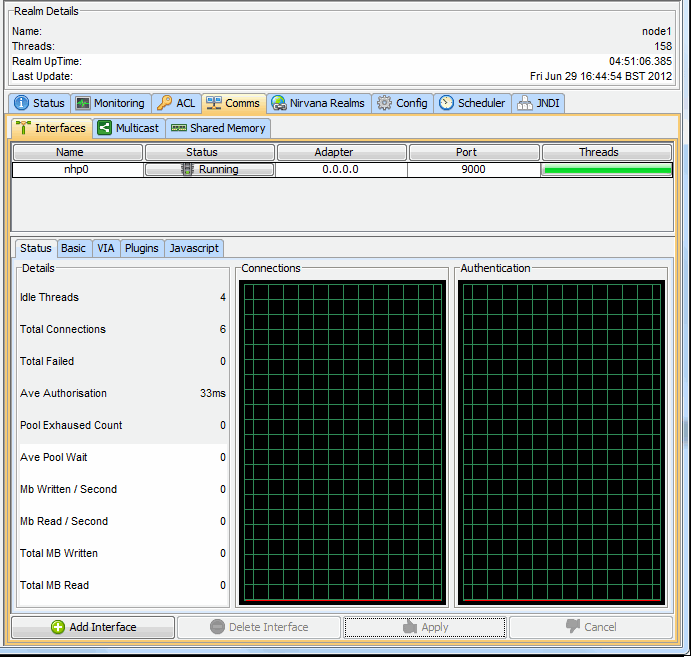
The image below shows the Interfaces tab containing the default realm interface.

The interfaces table consists of 5 columns:
 Name
Name : Defined as protocol + n, where n is a unique sequence number for the interfaces for that protocol.
 Status
 : Shows whether the interface is 'Running', 'Stopped' or 'Error'. The error status is shown if the interface has not been started due to an error.
 Adapter
 : The physical network interface to bind to, expressed either as an IP address or a hostname. The IP address 0.0.0.0 defines all known interfaces. You can use the hostname if you want the interface to be independent of the underlying IP address. Refer to the section
Usage of 0.0.0.0 When Defining Interfaces below for related information.
 Port
Port : The port to bind to.
 Threads
 : An indicator for the number of accept threads the interface has free to accept connections. A full green bar denotes all are free.
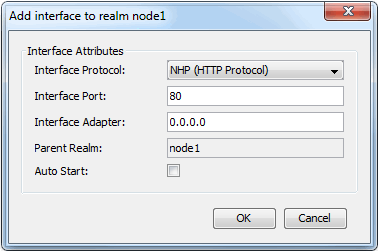
To add a new interface, click on the Add Interface button, which will show a dialog that allows you to choose the protocol, the adapter, the port as well as whether the interface should be started automatically when it is created and also when the server restarts. This dialog is shown below:

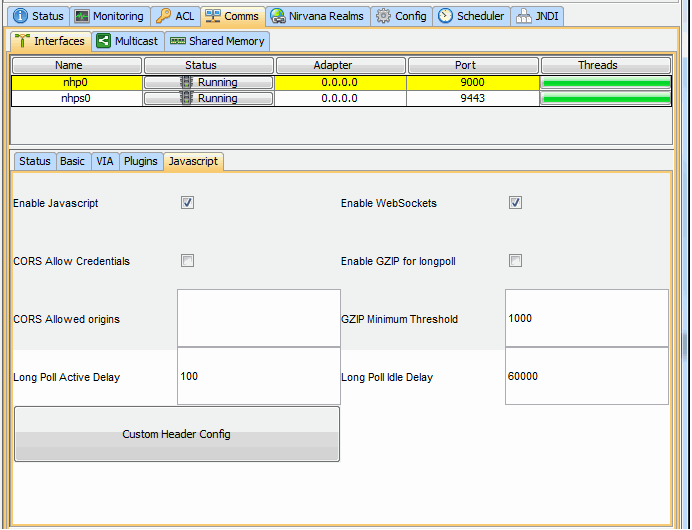
In the example above, we have chosen to add a Universal Messaging HTTP Interface (nhp) that will be bound to all known network interfaces (0.0.0.0) on port 80. If you select the Auto Start option (by ticking the Auto Start checkbox), then click the OK button, this means that when the interface is created in the realm server, it will automatically be started. Auto Start will also cause that interface to be started whenever the realm is restarted. Once the interface has been created it will appear in the interfaces table as shown in the image below.

Further instructions on configuring Universal Messaging interfaces are also available in the section
Interface Configuration.
In addition a VIA rule (see
Interface VIA Rules) can be added to interfaces as a security enhancement.
HTTP / HTTPS Interface
The Javascript tab allows configuration of Comet delivery and is available for HTTP / HTTPS (nhp / nhps) interfaces.
Usage of 0.0.0.0 When Defining Interfaces
When a client connects to a server, the server will deliver all interfaces that are marked as "advertised" (this is set using the checkbox Advertise Interface under the panel Comms > Interfaces > Basic). If you have interfaces bound to 0.0.0.0 (i.e. all known interfaces), then this will include both 127.0.0.1 (localhost) and any IP address that the server node has. This means that the client will receive at least 2 interfaces that it will use to reconnect to the realm.
If the client connection needs to be restarted for any reason, the client will attempt to iterate through this list of interfaces until it is successful on reconnection. However, the order of iterating through this list is not deterministic.
On a successful connection, the Universal Messaging realm server will construct a client principal name in the format <userName>@<IP-Address> used to check permissions on realm resources (e.g. channels or queues), where <IP-Address> is the IP address of the machine where the client is running. The IP address of the client in turn depends on the network interface the client used to connect to the server. In the aforementioned example with a server adapter bound on all network interfaces (0.0.0.0), a local client (i.e. on the same machine as the server) may connect over the loopback interface to the server (localhost) so the connection will come from 127.0.0.1, but that same client may also connect over the real network interface, in which case the IP address will be the address of this network interface. Thus one and the same client may end up with different principal names when reconnecting to the realm server. This may lead to permission issues if a resource's default ACL has been established using one principal name, and is subsequently accessed with a different principal name after a reconnection.
To avoid this, you should either create the interface for an external IP address (not "localhost") or ensure that required ACLs are configured.


