This section describes the following commands of the Layout Painter:
You have to define the source directory into which the adapter classes for the current project are to be written. This directory is used by the Code Assistant.
![]() To view/modify the configuration
To view/modify the configuration
From the tab of the Layout Painter, choose .
A dialog appears. For example:
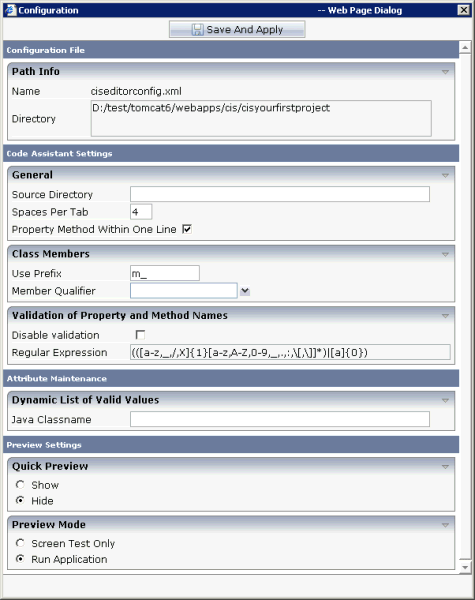
The name of the configuration file and the path to the current project are shown at the top of the dialog.
The following options are available:
- Source Directory
The path to your Java sources. This text box is initially empty.
It is not mandatory that your sources are stored in the <your-webapplication> directory. They can also be stored in another directory.
- Spaces Per Tab
The number of spaces that are to be inserted into the code when you add tabs with the Code Assistant.
- Property Method Within One Line
When this check box is selected, source code is written as follows:
// property >fieldText5<
String m_fieldText5;
public String getFieldText5()
{
    return m_fieldText5;
}
public void setFieldText5(String value)
{
    m_fieldText5 = value;
}
When this check box is not selected, source code is written as follows:
// property >fieldText5< String m_fieldText5; public String getFieldText5() { return m_fieldText5; } public void setFieldText5(String value) { m_fieldText5 = value; }- Use Prefix
The prefix that is to be used for all properties in the adapter class. By default, the prefix "m_" is defined. Example: "m_fieldText5".
- Member Qualifier
Using the options in this drop-down list box, you can specify whether the package is private, protected or public. Example:
protected String m_fieldText5;When none of these options is explicitly defined in this text box, the package is public by default. Example:
public String m_fieldText5;- Disable Validation
When this check box is selected, properties and methods are not validated.
When this check box is not selected (default), properties and methods are validated. In this case, the regular expressions listed in the Regular Expression text box (read only) are used for the validation.
- Java Classname
You can specify a Java class which implements the interface
IEditorValidValuesProvider. For details on this interface, see the Java API documentation. You have to define the package, without the extension ".java". For example:com.softwareag.cis.Testclass- Quick Preview
You can define whether the quick preview button is to be shown at the top of the Layout Painter, in addition to the regular preview button. The following check boxes are available:
Show The quick preview button is shown. When you choose this button, the changes to the adapter class are not applied. Only the layout in the preview area is updated. Hide The quick preview button is not shown (default). See also Previewing the Layout.
- Preview Mode
You can define which mode is to be active by default when the Layout Painter is started. The following check boxes are available:
Screen Test Only Loads the layout with an empty adapter. Run Application The latest changes to the adapter class are used (default). See also Previewing the Layout.
Choose the button to save your changes.
You can create a ZIP file which includes an up-to-date XML (XSD) schema.
If required, you can save and extract the ZIP file and load the included editor.xsd file into an editor such as XML Spy in order to validate an XML layout which has been coded manually.
![]() To create a ZIP file
To create a ZIP file
From the tab of the Layout Painter, choose .
A dialog appears asking whether you want to open or save the ZIP file.
The protocol lists error and warnings for your current layout.
A warning is provided, for example, when a method you have defined in the properties area, has not yet been set. See Using the Code Assistant for further information.
![]() To view the protocol
To view the protocol
From the tab of the Layout Painter, choose .
The following dialog appears.
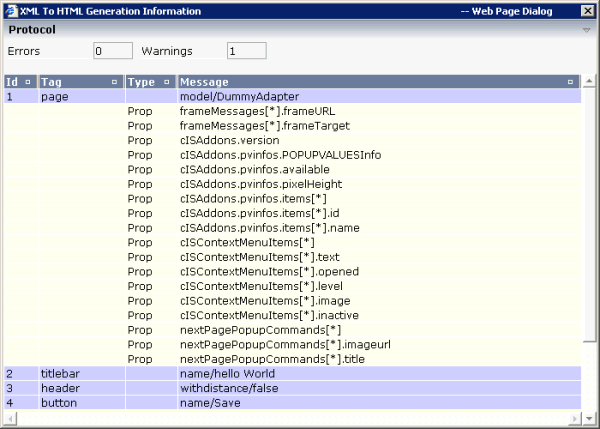
When a layout is not displayed correctly on the client, you can check the data which the server has sent to the client.
Note:
This dialog can also be accessed from the
monitoring tool.
![]() To view the server log
To view the server log
From the tab of the Layout Painter, choose .
A dialog appears. For example:
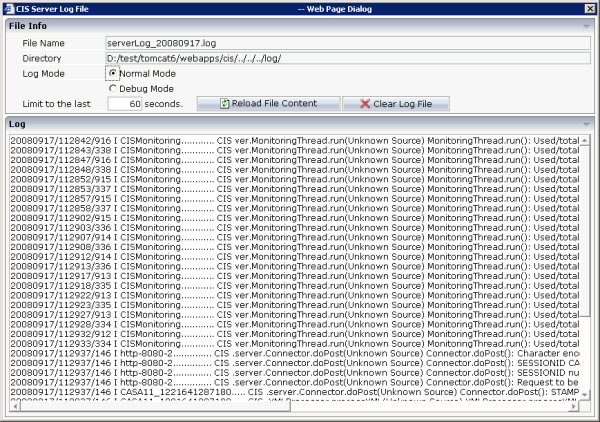
The name of the log file and the position at which it is stored is shown at the top of the dialog.
The following options are available:
- Log Mode
Choose the option button for the required log mode: Normal Mode or Debug Mode.
In debug mode, the log contains more detailed information.
- Limit to the last n seconds
This option is useful when used together with the button. You can specify a different number of seconds.
- Reload File Content
When you choose this command button, only the last n seconds (see the above option) are shown in the server log.
- Clear Log File
When you choose this command button, the content of the log file is deleted.
You can display information on the controls that have been written to the generated HTML page.
![]() To view the log
To view the log
From the tab of the Layout Painter, choose .
A dialog appears. For example:
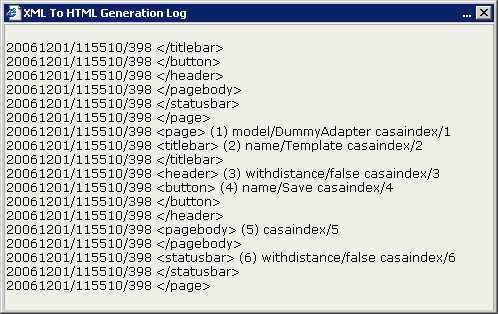
When creating the layout, you can view the currently defined XML code at any point of time.
![]() To view the XML code
To view the XML code
From the tab of the Layout Painter, choose .
A dialog appears. For example:
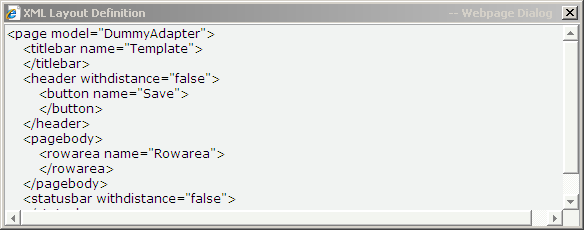
Note:
The properties for a tag which you leave blank are not shown in
the XML code.
You can display information on the resources that are used for the current layout. The resources are the XML layout definition, the Java source and the translation file.
![]() To view the resources
To view the resources
From the tab of the Layout Painter, choose .
A dialog appears. For example:
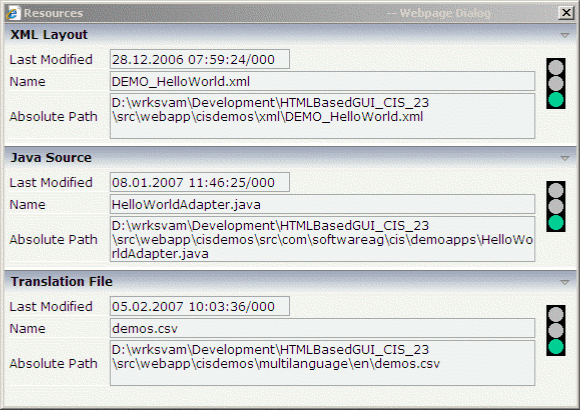
The dialog shows the file names for the different resources, the paths to these files, and the date and time when the resources have been modified last.
A traffic light is shown for each resource. One of the following colors can be shown:
| Color | Description |
|---|---|
| Red | The resource cannot be written. |
| Yellow | Modifications have not yet been saved. |
| Green | The resource has been saved successfully. |