Creating Channels
This section describes the process of creating a Universal Messaging channel on Universal Messaging realm servers. Channels are the logical rendezvous point for data that is published and subscribed. If you are using Universal Messaging Provider for JMS then channels are the equivalent of JMS topics.
Each channel that is created consists of a physical channel within the Universal Messaging realm as well as its logical reference within a namespace that may be made up of resources that exist across multiple Universal Messaging realm servers. Creating channels using the Enterprise Manager creates the physical object within the realm. Once created, references to channels can be obtained using the Universal Messaging Client and Admin APIs. Channels can also be monitored and managed using the Enterprise Manager.
When you connect to a Universal Messaging realm in the Enterprise Manager, all resources and services found within the realm namespace are displayed in a tree structure under the realm node itself. It is possible to view multiple Universal Messaging realm servers from a single enterprise manager instance.
Creating Channels on a Universal Messaging Realm
To create new Universal Messaging channels, the Enterprise Manager provides a number of options. Firstly, in order to create a channel, the branch where the channel will exist needs to be selected within the namespace tree.
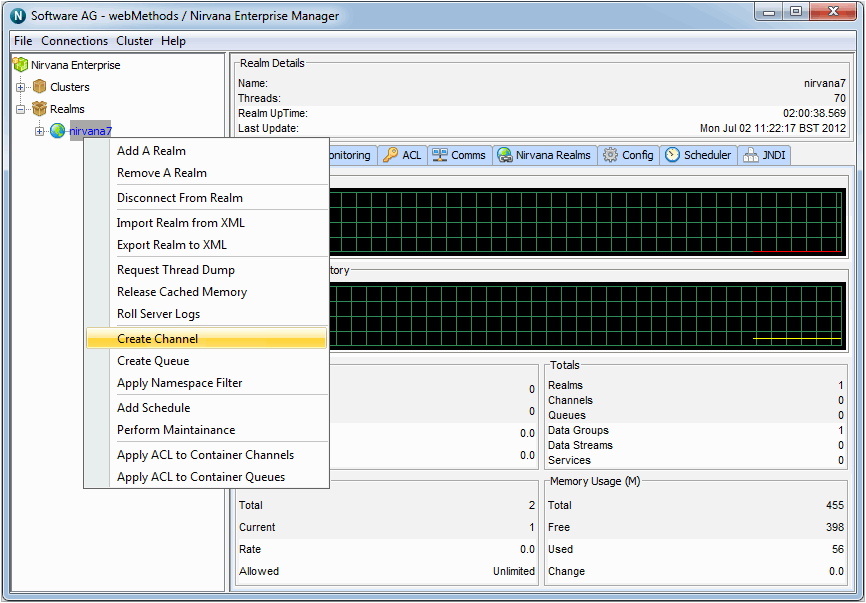
For example, to create a channel called '/eur/rates' on a Universal Messaging realm called 'nirvana7' simply right-click on the realm node to display a pop-up menu which contains a 'Create Channel' option.
When you select this option, the resulting dialog allows you to configure the channel behavior. See the sections
Channel Attributes,
Channel Storage Properties and
Google protobuf descriptors below for a description of the configuration options.
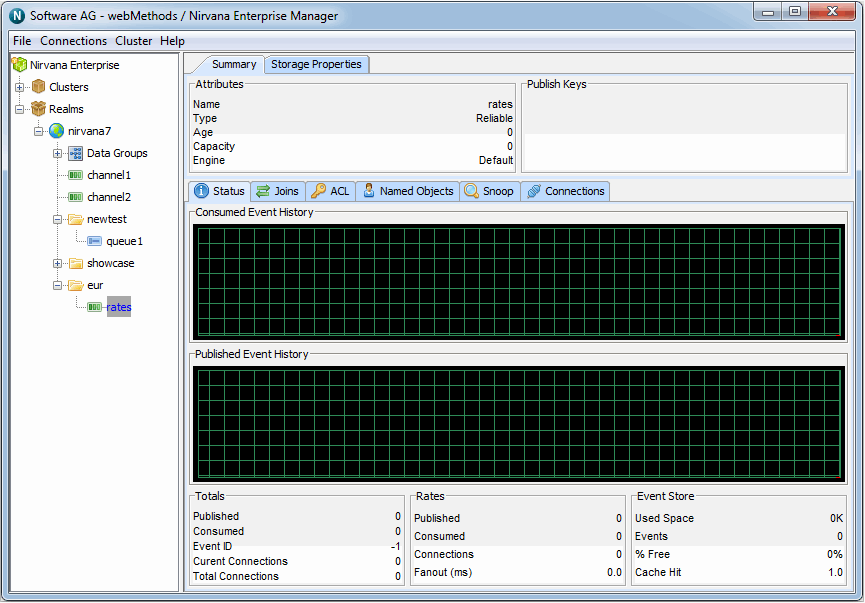
Clicking on the 'OK' button in the Add Channel dialog will create the channel with the name you specified (in this example, '/eur/rates') on the Universal Messaging realm 'nirvana7' and render the channel object in the namespace tree of the Enterprise Manager underneath the realm node. This is shown in the image below.
As you can see from the image above, the channel node in the tree has been created under a folder (which we call a container node) called '/eur' under the realm 'nirvana7'.
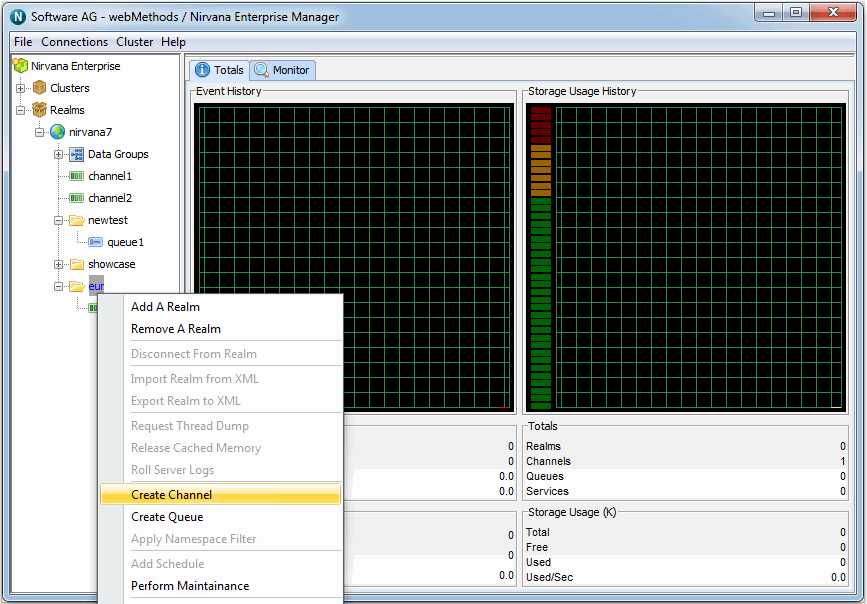
It is also possible to create channels directly underneath container nodes. For example, if we wished to create another channel called '/eur/trades', we could repeat the process described above using the full absolute name of the channel. This would again create a channel called trades under the container node /eur. Alternatively, we can select the /eur node and create the new channel using its relative name /trades. Selecting the container node and right-clicking on the node, shows another pop-up menu of options for container nodes. One of the options is 'Create Channel'. The image below shows this menu as it appears when the container is right-clicked.
By selecting the menu item, 'Create Channel' from the container node, you are once again presented with the create channel dialog. This dialog looks like the dialog used previously, except the dialog shows that the channel will be created under the container /eur.
Channel Attributes
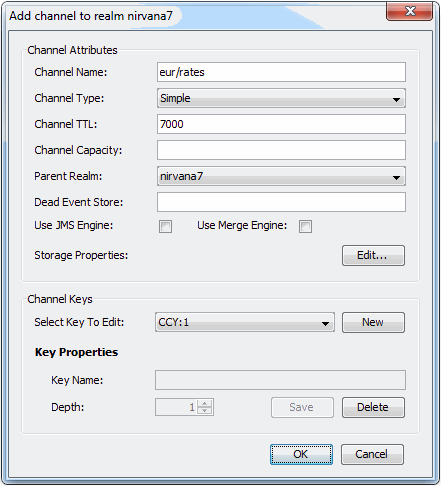
Channels have a set of attributes assigned to them when they are created. The Add Channel dialog allows you to input values for each of these attributes.
For information about the available channel attributes, such as Channel Type and Channel TTL (time-to-live), see the summary of
Channel Attributes.
In the example below, the channel '/eur/rates' will be created with a channel type of Simple and a TTL of 7 seconds.
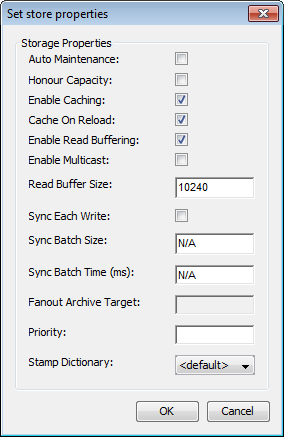
Channel Storage Properties
There are a number of Storage Properties associated with the channel. The storage properties allow you to configure the operational environment of the channel. The properties can be set by clicking the "Edit..." button to the right of "Storage Properties" in the Add Channel dialog.
For information about the available storage properties, see the summary of
Storage Properties of Channels and Queues.
Google protobuf descriptors
If you wish to activate Google protocol buffer (also called "protobuf") descriptors for the channel, click the "Set..." button to the right of "Protobuf Descriptor" in the Add Channel dialog. This allows you to specify a file containing the required protobuf descriptors.
For general information on protocol buffers, refer to the section
Google Protocol Buffers in the
Concepts guide.