This section contains step-by-step instructions to create a new business service. The following topics are covered:
Before creating a new business service, you must create a local project in which to generate the business service data.
![]() To create a Natural project:
To create a Natural project:
Open the NaturalONE perspective.
Select on the menu.
The Create a Natural Project window is displayed. For example:
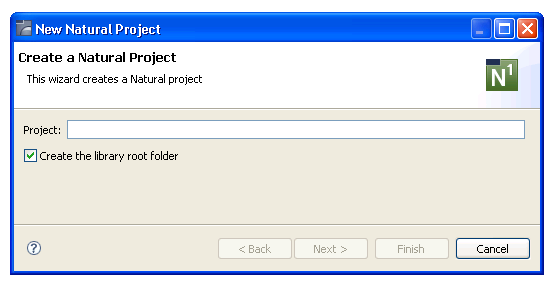
Type "NewProject" in Project.
Select .
The new project is displayed in the Navigator view. For example:
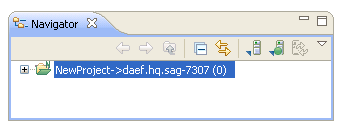
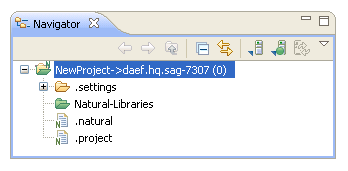
Expand the NewProject node.
The standard project components are displayed. For example:
Note:
For more information on creating a Natural project, refer to the
NaturalONE documentation.
This section describes how to create a new library in which to store the new business service.
![]() To create the library:
To create the library:
Open the context menu for NewProject in the Navigator view.
Select .
The Create a Natural Library panel is displayed. For example:
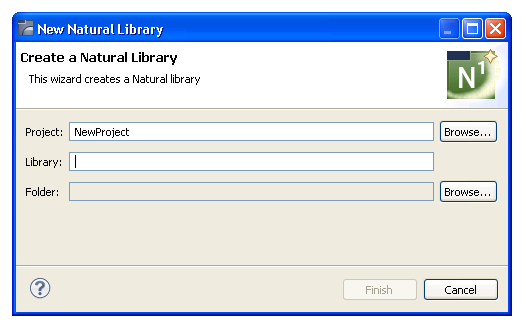
Type "NEWLIB" in Library.
Select .
The library is created locally.
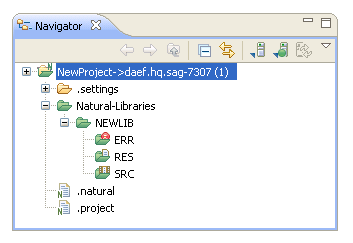
Expand the Natural-Libraries node in the Navigator view.
The new library and sub-folders are displayed. For example:
This section describes how to access the Business Services functions.
![]() To access the Business Services functions:
To access the Business Services functions:
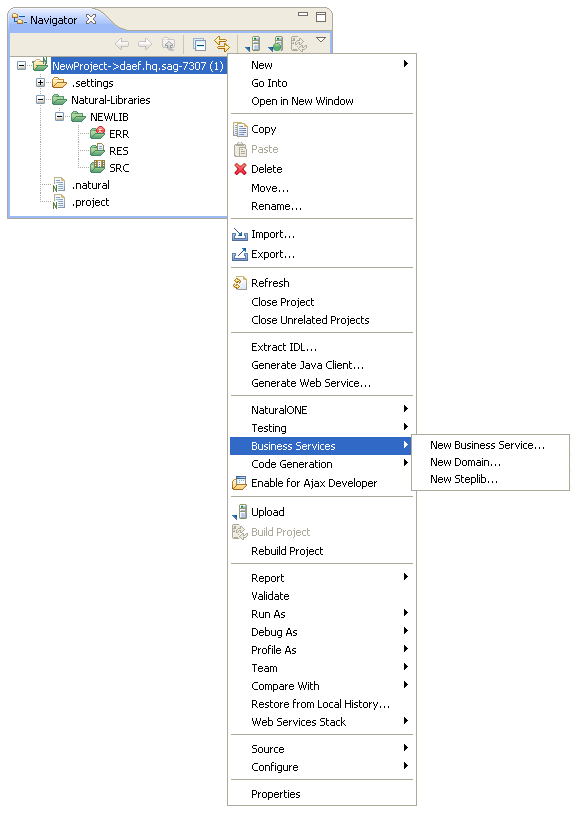
Open the context menu for NewProject in the Navigator view.
Select Business Services.
The Business Service functions are displayed. For example:
You are now ready to use the Business Service wizard to generate your business service. During generation, the wizard also creates default objects required by the service, such as the domain and steplib chain files. After generation, you can edit the default information about these objects as required.
![]() To generate the new business service:
To generate the new business service:
Open the context menu for NewProject in the Navigator view.
Select .
The Define Business Service Details panel is displayed, showing the name of the project. For example:
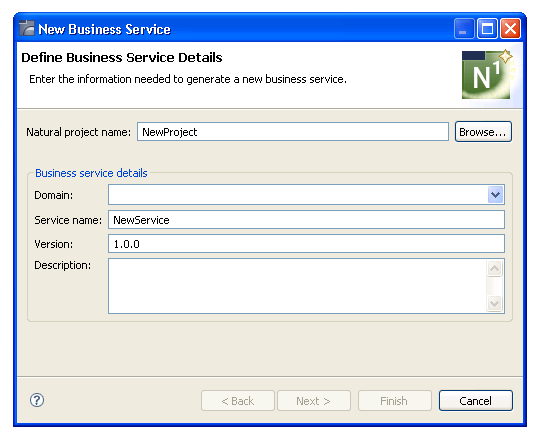
Select "NEWDOM" in Domain.
The domain will be created locally, along with an associated step library entry that points to a steplib chain with the same name as the domain.
Note:
If you specify the name of an existing domain, the wizard will
check the server connection and download any required data from the NBS
repository. Domain only contains domain entries that have
already been downloaded.
Type "This is a new business service." in Description.
Select .
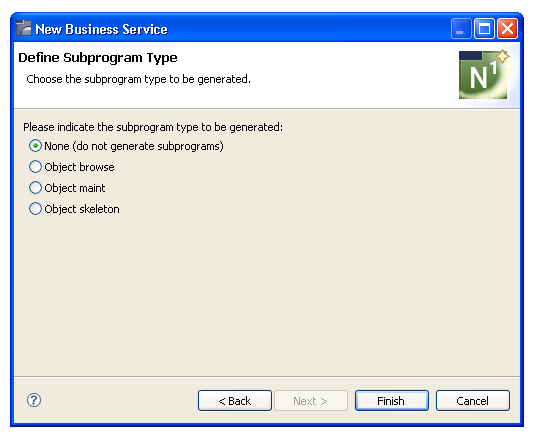
The Define Subprogram Type panel is displayed. For example:
Note:
By default, no subprograms are generated. For more information
about creating the subprogram types on this panel, see Code
Generation.
Select Object browse.
Select .
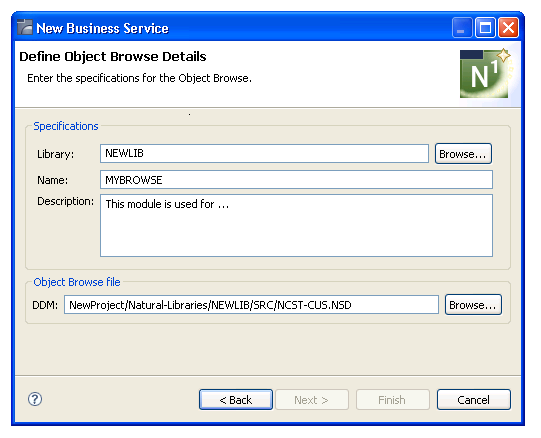
The Define Object Browse Details panel is displayed.
Select "NEWLIB" in Library.
Type "MYBROWSE" in Name.
Select "NewProject/Natural-Libraries/NEWLIB/SRC/NCST-CUST.NSD" in DDM.
For example:
Select .
The Change Defaults panel is displayed. For example:
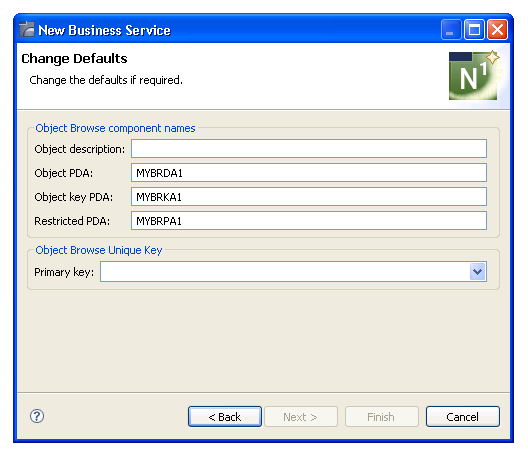
This panel shows the default specification values for the browse subprogram to be generated. Using this panel, you can:
| Task | Procedure |
|---|---|
| Change the name of the parameter data area (PDA) for the object. | Type the name in Object PDA. |
| Change the name of the local data area (LDA) for the object. | Type the name in Object
LDA.
Note: |
| Change the name of the restricted parameter data area (PDA) for the object. | Type the name in Restricted PDA. |
| Define the primary key field used for browse operations. | Select the field in Primary key. |
Type a description of the browse subprogram in Object description.
Select to generate the business service file, the associated domain and steplib files, and the corresponding Natural objects.
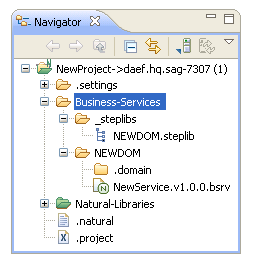
The generated items are added to NewProject and the new business service is now listed in the Navigator view. For example:
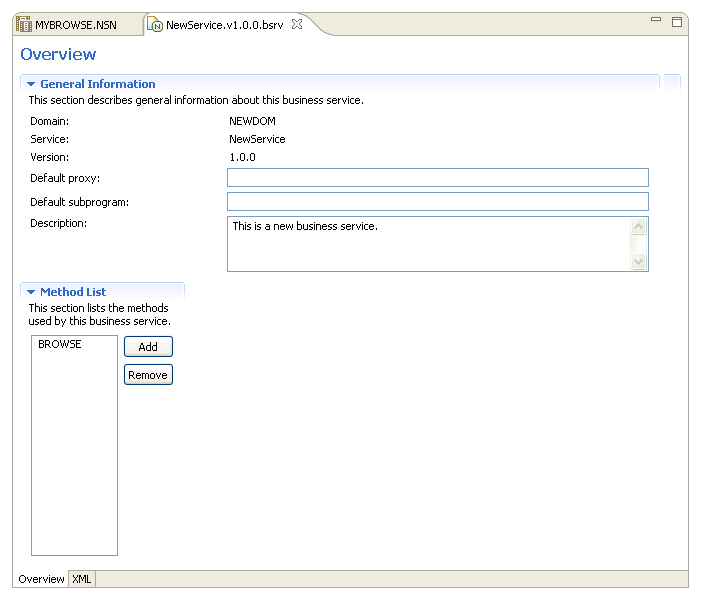
Details about the new service are displayed in the business service editor. For example:
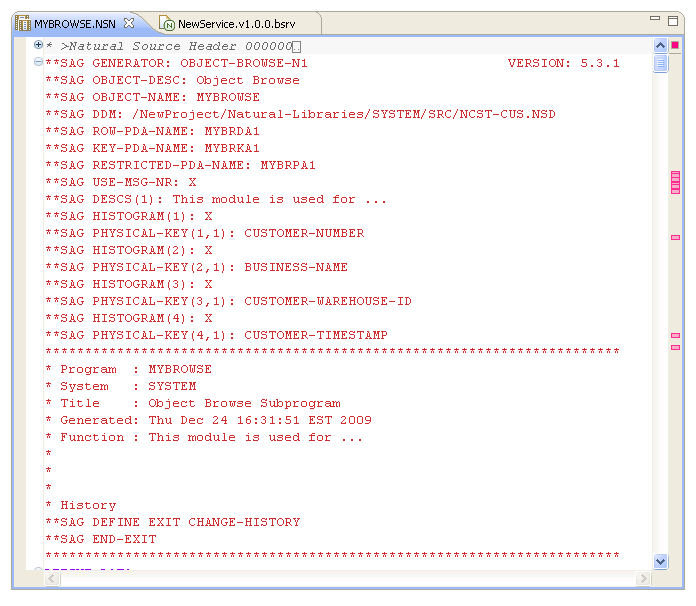
The generated object-browse subprogram is displayed in the editor view. For example:
Save the business service data.
Notes:
At this point, the business service has been created along with a default domain and steplib chain (list of libraries that includes the step library containing the subprogram that implements the service method). If required, you will now edit the default information for the domain and steplib files:
In this example, you will provide a brief description of the default domain generated by the Business Service wizard.
![]() To edit the default domain information:
To edit the default domain information:
Expand the NEWDOM node in the Navigator view.
For example:
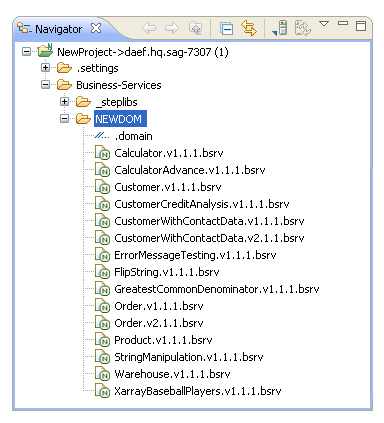
Open the .domain file.
The domain editor is displayed. For example:

Type "This domain contains the sample business service." in Description.
Save the domain file.
Note:
You can upload the domain file to the server using standard
NaturalONE functionality. For information, see the
NaturalONE documentation.
In this example, you will provide the database ID and file number for the default steplib chain generated by the Business Service wizard.
![]() To edit the default steplib information:
To edit the default steplib information:
Expand the _steplibs node in the Navigator view.
For example:
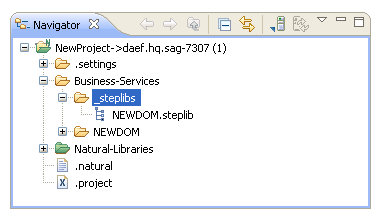
Open the NEWDOM.steplib file.
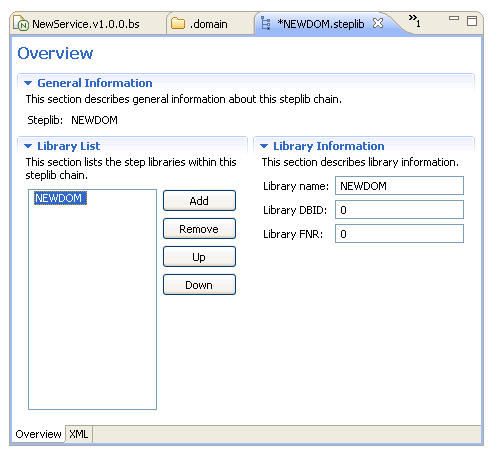
The steplib editor is displayed. For example:
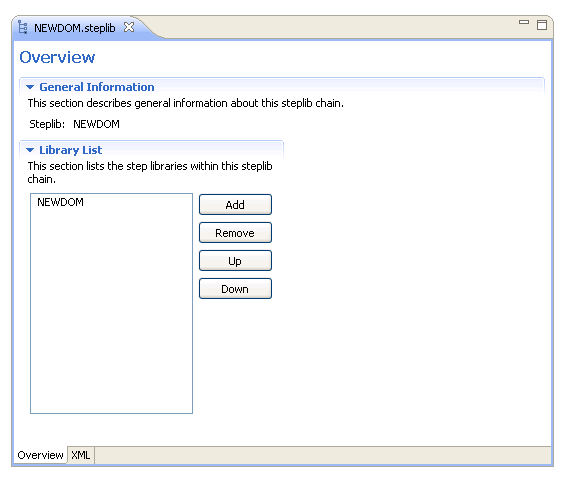
A step library with the same name as the steplib chain is displayed in the Library List section.
Tip:
The settings defined in Properties > Natural >
Steplibs on the context menu for the project can be used to populate
the Library List.
Select NEWDOM in the Library List section.
The Library Information section is displayed. For example:
Note:
The DBID and FNR values are not required; they are only used in
advanced configurations when uploading to the server.
Save the steplib file.