This section describes the Object Maint code generator, which creates a subprogram that maintains complex data objects and updates all entities within an object. The generator also creates the local and parameter data areas.
This section covers the following topics:
![]() To generate an object-maintenance subprogram and data areas:
To generate an object-maintenance subprogram and data areas:
Open the context menu in the Navigator view for the NaturalONE project into which you want to generate the modules.
Or:
Open the context menu in the Navigator view for
the library into which you want to generate the modules.
Select .
The Define Object Maint Details panel is displayed. For example:
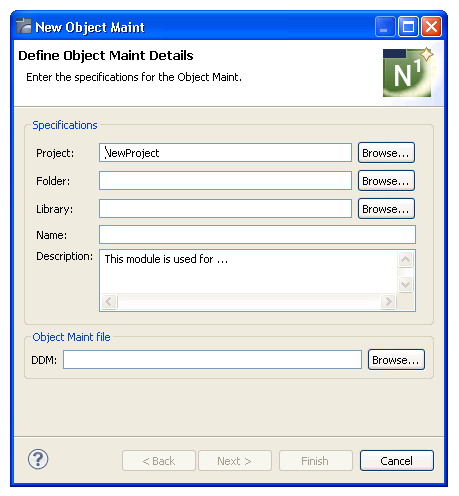
Using this panel, you can optionally:
| Task | Procedure |
|---|---|
| Select another NaturalONE project into which to generate the object maint modules. | Type the name of the project in Project or select to display a window listing the existing projects for selection. The project must currently exist. |
| Select a folder into which to generate the object-maintenance modules. | Type the name of the folder in
Folder or select to display
a window listing the existing folders for selection. The folder must currently
exist within the selected NaturalONE project.
Note: |
| Provide a description of the object maint subprogram. | Type a brief description in Description. |
Type the location of the Natural library into which to generate the subprogram and associated modules in Library.
The library must currently exist.
Or:
Select to display a window listing the
existing libraries for selection.
Note:
The libraries listed for selection are based on the current
project.
Type the name of the object maint subprogram in Name.
Select the DDM for the object maint subprogram in DDM.
Tip:
The DDMs are typically located in the SYSTEM library.
Select to generate the object maint subprogram and associated modules with the default values.
Or:
Select to change the default
specification values.
The Change Defaults panel is displayed. For example:
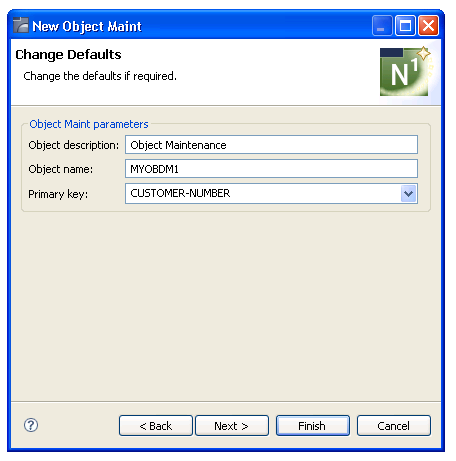
This panel displays the default specification values for the subprogram to be generated. Using this panel, you can optionally:
| Task | Procedure |
|---|---|
| Change the description of the subprogram to be generated. | Type the description in Object description. |
| Change the name of the object. | Type the name in Object name. |
| Change the primary key field used for maintenance operations. | Select the field in Primary key. |
Select to generate the object maint subprogram and associated modules.
Or:
Select to change the default parameter
values.
The Change Advanced Defaults panel is displayed. For example:
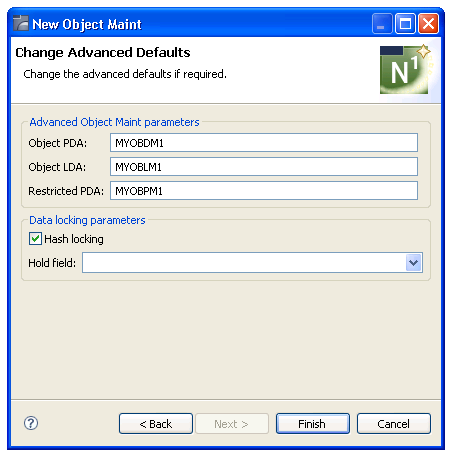
This panel displays the default parameter values for the subprogram to be generated. Using this panel, you can optionally:
| Task | Procedure |
|---|---|
| Change the name of the parameter data area (PDA) for the object. | Type the name in Object PDA. |
| Change the name of the local data area (LDA) for the object. | Type the name in Object
LDA.
Note: |
| Change the name of the restricted parameter data area (PDA) for the object. | Type the name in Restricted PDA. |
| Use a hold field to lock data for maintenance operations. | Select the hold field in Hold
field. For more information, see
Record-Locking
Options.
Note: |
Note:
If desired, a Generation Progress window can
be displayed during generation. For information, see
Set Code Generation
Preferences.
Select .
After generation, the subprogram and associated modules are displayed in the Navigator view. For example:
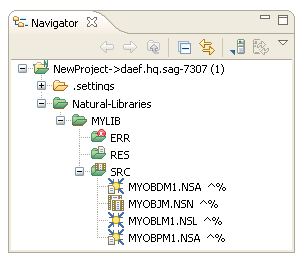
These modules are:
| Module | Description |
|---|---|
| MYOBDM1.NSA | Parameter data area for the object maint subprogram |
| MYOBJM.NSN | Object maint subprogram |
| MYOBLM1.NSL | Local data area for the object maint subprogram |
| MYOBPM1.NSA | Restricted parameter data area for the object maint subprogram |
The subprogram is displayed in the editor view. For example:
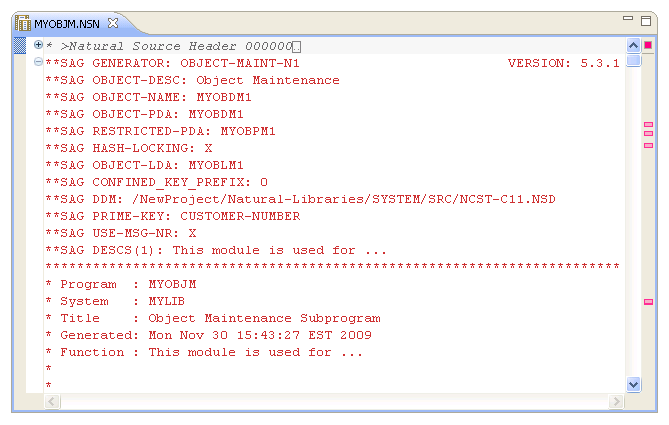
Save the subprogram and associated modules.
At this point, you can:
Use the NaturalONE Testing option to test the subprogram. For information, see Test a Subprogram Directly in Application Testing.
Define user exits for the subprogram. For information, see User Exits for the Object Maint Subprogram.
Edit generated source code that is not within user exits. For information about the protected lines in the generated source code, see Using the Source Editor in Using NaturalONE.
Use NaturalONE functionality to upload all generated modules to the server.
In a client/server environment, data retrieved for maintenance is not locked initially. Instead, the object maint subprogram retrieves the data again and locks it prior to updating, storing, or deleting data from the database.
To ensure changes are not overwritten by another user during this process, the subprogram must determine whether the data has changed since the initial retrieval. To do this, the object maint subprogram has two record-locking options:
Hash-locking
This method is the most reliable. The subprogram retrieves the initial data and hashes it to a number. When it retrieves the data to lock it, the subprogram hashes it to a number again. Logical variables are stored in alphanumeric format in the local data area to process the hashed values. All data must hash to the same value as when it was requested. If it does, data has not changed and the changes are allowed.
Timestamp
The timestamp (or counter) method is the traditional record-locking mechanism. This method assumes that every time data changes, the timestamp also changes. This method is more efficient than the hash-locking method because the subprogram only has to check one field, but this assumption can be incorrect when the file is not maintained by an Object Maint-generated subprogram (for example, a programmer-coded subprogram may not change the timestamp when data is modified).
If the file is not normally maintained through an Object Maint-generated subprogram, the hash-locking option should be used. If the file is only maintained through an Object Maint-generated subprogram, the timestamp option should be used (as it is more efficient). For more information, see Natural Construct Object Models.
The Outline view for the object-maintenance subprogram displays the available user exits. For example:
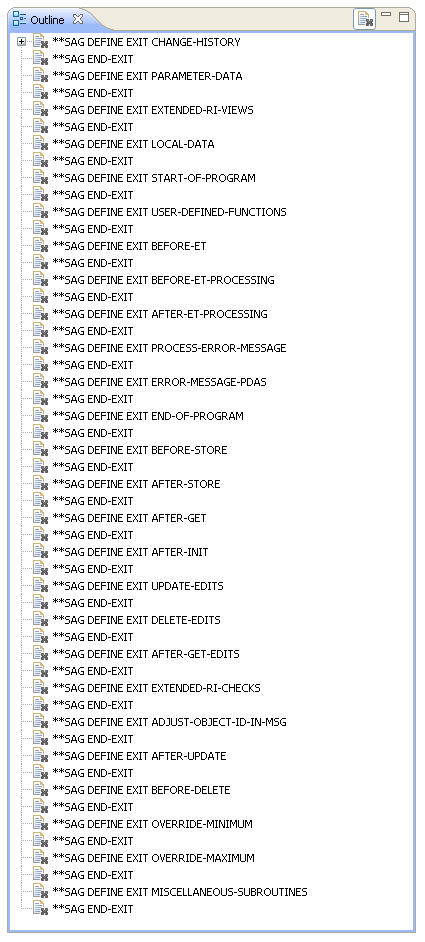
You can use these exits to define additional processing.
Notes: