
In the object workspace, the LMS elements are shown when you expand an OSD file.
This document covers the following topics:
Before displaying LMS elements, you can define a filter so that only those elements are shown which correspond to your filter criteria.
 To define a filter
In the object workspace, select the appropriate file in the OSD Files folder.
Or:
Select an LMS element in the list view window which shows a
list of LMS elements.
Invoke the context menu and choose either (when a file has been selected in the OSD Files folder) or (when an element has been selected in the list view window).
Or:
Press either CTRL+F3 (for the command) or F3 (for the
command).
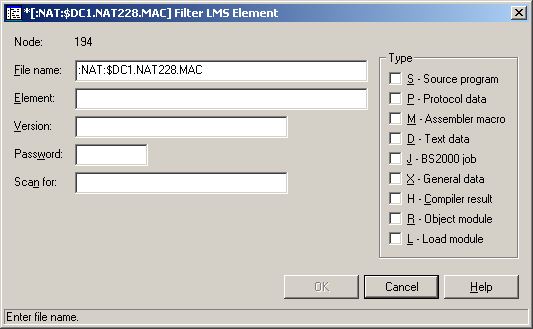
A dialog box appears. Its name in the title bar depends on the command that has been used.
Note:
When you have chosen the command, the File name text box is
dimmed.
Enter the filter criteria.
| Option | Description | |
|---|---|---|
| File name * | The name of the current OSD file is shown. You can specify a different name to select a different file. | |
| Element | Enter filter criteria for the element. If more than one version exists for an element, the highest version is listed. | |
| Version | Enter filter criteria for a previous element version. Default is the highest version. | |
| Password | Enter the system password, if the library or element is protected. Must be specified irrespective of read or write protection. | |
| Scan for | When you specify a character string, only the elements containing this string will be shown. | |
| Type | Select one or more types for the elements to be listed. | |
| S | Source program. | |
| P | Protocol area. | |
| M | Assembler macro. | |
| D | Text data. | |
| J | BS2000 job. | |
| X | General data. | |
| H | Compiler result. | |
| R | Object module. | |
| L | Load module. | |
* Cannot be modified with the command.
Choose the button.
The number of objects shown in the list view window depends on whether or not a filter has been defined for the LMS elements (see Filtering LMS Elements).
To list LMS elements
In the object workspace, select the appropriate file in the folder.
Invoke the context menu and choose .
Or:
Press F8.
The type of information contained in the list view window depends on whether or not a string has been specified with the Scan for option of the filter criteria (see Filtering LMS Elements).
The following topics are covered below:
When a string has not been specified with the Scan for option, all columns of the list are shown.
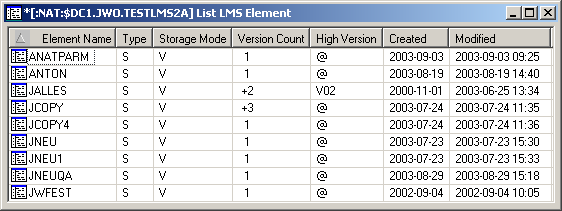
The following columns are provided:
| Column | Description | |
|---|---|---|
| Element Name | If more than one version exists for an element, the highest version is listed. | |
| Type | Type of element. | |
| Storage Mode | Possible values: | |
| D | Delta. | |
| V | Full version. | |
| Version Count | Number of versions for the element. | |
| High Version | Highest version encountered. | |
| Created | Creation date of highest version in format YYYY-MM-DD. | |
| Modified | Date (YYYY-MM-DD) and time the highest version was last modified or renamed. | |
When a string has been specified with the Scan for option, only the elements which contain this string are shown in the list. For example, when the string "missing" has been defined, the list is shown as follows:
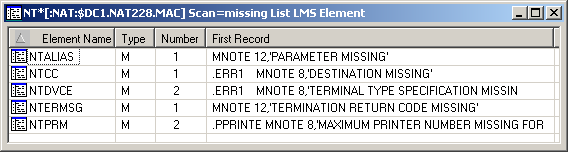
The following columns are provided:
| Column | Description |
|---|---|
| Element Name | The name of the element. |
| Type | Type of element. |
| Number | The number of times the string occurs in the element. |
| First Record | The first line that contains the string in the element. |
You can add a new LMS element to an OSD file.
To add a new LMS element
Select an LMS element in the list view window which shows a list of LMS elements, or in the object workspace.
Invoke the context menu and choose .
Or:
Press CTRL+N.
An empty new element appears in an editor window in the content pane:
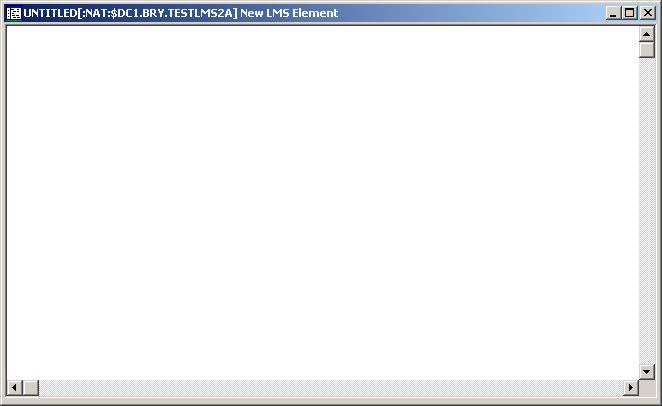
Enter the data for the new element.
See also Commands for Editing an Object.
From the menu, choose to save your data in the editor window.
The following dialog box appears.
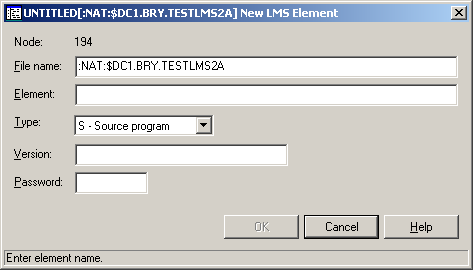
Enter the following information:
| Option | Description | |
|---|---|---|
| File name | Displays the file name last used. You can select any other file by typing over this name. | |
| Element | Name for the new LMS element. | |
| Type | Select one of the following types: | |
| S | Source program. | |
| P | Protocol area. | |
| M | Assembler macro. | |
| D | Text data. | |
| J | BS2000 job. | |
| X | General data. | |
| H | Compiler result. | |
| R | Object module. | |
| L | Load module. | |
| Version | Optional. A version name for the LMS element. | |
| Password | Optional. Enter a password if the new LMS element is to be password-protected. | |
Choose the button.
You can submit an LMS element to the operating system.
To submit an LMS element
Select an LMS element in the object workspace or list view window.
Invoke the context menu and choose .
Or:
Press CTRL+S.
A dialog box appears, confirming that the element has been submitted.
Follow mode is automatically activated. When the job has terminated, a corresponding message is shown.
Choose the button to close the dialog box.