Managing External Objects
This document covers the following topics:
Generating an External Object
This feature requires that the Schema Generation plug-in is installed and activated.
You can generate an external object from a documentation object.
![]() To generate an external object
To generate an external object
-
Select the documentation object for which you want to generate an external object.
You can generate an external object from the following object types:
-
DB2 databases
-
dataspaces
-
files of many different types
-
programs of type database function and SQL procedure
-
storagespaces
-
verifications of type automatic
-
-
Invoke the context menu and choose .
Note:
When the generation function is not available for the selected documentation object, the command is disabled.- Adabas files and DB2 tables/views only:
-
When you have selected an Adabas file or a DB2 table or view, a dialog box appears in which you have to select the external object type. Example for an Adabas file:
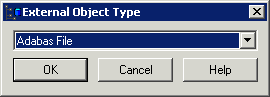
Select the desired type for the external object from the drop-down list box and choose the button.
The schema generation wizard appears. See the documentation for the Schema Generation plug-in for general information on how to use the wizard.
Note:
Since you have already selected a documentation object, the first page of the wizard which is described in the Schema Generation documentation does not appear when being invoked from Object Description. In addition, the button which is normally shown on the last page of the wizard is not available when being invoked from Object Description. -
Specify all required options. If available choose the button to proceed to the next page.
For detailed information on the object type-specific information that can be specified using this wizard, see Generation of External Objects in External Objects in Predict.
-
If all required information has been specified, choose the button to start generation.
When the generation process has completed, the last page of the wizard is shown. When the List option has been selected on a previous page of the wizard, a report is shown. If an error occurs during the generation process, an error report is shown.
Comparing a Documentation Object and an External Object
You can compare a documentation object and an external object in order to detect any inconsistencies.
![]() To compare a documentation object and an external object
To compare a documentation object and an external object
-
Open the External Objects node containing the external object that you want to compare.
-
Select the external object.
-
Invoke the context menu and choose .
Note:
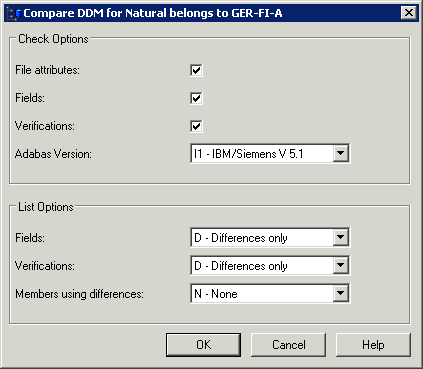
When the comparison function is not available for the selected external object, the command is disabled.The resulting dialog box depends on the type of object that has been selected. Example for a DDM:
-
Specify all required options. See Comparison in External Objects in Predict.
-
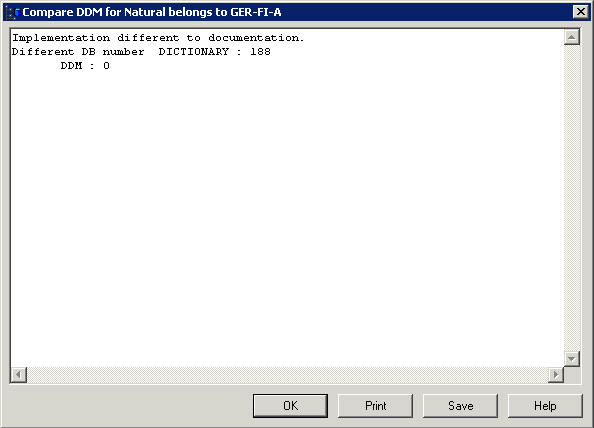
Choose the button.
A report is shown. Example:
-
If you want to print or save the report, choose the corresponding command button. See Printing and Saving a Report for an External Object for further information on these command buttons.
-
To close the window in which the report is shown, choose the button.
Refreshing an External Object
You can refresh Adabas files and DB2 tables/views. When you refresh such an external object, you delete all of its contents.
See Administration of External Objects in External Objects in Predict.
Caution:
Do not confuse this type of refresh (this term is used with
Adabas) with the refresh function in Windows which
updates your display.
![]() To refresh an external object
To refresh an external object
-
Open the External Objects node containing the external object that you want to refresh.
Tip:
If you want to refresh several external objects at the same time, you have to open the list view window. -
Select the external object(s).
-
Invoke the context menu and choose .
Note:
When the refresh function is not available for the selected external object, the command is disabled.A dialog box appears asking whether you really want to refresh the object.
-
To refresh the current object, choose the button.
Or:
To refresh all selected objects without further confirmation, choose the button.
Disconnecting an External Object
When you disconnect an external object from its corresponding documentation objects, the implementation pointer from the documentation object to the external object is deleted, but the object itself remains intact.
See Administration of External Objects in External Objects in Predict.
![]() To disconnect an external object
To disconnect an external object
-
Open the External Objects node containing the external object that you want to disconnect.
Tip:
If you want to disconnect several external objects at the same time, you have to open the list view window. -
Select the external object(s).
-
Invoke the context menu and choose .
A dialog box appears asking whether you really want to disconnect the object.
-
To disconnect the current object, choose the button.
Or:
To disconnect all selected objects without further confirmation, choose the button.Disconnected external objects are no longer shown in the External Objects node.
Purging an External Object
You can purge external objects using the command. When you purge an external object, it is disconnected and physically deleted.
See Administration of External Objects in External Objects in Predict.
![]() To purge an external object
To purge an external object
-
Open the External Objects node containing the external object that you want to purge.
Tip:
If you want to purge several external objects at the same time, you have to open the list view window. -
Select the external object(s).
-
Invoke the context menu and choose .
A dialog box appears asking whether you really want to delete the object.
-
To confirm the deletion for the current object, choose the button.
Or:
To delete all selected objects without further confirmation, choose the button.
Printing and Saving a Report for an External Object
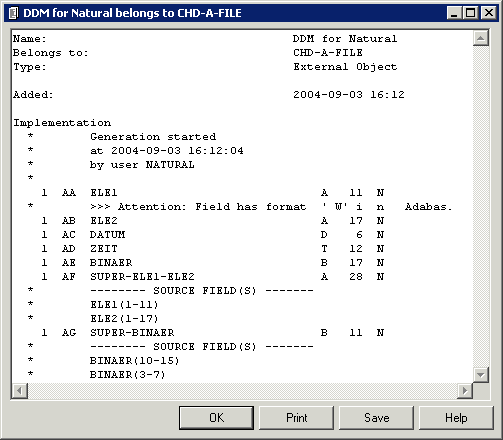
In contrast to the documentation objects, an or command is not available for external objects. However, information about an external object can be shown as a report in simple text format. It is possible to print and save this report.
![]() To print and save a report
To print and save a report
-
Select the external object in the tree view window for the documentation objects or from a list view window showing the external objects.
-
Invoke the context menu and choose .
A window such as the following appears.
-
Choose the desired command button:
Command Button Description The Print Setup dialog box appears. Specify all required information (for example, a different printer or text orientation) and choose the button. The Save Report dialog box appears. Select the folder in which you want to store the report, specify a report name and choose the button. -
To close the window in which the report is shown, choose the button.