General Commands for Managing Different Types of Objects
This document covers the following topics:
General Information
The commands described in this chapter work similarly with all types of objects. The descriptions below are not repeated in later sections of this documentation which deal with the different types of objects.
Editing an Object
You can edit datasets, files, members, LMS elements and LMS element versions.
When you edit an object, an editor window appears in which you can modify the content of the object.
![]() To edit an object
To edit an object
-
Select the appropriate object (either in the object workspace or list view window).
-
Invoke the context menu and choose .
z/VSE files only: A dialog box appears in which you enter your preferences for editing the file. You then have to choose the button to display the editor window.

Note:
This dialog box only appears for z/VSE files, not for other types of objects.The selected object appears in an editor window in the content pane (the example below shows a z/VSE file).
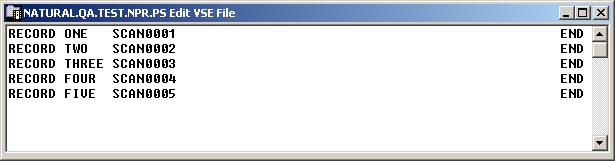
In addition, the menu is now shown in the menu bar and a special toolbar for the editor appears. See Commands for Editing an Object.
-
Apply all required changes to the object.
-
From the menu, choose to save your changes in the editor window.
Or:
Choose the following toolbar button.
Or:
Press CTRL+S.A dialog box appears informing you that the object has been saved.
-
From the menu, choose to close the editor window.
Or:
Choose the following toolbar button.
Or:
Press CTRL+F4.Or:
Or choose the standard close button at the top right of the window.When you close the editor window and recent changes have not yet been saved, a dialog box appears asking whether you want to save the changes. You have to choose one of the following command buttons:
Command Button Description Save the changes and close the editor window. Abandon the changes and close the editor window. Return to the editor window.
Commands for Editing an Object
The following table lists the editing commands that are available in an editor window. The commands can be invoked from the menu, or from a context menu which is invoked directly in the editor window. In addition to the commands, the following table also lists the toolbar buttons and shortcut keys that can be used instead of a command.
| Toolbar Button | Command | Shortcut Key | Description |
|---|---|---|---|
|
|
CTRL+Z | Undo the last editing step. | |
|
|
CTRL+Y | Redo an "undone" editing step. | |
|
|
CTRL+X | Cut a marked section of code or text and copy it to the clipboard for pasting to another position in the editor window or to an external editor. | |
|
|
CTRL+C | Copy a marked section of code or text to the clipboard for pasting to another position in the editor window or to an external editor. | |
|
|
CTRL+V | Paste a section of code or text to a selected position the editor window. | |
|
|
DEL | Delete a marked section of text or code. | |
|
|
CTRL+A | Select all code or text in the editor window. | |
|
|
CTRL+F | Find a string of text or code. A dialog box appears in which you can enter search criteria. | |
|
|
F3 | Find the search string again. | |
|
|
CTRL+H | Find and replace all instances of a string of code or text. A dialog box appears, in which you can enter selection criteria for the search, and enter code or text for the replacement. | |
|
|
CTRL+F3 | Find and replace the next instance of a string of code or text. A dialog box appears, in which you can enter selection criteria for the search, and enter code or text for the replacement. | |
|
|
CTRL+G | Go to a specified line of code or text. A dialog box appears in which you can enter the line number. | |
|
|
CTRL+P | Print using the standard Windows functionality. | |
|
|
- | Submit the object as a job. |
Browsing an Object
You can display an object in read-only mode. The content of the object is then displayed a browse window. You can copy the contents, but you cannot modify it.
You can browse all objects which can also be edited. In addition, it is also possible to browse sysout datasets, jobs and active jobs.
Browsing is limited to a record length of 2500 bytes. If a record is longer, it is truncated and only the first 2500 bytes are displayed.
![]() To browse an object
To browse an object
-
Select the appropriate object (either in the object workspace or list view window).
-
Invoke the context menu and choose .
Or:
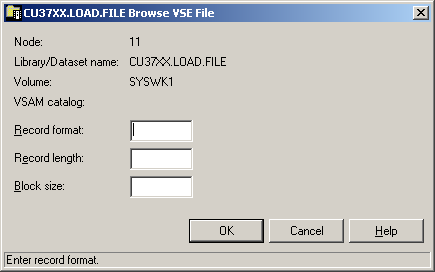
Press CTRL+B.z/VSE files only: A dialog box appears in which you enter your preferences for browsing the file. You then have to choose the button to display the browse window.
Note:
This dialog box only appears for z/VSE files, not for other types of objects.The selected object appears in a browse window in the content pane (the example below shows a z/VSE file).
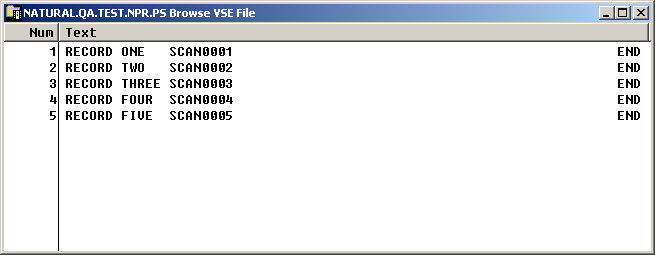
In addition, the menu is now shown in the menu bar and a special toolbar for browse mode appears. See Commands for Browsing an Object.
-
From the menu, choose to close the browse window.
Or:
Choose the following toolbar button.Or:
Press CTRL+F4.Or:
Or choose the standard close button at the top right of the window.
Commands for Browsing an Object
The following table lists the browsing commands that are available in a browse window. The commands can be invoked from the menu, or from a context menu which is invoked directly in the browse window. In addition to the commands, the following table also lists the toolbar buttons and shortcut keys that can be used instead of a command.
| Toolbar Button | Command | Shortcut Key | Description |
|---|---|---|---|
|
|
CTRL+C | Copy a marked section of code or text to the clipboard for pasting to an external editor. | |
| Not available. | CTRL+R | Reverse the line order of code or text in an object. The last line appears at the top of the browse window, the first line at the bottom. | |
| Not available. | F5 | Refresh text or code in the browse window. | |
|
|
CTRL+F | Find a string of text or code. A dialog box appears in which you can enter search criteria. | |
|
|
F3 | Find the search string again. | |
|
|
CTRL+G | Go to a specified line of code or text. A dialog box appears in which you can enter the line number. | |
|
|
CTRL+P | Print using the standard Windows functionality. |
Copying an Object
You can copy datasets, files, members and LMS elements.
When you copy an object, a new instance of that object is created at the location that you specify. For example, you can copy a z/OS dataset to a different z/OS node or to a BS2000 file.
Note:
The command described in this
section is different from the standard Windows
command. It does not copy any information to the Windows clipboard. Instead, it
immediately places the copied object at the specified location (without the
need for a command).
![]() To copy an object
To copy an object
-
Select the appropriate object (either in the object workspace or list view window).
-
Invoke the context menu and choose .
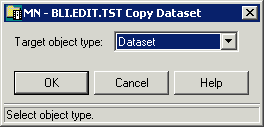
The following dialog box appears:
-
From the drop-down list box, select the target object type (dataset, member, z/VSE file, librarian member, OSD file, or LMS element).
-
Choose the button.
The dialog box for the selected target object type appears.
-
Specify the information for the target object type as described below in the appropriate section.
Note:
If this is the first time you are copying to the object type and if the source and target types are identical, the default values for the target object are taken from the source object. The next time the object type is selected, the previously entered values are used by default. -
Choose the button.
The following topics are covered below:
Copying an Object to a Dataset
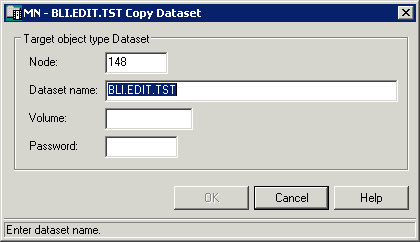
Note:
If you are copying from a dataset, the
Node and Dataset name text boxes
contain the dataset default values.
You can specify the following information:
| Option | Description |
|---|---|
| Node | The name of an Entire System Server node. |
| Dataset name | A target dataset name. |
| Volume | The serial number of the volume, if the dataset is not cataloged. |
| Password | A system password, if the dataset is to be protected. |
The selected object will be copied to the specified dataset. If the target dataset does not exist, it will be allocated, if possible.
If you are copying from a dataset, the new dataset is automatically cataloged and appears in the Datasets folder.
Copying an Object to a PDS Member
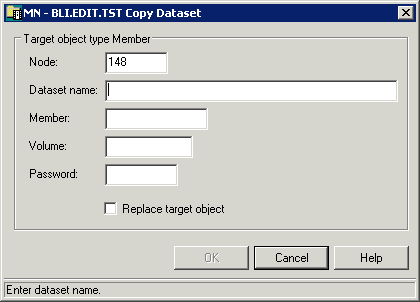
Note:
If you are copying from a PDS member, the
Node, Dataset name and
Member text boxes contain the member default
values.
You can specify the following information:
| Option | Description |
|---|---|
| Node | The name of an Entire System Server node. |
| Dataset name | The name of the dataset which will contain the new member. |
| Member | A target member name. |
| Volume | The serial number of the volume on which the target dataset resides (required only if dataset is not cataloged). |
| Password | A system password, if member is to be protected. |
| Replace target object | Activate this check box, if you are copying to a member which already exists. |
The selected object will be copied to the specified member.
Copying an Object to a z/VSE File
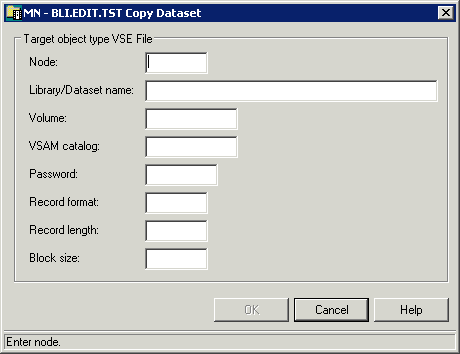
Note:
If you are copying from a z/VSE file, the
Node, Library/Dataset name,
Volume, VSAM catalog and
Record format text boxes contain the file default
values.
You can specify the following information:
| Option | Description | |
|---|---|---|
| Node | The name of an Entire System Server node. | |
| Library/Dataset name | A name for the new dataset. | |
| Volume | For non-VSAM installations: required only if the dataset has no label definition. The serial number of the volume on which the target dataset resides. | |
| VSAM catalog | For VSAM installations: required only if the dataset has no label definition. A VSAM catalog name for the target database. | |
| Password | A system password, if dataset is protected. | |
| Record format | A record format, for example: | |
| FB | Fixed block. | |
| VB | Variable block. | |
| FBA | Fixed block, ANSI control characters. | |
| Record length | The logical record length in bytes. | |
| Block size | The block size in bytes. | |
The selected object will be copied to the specified z/VSE file. If the target file does not exist, it will be allocated, if possible.
Copying an Object to a Librarian Member
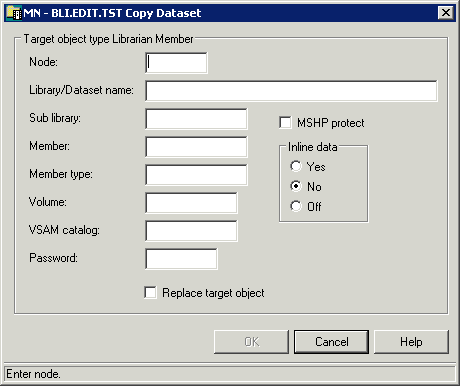
Note:
If you are copying from a librarian member, the
, , ,
, ,
and
text boxes contain the member default values.
You can specify the following information:
| Option | Description | |
|---|---|---|
| Node | The name of an Entire System Server node. | |
| Library/Dataset name | The name of the dataset which will contain the new member. | |
| Sublibrary | The name of the sublibrary which will contain the new member. | |
| Member | A name for the target member. | |
| Member type | A type for the target member. Members can be grouped and listed according to a user-defined type, which you can specify here. | |
| Volume | For non-VSAM installations: required only if the dataset has no label definition. The serial number of the volume on which the target dataset resides. | |
| VSAM catalog | For VSAM installations: required only if the dataset has no label definition. The name of the VSAM catalog which will contain the target member. | |
| Password | A system password, if dataset is protected. | |
| Replace target object | Activate this check box, if you are copying to a member which already exists. | |
| MSHP protect | Activate this check box to bypass MSHP protection; otherwise, leave this check box blank (relevant only for the command). | |
| Inline data | Relevant only for the command. Choose one of the following option buttons: | |
| Yes | Indicates that the member contains SYSIPT data. | |
| No | Indicates that the member does not contain SYSIPT data. | |
| Off | Switches off the SYSIPT flag for the existing member. | |
The selected object will be copied to the specified librarian member.
Copying an Object to an OSD File
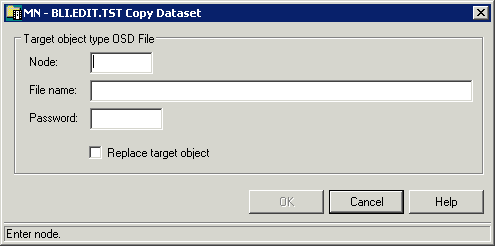
Note:
If you are copying from an OSD file, the
Node and File name text boxes contain
the file default values.
You can specify the following information:
| Option | Description |
|---|---|
| Node | The name of an Entire System Server node. |
| File name | A target file name. |
| Password | A system password, if file is protected. |
| Replace target object | Activate this check box, if you are copying to a file which already exists. |
The selected object will be copied to the specified OSD file.
Copying an Object to an LMS Element
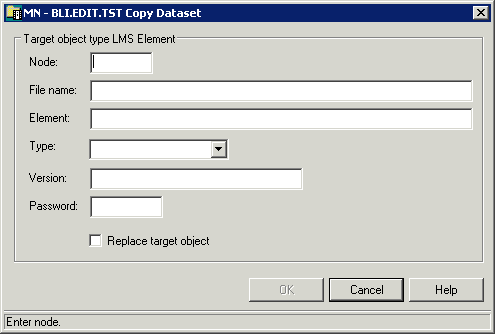
Note:
If you are copying from an LMS element, the
Node, File name,
Element text boxes and the Type
drop-down list box contain the element default values.
You can specify the following information:
| Option | Description |
|---|---|
| Node | The name of an Entire System Server node. |
| File name | The name of the file which will contain the new element. |
| Element | The name of the target element. |
| Type | A type for the target element. For example: S - source program, M - assembler macro. |
| Version | A version number for the target element. |
| Password | A system password, if element is protected. |
| Replace target object | Activate this check box, if you are copying to an element which already exists. |
The selected object will be copied to the specified LMS element.
Deleting an Object
You can delete datasets, files, members, z/OS and z/VSE jobs, sysout datasets, LMS elements and element versions, BS2000 job variables, and duplicated nodes.
![]() To delete an object
To delete an object
-
Select the appropriate object (either in the object workspace or list view window).
-
Invoke the context menu and choose .
Or:
Press DEL.A dialog box appears, asking to confirm the delete function for the selected object.
-
Choose the button to delete the object.
Renaming an Object
You can rename datasets, files, members, LMS elements and element versions, and BS2000 job variables.
![]() To rename an object
To rename an object
-
Select the appropriate object (either in the object workspace or list view window).
-
Invoke the context menu and choose .
Or:
Press F2.The name is selected so that you can immediately enter a new name. Any text you enter automatically deletes the selection.
Note:
If you want to cancel your modifications, press ESC. -
Enter a new name for the object.
-
Press ENTER.
Or:
Click any other position in the object workspace or list view window.
Sending an Object to an E-mail Recipient
You can send datasets, files, members, sysout datasets, z/VSE jobs, LMS elements and element versions to one or more e-mail recipients.
![]() To send an object to an e-mail recipient
To send an object to an e-mail recipient
-
Select the appropriate object (either in the object workspace or list view window).
-
Invoke the context menu and choose Send To.
A dialog box appears. The following example shows the dialog box which appears when you have selected a dataset.

-
Specify the following information:
Option Description To Enter the e-mail address of the recipient. If you want to send the object to more than one recipient, use a semicolon to separate the e-mail addresses. Cc Optional. Enter the e-mail address of one or more persons who are to receive a copy (Cc). Subject Optional. Change the default subject heading. Comment Optional. Enter a short message. -
Choose the button to send the object.