
Using the Unattended Workstation (UA), you can schedule tasks to be executed without supervision.
This document covers the following topics:
Each task that you want to schedule must already be defined as a task in the Configuration Manager.
 To invoke the unattended workstation
From the menu, choose .
The Unattended Workstation dialog box appears. For each scheduled task, it shows the name, scheduled processing time and the current status.
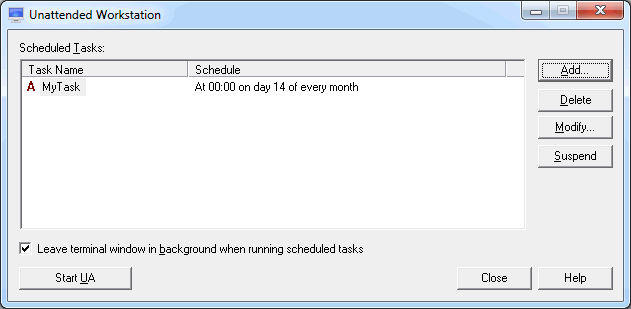
The task status is indicated by the character to the left of the task name. It can be one of the following:
| Status | Description |
|---|---|
| A | Active. The task is waiting to be processed. |
| S | Suspended. The task has been deactivated. |
| N | Never. The task was scheduled for processing, but at the defined processing time UA mode was not active. If you still want to process this task, you must define a new processing time. |
| C | Completed. The task has been processed according to schedule. From now on, it will no longer be executed. |
The Unattended Workstation dialog box contains the following buttons (in addition to the standard buttons):
| Schedule a new task. | |
| Delete the selected task. | |
| Modify the selected task. | |
|
|
Deactivate the selected task. The button name then
changes to .
Reactivate the selected task so that it can be executed according to its original schedule. The button name then changes to . |
|
|
Start
UA mode. The
button name then changes to .
Stop UA mode. The button name then changes to . |
When the check box Leave terminal window in background when running scheduled tasks is selected, message boxes that result from task execution are not shown.
To schedule a task
Choose the button.
The Scheduled Task dialog box appears. The date and time formats used in this dialog box are determined by your Windows settings.
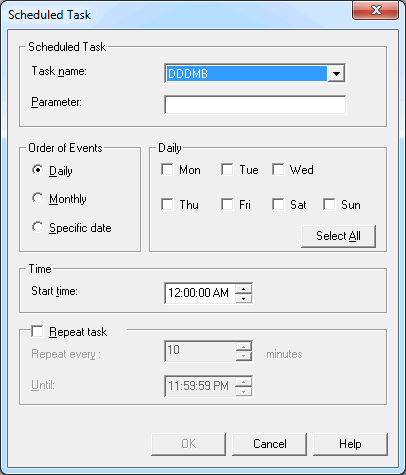
From the Task name drop-down list box, select the desired task.
If the task requires parameters, enter them in the Parameter text box.
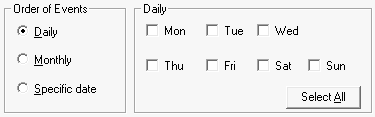
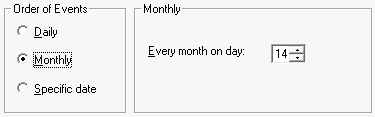
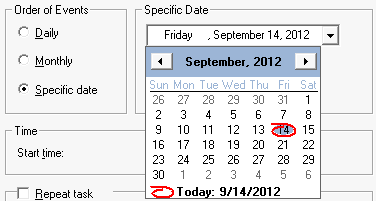
In the Order of Events group box, select the desired option button. The group box to the right changes according to the selected option button.
When you select Daily, you must mark the check box for the desired day of the week. You can also choose the button to select all days of the week at once.
When you select Monthly, you must specify the number of the desired day in the spin box. When the number is greater than the last day of the month, the task is executed on the last day of the month.
When you select Specific date, you must specify the desired date. To do so, select a component of the date (week day, day, month or year) and use the arrow keys to set this component to the desired value. Or open the drop-down list box to select the date from a calendar.
Optionally: specify the time at which the task is to be processed in the Start time spin box.
By default, midnight is shown as the start time.
If the task is to be repeated, mark the Repeat task check box.
In the Repeat every spin box, specify the number of minutes (1 to 1439) after which processing of the task is to be repeated.
Optionally: in the Until spin box, specify the time until when the task is to be repeated.
By default, 11:59:59 PM (or 23:59:59) is shown indicating that the task will be repeated for the rest of the day.
Choose the button.
The new task is now shown in the Unattended Workstation dialog box. Its status is A (active).
Tip:
If you want to schedule a task that is to be repeated every
n minutes without end, select
Daily and choose the
button. Leave start time and end time with the default values, and specify the
number of minutes after which processing of the task is to be repeated.
The task has been scheduled as follows:
Start time: 12:00:00 AM
End time: 10:00:00 PM
Repeat task: every 10 minutes
UA mode is started at 09:00 AM.
In this case, where the start time has already passed, the task is started for the first time at 09:10 AM. It is repeated every 10 minutes until 10:00 PM.
Scheduled tasks are only processed if UA mode is active. UA mode cannot be started, if a host session is still open. Moreover, UA mode cannot be started, if all tasks in the Unattended Workstation dialog box have the status S (suspended), C (completed) or N (never).
It is possible that a task does not start at exactly the time it was scheduled because a previously scheduled task must be completed first.
To start UA mode
In the Unattended Workstation dialog box, choose the button.
UA mode is now active. The name of the command button changes to .
You cannot use the terminal application until you stop UA mode.
To stop UA mode
In the Unattended Workstation dialog box, choose the button.
The Entire Connection Logon dialog box appears. It shows the user name with which you are currently logged in.
Enter your password (if required).
Choose the button.