
The Import function of SYSMAIN is used to copy objects (files) from an external source to a Natural library. Alternatively, you can use the unload and load functions of the Object Handler (see the relevant documentation).
When you import objects, the file directory FILEDIR.SAG of the target library is automatically updated to contain information on the newly imported objects. Be aware that Natural will not update the file directory FILEDIR.SAG if you use a non-Natural function or facility (such as the Windows Explorer) to copy objects to a Natural library. As a result, you cannot access the objects contained in this library. FILEDIR.SAG contains internal library information required by Natural such as programming mode (structured or reporting), object form (source object and/or cataloged object) and user ID.
The objects to be imported with SYSMAIN must have been created with Natural.
Note:
You cannot import shared resources into a remote environment located
on a mainframe platform.
 To import an object
In the Source group box, specify the object(s) you want to import:
In the Path box, enter the name of the path of the folder that contains the objects you want to import. The default is the directory path used when starting Natural.
Or:
From the Directory list box,
select the path of the folder that contains the objects you want to import.
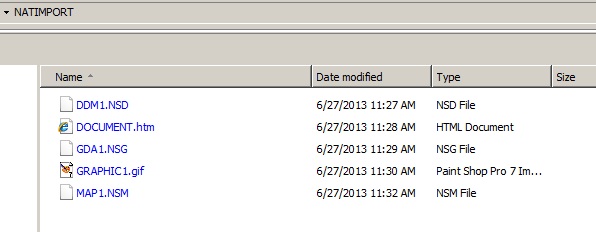
Remember that a file containing a Natural object must have the appropriate extension as indicated in the following example:
In the Name box, enter the name of a single object you want to import or specify a range of names; see Specifying a Range of Names. The default is asterisk (*), indicating all objects.
In the Code group box, select Source and/or Cataloged to import the object either as a source object or a cataloged object, or both. The default is both the source object and the cataloged object.
In the Target group box, specify the target environment for the objects to be imported:
In the Library list box, enter the name of the library into which you want to import the objects or select a library from the drop-down list. The default is the current library. If you want to create a library, enter the name of a new library.
In the DBID (database ID) and FNR (file number) boxes, replace the values if the target library is not in the current system file. The default is the current FNAT or FUSER, or FDIC for DDMs on mainframes. In a remote environment, you can specify security information for these files as described in File Security for Remote Environments.
In a remote environment, use the FSEC/FDIC button if you want to specify security information for the system file FSEC or FDIC for XRef data; see File Security for Remote Environments and XRef Considerations.
In the User ID box, enter the ID of the user
you want to appear in the object properties or object directory information. If
you leave the box empty (default), the ID specified with the
*USER
system variable is used (see also the System Variables
documentation).
In the Mode box, you can select the programming mode in which the imported object is to be saved. The default is set according to the current setting of the SM parameter. To set or change the programming mode, see Setting/Changing the Programming Mode.
Use the Confirm on replace check box to confirm (default) or reject object replacement. See also Confirm on replace below.
Choose Object List when you have finished specifying the source and target environments.
If you entered a single name in the Name box, skip the following instructions and proceed with Confirm on replace in Step 5.
If you specified a range of names in the Name box, an additional dialog box similar to the example below appears with a list of all matching objects:

The dialog box shows the name of the source path, the number of
objects found and the object names and types. It also indicates whether a
source (S) and/or a cataloged (C) object exists.
Select or deselect the required object(s) from the list:
To select list items:
Or:
Press UP ARROW or DOWN ARROW
to go to and select the required item.
Or:
Press and hold down CTRL or
SHIFT and click on multiple non-consecutive or consecutive items
respectively.
Or:
Press SHIFT+UP ARROW or SHIFT+DOWN
ARROW to select multiple consecutive items.
Or:
Choose Select All to select all
items.
To deselect list items:
Press and hold down CTRL and click on a selected item again.
Or:
Choose Deselect All if all
items have been selected.
Choose Import to process the selected object(s).
(Cancel exits the dialog box without any action.)
If the Confirm on replace check box has been selected and if the target environment already contains an object with the same name as the object to be imported, an additional dialog box appears with a warning message.
Confirm or reject object replacement by choosing one of the following buttons:
Yes to confirm each object replacement individually one after another.
Or:
Yes to All to confirm all object
replacements in one go.
Or:
No to not replace the current
object.
Or:
Cancel to exit the dialog box
without any action.
After all objects have been imported into the specified library, the Object Maintenance - Import dialog box is closed and the Object Maintenance menu appears.
An imported objects is contained in the library folder appropriate for its type. For example, a Natural object of the type program is contained in the folder (in the Logical View) of the library. If a type of object is imported for which no folder yet exists, Natural automatically creates the appropriate folder when performing the Import.