
You will now learn how to prompt the user for data, that is: a starting name and an ending name for the output.
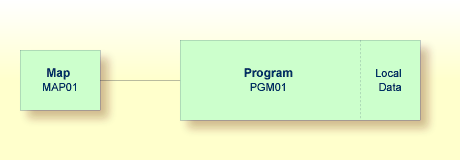
When you have completed the exercises below, your sample application will consist of the following modules:
This document contains the following exercises:
You will now modify your program so that input fields for the starting
name and ending name will be shown in the output. This is done using the
INPUT statement.
 To define input fields
Insert the following below END-DEFINE:
INPUT (AD=MT)
  "Start:" #NAME-START /
  "End:  " #NAME-END
The session parameter AD stands for
"attribute definition", its value "M"
stands for "modifiable output field", and the value
"T" stands for "translate lowercase to
uppercase".
The "M" value in
AD=MT means that the default values defined with
INIT (that is: "ADKINSON" and
"BENNETT") will be shown in the input fields.
Different values may be entered by the user. When the
"M" value is omitted, the input fields will be empty
even though default values have been defined.
The "T" value in
AD=MT means that all lowercase input is translated to
uppercase before further processing. This is important since the names in the
demo database file have been defined completely in uppercase letters. When the
"T" value is omitted, you have to enter all names
completely in uppercase letters. Otherwise, the specified name will not be
found.
"Start:" and "End:" are text fields
(labels). They are specified in quotation marks.
#NAME-START and #NAME-END are data fields
(input fields) in which the user can enter the desired starting name and ending
name.
The slash (/) means that the subsequent fields are to be shown in a new line.
Your program should now look as follows:
DEFINE DATA
LOCAL
  1 #NAME-START        (A20) INIT <"ADKINSON">
  1 #NAME-END          (A20) INIT <"BENNETT">
  1 EMPLOYEES-VIEW VIEW OF EMPLOYEES
    2 FULL-NAME
      3 NAME (A20)
    2 DEPT (A6)
    2 LEAVE-DATA
      3 LEAVE-DUE (N2)
END-DEFINE
*
INPUT (AD=MT)
  "Start:" #NAME-START /
  "End:  " #NAME-END
*
READ EMPLOYEES-VIEW BY NAME
  STARTING FROM #NAME-START
  ENDING AT #NAME-END
*
  DISPLAY NAME 3X DEPT 3X LEAVE-DUE
*
END-READ
*
END
Run the program.
The output shows the fields you have just defined.
Start: ADKINSON
End:   BENNETT
Use the default names and press ENTER.
The list of employees is now shown.
Press ENTER repeatedly until you return to the program
editor, or enter EDIT at the MORE
prompt.
Stow the program.
You are now introduced to a different way of prompting the user for input. You will use the map editor to create a map which contains the same fields that you have previously defined in your program. A map is a separate object and is used to separate the user interface layout from the business logic of an application.
The map you will create now will look as follows:
Ob _                                    Ob D CLS ATT  DEL    CLS ATT  DEL
.                                       .     T  D    Blnk    T  I    ?
.                                       .     A  D    _       A  I    )
.                                       .     A  N    ^       M  D    &
.                                       .     M  I    :       O  D    +
.                                       .     O  I    (
.                                       .
001   --010---+----+----+---030---+----+----+---050---+----+----+---070---+----
(XXXXXXXXXX                                                         (XXXXXXXX


                          Start :XXXXXXXXXXXXXXXXXXXX

                            End :XXXXXXXXXXXXXXXXXXXX


Enter-PF1---PF2---PF3---PF4---PF5---PF6---PF7---PF8---PF9---PF10--PF11--PF12---
Help Mset Exit Test Edit -- - + Full < > Let |
The first line of the map contains system variables for the current date and time. There are two data fields (input fields) in which the user can specify a starting name and an ending name. The data fields are preceeded by text fields (labels).
The length of a field is indicated by a number of "X" characters. Delimiters are used to distinguish the different types of fields. In our sample map, the following default delimiters are used:
| Delimiter | Type of field |
|---|---|
| ( | System variable. |
| : | Data field. |
The following steps are required for the above map:
You will now invoke the map editor in which you will design your map. The map editor can be accessed using the Edit Map menu.
To access the Edit Map menu
Enter a dot (.) in the command line of the program editor to return to the Development Functions menu.
At the bottom of the Development Functions menu, enter the following information and press ENTER:
     Code .. E    Type .. M   Name .. ________________________________


Command ===>
Enter-PF1---PF2---PF3---PF4---PF5---PF6---PF7---PF8---PF9---PF10--PF11--PF12---
Help Menu Exit Canc |
"E" stands for the function Edit Object, and "M" stands for the object type map.
Note:
It would also have been possible to enter the code
"C" for Create Object. But in
this case, you would have been prompted to enter an object name.
The Edit Map menu appears.
16:43:41                ***** NATURAL MAP EDITOR *****               2012-07-17
User SAG                         - Edit Map -                  Library TUTORIAL

                   Code    Function
                   ----    ---------------------------------
                     D     Field and Variable Definitions
                     E     Edit Map
                     I     Initialize new Map
                     H     Initialize a new Help Map
                     M     Maintenance of Profiles & Devices
                     S     Save Map
                     T     Test Map
                     W     Stow Map
                     ?     Help
                     .     Exit


             Code .. I     Name .. ________       Profile .. SYSPROF_

Command ===>
Enter-PF1---PF2---PF3---PF4---PF5---PF6---PF7---PF8---PF9---PF10--PF11--PF12---
Help Exit Test Edit |
To initialize a new map
At the bottom of the Edit Map menu, enter the following information and press ENTER:
             Code .. I     Name .. MAP01___       Profile .. SYSPROF_

Command ===>
Enter-PF1---PF2---PF3---PF4---PF5---PF6---PF7---PF8---PF9---PF10--PF11--PF12---
Help Exit Test Edit |
The Define Map Settings screen appears.
16:43:42               Define Map Settings for MAP                   2012-07-17

 Delimiters           Format                         Context
 -----------------    ---------------------------    --------------------------
 Cls Att CD  Del      Page Size ...... 23            Device Check .... ________
  T   D      BLANK    Line Size ...... 79            WRITE Statement   _
  T   I      ?        Column Shift ... 0 (0/1)       INPUT Statement   X
  A   D      _        Layout ......... ________      Help  ____________________
  A   I      )         dynamic ....... N (Y/N)        as field default N (Y/N)
  A   N      ^        Zero Print ..... N (Y/N)
  M   D      &        Case Default ... UC (UC/LC)
  M   I      :        Manual Skip .... N (Y/N)       Automatic Rule Rank  1
  O   D      +        Decimal Char ... .             Profile Name .... SYSPROF
  O   I      (        Standard Keys .. N (Y/N)
                      Justification .. L (L/R)       Filler Characters
                      Print Mode ..... __            ------------------------
                                                     Optional, Partial ....
                      Control Var .... ________      Required, Partial ....
                                                     Optional, Complete ...
                                                     Required, Complete ...

Enter-PF1---PF2---PF3---PF4---PF5---PF6---PF7---PF8---PF9---PF10--PF11--PF12---
Help Exit Let |
In this screen, you define the default settings for a map (for example, the size of the map). It is possible to change the delimiter characters in this screen. However, for this tutorial, you will use the default delimiter characters. You will only define the filler characters (see the next step).
The delimiter character indicates the combination of class and attribute assigned to a field. The delimiters indicated in bold are used in this tutorial:
Delimiters ----------------- Cls Att CD Del T D BLANK T I ? A D _ A I ) A N ^ M D & M I : O D + O I ( |
The colon identifies a field as a modifiable input and output field ("M" in the Cls column) and intensified ("I" in the Att column).
The opening parenthesis identifies the field as output only ("O" in the Cls column) and intensified ("I" in the Att column).
When you do not use a delimiter character (indicated with "BLANK" in the screen), the field is identified as a text constant ("T" in the Cls column) with default attibutes ("D" in the Att column).
Enter an underscore (_) for each of the filler character options as shown below:
Filler Characters ------------------------ Optional, Partial .... _ Required, Partial .... _ Optional, Complete ... _ Required, Complete ... _ |
A filler character is used to fill any empty positions in input fields in the map, allowing the user to see the exact position and length of a field when entering input.
Press ENTER to save the changes.
Press ENTER once more to invoke the map editing area.
The map editing area is shown in split-screen mode.
Ob _                                    Ob D CLS ATT  DEL    CLS ATT  DEL
.                                       .     T  D    Blnk    T  I    ?
.                                       .     A  D    _       A  I    )
.                                       .     A  N    ^       M  D    &
.                                       .     M  I    :       O  D    +
.                                       .     O  I    (
.                                       .
001   --010---+----+----+---030---+----+----+---050---+----+----+---070---+----


Enter-PF1---PF2---PF3---PF4---PF5---PF6---PF7---PF8---PF9---PF10--PF11--PF12---
Help Mset Exit Test Edit -- - + Full < > Let |
Note:
The Define Map Settings screen only appears
when you initialize a new map. When you edit a map, the Define Map
Settings screen is invoked if you press PF2 (Mset) in the
map editing area (see the above screen).
In split-screen mode, the upper half of the screen shows the valid delimiter characters. The lower half of the screen is the editing area in which you will create the map.
Unlike the program editor and the data area editor (described later in this tutorial), the map editor does not have a command line or command prompt where you can enter Natural system commands. Many functions in the map editor are performed by using line or field commands (see below) or by using PF keys.
You can press PF9 to toggle between split-screen mode and full-screen mode, which displays the editing area in full size.
You will now add two text fields (also called constants or labels) to the map.
To define the text fields
In the map editing area, move the cursor to the first position of the fourth line and type in the following:
Start
Move the cursor to the first position of the next line and type in the following:
End
Your map should now look as follows:
Ob _                                    Ob D CLS ATT  DEL    CLS ATT  DEL
.                                       .     T  D    Blnk    T  I    ?
.                                       .     A  D    _       A  I    )
.                                       .     A  N    ^       M  D    &
.                                       .     M  I    :       O  D    +
.                                       .     O  I    (
.                                       .
001   --010---+----+----+---030---+----+----+---050---+----+----+---070---+----


Start
End


Enter-PF1---PF2---PF3---PF4---PF5---PF6---PF7---PF8---PF9---PF10--PF11--PF12---
Help Mset Exit Test Edit -- - + Full < > Let |
Note:
If you want to cancel your last changes, press PF12
before you press ENTER.
You will now add two data fields to the map. These are the input fields in which the user can specify the starting name and ending name.
You can define the data fields in two different ways: in the classic way where it is your responsibility to define the correct length of the data field, or in a more user-friendly way where you simply select the data field from a list and where the correct length is automatically used. These two ways are described below.
To define a data field where you have to specify the length
Type in the following behind the Start text field (leave a blank space between text field and data field):
:X(20)
The colon (:) is the delimiter character which indicates that the data field is modifiable and intensified. The data field is defined with a length of 20 characters. The length of the field is indicated by "X" characters.
Press ENTER.
Your map should now look as follows:
Ob _                                    Ob D CLS ATT  DEL    CLS ATT  DEL
.                                       .     T  D    Blnk    T  I    ?
.                                       .     A  D    _       A  I    )
.                                       .     A  N    ^       M  D    &
.                                       .     M  I    :       O  D    +
.                                       .     O  I    (
.                                       .
001   --010---+----+----+---030---+----+----+---050---+----+----+---070---+----


Start :XXXXXXXXXXXXXXXXXXXX
End


Enter-PF1---PF2---PF3---PF4---PF5---PF6---PF7---PF8---PF9---PF10--PF11--PF12---
Help Mset Exit Test Edit -- - + Full < > Let |
To select a data field from a list
In the Ob field, which is located at the top left of the screen, enter the following and press ENTER:
P PGM01
The data fields that are currently used by the program
PGM01 are now shown in the screen. The fields that can be used in
the map are preceded by a number.
Ob P PGM01                              Ob D CLS ATT  DEL    CLS ATT  DEL
1 #NAME-START               A20         .     T  D    Blnk    T  I    ?
2 #NAME-END                 A20         .     A  D    _       A  I    )
. EMPLOYEES-VIEW            *V1         .     A  N    ^       M  D    &
. FULL-NAME                 *2          .     M  I    :       O  D    +
3 NAME                      A20         .     O  I    (
4 DEPT                      A6          .
001   --010---+----+----+---030---+----+----+---050---+----+----+---070---+----


Start :XXXXXXXXXXXXXXXXXXXX
End


Enter-PF1---PF2---PF3---PF4---PF5---PF6---PF7---PF8---PF9---PF10--PF11--PF12---
Help Mset Exit Test Edit -- - + Full < > Let |
Not all data fields defined in PGM01 are shown in the
screen. To page through the list of data fields, enter one of the following
positioning commands in the Ob field (that is: in the
field which currently contains the letter "P"):
| Command | Description |
|---|---|
+ |
Page forward in the list. |
- |
Page backward in the list. |
++ |
Go to the bottom of the list. |
-- |
Go to the top of the list. |
Type in the following behind the End text field (leave a blank space between text field and data field) and press ENTER:
:2
The colon (:) is the delimiter character which indicates that the
data field is modifiable and intensified. 2 is the number assigned to
#NAME-END.
The data field is automatically defined with the correct length (20 characters in this case). The length of the field is indicated by "X" characters.
The following applies only for the data field for the starting name which you have defined manually. It does not apply to the data field for the ending name which you have selected from a list: When you create a new data field for a user-defined variable, Natural assigns a field name to it. This field name contains a number. You have to adjust the names of the newly created fields to the variable names defined in your program.
You will now make sure that the same names are used as in your program:
#NAME-START and #NAME-END. The output of these fields
(that is: the user input) will be passed to the corresponding user-defined
variables in your program.
To define names for the data fields
Starting in the first position of the data field for the starting name, enter the following and press ENTER:
.E
Or:
Position the cursor anywhere in the data field and press
PF5.
The extended field editing section is displayed for the specified field.
Fld #001                                                        Fmt A20
-------------------------------------------------------------------------------
AD= MIT'_'____     ZP=         SG=        HE= _____________________   Rls 0
AL= _____          CD= __      CV= ________________________________   Mod Undef
PM= __  DF=                    DY= ______________________________
EM= __________________________ SB= ________________________________

001   --010---+----+----+---030---+----+----+---050---+----+----+---070---+----


Start .EXXXXXXXXXXXXXXXXXXX
End :XXXXXXXXXXXXXXXXXXXX


Enter-PF1---PF2---PF3---PF4---PF5---PF6---PF7---PF8---PF9---PF10--PF11--PF12---
HELP Mset Exit <--- ---> -- - + < > Let |
The Fld field in the upper left corner of the screen shows the field name that has been assigned by Natural: "#001".
In the Fld field, enter "#NAME-START".
Press PF3 to leave the extended field editing section.
Since the data field for the end value has been selected
from a list in the previous exercise, it is not required to repeat the above
steps for the ending name. #NAME-END is already defined in this
case. If you want, you can check this with the line command
.E as described above.
Note:
For #NAME-END, the session parameter
AD has the additional value
"L" which has not been defined for
#NAME-START. "L" means that the value
of the field is displayed left-justified. Since this is the default value for
alphanumeric fields, it is not necessary to define this for
#NAME-START.
Natural system variables contain information about the current Natural session, such as the current library, user, or date and time. They may be referenced at any point within a Natural program. All system variables begin with an asterisk (*).
You will now add system variables for the date and time to the map. When the program is run, the current date and time will be displayed in the map.
To add system variables
Move the cursor to the first position of the first line and type in the following:
(*DAT4I
The opening parenthesis is the delimiter character which identifies the system variable as output only and intensified.
Move the cursor to the first position of the second line and type in the following:
(*TIMX
Your map should now look as follows:
001   --010---+----+----+---030---+----+----+---050---+----+----+---070---+----
(*DAT4I
(*TIMX

Start :XXXXXXXXXXXXXXXXXXXX
End :XXXXXXXXXXXXXXXXXXXX
|
Press ENTER.
"X" characters are now shown instead of the system variable names.
You will now use line commands and field commands to reposition the fields you have added.
To move one field
Starting in the first position of the system variable in the second line, enter the following field command:
.M
Example:
001   --010---+----+----+---030---+----+----+---050---+----+----+---070---+----
(XXXXXXXXXX
.MXXXXXXX

Start :XXXXXXXXXXXXXXXXXXXX
End :XXXXXXXXXXXXXXXXXXXX
|
A field command is entered at the beginning of a field. It applies only to the field in which you enter it.
Move the cursor to the position to which you want to move the system variable (column 70 of the first line).
Press ENTER.
The system variable is moved to the cursor position.
To insert a blank line
Starting in the first position of the fourth line (starting name), enter the following line command:
..I(1)
Example:
001   --010---+----+----+---030---+----+----+---050---+----+----+---070---+----
(XXXXXXXXXX                                                         (XXXXXXXX


..I(1):XXXXXXXXXXXXXXXXXXXX
End :XXXXXXXXXXXXXXXXXXXX
|
A line command is entered at the beginning of a line. It applies to the whole line in which you enter it.
Press ENTER.
A blank line is inserted below the line in which you have entered the line command.
To center a line
Starting in the first position of the fourth line (starting name), enter the following line command:
..C
Example:
001   --010---+----+----+---030---+----+----+---050---+----+----+---070---+----
(XXXXXXXXXX                                                         (XXXXXXXX


..Crt :XXXXXXXXXXXXXXXXXXXX

End :XXXXXXXXXXXXXXXXXXXX
|
Press ENTER.
The line is centered.
To move more than one field
Enter the following field command starting in the first position of the text field in the sixth line (End) and in the first position of the data field in this line:
.M
Example:
001   --010---+----+----+---030---+----+----+---050---+----+----+---070---+----
(XXXXXXXXXX                                                         (XXXXXXXX


                          Start :XXXXXXXXXXXXXXXXXXXX

.Md .MXXXXXXXXXXXXXXXXXXX
|
Move the cursor to the position to which the text field is to start (column 30 of the sixth line).
Press ENTER.
Both fields are moved.
The map should now look as shown at the beginning of this section.
You will now test your map to check whether it works as intended.
To test the map
Press PF4.
The following output is shown.
2009-06-30                                                          13:39:55


                           Start  ____________________

                             End  ____________________
|
The input field for the starting name is automatically selected since it is the first input field in the map. Both input fields contain the filler character.
Note:
When working in insert mode, the user has to delete the filler
characters before it is possible to enter text. This is not necessary in
overwrite mode which is the default.
Press ENTER to return to the map editor.
When the map has successfully been tested, you have to stow it so that it can be found by your program.
To stow the map
Press PF3 to return to the Edit Map menu.
Enter the following in the Code field and press ENTER:
W
Once a map has been stowed, it can be invoked by a Natural program using
a WRITE or INPUT statement.
To invoke the map from your program
Return to the program editor by entering one of the following in the command line of the Edit Map menu.
EDIT PGM01
E PGM01
Replace the previously defined INPUT lines with the
following line:
INPUT USING MAP 'MAP01'
This will invoke the map you have just designed.
The map name must be enclosed in single quotation marks to distinguish the map from a user-defined variable.
Your program should now look as follows:
DEFINE DATA
LOCAL
  1 #NAME-START        (A20) INIT <"ADKINSON">
  1 #NAME-END          (A20) INIT <"BENNETT">
  1 EMPLOYEES-VIEW VIEW OF EMPLOYEES
    2 FULL-NAME
      3 NAME (A20)
    2 DEPT (A6)
    2 LEAVE-DATA
      3 LEAVE-DUE (N2)
END-DEFINE
*
INPUT USING MAP 'MAP01'
*
READ EMPLOYEES-VIEW BY NAME
  STARTING FROM #NAME-START
  ENDING AT #NAME-END
*
  DISPLAY NAME 3X DEPT 3X LEAVE-DUE
*
END-READ
*
END
Run the program.
Your map is now shown.
Press ENTER repeatedly until you return to the program
editor, or enter EDIT at the MORE
prompt.
Stow the program.
As your program is coded now, no data will not be found if an ending name is not specified.
You will now remove the initial values for the starting name and ending name; then the user always has to specify these names. To ensure that an ending name is always used, even if it has not been specified by the user, you will add a corresponding statement.
To use the ending name
In the DEFINE DATA block, remove the default values
(INIT) for the fields #NAME-START and
#NAME-END so that the corresponding lines look as follows:
1 #NAME-START        (A20)
1 #NAME-END          (A20)
Insert the following below INPUT USING MAP 'MAP01':
IF #NAME-END = ' ' THEN
    MOVE #NAME-START TO #NAME-END
END-IF
When the #NAME-END field is blank (that is: when an
ending name has not been entered by the user), the starting name is
automatically used as the ending name.
Note:
Instead of using the statement MOVE #NAME-START TO
#NAME-END it is also possible to use the following variant of the
ASSIGN or COMPUTE statement: #NAME-END :=
#NAME-START.
Your program should now look as follows:
DEFINE DATA
LOCAL
1 #NAME-START (A20)
1 #NAME-END (A20)
1 EMPLOYEES-VIEW VIEW OF EMPLOYEES
2 FULL-NAME
3 NAME (A20)
2 DEPT (A6)
2 LEAVE-DATA
3 LEAVE-DUE (N2)
END-DEFINE
*
INPUT USING MAP 'MAP01'
*
IF #NAME-END = ' ' THEN
MOVE #NAME-START TO
                              		  #NAME-END
END-IF
*
READ EMPLOYEES-VIEW BY NAME
STARTING FROM #NAME-START
ENDING AT #NAME-END
*
DISPLAY NAME 3X DEPT 3X LEAVE-DUE
*
END-READ
*
END
Run the program.
In the resulting map, enter "JONES" in the field which prompts for a starting name and press ENTER.
In the resulting list, only the employees with the name "Jones" are now shown.
Press ENTER to return to the program editor.
Stow the program.
You can now proceed with the next exercises: Loops and Labels.