When you start the Natural Web I/O Interface client or Natural for Ajax in the browser, a logon page appears. The entries in this logon page depend on the settings in your configuration file (see Managing the Configuration File for the Session).
This document covers the following topics:
In order to start a Natural application from the logon page, you enter one of the URLs listed below inside your browser. Different names and locations are used for the logon pages, depending on the application/web server and the type of client that you are using.
J2EE Server
For the Natural Web I/O Interface client, you have to enter the
following URL:
http://<host>:<port>/natuniweb/natural.jsp
For Natural for Ajax, you have to enter the following URL:
http://<host>:<port>/cisnatural/servlet/StartCISPage?PAGEURL=/cisnatural/NatLogon.html
Microsoft Internet Information Services (IIS)
This web server can only be used with the Natural Web I/O Interface
client. You have to enter the following URL:
http://<host>:<port>/Natural/Default.aspx
where <host> and <port> are the host name and port number of your application/web server.
For each session definition that has been configured in the configuration file, an entry appears on the logon page. If the user selects the corresponding entry, only those parameters that were not preconfigured in the configuration file need to be specified in the logon page in order to start the application. Usually, you will preconfigure all connection parameters except user name and password.
The look of the logon page depends on the type of client that you are using.
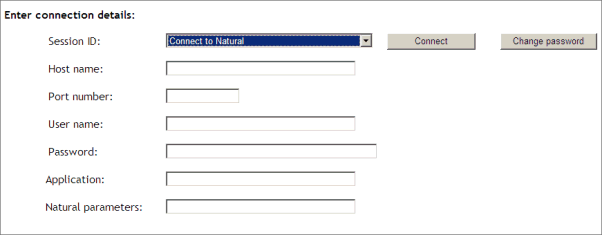
The following example shows part of a logon page which results from a configuration file in which no special entries are defined for a session:
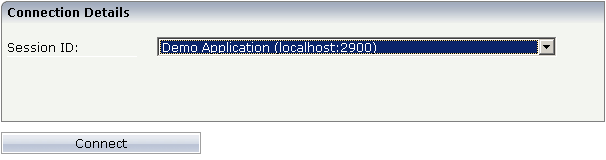
The following example shows part of a logon page which results from a configuration file in which many settings are already predefined (including user ID and password):

To log on to a session, you have to specify all required information in the logon page (for example, you select a session from the corresponding drop-down list box). When you choose the button, the screen for the selected session appears.
The following example shows part of a logon page which results from a configuration file in which no special entries are defined for a session:
The following example shows part of a logon page which results from a configuration file in which many settings are already predefined (including user ID and password):
To log on to a session, you have to specify all required information in the logon page (for example, you select a session from the corresponding drop-down list box). When you choose the button, the screen for the selected session appears.
Currently, this functionality is only available for Natural for UNIX, Natural for OpenVMS and Natural for Windows.
The following information applies when the fields for entering a user ID and a password appear on the logon page. These fields do not appear when user ID and password have already been defined in the configuration file; in this case, it is not possible to change the password in the logon page.
When your password has expired, you are automatically asked for a new password. When you try to log on with your current password, an error message appears and input fields for changing the password are shown.
![]() To change the password with the Natural Web I/O Interface client
To change the password with the Natural Web I/O Interface client
Choose the button in the logon page.
The name of this button changes to Don’t change password and the following two input fields are shown in the logon page:
New password
Repeat new password
Enter your user ID and your current password as usual.
Enter the new password in the two input fields.
Choose the button to change the password.
Or:
If you do not want to change your password, choose the
Don’t change password button. The two input fields will
then disappear.
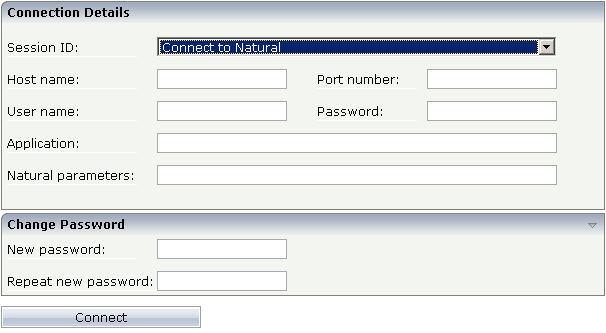
![]() To change the password with Natural for Ajax
To change the password with Natural for Ajax
Click the title to show the content of this input area.
The following two input fields are shown in the logon page:
New password
Repeat new password
Enter your user ID and your current password as usual.
Enter the new password in the two input fields.
Choose the button to change the password.
The browser's "Back" and "Forward" buttons do not work with the two types of clients and should therefore not be used.
If you want to run two Natural sessions in parallel, you have to start a new instance of the browser (for example, by choosing the corresponding icon in the Quick Launch toolbar of Windows). You must not use the browser's "New Window" function. This would result in one session running in two browsers, which is not allowed.