Customize the Layout for Basic Apps
Basic apps that include two or more views have a layout that determines where each view is rendered within the app. Views can render in separate tabs or cards that users navigate to or they can render all views within the single card of the app in simple geometries such as side-by-side.
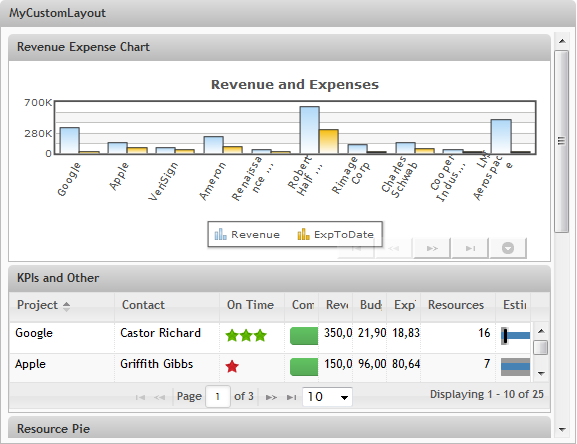
You can provide a custom layout for basic apps for more complex layouts. The example shown in this topic is a basic app with four views that are rendered in a single stack:

To customize this layout
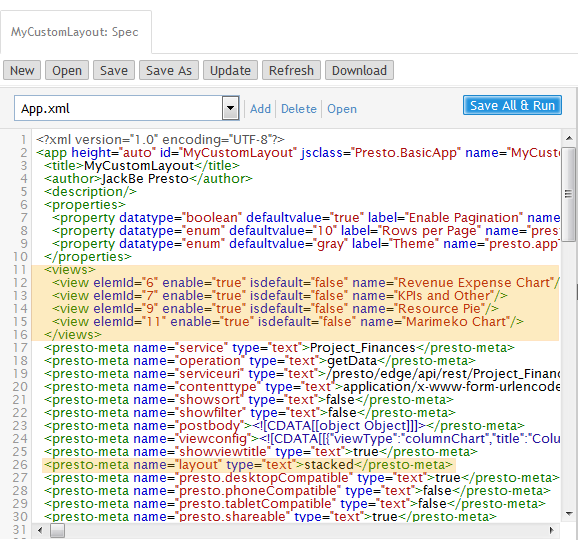
1. If needed, create a basic app with the views you want to provide in a custom layout and open this basic app. See Customize a Basic App or View for instructions. The App Spec for the basic app contains metadata for the views contained in the app and also the built-in layout you selected when you created the app.
2. Create an HTML fragment in a text editor of your choice with <div> container elements to wrap all the views and contain each view in position within the custom layout. This fragment must:

Have a root
<div> container. It is a good practice to assign a unique ID or your own unique CSS class. For example:
<div id="myCustomAppLayout"></div>
Have a
<div> container for all views with a
data-presto-role="output" attribute. For example:
<div id="myCustomAppLayout">
<div data-presto-role="output"></div>
</div>
Data roles identify the different purposes for containers within the layout. In this case,
output indicates that the contents are meant to be rendered. See
Layout Roles for a list of valid data roles for
MashZone NextGen basic apps.
Have a
<div> container for each view with a
data-presto-id attribute identifying the view to be rendered in that container.
You can determine the view IDs from the names of the <view> elements in the App Spec. Replace any spaces in the view names with underscores (_).
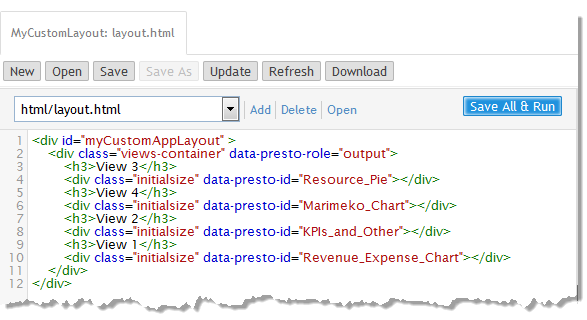
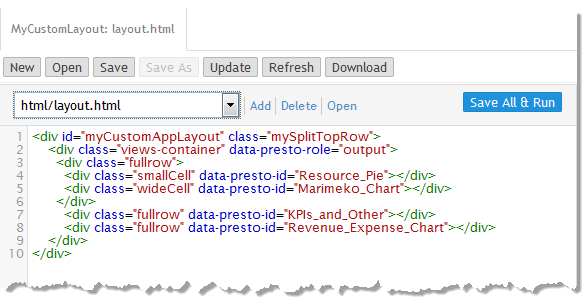
For this example, we will rearrange the views so that the Resource Pie and Marimeko Chart views appear side-by-side at the top of the app followed by the KPIs and Others view and then the Revenue Expense Chart view.
The initial HTML for this layout looks something like this:
Save this fragment to your computer. In this example, it is
layout.html but you can use any file name.
3. Add the HTML custom layout to your basic app:
a. In the App Editor, click Add and select HTML as the type of resource.
b. Click Browse and find the custom HTML layout file you created previously.
c. Click Add Local Resource.
The layout.html file is uploaded to MashZone NextGen and associated with this basic app. It opens in the App Editor.
4. Update the App Spec to use this custom layout:
a. Use the pull-down list for files in the App Editor to move back to the App Spec.
b. Change the value of the <presto-meta name="layout"> element from stacked (or whatever built-in layout is assigned) to custom.
Once you change the layout metadata for the basic app to custom, MashZone NextGen uses the HTML file associated with the basic app to control the content and layout for the app.
5. Click Save all and run to save this change and test the app.
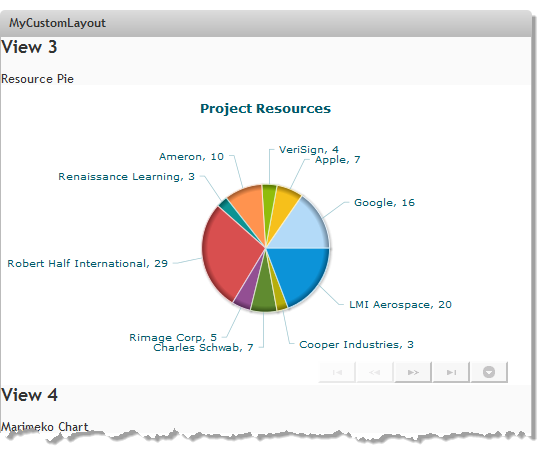
This example now looks like this:
The app title bar looks just the same. But the views have been rearranged in the order set by the custom layout. The headings from the custom layout also appear, such as View 3. So do the view titles, such as Resource Pie, that come from the basic app, but the default look and feel has disappeared for view headers.
This is because custom layouts override the default containers and classes for the contents of the basic app. The containers and classes for the App Framework that wrap the basic app, however, are still present allowing the app title bar to remain untouched. For an overview of the standard container elements and classes for a basic app, see
App Framework for Basic Apps.
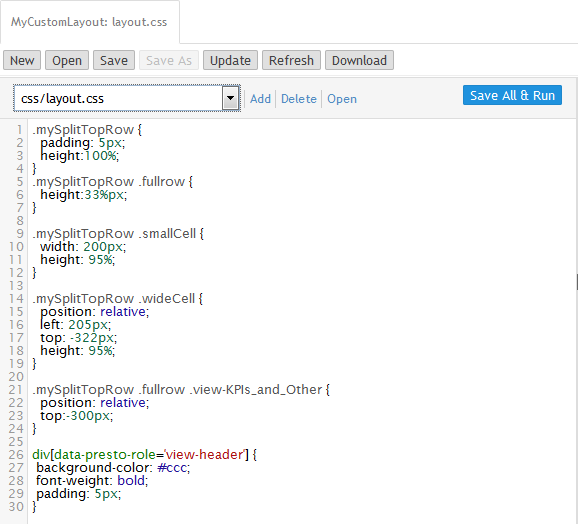
6. Add CSS classes to better control the layout.
It is a best practice to assign unique classes to the various containers in your custom layout and add CSS styles to control the look and feel. For this example, we will simplify the layout a little and add classes to make layout.html be:
7. Create a CSS file with styles to control the layout and look and feel for your custom layout and save this file.
For this example, the file is named layout.css and the CSS rules are:
Most of the styles use the class names assigned to containers in layout.html. However, the style rule that is applied to the view title bars uses a selector based on [data-presto-role='view-header']. This data role is used for the view headers generated by the App Framework.
8. Upload the layout CSS file:
a. Click Add and select CSS as the type of resource.
b. Click Browse and find the custom CSS layout file you created previously.
c. Click Add Local Resource.
The layout.css file is uploaded to MashZone NextGen and associated with this basic app. It opens in the App Editor.
9. Click Save all and run to save this change and test the app.
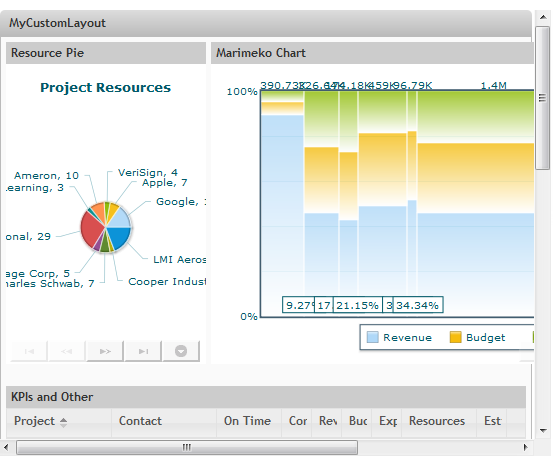
The basic app now renders the Pie and Marimeko views in a singe line, followed by the other views:
The view title bars also have better visibility and match more closely with the app title bar.
10. Update the HTML and CSS as needed until you are satisfied with the app.