
Select a computer on which the CONNX Administrator component is installed. Click the Start button, and then point to All Programs. Point to CONNX Driver and then click CONNX Server Setup. The CONNX Server Component Installation dialog box appears. Select the UNIX/Linux tab.
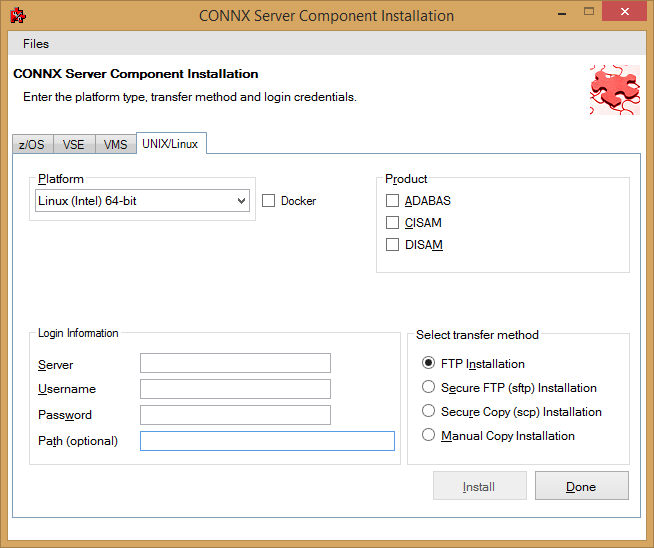
Select
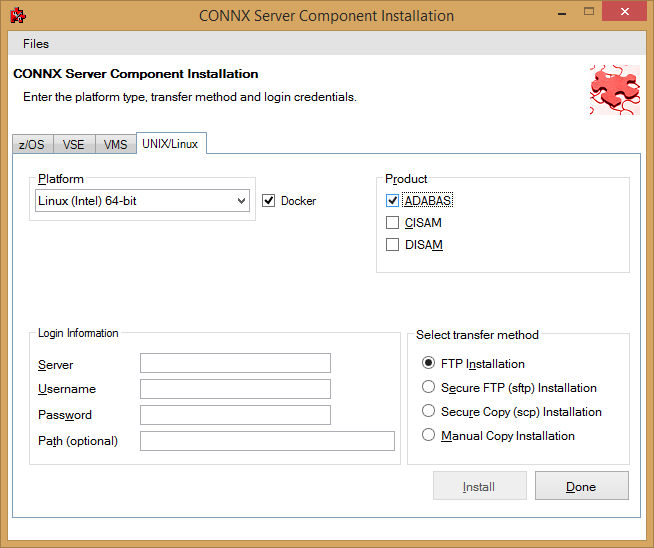
your system's platform from the Platform
drop-down box. Select the Adabas
check box in the Product
area. Select the Docker
checkbox.
If the target system
has an FTP, SFTP or SCP server enabled, skip to step 5.
If the target system
does not have an FTP, SFTP or SCP server enabled, select the Manual
Copy Installation option and click the Begin Client Installation button.
This option will create the necessary install files in the ADABAS\TEMPINST
subdirectory of the CONNX installation directory. Move these
files via an alternate copy method to the Unix server and then proceed
to step 12 below.
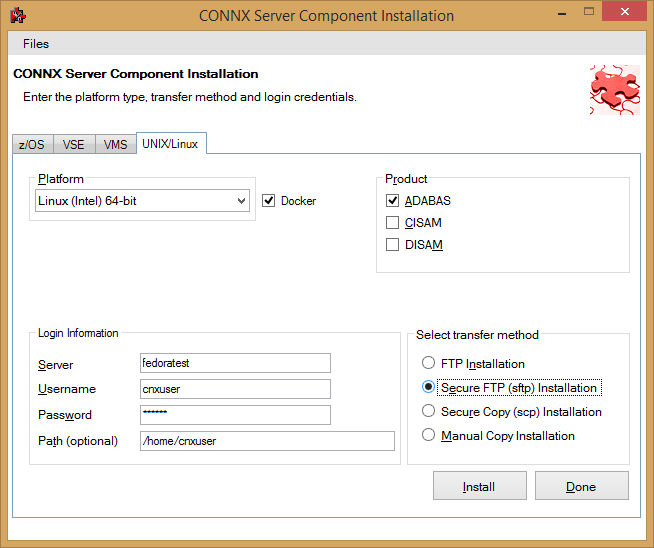
Select
the desired transfer method
and then in the Server text
box, enter the TCP/IP host name or address for your system platform.
In
the User ID text box, enter
a privileged user account name. In the Password
text box, enter a user account password.
By
default, the Adabas data is sent to your home directory. If you wish
to send it to another location, enter the name of the alternate directory
in the Installation Information Install
Path text box.
Click
the Install button. This action
starts an FTP, SFTP or SCP session and copies the selected components
to the target server. Progress will be displayed at the bottom of
the screen.
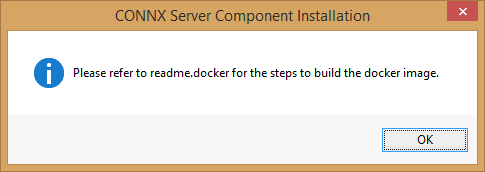
An
ftp window appears saying the files were successfully copied to the
system and instructs you to log on to your system and follow the instructions
in the readme.docker text file..
If
the file transfer was not successful, an error box appears. Select
Files from the menu. The
sub menu has options to view the FTP log as well as the FTP script.
The FTP logs have a timestamp appended to the name. Select
the appropriate log file and check for errors. If the resolution
to the problem requires a call to technical support, please provide
the log file as well as the script file to the support representative.
Note: If the files fail to
copy via the Client Installation's FTP, SFTP or SCP session, please
use the Manual Copy Installation as outlined in step 4 above.
To build the Docker
image, start a terminal emulator on the Linux server and type the
appropriate user name and password.
Navigate to the directory
you specified in the windows file transfer GUI. This directory
will contain several files, including the Docker script file.
To build a docker image
for the CONNX Adabas Data server, use the following command:
(replace XXX with the current CONNX version number - 138 for example
for 13.8)
docker build -t connxXXXdataserver . -f./Dockerfile
Example:
docker build -t connx138dataserver
. -f./Dockerfile
The
final output should read:
Successfully
tagged connxXXXdataserver:latest.
To run the CONNX
Data server docker image, use the following command:
(replace XXX with the current CONNX version number - 138 for example
for 13.8)
docker run -d -e "ACCEPT_EULA=Y" --name cnxserver -v
<adabas client config directory>:/config:z -p <external port>:6500
connxXXXdataserver
Example:
docker run -d -e "ACCEPT_EULA=Y"
--name cnxserver -v /home/cnxuser/adaconfig:/config:z -p 20003:6500
connx138dataserver
The <adabas client config directory> should contain your dbmapping.txt
to configure TCP/IP connectivity to Adabas nucleus.
Please see Adabas Client documentation
for more details.
Ensure that the directory on the host
system has an owner and group of sagadmin with an id of 1724.
The <external port> should be the port number for connecting
to the JDBC server.
Verifying the
Build:
Please refer to the following docker command reference to manage and
verify the image and container.
Show the available docker images:
docker images
Start the docker image - for example:
docker
run -d -e "ACCEPT_EULA=Y" --name cnxserver -v /home/cnxuser/adaconfig:/config:z
-p 20003:6500 connx138dataserver
Show the log:
docker logs cnxserver
Show the containers:
docker ps -a
Stop the container:
docker stop cnxserver
Delete the container:
docker rm cnxserver
Remove the image:
docker
image rm connx138dataserver