
To use the CONNX .NET Data Provider within Microsoft Visual Studio .NET or Visual Studio .NET 2003, you must first add a reference to the CONNX.Provider.dll file containing the CONNX .NET Data Provider objects.
In Microsoft Visual Studio .NET or Visual Studio .NET 2003, open a new project or use a current project, and then select the
Project menu.
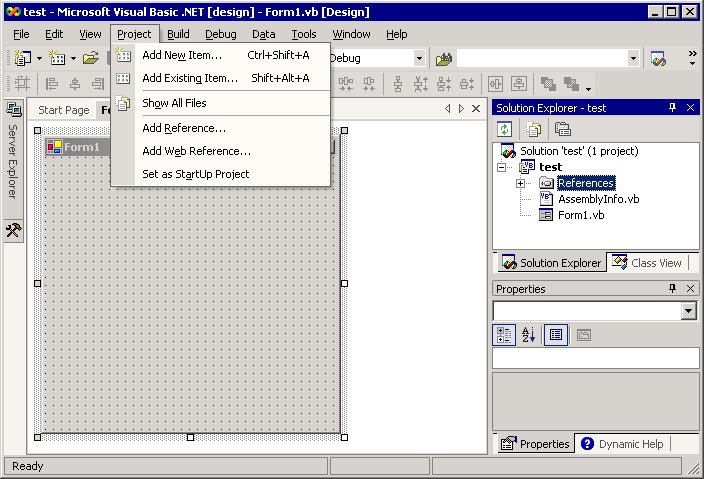
Select Add Reference. You may also choose to right-click the Project name as it is listed in the Microsoft Visual Studio .NET or Visual Studio .NET 2003 pane in the Solution Explorer and select Add Reference. A third option is to right-click the References folder in the Solution Explorer and select Add Reference.
The Add Reference dialog box appears.
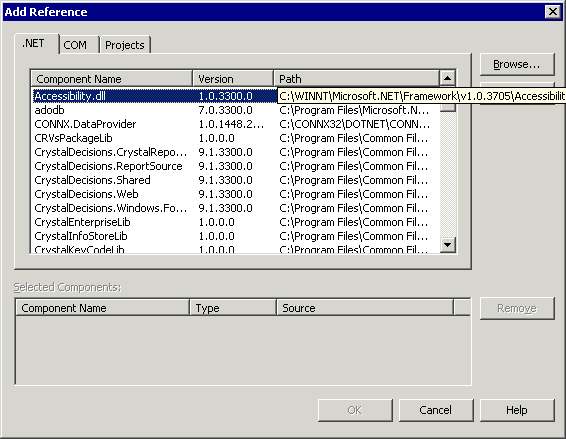
On the .NET tab in the Add Reference dialog box, click the Browse button.
The Select Component dialog box appears. Navigate to the Windows\System32 folder and select the CONNX.DataProvider.dll file.
Click the OK button to return to the Add Reference dialog box.
Select the CONNX.DataProvider.dll in the Add Reference dialog box, and then click the OK button. The objects in the CONNX .NET Data Provider can now be used within your code. This enables you to add the CONNX .NET Data Provider object to your application.