
Click the Start
button, and then point to Settings.
In Control Panel, click Administrative Tools, and then double-click
the Data Sources (ODBC) icon.
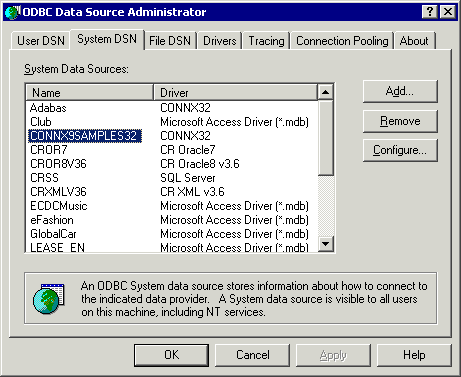
The ODBC Data Source Administrator dialog box appears. Select the data source to configure, and then click the Configure button.
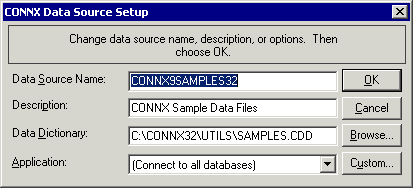
The CONNX
Data Source Setup dialog box appears. Type a data source name,
a description, the name of the CONNX Data Dictionary where the data
source or CDD is located, and the type of application to use. Complete
the fields requiring the data source name and a description, and leave
the other fields blank. Insert the required information when the application
is run, or click the Browse
button to confirm locations.
The Data Source Name is the
name used to identify the data source to ODBC. This generally equates
to a database. There are three types of data source names:
User data source name: A data source name only relevant to the
current user.
Machine data source name: A data source name used only by the
client computer.
File data source name (recommended): A separate file placed
on a network and available to multiple clients.
You must insert a comment in the Description
field. This is a required field.
Data Dictionary is the full UNC (Universal Naming Convention)
path to the CDD definition.
A CONNX Application
name is defined to specify the databases required for this data source
if using CONNX to access multiple databases. This is an optional field.
Click the OK button. The driver writes the values to the ODBC.INI file, and they become the default values that are displayed when connecting to the data source. The data source must be reconfigured to change these defaults.