
This tutorial replicates a table from an Adabas database to a SQL Server database. If you do not have access to SQL Server, Microsoft provides a free version called SQL Server Express Edition. For more information see http://msdn.microsoft.com
Prerequisites:
Install Adabas version 6.1.4 or above.
Install ConnecX SQL Engine 1.1.2 or above
Install the Open Systems Event Replicator
Create an Adabas database with a DBID of 1 using the Adabas sample tables. For this example, we will be using the Adabas sample table EMPLOYEES-NAT (File11)
Start the Adabas database.
An available SQL Server database. For this tutorial, we recommend that you create a database named Replication. Otherwise, you can use any existing SQL Server database.
On the Start menu, click Programs, click CONNX Driver and then click CONNX Data Dictionary. The Open window appears.
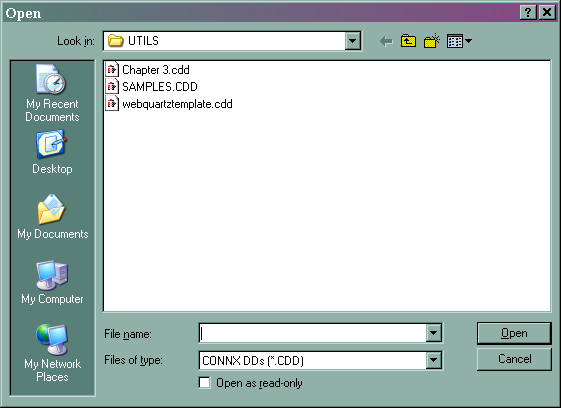
Click Cancel. The CONNX Data Dictionary Manager window appears.
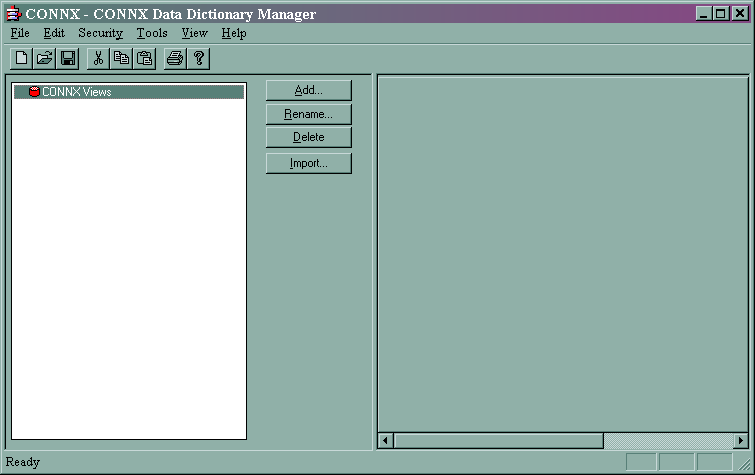
Click Import. The Import CDD window appears.
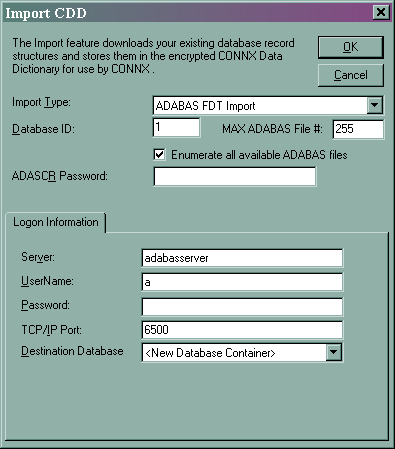
In Import Type, select FDT Import. Type 1 in Database ID. Type 255 in MAX ADABAS File #. Type in the logon information.
Warning: Do not use localhost as the server name for the Adabas Source tables. In certain instances using localhost as the server name may cause you to lose all your source table records during an initial state.
Click OK. The CONNX Import Table Selection window appears.
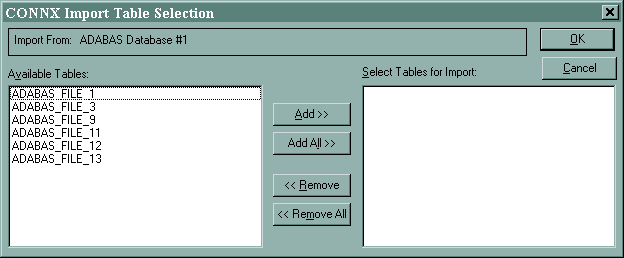
Select ADABAS_FILE_11 and click Add.
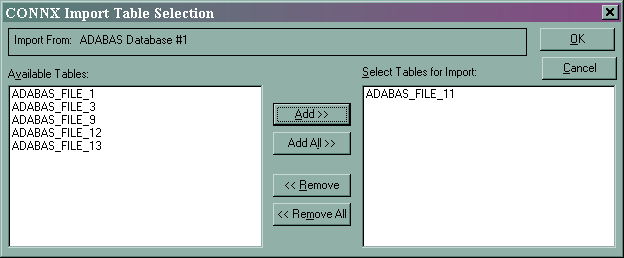
Click OK. The ADABAS Count Selection window for the source table appears.
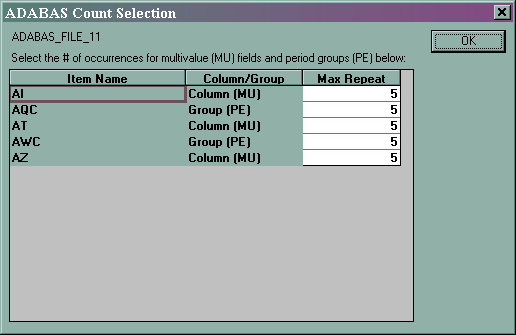
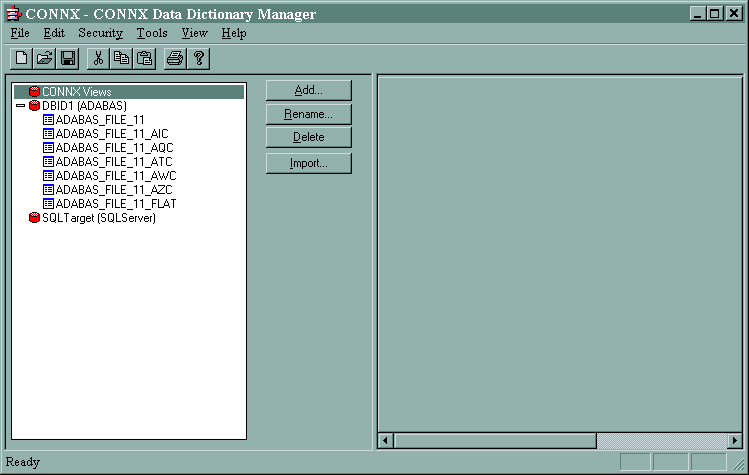
Accept the default values and click OK. The CONNX Data Dictionary Manager window containing the source table information appears.
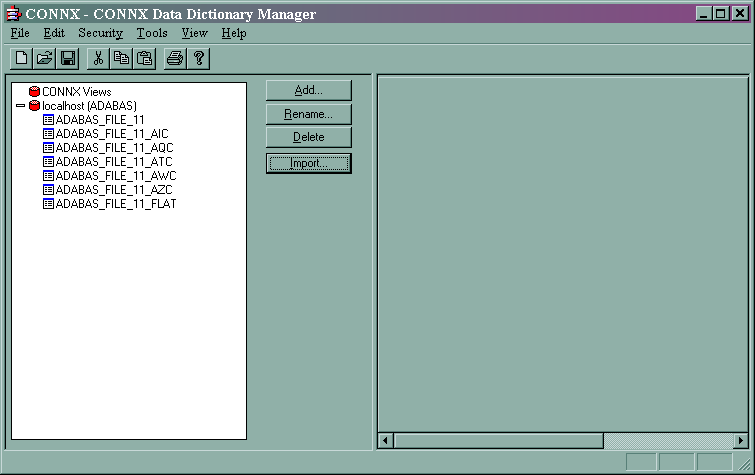
You have imported the Adabas source tables into the CDD.
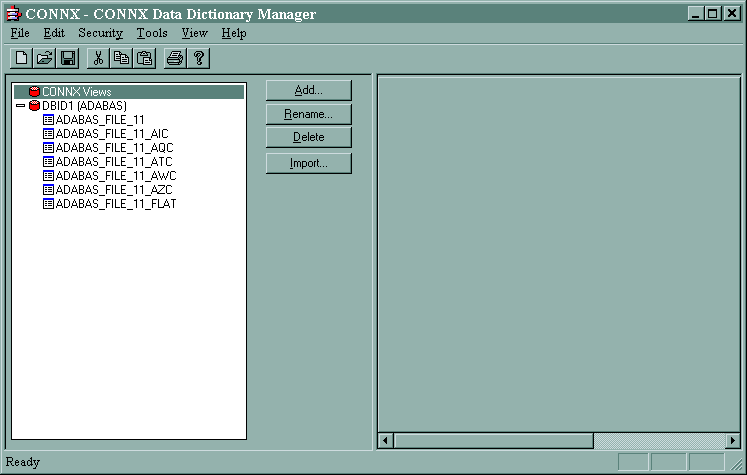
Rename the database from localhost to DBID1. In the CONNX Data Dictionary window, click localhost (ADABAS).Click Rename. On the Rename Object window type DBID1.
Click Import. The Import CDD window appears.
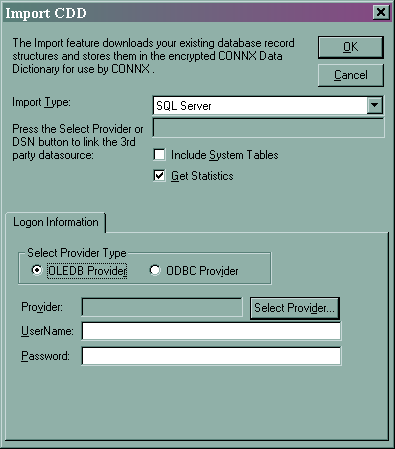
In Import Type, select SQL Server.
In Select Provider Type, click OLEDBC Provider. Click Select Provider. The Data Link Properties window appears. Select Microsoft OLEDB Provider for SQL Server and click Next. The Data Link Provider appears.
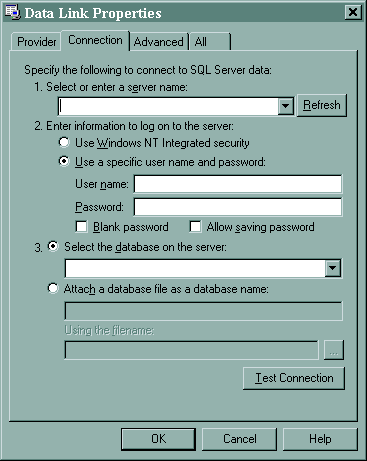
Fill in the window based on your SQL Server installation and click OK. The CONNX Import Table Selection window appears. If there are any tables in your SQL Server database, they will appear in Available Tables (in this example, we created a new SQL Server database so there are no tables).. Click Add All and then click OK. The CONNX Data Dictionary Manager window appears.
Rename the target database to SQLTarget.
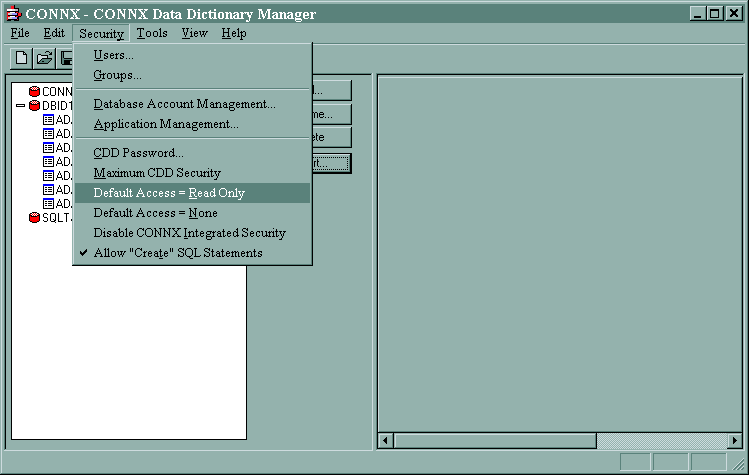
In the Security menu, clear Default Access = Read Only.
In the File menu, select Save As.
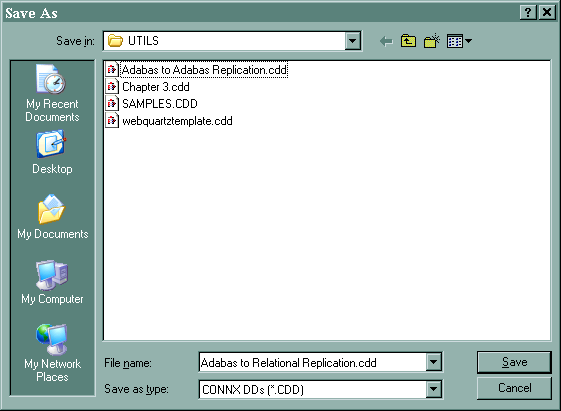
Name your CDD Adabas to Relational Replication and click Save.
Close the CONNX Data Dictionary Manager.
On the Start menu, click Programs, click CONNX Solutions, click Open Systems Event Replicator and then click Replication Administrator. The Open the Data Dictionary window appears.
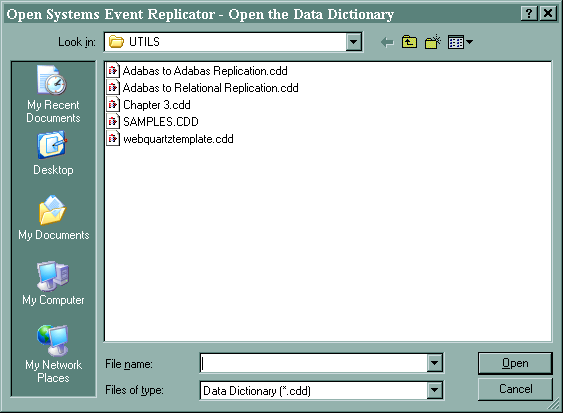
Select a Adabas to Relational Replication.cdd and click Open. The Configure Servers window appears.
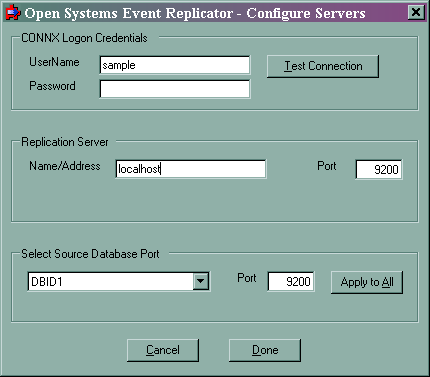
In CONNX Logon Credentials enter your Sample in UserName; leave the Password blank. Click Test Connection. The CONNX Integrated Logon window appears:
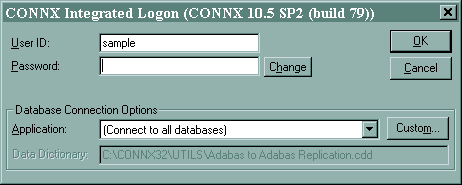
Leave the Password blank and click OK.
You will be prompted to create a user in the CDD. Press OK. The User ID sample will be created with a blank password.
When the connection succeeds, enter localhost in Name/Address and 9200 in Port.
Click Done. The Add Tables window appears.
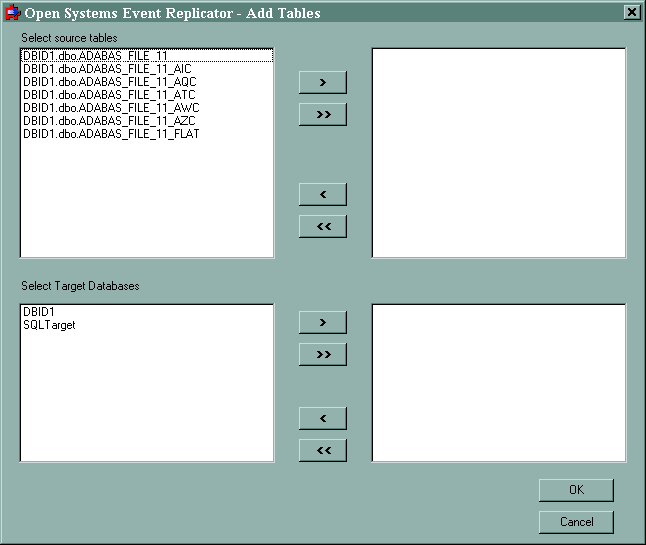
From Select source tables, select DBID1.dbo.ADABAS_FILE_11. From Select Target Databases, select SQLTarget.
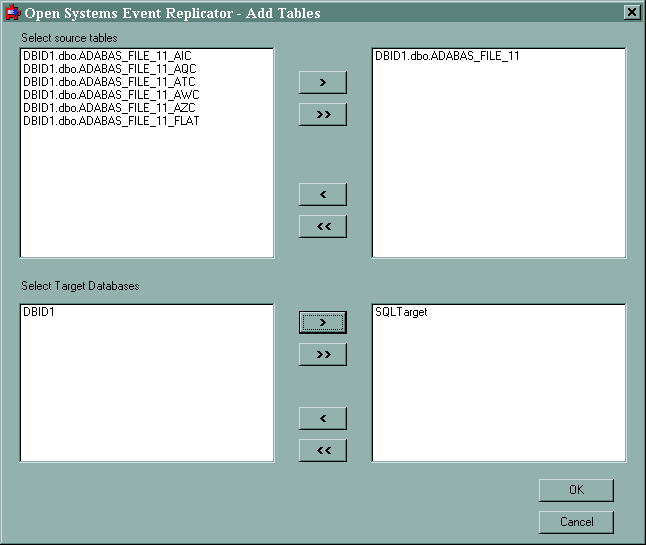
Click OK. The Open Systems Event Replication window appears.
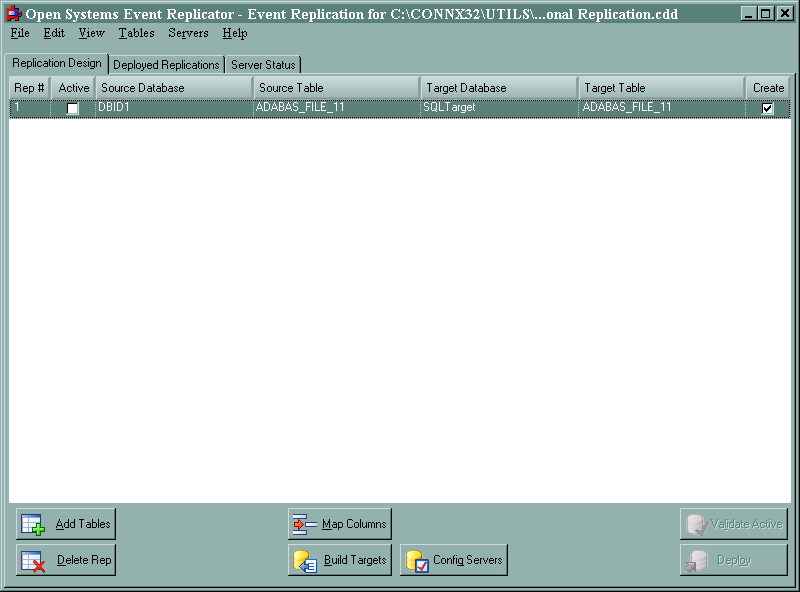
Click Active and then Deploy.
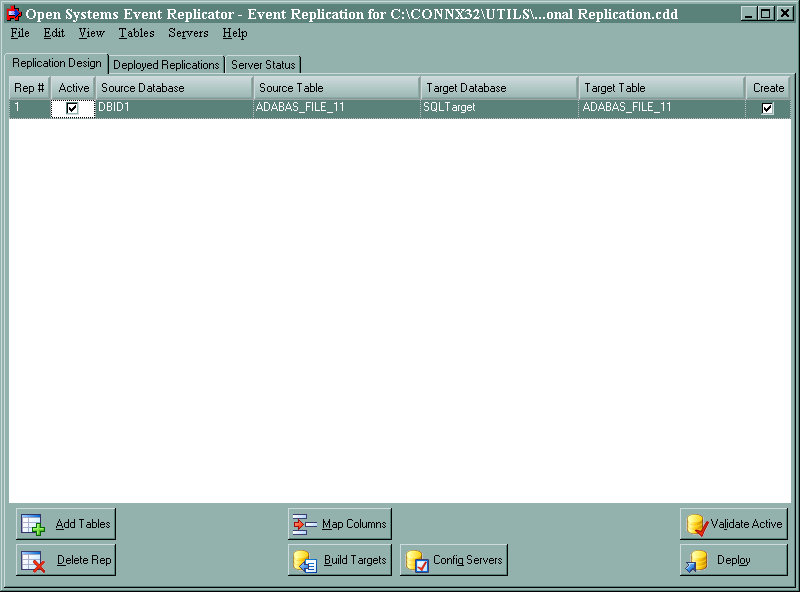
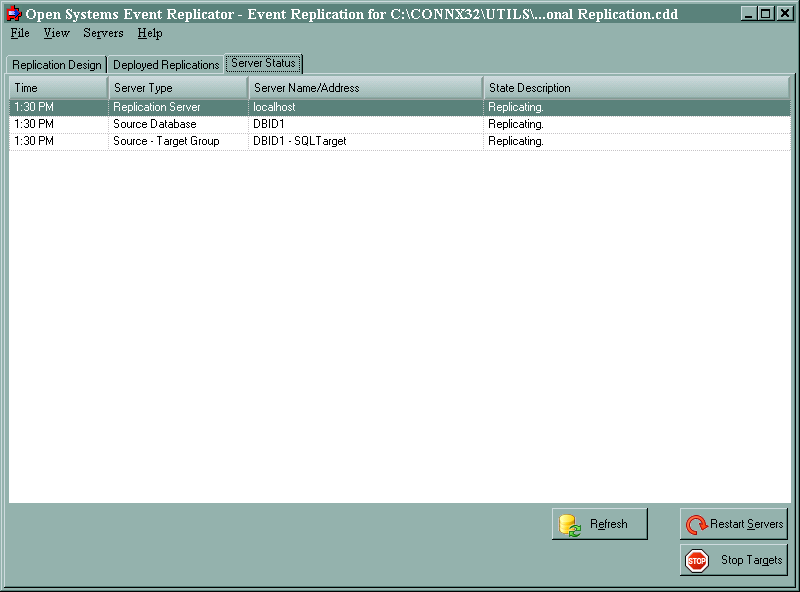
Click the Server Status tab. Verify that the Replication Server, Source Database and Source - Target Group contain Replicating in State Description.
This completes a simple Adabas to relational database replication. You can do inserts, updates and deletes against the ADABAS_FILE_11 in database 1 and the changes will replicate to your SQL Server database.